RSS Feed

Tag Archives: cookies

Triple Ginger Cookies and Holiday Sangria

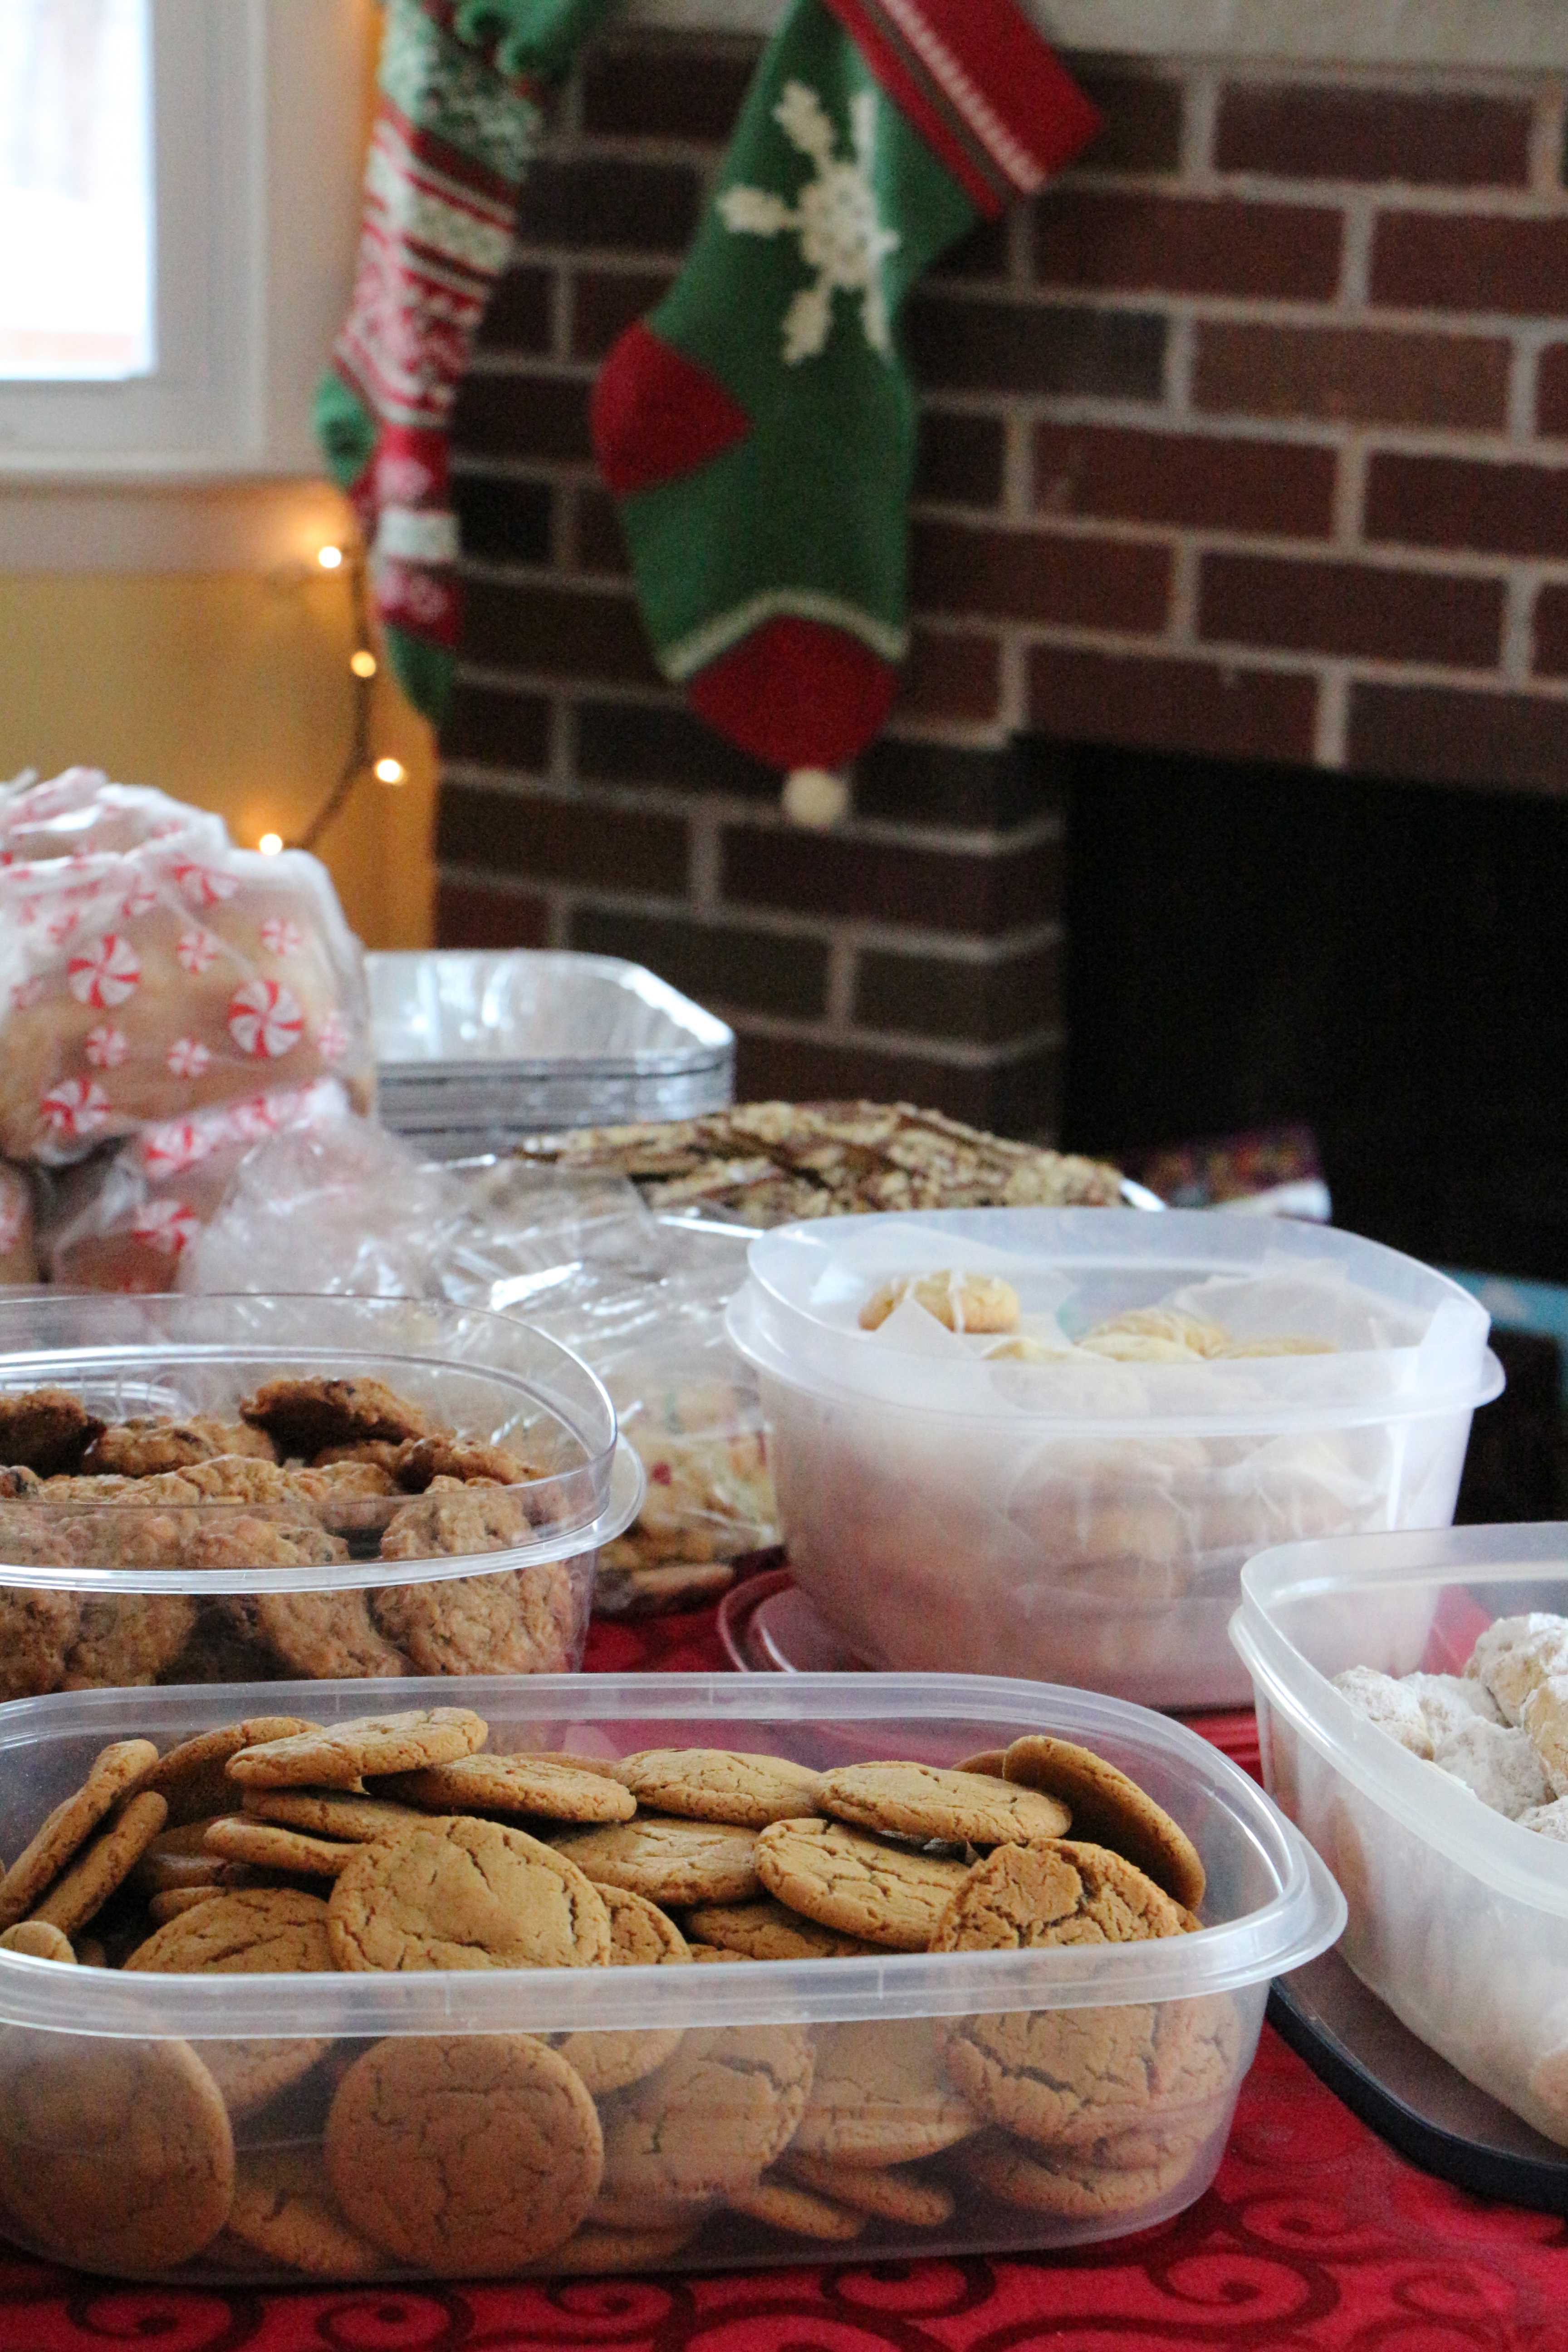
This past weekend, I hosted my third annual cookie exchange party. Cookie party, for me, is quite simply an excuse to have a bunch of my friends over to my festively adorned house, so we can indulge in afternoon cocktails and eat cookies.

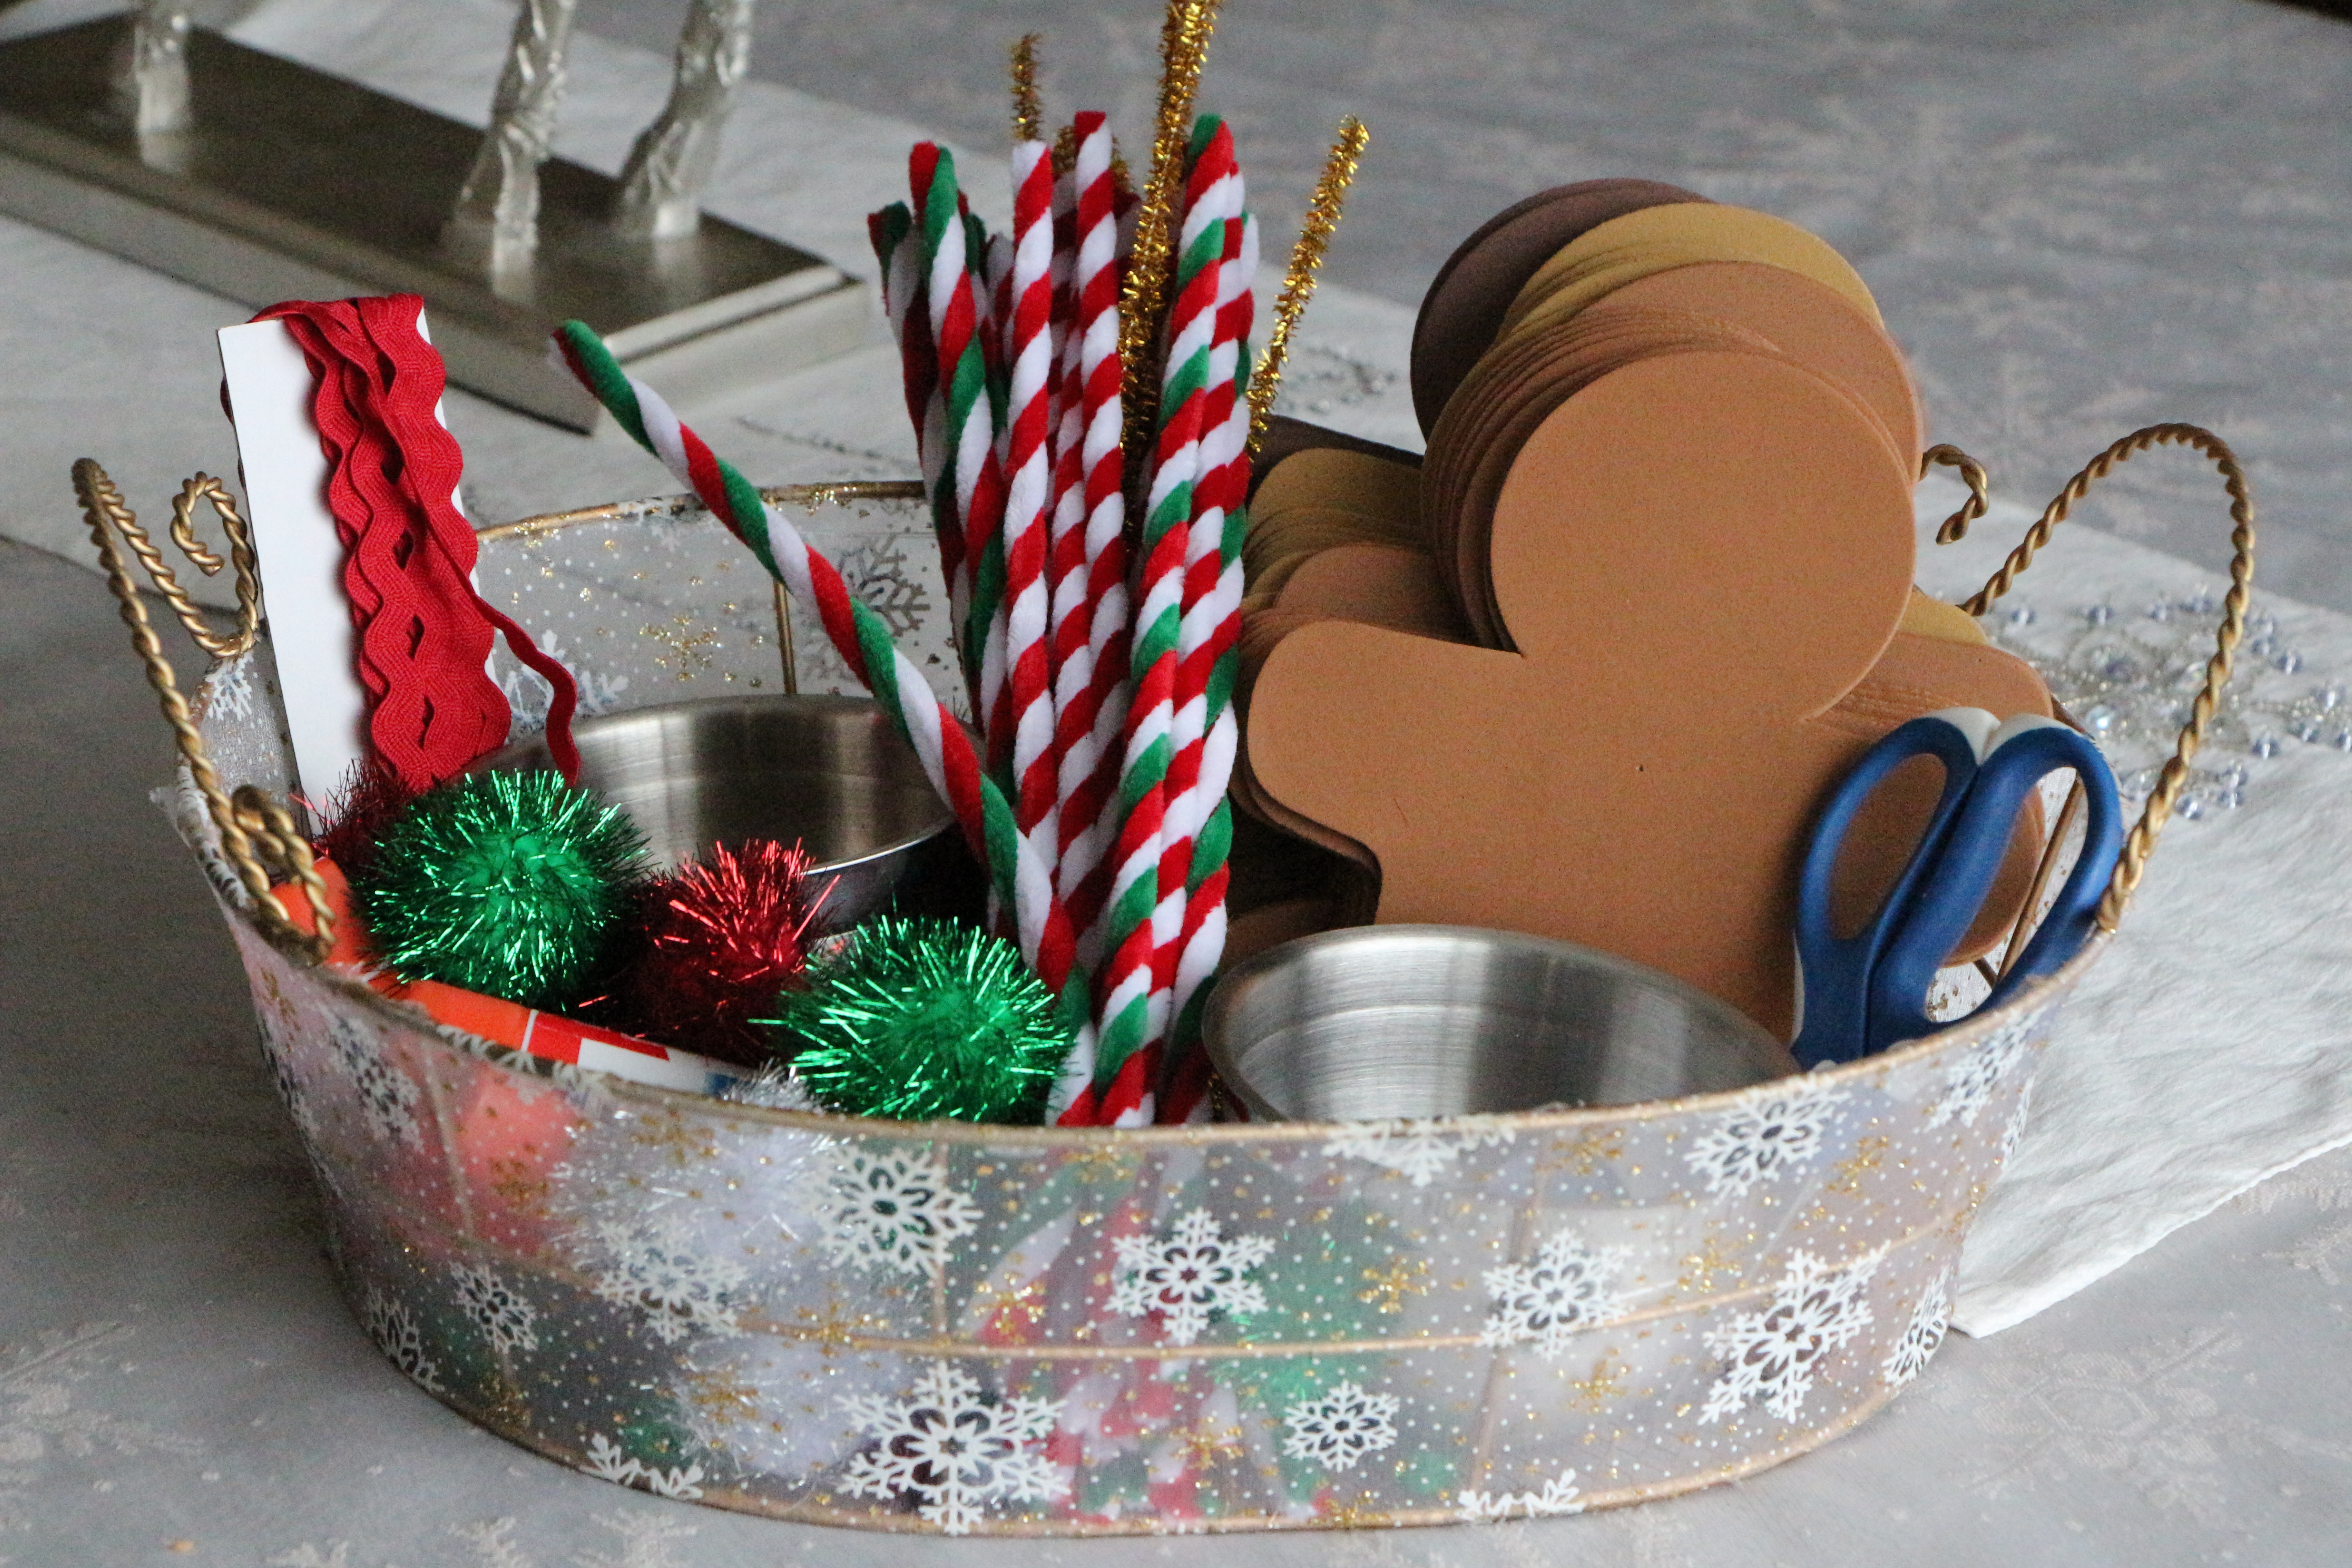
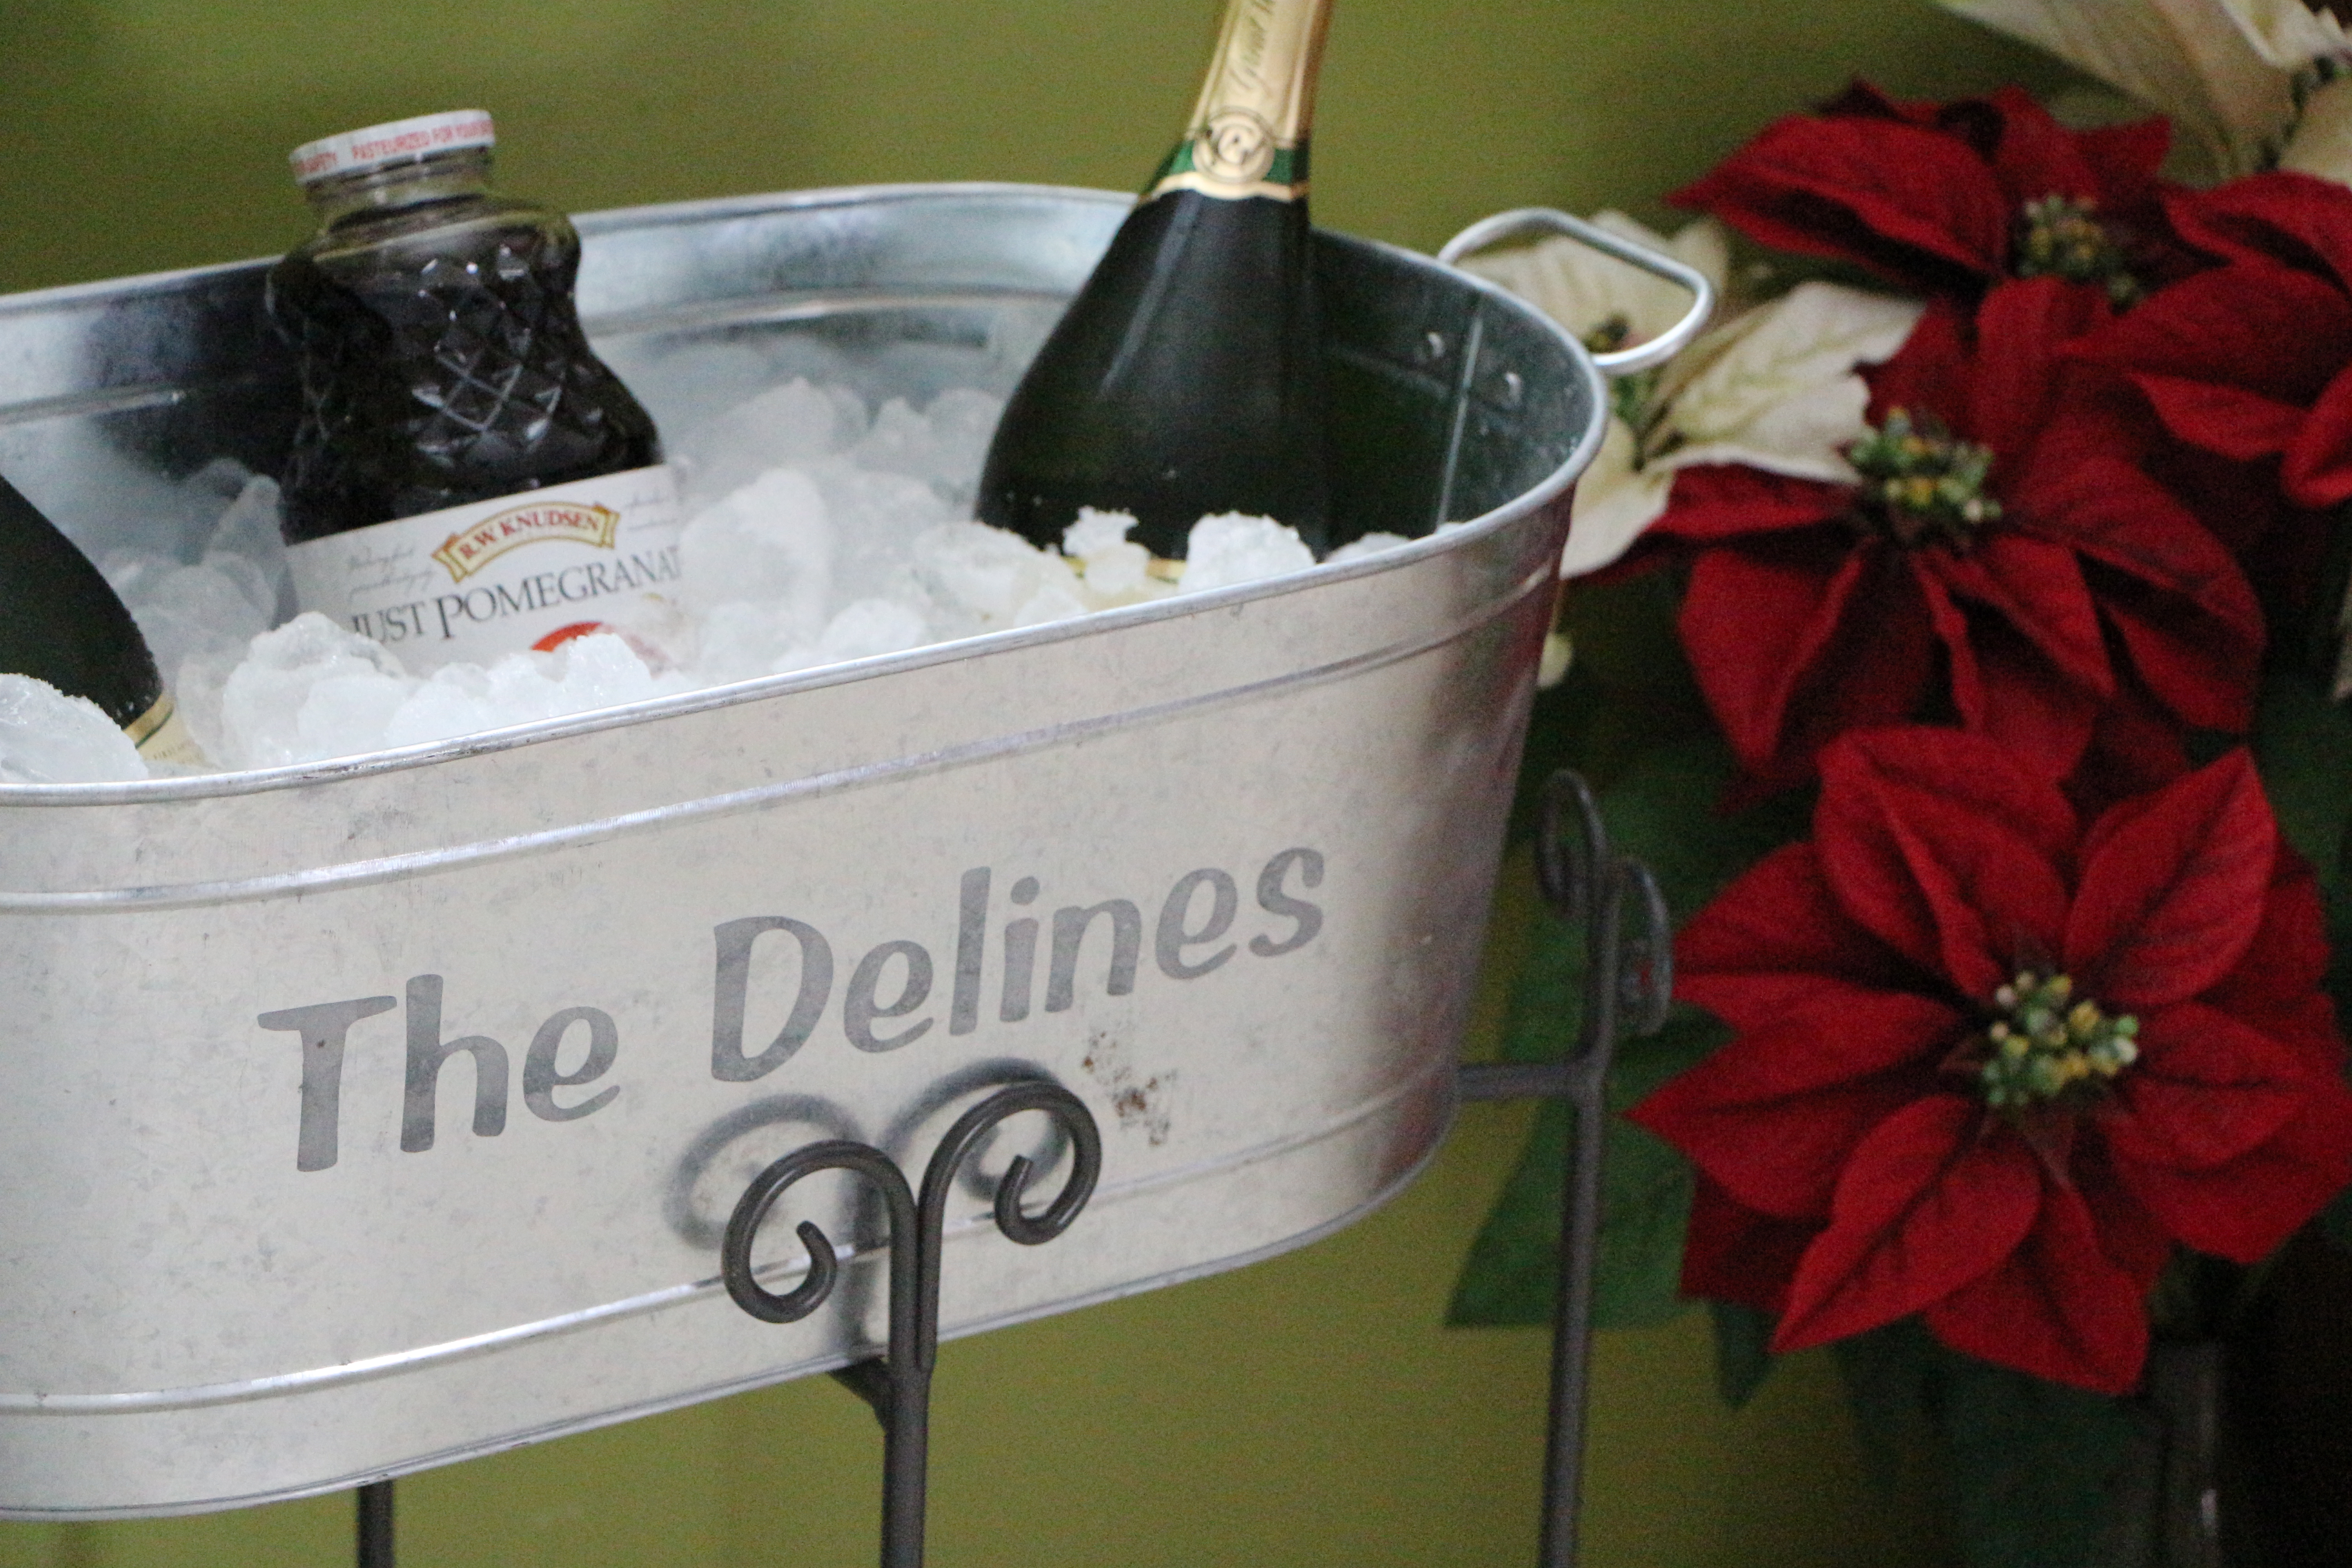
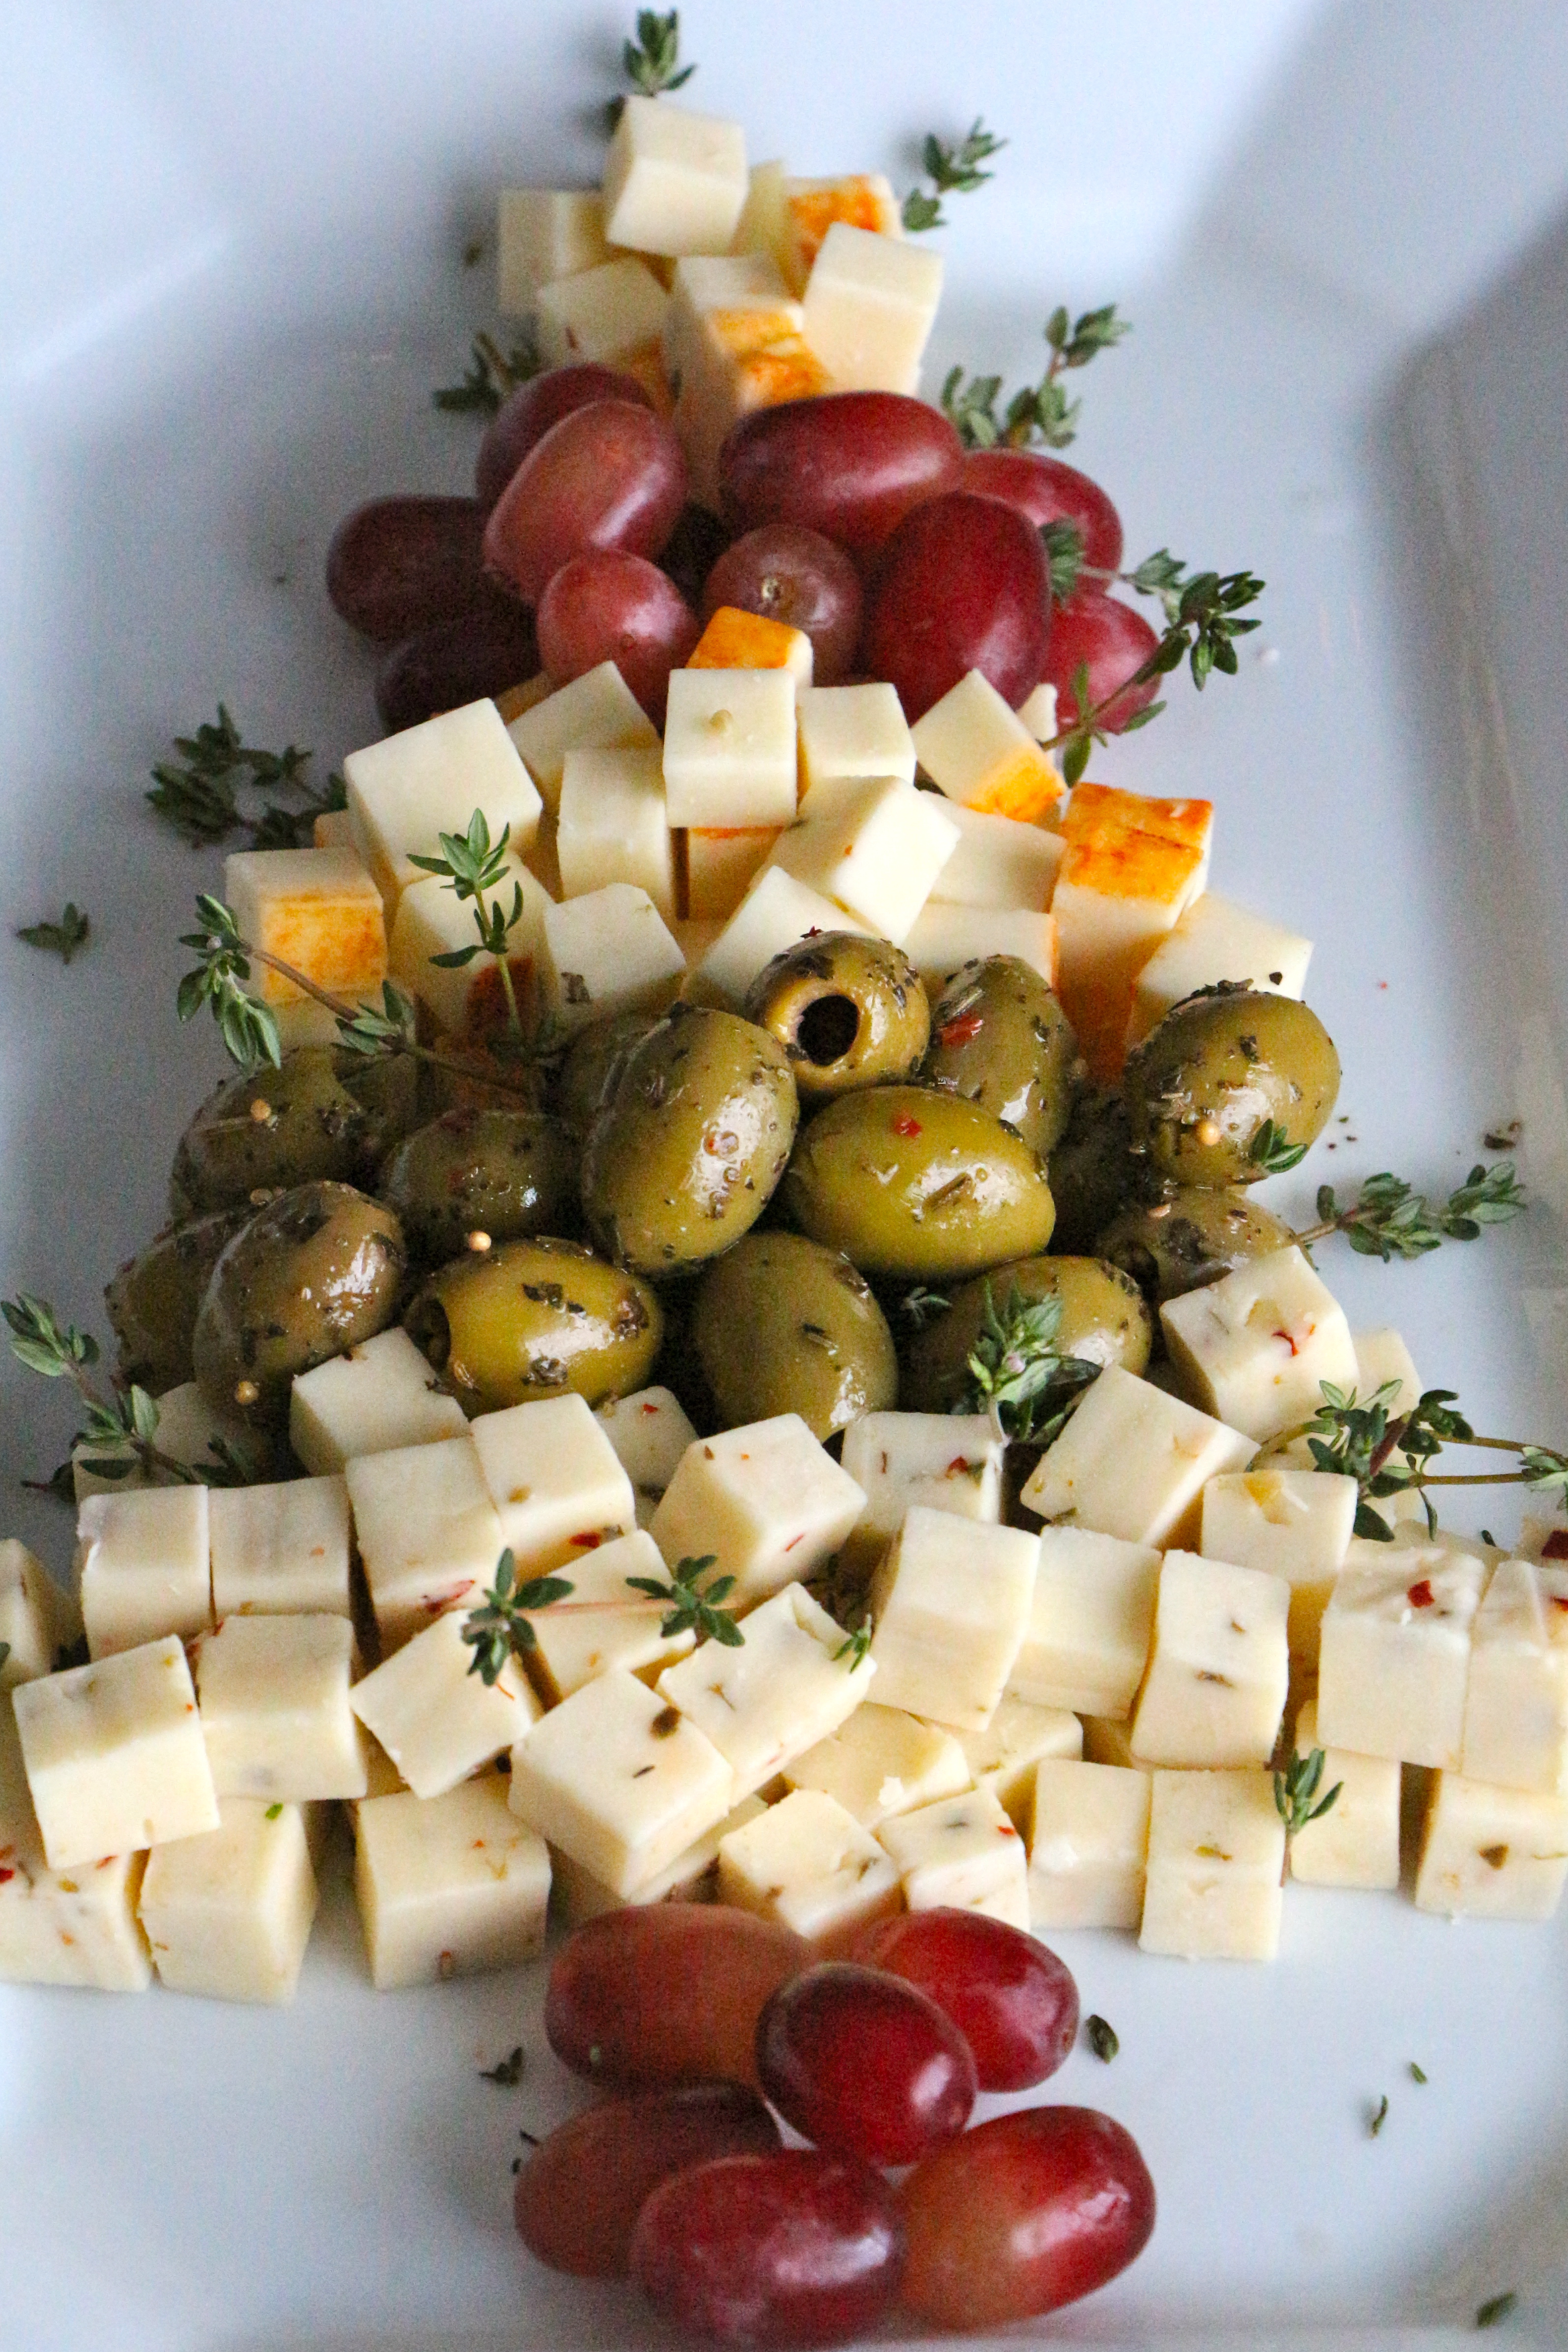
We eat cheese. We drink holiday sangria, pomegranate champagne cocktails, and cocoa. We trade cookies. The kids make holiday crafts. Everyone has grand time.

IMG_2001

This year’s party was apparently so grand and inviting, that perfect strangers decided to join us.

No joke.

My cookie party got crashed by three women wearing Santa hats.

IMG_2005

They walked up our driveway, let themselves in through the front door, sat on our stairs to remove their winter boots, coats, and hats, then proceeded to walk through the house in search of someone they knew.

One of my friends alerted me to the presence of my new guests, who were wandering my house at that very moment. I ran to my husband to find out what to do.

We were just about to greet our new guests as they walked into the living room and realized their mistake.

IMG_2013

One woman, who appeared to be the mother of the other two, mumbled an embarrassed apology, then made a hasty exit. The other two women sat on the stairs while they laced up what seemed like the tallest winter boots in creation. They then chased after their mom, who was already in her car driving down the road in search of their intended party.

Had it been me, standing there, eating a piece of cheese in the living room of a complete stranger, surrounded by that stranger’s family and friends, I would have run out of that house barefoot, into the foot and a half of snow on the ground.

IMG_2027

Had they brought cookies to share, I would have eagerly encouraged them to stay. But, as I always say, every time someone crashes my cookie party… No cookies? No cocktails!

Next year, I’m hiring a cookie bouncer for my party.

IMG_2020

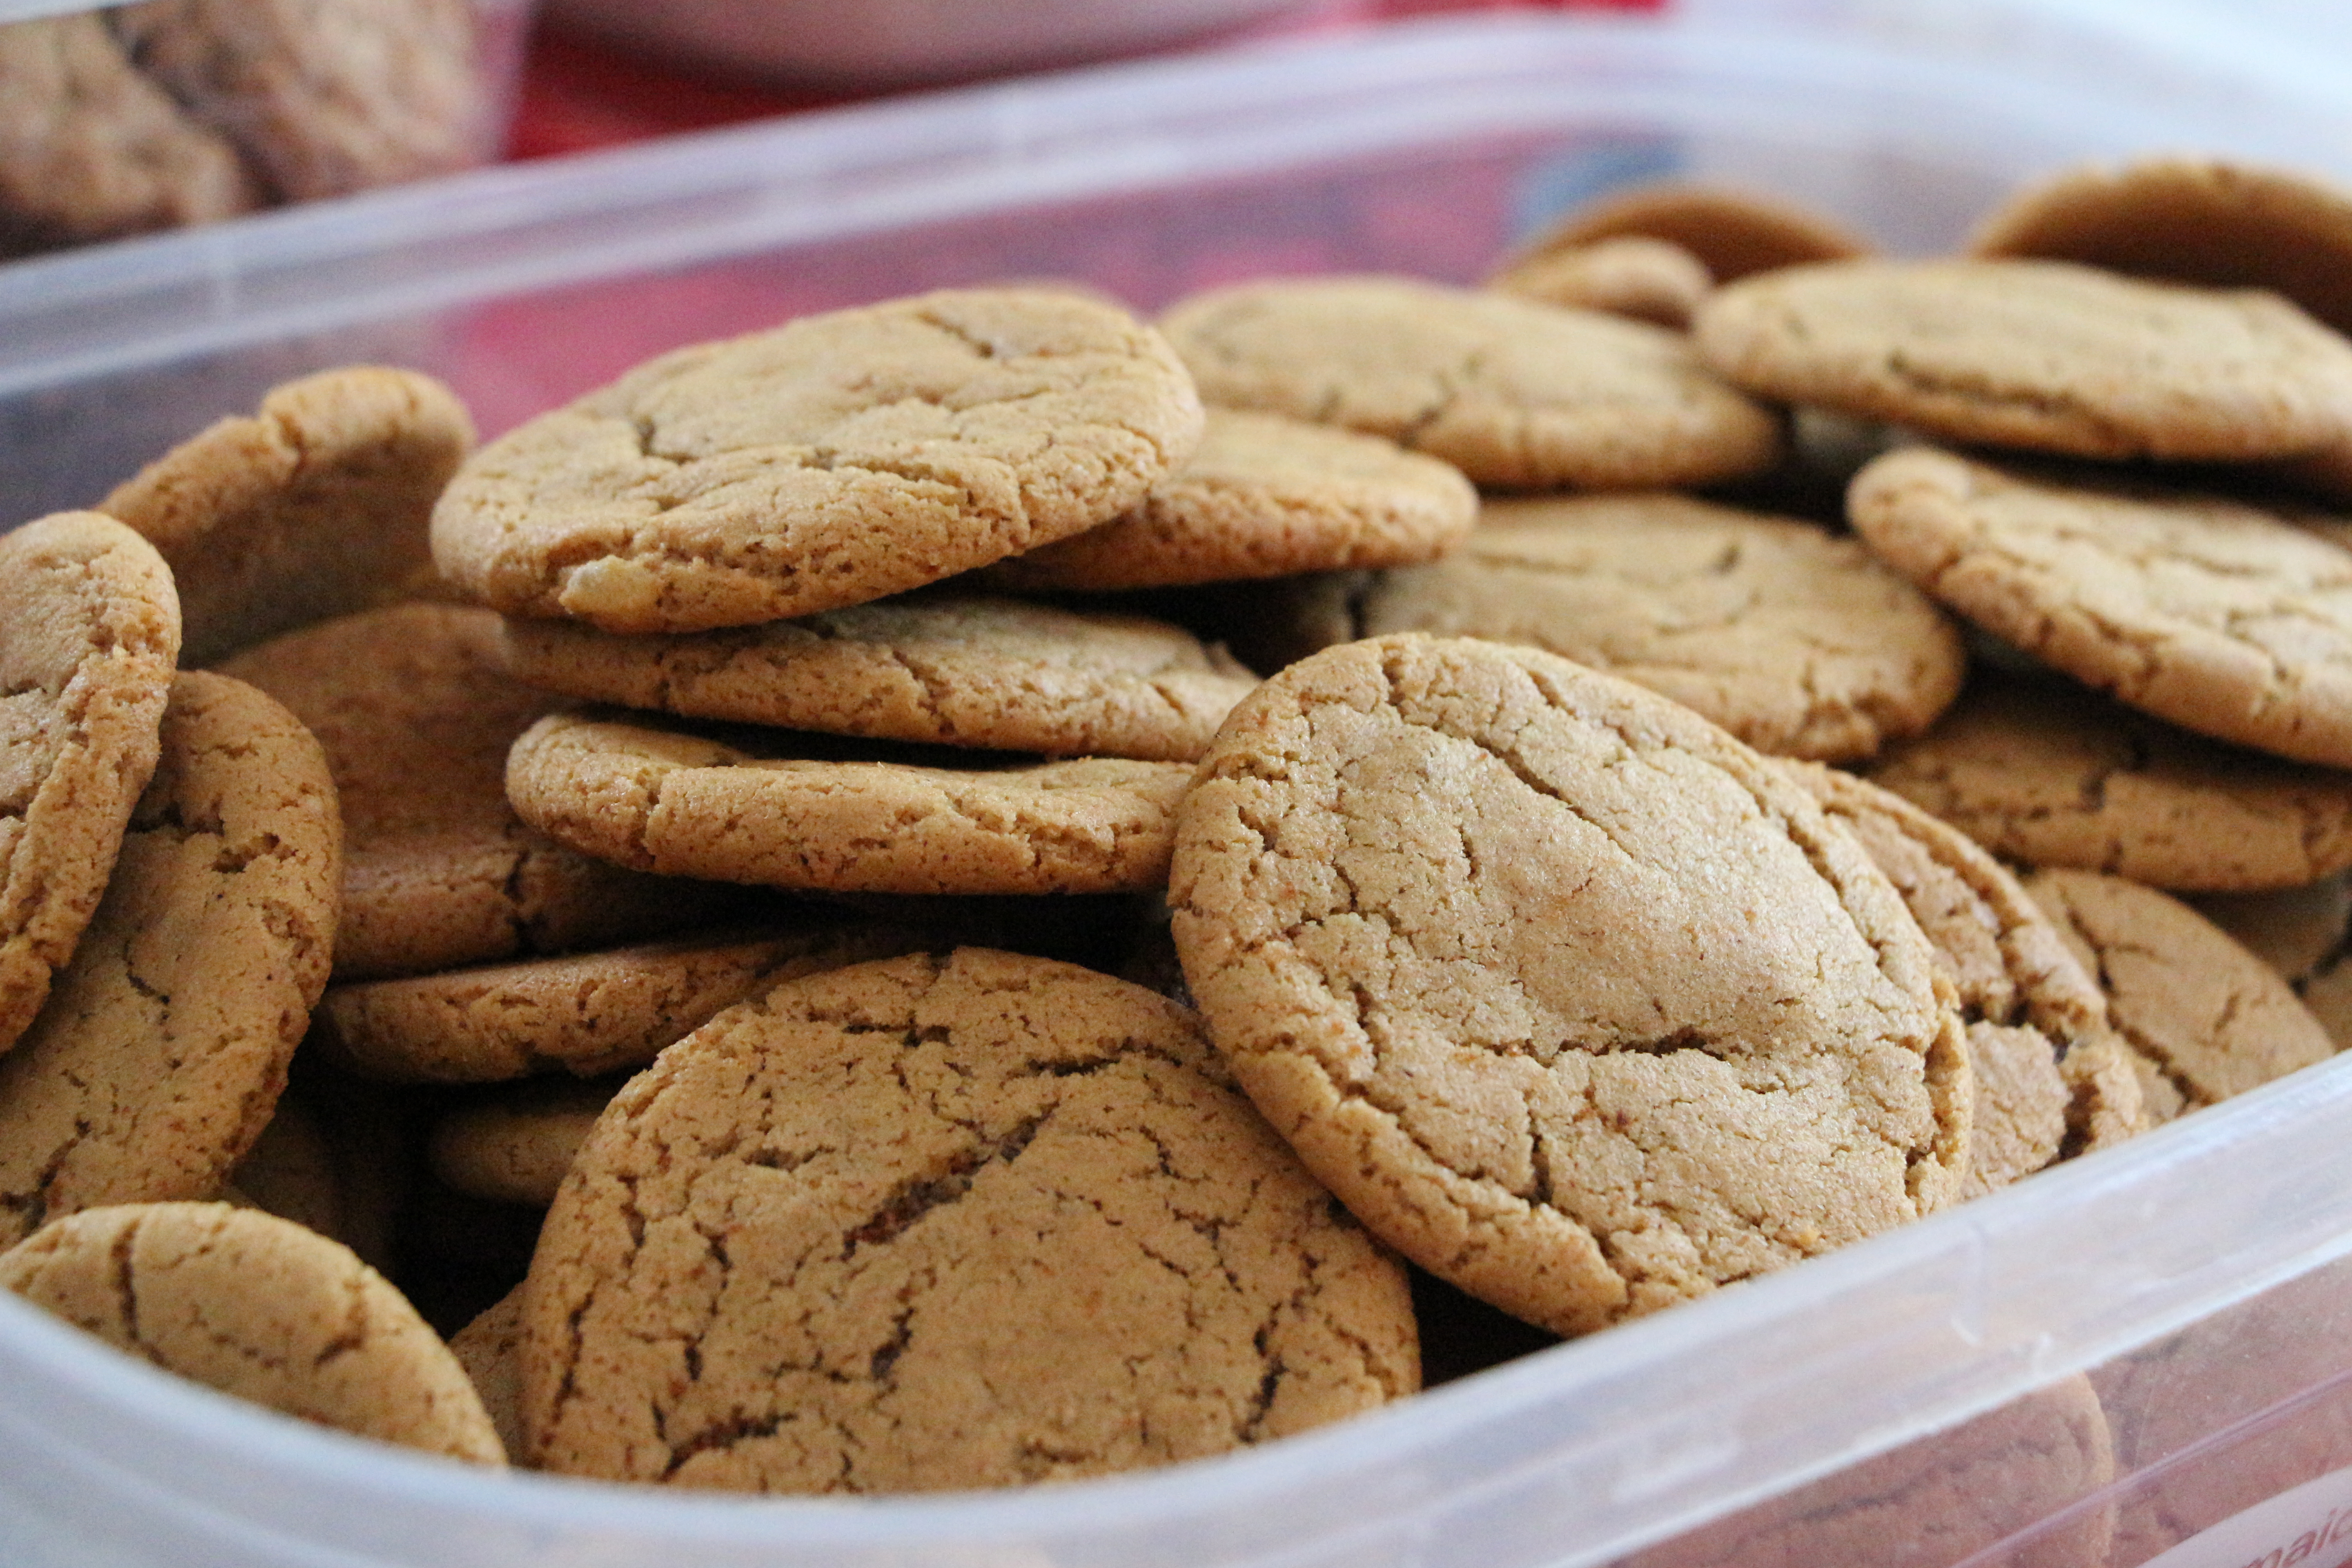
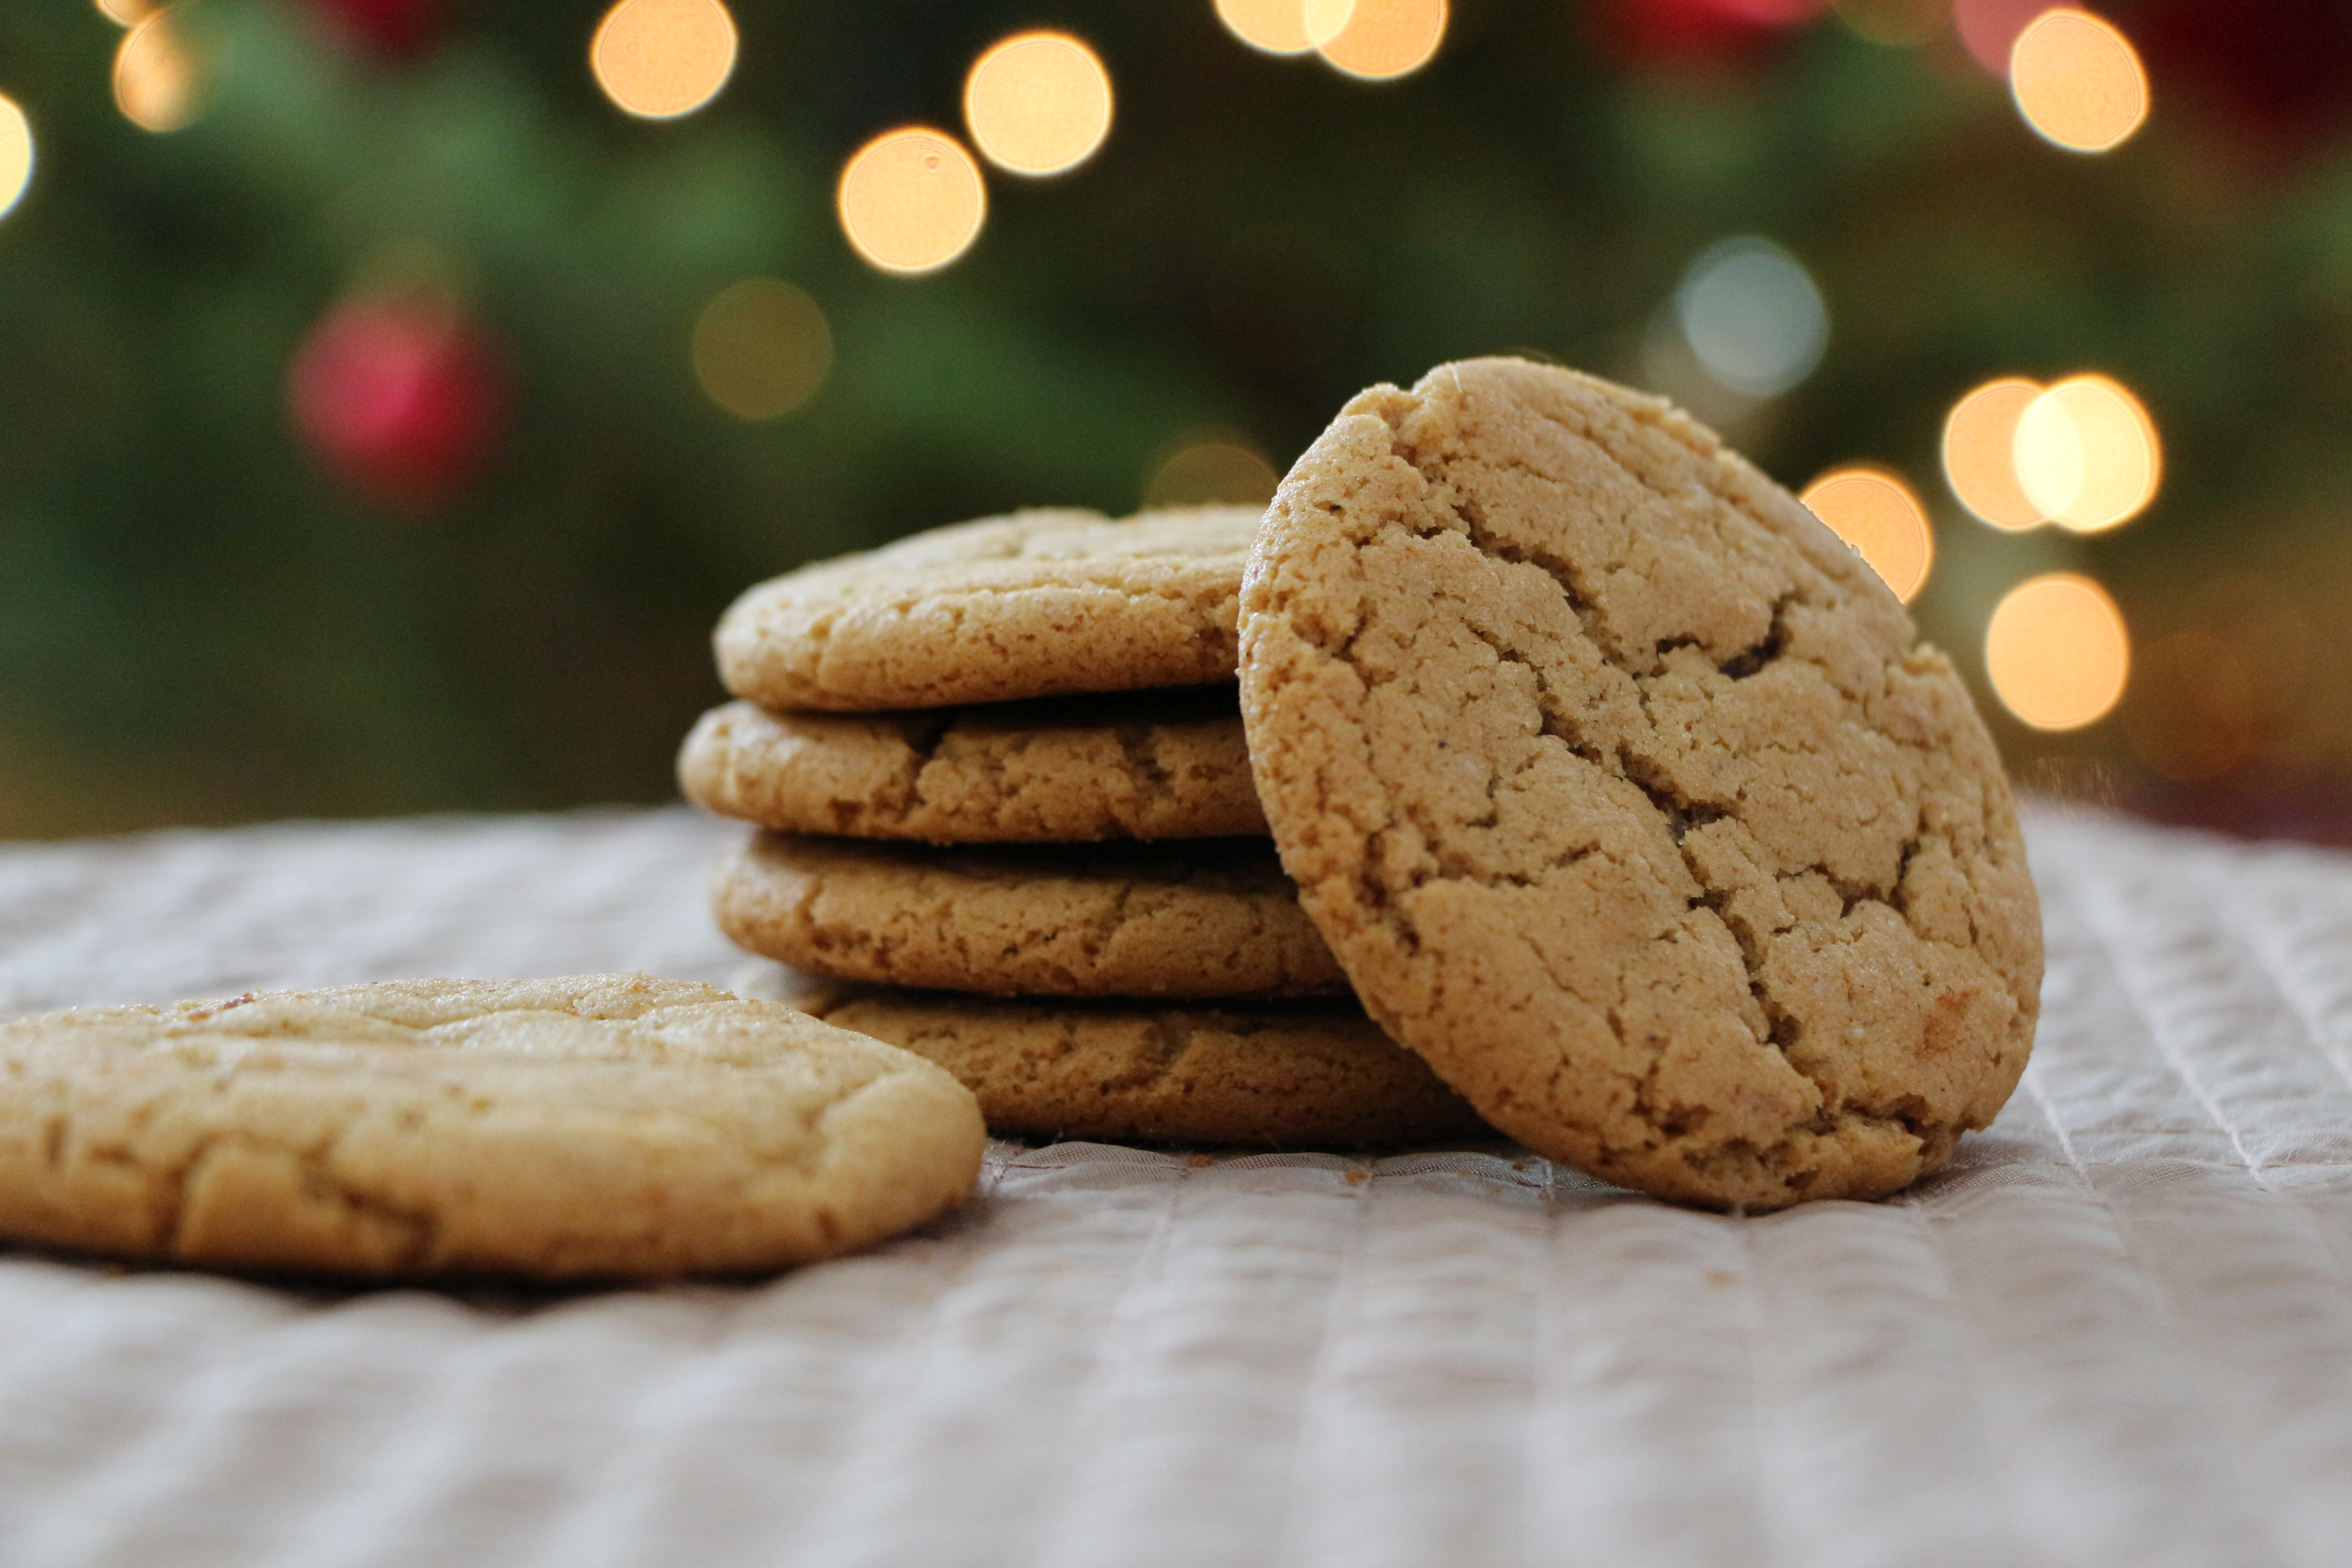
These spicy, triple-ginger cookies were my contribution to the cookie buffet. They’re sweet and chewy and oozing with gingery flavor. The holiday sangria, which follows, is accented with festive flavors of orange, ginger, cinnamon, and pomegranate.

You’d have crashed my cookie party too, if you knew these cookies and sangria were waiting inside.

IMG_2037

Triple Ginger Cookies

Ingredients

  • 1 3/4 cups sugar
  • 1 cup vegetable oil
  • 2 eggs
  • 1/2 cup molasses
  • 2 teaspoons baking soda
  • 1 teaspoon cinnamon
  • 1/2 teaspoon ground cloves
  • 2 teaspoons ground ginger
  • 1 tablespoon fresh ginger, grated
  •  1 2-ounce bottle crystallized ginger, chopped
  • 1 teaspoon salt
  • 4 cups flour

Directions

Preheat oven to 350 degrees. Mix sugar, eggs, and oil. Add the remaining ingredients and stir until well blended. Roll into 1″ balls. Arrange the balls about 1 1/2″ apart on a baking sheet. Bake for 8-10 minutes, until crackles form on the top. Remove the cookies from the oven, then give the baking sheet a little whack on the counter to flatten the cookies.
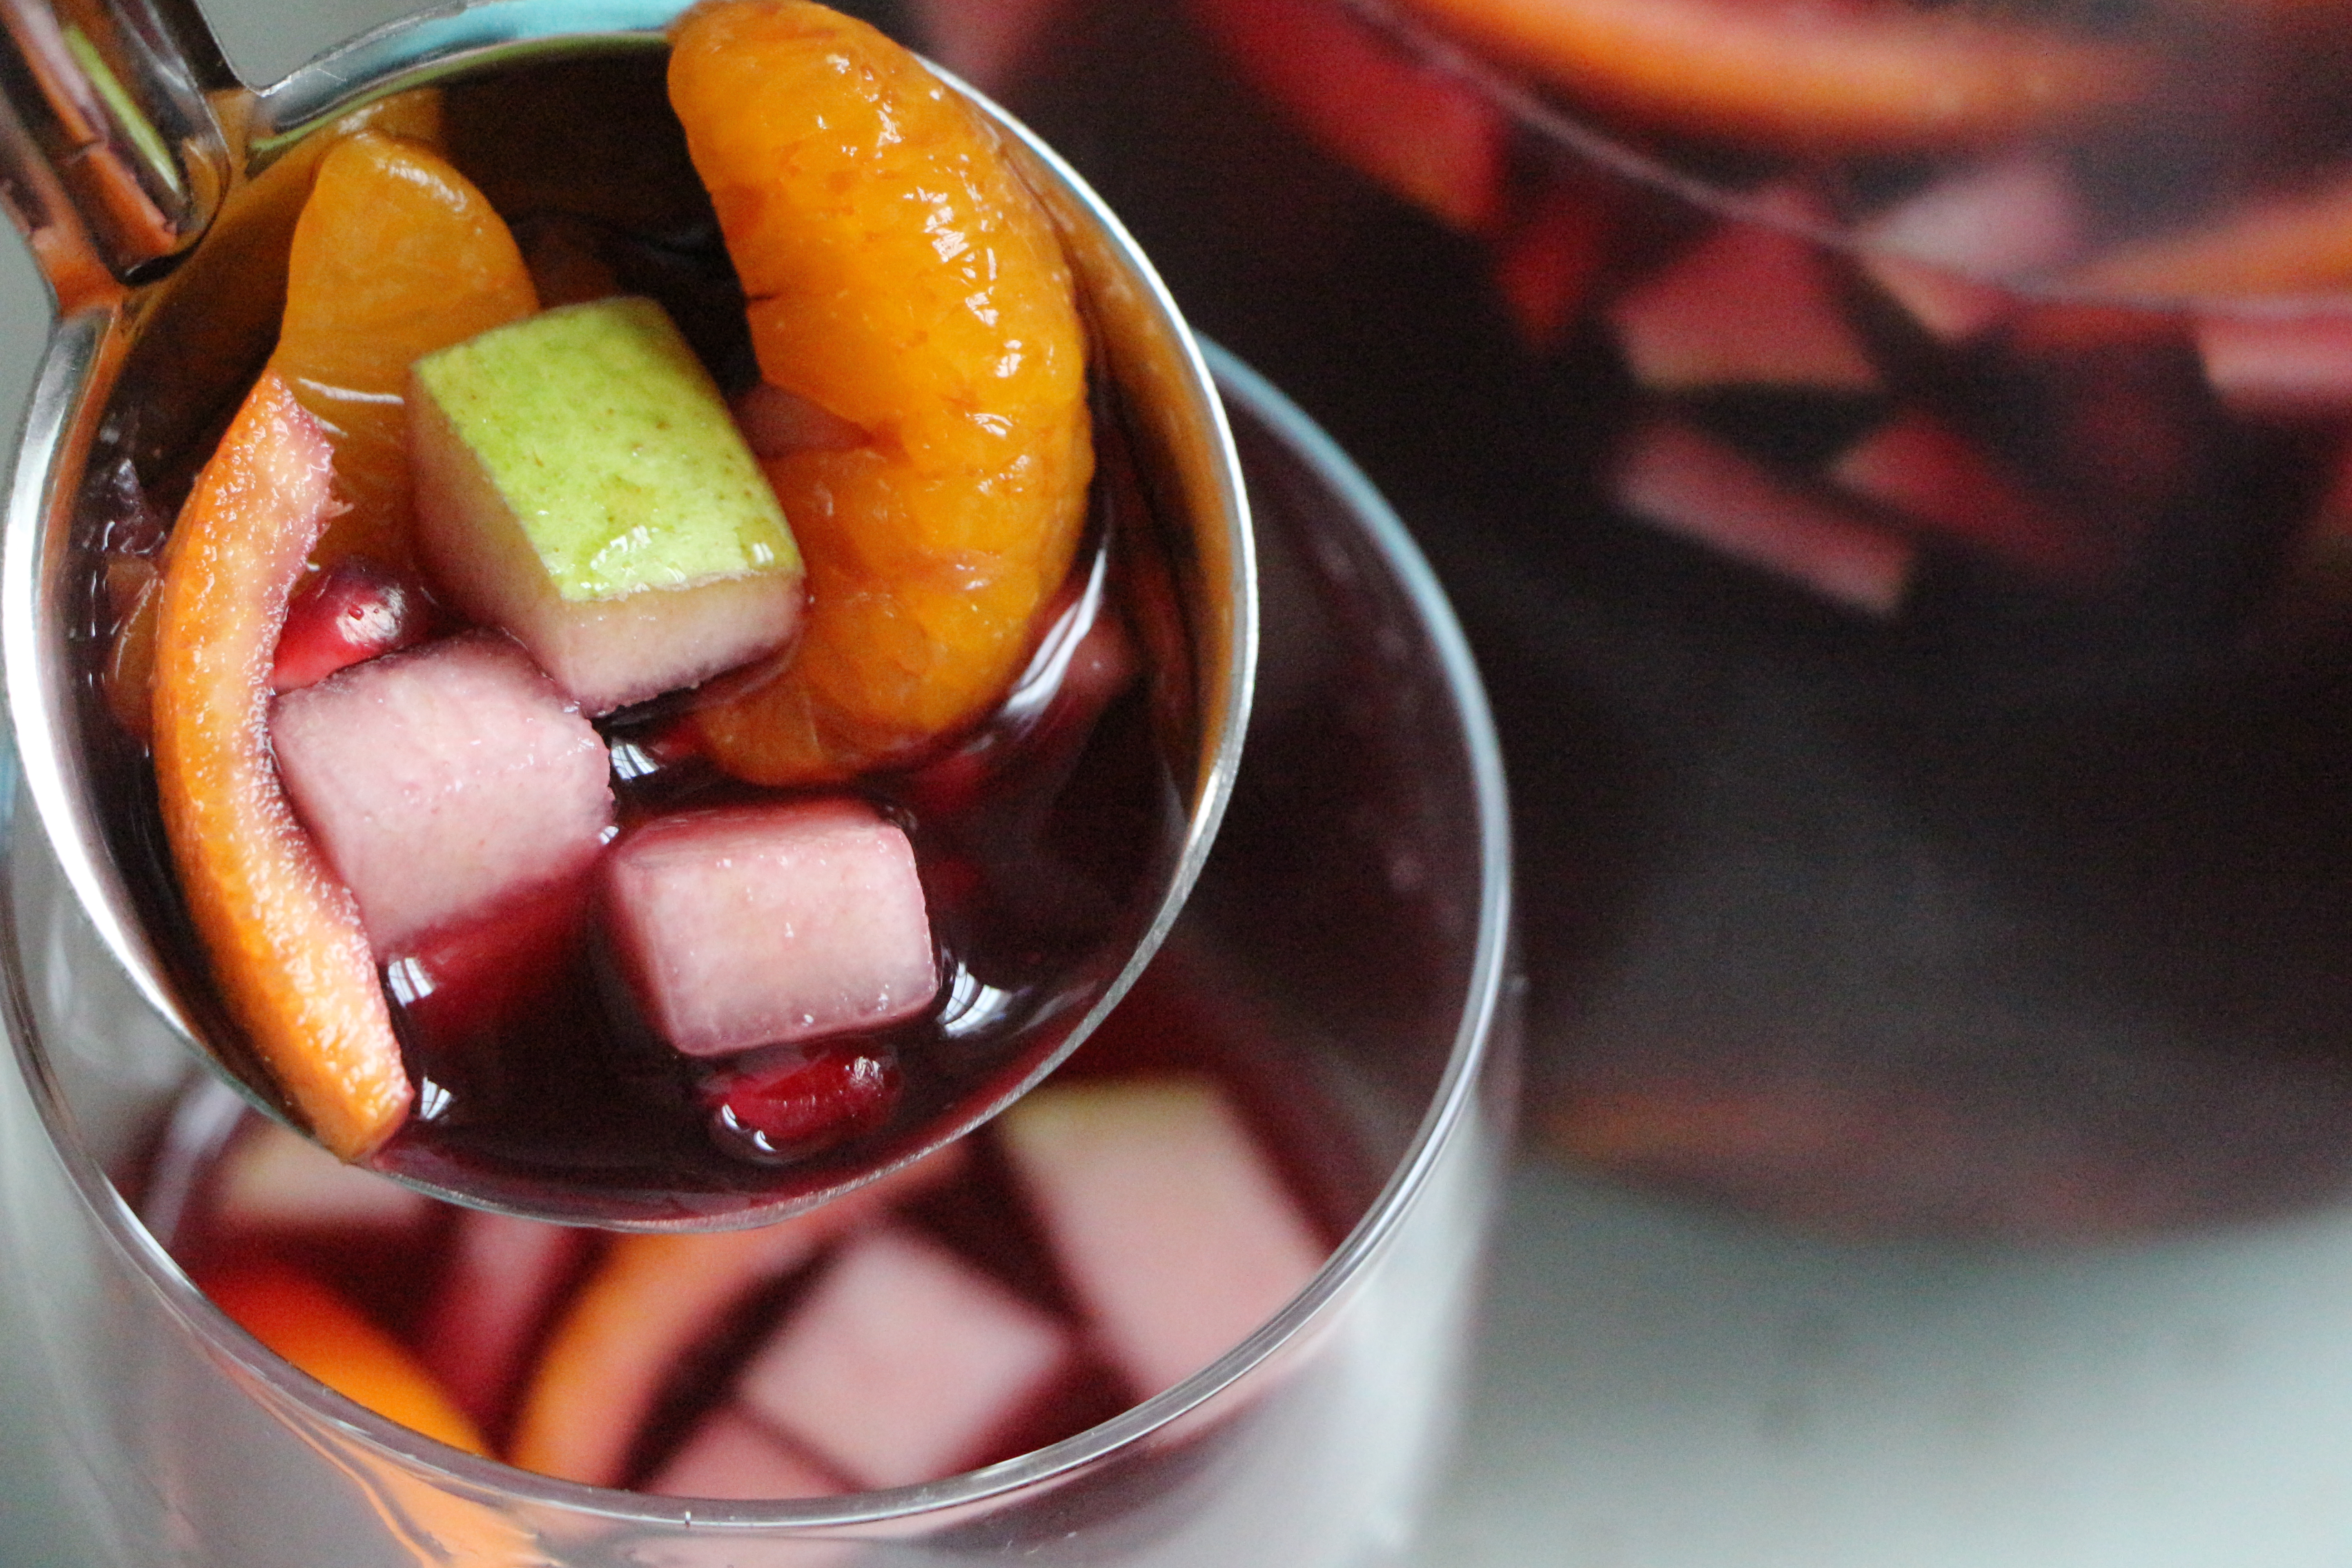
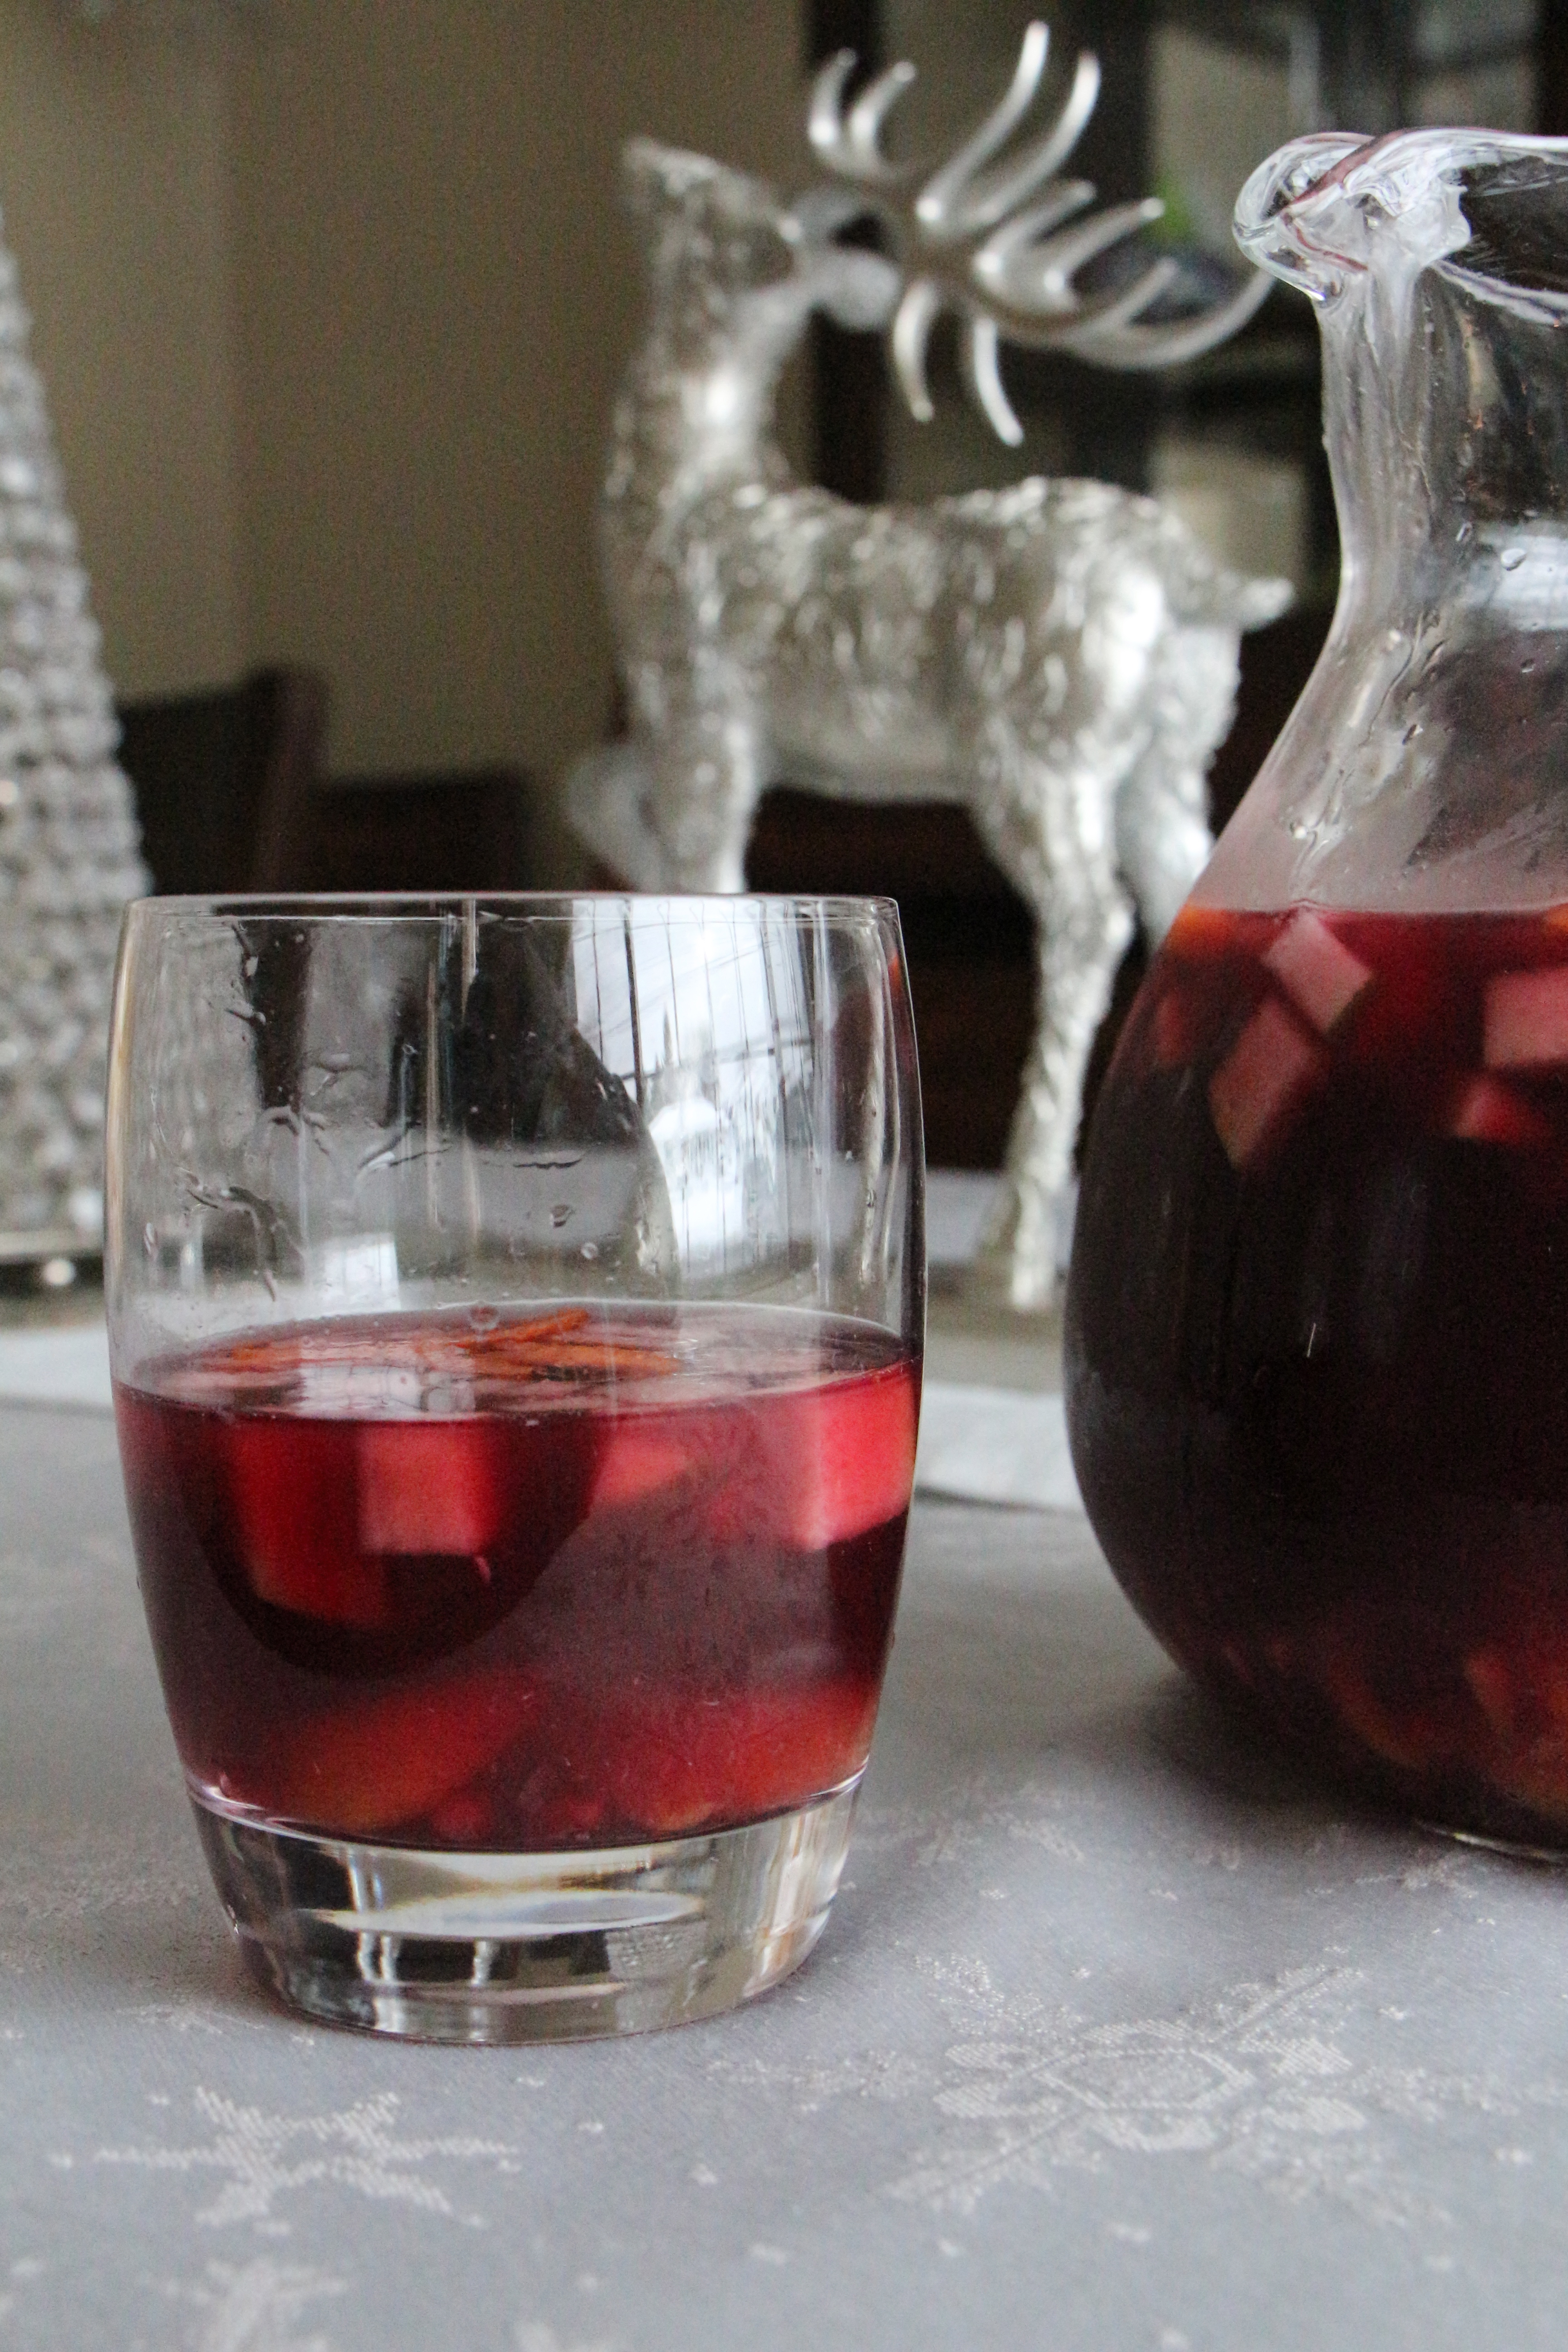
IMG_1988

Holiday Sangria

Ingredients

  • 1.5 liter bottle of sweet red wine (I used Sutter Home’s Sweet Red Wine)
  • 1/2 cup triple sec
  • 1/2 cup orange juice
  • 1 cup ginger ale
  • 1 cinnamon stick
  • 1 pear, chopped
  • 1 pomegrante
  • 1 orange

Directions

Combine the wine, triple sec, orange juice, and ginger ale. Add the cinnamon stick and the chopped pear. Remove the arils from the pomegranate and add to the mixture. Remove the orange segments from the orange, chop into small pieces and add to the mixture. Remove the white pith from the orange peel, then slice the peel into small slivers. Add to the sangria. Chill and enjoy.

IMG_1997

Individual Red, White, and Blue Trifles

Posted on

The fact that the Fourth of July falls right smack in the middle of peak berry season seems almost too good to be true. Right around the time when many of us are scrambling to come up with the perfect patriotic red, white, and blue dessert for our Independence Day barbecues, the sweetest strawberries, blueberries, and raspberries are arriving in the grocery store, fresh picked from local berry farms. It’s no wonder that so many 4th of July desserts feature berries. It’s patriotic kismet.

And this dessert is no different. But it’s more than just seasonal festive colors. These red, white, and blue fresh berry and vanilla custard trifles are addictively delicious. Seriously, I should admit that I made two batches since I just wasn’t satisfied with the photos I’d gotten from the first batch. I ate most of that first batch. I shared a little with the kids, but I made quick work of the rest…and I barely regret it either. I’m going to try to save the second batch for tomorrow’s festivities, but I’m not making any promises.

Traditionally, trifles are made with layers of fruit, spongecake, custard and whipped cream, arranged in a large glass bowl to display the beautiful layers. My version is made in perfect individual portions, arranged in jam jars for a unique presentation. In some variations of trifle, the fruit is suspended in gelatin. In mine, a bit of sugar and some instant pectin (commonly used in making jams and jellies), create a sweet thickened glaze around the fresh berries. Layers of crushed vanilla wafers, creamy vanilla custard, and sweet whipped cream complete the perfectly portioned dessert. Be sure to stick your spoon straight down to the bottom with every bite to get a little bit of every layer.

How will you be spending your 4th of July??

Individual Red, White, and Blue Trifles

Ingredients

  • 20 vanilla wafer cookies, crushed
  • 1 cup blueberries

For the Berry ‘Jam’

  • 1 cup strawberries, chopped
  • 1 cup raspberries, chopped
  • 1/2 cup sugar
  • 1 17-gram package instant pectin*

For the Vanilla Custard

  • 1 1/2 cup milk
  • 1/4 cup sugar
  • 1 1/2 teaspoons vanilla
  • Pinch of salt
  • 2 tablespoons cornstarch
  • 3 egg yolks

For the Whipped Cream

  • 1 cup heavy cream
  • 3 tablespoons sugar
*Look for pectin wherever your grocery store carries their jarring supplies for jams and jellies.

Directions

For the Custard: Bring the milk, sugar, vanilla, salt and cornstarch to a simmer over medium heat, whisking frequently so that the sugar and cornstarch dissolve. Then, reduce the heat. In a separate bowl, lightly beat the egg yolks with a fork. Gradually whisk about 1/2 cup of the hot milk into the egg yolks, starting with a very slow drizzle. (Gradually incorporating the hot milk into the egg yolks tempers the eggs, allowing them to slowly rise in temperature without scrambling.) Gradually whisk the egg mixture into the remaining hot milk in the pot. Bring to a gentle boil over medium heat, whisking constantly for about 3 minutes, until thickened and smooth. Allow to cool at room temperature, whisking occasionally, until no longer hot. Then, transfer the mixture to a bowl or large measuring cup. Press a piece of plastic wrap directly against the custard to prevent a skin from forming. Refrigerate until chilled.

For the Berry Jam: Combine the strawberries, raspberries, sugar, and pectin. Stir for about 3 minutes. Set aside while you prepare the other components.

For the Whipped Cream: Beat the heavy cream and sugar for several minutes until quite thick.

To Assemble the Trifles: Spoon about 1/6 portion of the berry jam into the bottom of each serving glass. (8-ounce jam jars work perfectly.) Sprinkle about 1/6 of the crushed cookies on top of the jam. Spoon or pipe about 1/6 of the custard on top of the cookie layer. Top the custard layer with a layer of blueberries. Spoon 1/6 of the whipped cream onto each blueberry layer. Garnish with a additional berries, if desired. Refrigerate until serving.

Makes 6 Servings

Tutti Frutti Chocolate Fudge and Crispy Peanut Butter Snowballs

There’s less than a week until Christmas! Is anyone else absolutely buzzing with excitement? I mean, literally trembling with anticipation??? Or maybe that’s just the result of the extra caffeine I’ve been pumping into my system to give me enough Santa power to get everything accomplished in time.

I hesitate to admit it, but I may have taken on too much this time. I’m absolutely spinning in my to-do list. My kitchen looks like Pamplona post bull run. My guest room (which needs to be houseguest-ready by Wednesday), looks like Santa’s workshop in the 11th hour. There’s glitter permanently embedded in the baby’s scalp (you know that stuff never comes off) from the place-setting ornaments I decided to make for each of my sixteen Christmas dinner guests. And there’s still a googly eye hot-glued to my wrist from the small army of candy cane reindeer my sons and I prepared for their little schoolmates. Oh, and though I’ve been baking faster than the Keebler elves, I don’t think I’ve made enough to pass out to all of the people on my list.

It’s too late to turn back now. Onward we go.

I’ve been tossing around a few stories I’d hoped to pair with this post, stories about Christmas trees, wish lists, and snakes in my bathtub. Yes, snakes in my bathtub! But, I fear I may never get this posted if I don’t just get right to it! So, let’s just do this.

They say variety is the spice of life. Well, same goes for cookie platters. The key to a great cookie platter is variety of flavors, textures, and color. So, in addition to the standard mix of baked oatmeal chocolate chip craisin cookies, vanilla cherry drops, and sand tarts, I like to include a few other non-cookie type goodies…like chocolate dipped dried fruits or pretzels, truffles, and fudge. Like this simple and delicious tutti frutti chocolate fudge or kid-friendly crispy peanut butter snowballs!

If you’ve got even a little space left on your holiday to-do list, go ahead and pencil these in!

Tutti Frutti Chocolate Fudge

Ingredients

  • 3 1/3 cups sugar
  • 1 1/3 cups evaporated milk
  • 1 teaspoon salt
  • 4 tablespoons butter
  • 4 cups mini marshmallows
  • 3 cups semi-sweet chocolate chips
  • 1 cup fruitcake mix (finely chopped, mixed candied fruits), divided

Directions

Lightly butter two 8×8 inch baking dishes or one 13×9 baking dish. Combine sugar, evaporated milk, butter, and salt in a pan over medium heat. Bring to a full boil. Cook 4-5 minutes, stirring constantly. Reduce heat to medium-low if the mixture bubbles up too vigorously. Remove from heat. Stir in the marshmallows and chocolate chips until melted. Stir in 3/4 cup of the candied fruit. Pour the fudge into the baking dish(es). Sprinkle the remaining candied fruit on top. Cool completely at room temperature. Then, refrigerate until firm. Remove the fudge from the baking dish and cut into small squares. Store in an airtight container in a cool place.

Makes 4 pounds

Crispy Peanut Butter Snowballs

Ingredients

  • 1 cup peanut butter
  • 1 cup powdered sugar
  • 1 cup crisped rice cereal (Rice Krispies)
  • 1 cup shredded, sweetened coconut

Directions

Combine peanut butter, powdered sugar, and rice cereal until well blended. Roll into 1″ balls. Roll the balls in the shredded coconut to adhere. Store in a cool place until serving or adding to cookie platters.

Coconut Crisps

I mourn my lack of singing ability every time O Holy Night comes on the radio. Man, do I wish I could sing the bananas out of that song! Mind you, my lack of musical ability doesn’t even begin to stop me from belting it out at the top of my lungs. My poor, unfortunate children who have to listen to me sing!

It’s one of my life’s greatest heartaches; my longing for even a pinch of musical ability. I would have been a Broadway star. Or maybe taken Michael Flatley’s place as the fast-stepping star of Riverdance. At least I could have tried, if I’d had even an ounce of talent to pursue that path. But I’m resigned to simply sing along with the soundtracks and watch episodes of So You Think You Can Dance, with both admiration and envy in my heart. It just wasn’t the path my life was meant to take.

But, I can bake.

And I can play around with ingredients to create delicious treats, like these coconut crisps. O holy night, are these good! Thin, crispy, and buttery. We’re going coconuts over these cookies around here. It’s gonna take a lot of self-control to save some for our Christmas guests. I promise I’ll try.

Coconut Crisps

Ingredients

  • 1 cup (2 sticks) butter, softened
  • 1 cup sugar
  • 1/4 teaspoon salt
  • 1 teaspoon vanilla
  • 1 egg
  • 1 cup flour
  • 2 cups sweetened, shredded coconut

Directions

Using a hand-mixer, blend together the butter and sugar until pale and creamy. Add the salt, vanilla, and egg. Beat until well-blended. Blend in the flour and the coconut. Form the dough into a ball and refrigerate for about 30 minutes, until firm and moldable. Form the dough in a log shape, about 2 inches in diameter. Wrap the log in the wax paper and roll the dough to make it as even and round as possible. Freeze for at least 2 hours, until hard.

Preheat oven to 375 degrees. Cut the dough into 1/4 inch slices. Arrange the slices on cookies sheets, at least two inches apart. Bake for 8-10 minutes until golden brown around the edges and on the bottom. Allow to cool for a few minutes on the baking sheet, then carefully transfer to a cooling rack. The cookies will be soft initially, so you can somewhat adjust the shape, if necessary. Store the completely cooled cookies in an air-tight container.

Makes about 3 dozen

No-Bake Ginger Fruit Cake Balls

Did you know that you can watch the Radio City Music Hall Christmas Spectacular on Netflix? I was beyond thrilled when I found it yesterday.

Growing up on Long Island, attending the Christmas Spectacular was just about an annual event. To me, it is the epitome of Christmas in New York City. I have been itching to make a trip down to NYC to share the experience with the boys, but for the cost of the good seats, they’re just not ready. We’ll definitely bring them in a few years, when all of their attention spans are a bit more predictable. If you ever find yourself in NYC during the holiday season (and I strongly suggest you make a point of finding yourself there at some point in your life), make sure you get yourself tickets to the show. And if you can’t get there to see it, check it out on Netflix. It’s really wonderful. I’m totally going to be a rockette when I grow up.

In between working on my kickline skills and practicing my sweet tap dancing moves, I started working on this year’s cookie collection. I baked eleven dozen Double Chocolate Peppermint cookies for a little cookie exchange I’m hosting tonight. And then I made these little no-bake fruit cake balls. Crushed gingersnaps and sweet molasses make up the spiced base, while tender bits of brightly colored candied fruit deck the balls with festive fruitcake flavor. And if you like your Christmas cookies spiked with a bit of booze, go ahead and soak the candied fruit in a bit of spiced rum for even more fruitcake flavor! Loving this new addition to my cookie collection!

No-Bake Ginger Fruit Cake Balls

Ingredients

  • 2 cups gingersnap crumbs (about 40 gingersnaps, very finely crushed)
  • 6 tablespoons molasses
  • 4 tablespoons peanut butter
  • 3/4 cup candied fruit (fruit cake mix)
  • 1-2 tablespoons spiced rum (optional)
  • 3/4 cup white chocolate chips or candy melts

Directions

If desired, pour the rum over the candied fruit and allow it to soak for at least an hour. Combine the gingersnap crumbs, molasses, peanut butter, and candied fruit until well blended. The mixture should stick together when pressed, but not be overly wet or sticky. Add a touch more molasses if the mixture is too dry. Use your hands to form balls, about 1″ in diameter. It’s helpful to press the mixture into a rough ball shape before rolling in your palms. Gently melt the white chocolate chips or candy melts in the microwave or in a double boiler. Use a spoon or pastry bag fitted with a fine round tip to drizzle the melted chocolate over the fruit cake balls. Store in an air-tight container.

Makes about 40

Holiday Cookie Round-Up

Well, folks… The holiday season is officially upon us! And with that, the time to complain about the too-early Christmas displays and carols on the radio has passed.

But then, that stuff never really bothered me anyway. Quite the opposite.

In fact, the week before Thanksgiving, as I stood in line waiting to checkout at my local Target, I overheard a woman complaining to the cashier about how early the Christmas displays appear. I stood there, silently judging her, as I pretended to peruse the selection of batteries, mascara, and matchbox cars, cleverly arranged to attract impulse shoppers. Bah humbug, Ms. Scrooge!

I happen to enjoy the early holiday displays in the stores. (Now you’re judging me, aren’t you??) There’s something about the anticipation…seeing those decorations, but knowing it’s not time, not just yet. I look, I plan, I wait. As much as I love Christmas, I force myself to wait until after Thanksgiving to bust out my full festive cheer. Honestly, I can only focus on one holiday at a time. And we’ve still got a skeleton hanging outside our front door and leftover Thanksgiving green beans in the fridge.

It’s here though, for real now. There is no longer shame in the jingle bells I’ve left tied to my running sneakers or the shopping cart I intend to fill with glittery wrapping paper this morning. The scarecrows and skeleton outside my front door will promptly be replaced by a happy family of snowmen and a blinking reindeer. The holiday season is here and that also means it’s cookie baking time! Are you ready??

I’ve got a few new cookie ideas brewing for this year. But to get you started, here’s a look back at some of my previously posted cookie recipes.

**I’ve starred the favorites I’ll be remaking for this year’s cookie collection.**

Carrot Cake Cookies

Peppermint Patty Cheesecake Bars

Mexican Hot Chocolate Cookies

**Sand Tarts**

**Cherry Vanilla Drops**

Rainbow Cookies

**Coconut Macaroons**

**Double Chocolate Peppermint Cookies**

Choco-Cherry-Coconut Bars

**Pfeffernussen**

**Oatmeal Chocolate Craisin**

Lemon Ginger Sugar Cookies

Almost Thin Mints

**Chocolate Covered Spiders (Haystacks)**

**Peanut Butter Fudge**

Holiday Bark

Carrot Cake Cookies

Posted on

Yowzers! It’s sure been tough to find the time to write lately. Busy summer days with very busy little boys!

I’ve got an ever-growing backlog of recipes hanging out in the queue. They’ve all been taste-tested and photographed. Ingredients, quantities, and procedures have been drafted. Now if only I could find a moment to form a few semi-coherent thoughts to complete the posts. Coherent thoughts are hard to come by these days.

But, busy is good. Busy means happy, healthy, curious kids. Busy makes me tired, but busy is definitely good!

Hanging out alongside a tasty recipe for corn and bacon fritters and two separate grilled shrimp recipes were these cookies…carrot cake cookies. They’re sort of a cross between a chewy oatmeal raisin cookie and a slice of moist, delicious carrot cake. And they’re good! I made the first batch as a thank you gift for the midwives I saw throughout my pregnancy and a second batch for my son’s nursery school teachers. Who doesn’t love to receive homemade cookies as a gift?? And somewhere in between those two batches, I ate at least a dozen of these tender, sweet and spicy cookies myself. Mhmm…they’re yummy indeed!

Carrot Cake Cookies

Ingredients

  • 2 cups flour
  • 1 teaspoon baking soda
  • 2 teaspoons cinnamon
  • 1/2 teaspoon ginger
  • 1/4 teaspoon salt
  • 2 sticks salted butter, softened
  • 1 cup light brown sugar, firmly packed
  • 1/2 cup white sugar
  • 2 eggs
  • 2 teaspoons vanilla
  • 1 1/2 cups Quaker oats
  • 1 1/2 cups carrots, finely grated
  • 1 1/4 cup golden raisins
  • Confectioner’s sugar and water, for icing (optional)

Directions

Preheat oven to 350 degrees. In a bowl, combine flour, baking soda, cinnamon, and salt. Set aside. In another large bowl, beat the butter and sugar together until creamy. Add the vanilla and eggs to the butter mixture. Blend until well combined. Gradually add the flour mixture to the bowl and blend. Stir in the oats, carrots, and raisins. Drop rounded spoonfuls onto a cookie sheet which has been lightly greased with cooking spray. Bake for 12-14 minutes on the middle rack. Allow to cool for 10 minutes before transferring to a cooling rack.

For the icing (optional): Combine about a cup of confectioner’s sugar with a few spoonfuls of water to form an icing. Add the water slowly. It won’t need much. The icing should be thin enough to drizzle, but thick enough to maintain it’s shape. You can add more sugar or water, as necessary, to achieve the desired consistency. Use a spoon to drizzle the icing over the cookies. Allow the icing to harden at room temperature.

Chocolate Banana Monkey Bars

Children are filled with genius ideas if you listen closely. A few weeks ago, my son was staring longingly into our snow-filled, icicle-rimmed backyard, dreaming of warmer days. And then he exclaimed, Mommy, we should make some monkey bars! In retrospect, he was probably referring to building his own personal playground in our backyard. But, in the moment, as I moved about our kitchen preparing dinner, my mind interpreted his request into a recipe idea. Monkey Bars. Genius!

We paused for a moment to consider the foods which monkeys enjoy. Clearly, bananas were on the top of the list. Chocolate and peanuts decided to tag along for the ride. Our plan came together easily after that. We’d start with a peanut butter cookie crust, topped with our favorite, simple fudgey brownie, mixed with chunks of fresh banana and garnished with crunchy peanuts.

Your monkeys will go bananas for these tasty little treats! Mine sure did!

Chocolate Banana Monkey Bars

Ingredients

  • 15 peanut butter sandwich cookies, crushed
  • 4 Tablespoons butter, melted
  • 1 stick butter
  • 1 cup chocolate chips
  • 1 cup sugar
  • 1 Tablespoon unsweetened cocoa powder
  • 1/2  teaspoon salt
  • 1 cup flour
  • 2 eggs
  • 3/4 cup bananas, chopped
  • 1/4 cup shelled peanuts, coarsely chopped

Directions

Preheat oven to 350 degrees. Spray an 8×8 baking dish with cooking spray.

Combine the cookie crumbs with the melted butter, until well blended. Press the mixture into the bottom of the baking dish. Bake for 15 minutes. Remove from the oven.

In a saucepan over medium-low heat, melt the chocolate chips and butter until smooth, stirring constantly. Turn off the heat. Stir in the sugar, cocoa powder, and salt until dissolved. Stir in the flour. Add the eggs and stir until well blended. Stir in the chopped bananas. Spread the mixture over the peanut butter cookie crust. Sprinkle the chopped peanuts on top. Bake for about 35-45 minutes, until the brownies appear set and a toothpick inserted near the center comes out mostly clean. Cool before cutting into small squares.

Mexican Hot Chocolate Cookies

The big day is finally upon us! The remainder of our holiday house guests and house pets arrived a few days ago and our home is now bustling with activity. The kids (and I) are overflowing with anticipation.

Yesterday evening, Santa made an early visit to my house, dressed as a Home Depot delivery man. He brought me the gift which every Gourmand Mom needs…an extra refrigerator for the garage. Skip the faux furs, glitzy clutch purses, and other sparkly bling that television advertisements will lead you to believe that every woman desires. All this girl wanted was a fridge.

I’ll be signing out for a few days to enjoy this most wonderful holiday with my family, but before I go, here’s one more cookie recipe to add to the collection. These cookies weren’t on the agenda for this year. They were a last minute addition, inspired by those Double Chocolate Peppermint Cookies I’d baked and Martha Stewart. The chocolate cookie recipe, adapted from Hershey’s was so delicious, that it left me with the overwhelming urge to bake more chocolate cookies. Then, while flipping through Martha Stewart’s most recent cookie magazine, I ran across a recipe for Mexican Hot Chocolate Cookies.

The idea was irresistible to me; chocolate cookies accented with a healthy dose of cinnamon and spicy cayenne pepper. It reminded me of a Chocolate Chile Cake I baked several months ago. I had to give these cookies a try. So, I took the Hershey’s cookie recipe and combined it with Martha’s spices to create these delicious Mexican Hot Chocolate Cookies. The result is a chewy, rich chocolate cookie, which tastes of fudge on the first bite, but lingers with a kick of cayenne in the background. Definitely worth a try!

Mexican Hot Chocolate Cookies

Ingredients

  • 2 cups Flour
  • 1/2 cup Unsweetened Cocoa Powder
  • 1 tsp Baking Soda
  • 1/2 tsp Salt
  • 2 teaspoons Cinnamon
  • 1/2 teaspoon Cayenne Pepper
  • 2 sticks Butter, softened
  • 1 cup White Sugar
  • 3/4 cup Light Brown Sugar
  • 2 Eggs
  • 1 teaspoon Vanilla Extract

Directions

Preheat oven to 375 degrees. Stir together the flour, cocoa, baking soda, and salt. Set aside. In a separate bowl, beat together the butter and sugars until creamy. Add the eggs and vanilla extract to the butter/sugar mixture. Beat for another minute or two, until well blended. Gradually blend in the flour mixture. Roll the dough into small balls (about 1″ diameter) and place about 1 1/2″ apart on a baking sheet. Bake for 9-10 minutes. Cool for a couple minutes on the baking sheet before moving the cookies to a cooling rack to cool completely.

Makes about 5 dozen cookies

If you ask my kids, you can’t have hot chocolate without marshmallows. So, for a fun little twist, I wrapped some of the spicy chocolate dough around mini marshmallows before rolling the balls. The marshmallows melted into the cookies and added a touch of extra gooeyness in the center!

Wishing you all a Very Merry Christmas and Happy Holiday Season!

Sand Tarts

You’ve heard me kvetching about cut-out cookies in the past. As much as I love to bake, I’ve got very little patience for the flouring, rolling, cutting, baking, and individual decorating involved in making cut-out cookies. And all too often, I just don’t find the results to be worth the effort. But I have one big exception to this sentiment; Sand Tarts.

I found the recipe for these Sand Tarts several years ago, nestled in the back pages of an old Better Homes and Gardens A Festive Christmas cookbook. They are essentially a sugar cookie, accented with lemon and garnished with cinnamon sugar and almonds, which gives them the appearance of perfectly round, perfectly delicious sand dollars.

They are cut-out cookies. They require that floured work surface, rolling, cutting, baking, and individual decorating I have such low tolerance for. But, with these particular cut-out cookies, the end result is worth the work. I make these almost every year.

There is something about the particular combination of flavors and proportion of ingredients in this recipe which produces the most perfectly delicious cookie with the most spectacular texture. They are crisp around the edges with an excellent chewy pull to the center. This recipe is pretty perfect as is, so I’ve shared it almost exactly as it’s written in the cookbook. Give them a try. I think you’ll be happy you did!

Sand Tarts

Very slightly adapted from the Sand Tarts in Better Homes and Gardens’

A Festive Christmas

Ingredients

  • 1 cup (2 sticks) Butter, softened
  • 2 1/2 cups Flour
  • 2 cups Sugar
  • 2 Eggs
  • 1/2 teaspoon Lemon Extract
  • 1 Egg White, beaten
  • 1/4 cup Sugar
  • 1/2 teaspoon Cinnamon
  • Sliced Almonds

Directions

Beat butter with an electric mixer for a few seconds, until creamy. Beat in half of the flour, the 2 cups sugar, eggs, and lemon extract until well combined. Stir in the remaining flour.

Divide the dough in half, wrap each half, and chill for at least one hour.

Preheat oven to 375 degrees. Handling one half of the dough at a time, roll the dough onto a well-floured surface to about 1/8 inch thickness. Use a 2-3 inch round cookie cutter to cut the cookies. Place the cut cookies onto a baking sheet about 1 inch apart. In a small bowl, combine the cinnamon and sugar. Brush each cookie with the beaten egg white. Then, sprinkle with a bit of the cinnamon sugar and arrange 3-5 almonds on top. Bake for about 8-9 minutes, until the edges are lightly browned.

Makes 4-5 dozen


The Gourmand Mom

Good food, seasoned with a dash of life