RSS Feed

Category Archives: Baking

Rainbow Cookie Cake

Is anybody else planning on getting their two-year-old a Harry & David fruit basket for Christmas this year??

I’m guessing I might be the only one, and yet, I’m 99.99% certain that it will be his favorite gift, by far. The kid is ridiculously in love with fruit.

IMG_1887

In fact, on Halloween, we stopped by my sister’s house to trick-or-treat. She handed each of the boys a piece of candy from the bowl of treats by her door, before remembering that she had an ultra-ripe Harry & David pear for my littlest guy. She ran into her kitchen to grab the foil-wrapped gem, then handed it to my little James, who literally threw the piece of candy over his shoulder like a piece of worthless garbage, in exchange for the tender pear.

I expect him to be as excited over his Harry & David fruit basket as the other boys will be over their massive Lego castle and Minecraft video game.

IMG_1898

When it comes to Christmas, I am like Walt Disney, carefully masterminding magical moments. While James revels in the magic of an assortment of unusually large, perfectly ripened fruit, I expect the other two boys to be doing giggling backflips over the two-foot-long gummy worm I plan to order or the giant rice krispie treat I found at Target.

IMG_1920

In the spirit of magical, over-sized treats, I think you’ll enjoy this oversized rainbow cookie cake. It’s like those addictingly delicious, almondy rainbow cookies, only it’s the size of an entire cake. It’s like one, giant rainbow cookie, and I wouldn’t blame you if you ate the whole darn thing.

I started with a recipe for rainbow cookies, then lighted it up just a bit with an additional egg, a bit more flour, and a teaspoon of baking powder. It’s got the dense lusciousness you expect to find in a rainbow cookie, just a bit more cake-like.

IMG_1915

This rich, chocolate-drenched cake is a must-have on any holiday table.

Rainbow Cookie Cake

Ingredients

  • 5 eggs, separated
  • 1 8-ounce can almond paste
  • 1 1/4 cups sugar
  • 2 1/2 sticks butter, softened to room temperature
  • 1 teaspoon almond extract
  • 2 1/2 cups flour
  • 1 teaspoon baking powder
  • 1/4 teaspoon salt
  • Green food coloring
  • Red food coloring
  • Yellow food coloring
  • Seedless raspberry jam
  • Apricot jam
  • 4 ounces semi-sweet chocolate
  • 1/4 cup heavy cream
  • Chocolate sprinkles

Directions

Preheat oven to 350 degrees. Spray three 9×5 inch loaf pans with baking spray.

Place the five egg whites into a clean bowl. Beat with an electric mixer until stiff peaks form. Set aside.

Use a fork to break up the almond paste into smaller pieces. In a large bowl, combine the almond paste and sugar with an electric mixer until there are no large lumps. Add the butter and beat until well combined. Add the egg yolks and almond extract and beat until blended.

In a separate bowl, stir together the flour, salt, and baking powder.

Gradually beat the flour mixer into the wet ingredients. The dough will be quite thick.

Stir one third of the beaten egg whites into the dough. This will slightly lighten the mixture. Then, fold in the remaining egg whites until well blended.

Divide the dough into three equal portions. Use a few drops of food coloring to color one portion red, another portion green, and the remaining portion yellow. *Gel food coloring has the best effect.

Use a spatula to spread each portion of dough into the three prepared baking pans.

Bake on the middle rack of your oven for 20-25 minutes, until the cakes are set and the edges just begin to turn golden.

Allow the cakes to cool for a few minutes in the pans, then carefully invert the cakes onto cooling racks. Cool completely.

Use a long serrated knife to level the cakes, removing as little cake as necessary.

Spread a layer of raspberry jam over the red layer. Place the yellow layer over the jam, then spread the apricot jam on top. Top with the red layer.

Chop the semisweet chocolate. Heat the heavy cream in a small saucepan or in the microwave, just until boiling. Pour the hot cream over the chocolate, then stir until smooth. Use a spatula to spread the chocolate ganache over the top and sides of the cake. Garnish liberally with chocolate sprinkles.

Refrigerate to set, but remove the cake from the fridge before serving, so it comes up to room temperature.

IMG_1949

Thanksgiving Menu Ideas

Hey, folks…

Reposting last year’s round-up of Thanksgiving ideas for a little menu-planning inspiration!

~Amy

APPETIZERS

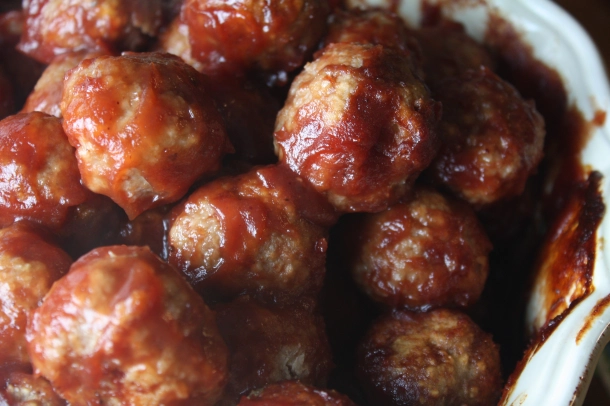
Cranberry Chipotle Meatballs

Corn and Bacon Fritters with Smoked Salmon

Bacon-Wrapped Dates stuffed with Bleu Cheese

THE MAIN EVENT

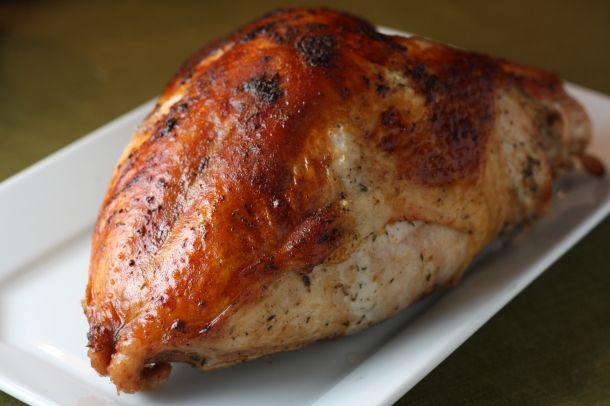
Herb-Roasted Turkey Breast with Pan Gravy (and tips for roasting a whole turkey)

Bacon and Cider Braised Turkey Drumsticks (and garlicky creamed spinach)

Spiced Sweet Potato Puree with Pecan Streusel

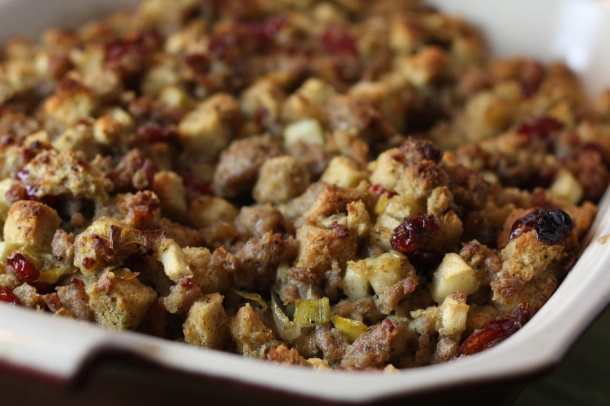
Sausage, Apple, and Leek Stuffing

Cranberry-Orange Sauce

Green Beans Almondine

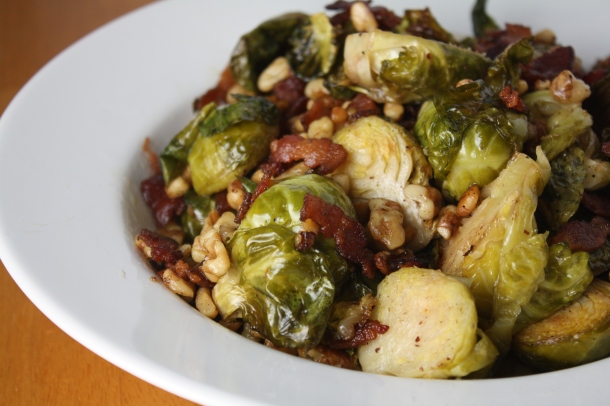
Roasted Brussels Sprouts with Bacon and Walnuts

Hot Doughy Buns

DESSERTS

Chocolate Pecan Pie

Pumpkin Coconut Pie

A Few Variations on Apple Pie (in an all butter pie crust)

Caramel Apple Cake

Turkey-Shaped Sugar Cookies

Caramel Apple Tartlets

Spiced Mango Upside Down Cake

Cannoli Cheesecake

Triple Ginger Apple Muffins

If an apple a day keeps the doctor away, then my little James is going to have the doctors bolting in the other direction. The kid eats, oh, anywhere from 5 – 10 apples a day. No joke.

IMG_0933

At one point, I would dole out his daily allotment of apples, spending a ridiculous percentage of my days washing, peeling, and slicing his favorite food. After eating 3 in a day, I’d determine he’d reached his daily apple limit and try to persuade him to eat some nice, delicious cookies or perhaps some potato chips instead.

This never ended well. In fact, our worst fights pretty much all came down to a disagreement over how many apples a two-year-old should reasonably eat in a day.

IMG_1028

But, you know, as parents, you have to pick your battles, and eventually, I simply decided that if the kid wants to eat apples from dawn to dusk, then so be it.

We now buy multiple sacks of apples each week, which I wash and leave in a giant mountain on the counter, for my little guy to snack on at will. My only remaining problem is finding half-eaten apples hidden within my slippers. True story.

IMG_0951

Naturally, being peak apple season up here in Central New York, we recently spent an afternoon at our favorite apple orchard, Beak and Skiff, where we rode a flatbed tractor up to the rows of ripe Cortland apples and picked until the bags were too heavy to carry.

James filled his bag, then refused to let anyone touch his precious, precious fruit. He walked row by row, dragging that bulging bag of apples behind his little apple-nourished body, shrieking if I even attempted to lighten his load.

IMG_1039

After riding the tractor back to the front of the orchard, we placed our loot on the scales and handed over $26 for our sweet bounty. (Note to self: It costs 16 cents more per pound to pick the apples yourself than to buy the same apples, from the same orchard at the local grocery store.)

I went through the bags of apples once we’d arrived home. To my utter lack of surprise, James’ bag contained at least 10 bucks worth of half-eaten apples.

IMG_0966

Some of what I found in James’ bag of apples…

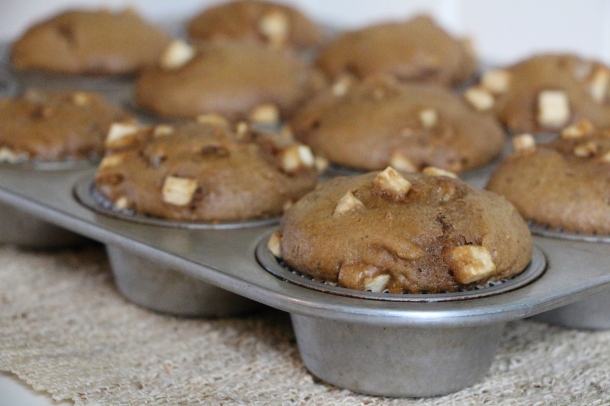
Thankfully, most of Liam and Lucas’ apples were not already eaten, leaving plenty of freshly-picked apples for snacking and for making these outrageous muffins. Based on a basic not-too-sweet molasses muffin, accented with a triple dose of ground, fresh, and crystallized ginger, these spicy muffins barely made it to the next morning.

I recommend making a double batch.

IMG_1052

Triple Ginger Apple Muffins

Ingredients

  • 2 cups flour
  • 1/3 cup sugar
  • 1 teaspoon baking soda
  • 1/2 teaspoon salt
  • 1 teaspoon ground ginger
  • 1/2 teaspoon ground cinnamon
  • 1 6-ounce container vanilla or apple-cinnamon greek yogurt
  • 2 eggs
  • 1/3 cup vegetable oil
  • 1/3 cup molasses
  • 1 tablespoon fresh ginger, grated
  • 1/4 cup crystallized ginger, chopped
  • 1 1/2 cups apple, peeled and diced

Directions

Preheat oven to 325ºF. Prepare muffin tins with liners or by spraying with a nonstick baking spray.

Combine the flour, sugar, baking soda, salt, ground ginger, and cinnamon in a large bowl.  In a separate bowl, whisk together the yogurt, eggs, oil, and molasses. Stir in the fresh ginger.

Combine the wet ingredients with the dry ingredients until well blended. Stir in the crystallized ginger and the apple. The batter will be pretty thick.

Spoon the batter into the muffin tins, so that each tin is about 2/3 – 3/4 full.

Bake for 20-25 minutes.

Makes 12-15 muffins

IMG_1034

Treat Your Valentine

Treat your valentine to a day’s worth of mouth-watering meals. Here are three ideas for each meal, from super simple to more elaborate. Click on the pictures or the links to see the recipes!

You can also check out the Recipes section at the top of the page for more ideas to delight your sweetie.

Breakfast

Super Simple: Strawberry and Nutella Stuffed French Toast

img_4248

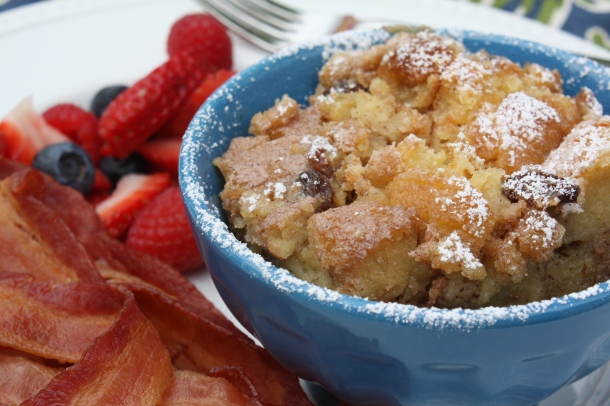
A Bit More Complex: Cinnamon Raisin Donut Bread Pudding

img_7310

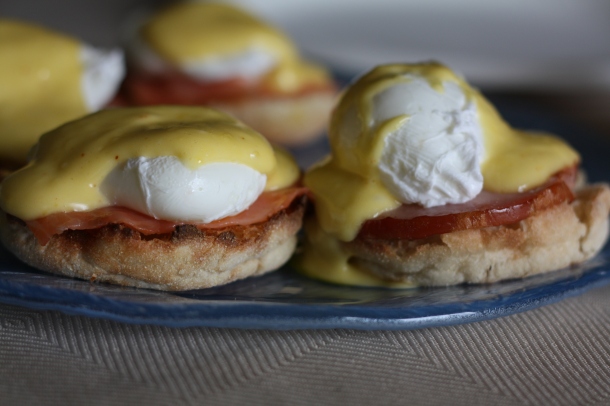
Manageably Elaborate: Eggs Benedict

0721

Lunch

Super Simple: Sausage, Bean, and Rapini Soup

10-26-10-042

A Bit More Complex: Smoked Salmon and Cucumber Salad

img_3389

Manageably Elaborate: Quiche Lorraine

074

Dinner

Super Simple: Penne a la Vodka

110

A Bit More Complex: Pork Chops with Fontina and Marsala

0371

Manageably Elaborate: Slow-Braised Beef Short Ribs with Figs over Creamy Brie Potatoes

img_8548

Dessert

Super Simple: World’s Simplest Fudgey Brownies with Raspberry Coulis

img_4317

A Bit More Complex: Chocolate Raspberry Torte

img_2783

Manageably Elaborate: Fresh Berry Mousse with Vanilla Panna Cotta

mousse-and-panna-cotta-in-cup

Cherry Cordial Brownie Bites

My Lucas is charismatic, enigmatic, and profusely loving. There’s just something insanely captivating about him. He’s a heart-melter for sure, with his big blue eyes, sweet dimples, and long, dark lashes. And he’s mine. More than anyone or anything in the whole world (except perhaps Ninjago legos), he loves me. Not sure how I got so lucky!

IMG_1649

Just look at that face!

The kid says, “I love you sooooo much,” so many times each day that I’d begun to suspect it was just a filler statement; simply something to say when there was nothing else to be said. He even says it in his sleep, when I sneak in at night to kiss his little head before I tuck myself into bed. “Mommy, I love you so much.”

But I’ve come to realize that his words are so much more than sounds to fill the silence. He recently turned to my husband and began to say, “Daddy, I love…” I’d expected the statement to end with his predictable “…you soooo much.” But it didn’t. It was quite beautifully, “Daddy, I love Mommy soooo much.” He’s my precious little lovebug.

IMG_5788

On a recent trip to the grocery store, as we walked hand in hand through the parking lot, he squeezed my hand and expressed his sweet statement of love. I returned the sentiment, then we continued into the store. An older woman, who’d been coming from her car, caught the exchange as we passed. I saw her pause and hold her heart for a moment. We ran into that woman as we made our way through the store and she stopped to comment on my sweet boys. I thanked her and she parted with a friendly, “God bless.” As we began to walk away, she shouted back, “What am I saying? Clearly, He already has.”

He certainly has. I have been so generously blessed in love; a family who cherishes and supports me, a husband I can laugh with, children whose love is more contagious than the flu, and the most beautiful friends, who persistently raise me up. This Valentine’s Day, I will celebrate every bit of that priceless, precious love.

IMG_5790

Sweet treats are the perfect way to celebrate the sweetest people in your life, like these absolutely decadent, truffle-like cherry cordial brownie bites. They start with my World’s Simplest Fudgey Brownies, which are then blended with a bit of cream cheese, until rich and smooth. The luscious brownie mixture is then rolled into small balls with a Grand Marnier (or orange juice, for the kiddies) soaked cherry in the center, before being dipped in smooth, melted chocolate. A drizzle of melted pink candy and sprinkles provide the perfect final touches.

Today’s Focus on Technique – Using a Double Boiler

The process of cooking with a double boiler (also called a bain marie) is an ideal technique to use when preparing delicate sauces, such as hollandaise, or when melting chocolates. In a double boiler set-up, the food is placed in a bowl which is suspended above simmering water. The water provides a gentle, consistent, indirect heat which prevents finicky foods from breaking (separating) or burning. It works in a similar manner as using water bath to prepare custards and other delicate egg-based dishes. No special equipment or dedicated ‘double boiler’ is required to utilize a double boiler technique. Simply fill a saucepan with an inch or two of water. Place a stainless steel or glass mixing bowl on top of the pot, so that the bottom of the bowl dips into the pot, but does not touch the water. Place the food you’re preparing in the bowl, bring the water to a simmer, and you’re set to go!

For more useful tips, techniques, and culinary photo guides click HERE.

IMG_5804

Cherry Cordial Brownie Bites

Ingredients

For the brownies:

  • 1 stick of butter
  • 1 cup chocolate chips
  • 1 cup sugar
  • 1 cup flour
  • 2 eggs
  • 1/4 teaspoon salt

For the brownie bites:

  • 1/4 cup Grand Marnier or orange juice (approximately)*
  • 3 dozen dried cherries
  • 4 ounces cream cheese, softened to room temperature
  • 2 cups chocolate chips (semi-sweet or milk chocolate)
  • Pink or red candy melts and sprinkles, for decorating (optional)

*Be aware that no alcohol will be cooked off in the preparation of these candies, so it would be wise to use the orange juice for children, pregnant women, or anyone who is avoiding alcohol intake.

Directions

To prepare the brownies:

Preheat oven to 350 degrees. Spray an 8×8 baking dish with cooking spray. In a saucepan over medium-low heat, melt the chocolate chips and butter until smooth, stirring constantly. Turn off the heat. Stir in the sugar and salt until dissolved. Stir in the flour. Add the eggs and stir until well blended. Pour the mixture into the prepared pan and bake for about 35 minutes.

To prepare the brownie bites:

Soak the dried cherries in approximately 1/4 cup of Grand Marnier or orange juice for at least an hour.

Once the brownies are cool, crumble into small pieces, then place in a food processor. Add the cream cheese and pulse until well-blended and smooth. (A food processor would work best for this task, but it can also be done by hand. If combining by hand, cut off the crispy brownie edges before blending, for a smoother result. If using the food processor, it’s not necessary to cut off the brownies edges.) Roll the mixture into small balls (less than 1″ diameter), inserting a soaked cherry in the center as you roll. Refrigerate until well chilled.

Melt the chocolate chips in a double boiler, stirring frequently, until smooth. Use a fork to lower each brownie ball into the melted chocolate. Shake off the excess chocolate, then place on a baking sheet, which has been lined with parchment paper or wax paper. Refrigerate until the chocolate has set. If desired, drizzle the brownie bites with melted pink or red candy melts and decorate with sprinkles.**

**Click HERE to see an easy pastry bag technique, which can be used for drizzling the brownie bites.

Makes 2.5 – 3 dozen candies

IMG_5841

Huevos Rancheros Pizza

Back in the spring, I strong-armed a couple of my friends into taking Irish step dancing lessons with me. (I actually didn’t need to twist their arms too hard.) We three became the unlikeliest bunch of dancers you could imagine. It was a blast. We clobbered away through a few classes, along with an (almost) equally novice classmate, before the weather became too hot to continue in our dance space. At that point, we broke for the summer, with the intention of resuming classes come fall.

IMG_5639

Well, fall rolled around and I sent an email to our instructor expressing our eagerness to continue. But we never heard back. After a few months with no reply, we’d become fully convinced that we’d been silently dumped as a result of our utter hopelessness in the field of Irish dancing. We couldn’t really blame her. We truly are a hopeless bunch. But then, just as we were about to pack away our dancing shoes, I received a message explaining an email switch, along with an invitation to resume classes. We accepted, of course.

This time though, there are a few other adults in our class and a second instructor. Apparently, our new classmates danced all throughout their childhood and teen years. They’re just picking up where they left off, which is someplace lightyears ahead of the rest of us. While we practiced basic skips, intently concentrating on not running into each other, one of our new classmates gracefully danced circles around us, quite literally. It feels oddly like being stuck in the ‘guppies’ group, aside out advanced classmates in the ‘shark’ group. They’re reading War and Peace, while we struggle through Ted in a Red Bed. Us four clumsy guppies stick as close together as we can without kicking each other. It’s a level of comfort thing. We huddle close together, executing every drill as a unified group, in a fruitless attempt not to draw too much attention to ourselves.

IMG_5642

It’s a ridiculously fun time, swimming in our guppy group. I haven’t laughed so hard in a long while. Graceful, we are not. Skillful, we are not. Coordinated, we most definitely are not. But for all we lack in ability, we more than make up for it with enthusiasm. We will probably never have the graceful, swift-footed skills of our river-dancing role models, but we’re certainly having fun with it. And that’s what it’s all about, isn’t it??

The added bonus is that our weekly lesson and all the practice in between burns a bucketload of calories. Now, if I were smart, I’d save those burned calories and let them work their magic on a bit of weight loss. Oh, but I love food too much and the dancing leaves me ravenously hungry. So, I choose to ‘spend’ my burned calories on fun food, like this Mexican-inspired huevos rancheros pizza. Truth be told, this pizza is fully inspired by nothing more than my desire to cook a pizza with eggs baked into it. It starts with a cornmeal crust, in place of the corn tortillas which would typically be used in huevos rancheros. The homemade crust is then topped with beans, taco sauce, Mexican cheese, chiles, and tomatoes. Fresh eggs are then carefully cracked on top of the pizza before baking for a stunning and unique twist on pizza.

IMG_5656

Today’s Focus on Technique – Cooking with Baker’s Yeast

Baker’s yeast is a single cell organism, commonly used as a leavening agent in many breads, pretzel doughs, and pizza doughs. As the yeast feeds on the sugars in the dough, it releases carbon dioxide, which becomes trapped within the dough, causing it to rise and expand. The most common types of yeast used in baked goods are active dry yeast and rapid rise yeast. Rapid rise yeast is made up of smaller particles, which touch a greater surface area of the dough and typically require half as much time to rise. Many people feel that the long rise time required for active dry yeast recipes results in a more flavorful dough.

Typically, many yeast dough recipes begin by proofing the yeast. Proofing is simply a process of dissolving the yeast in lukewarm water. After a few minutes, the yeast should begin to foam, proving that it is alive and ready to work its leavening magic. If the yeast doesn’t foam, it’s time to buy some new yeast. The magic temperature for proofing yeast is somewhere between 110-115°F. To assure you’ve got the right temperature, it’s helpful to use an instant-read thermometer. I usually stick the thermometer in hot water from the tap, then wait until it reduces to the right range before adding the yeast.

Yeast doughs rise best in a draft-free area, on the warmer side of room temperature (around 70°F). If your house is chillier than that, allow extra time for rising. If time is an issue, I sometimes find it helpful to preheat the oven for a bit, then place the bowl of rising dough on top of or near the oven. You don’t need to keep the oven on throughout the rise time; just long enough to release a little extra heat near the rising dough.

** Lots of other interesting information about yeast can be found HERE.


Huevos Rancheros Pizza

Ingredients

  • 2/3 cup refried beans
  • 1/3 cup taco sauce
  • 2 cups shredded Mexican blend cheese
  • 2-3 tablespoons red onion, finely diced
  • 2-3 tablespoons green chile (fresh or canned), finely diced
  • 5-6 grape tomatoes, thinly sliced
  • 1/3 cup chorizo, chopped (optional)
  • 3 eggs
  • Additional taco sauce or hot sauce for drizzling (optional)
  • Cornmeal Pizza Dough (recipe from www.marthastewart.com)

Directions

Preheat oven to 450°F.

Prepare the cornmeal pizza dough according to the recipe found HERE, except do not divide the dough into smaller portions. Roll the entire dough into one large (approximately 12″) crust. Transfer the rolled dough to a baking sheet, which has been sprinkled with a bit of cornmeal.

Spread the refried beans onto the crust, leaving a 1/2″-1″ lip around the edge. Drizzle the taco sauce over the beans. Scatter about 1/2 of the cheese over the sauce, then sprinkle with the onion, chile, tomatoes, and chorizo. Scatter with the remaining cheese.

Use your fingers to create three shallow wells in the pizza toppings. Carefully crack an egg into each well.

Bake for approximately 15 minutes, until the toppings are hot and melty and the eggs are cooked to your desired doneness.

**Be aware that the egg whites and yolks will maintain a bright, glossy appearance as they bake. In this case, touching the eggs to check for doneness is a more reliable indicator than their appearance. (I made the mistake of relying on appearance and cooked my eggs past the cooked white/runny yolk I was aiming for. The yolks in the photos with this post are actually fully cooked, even though they appear runny.)

IMG_5659

Thanksgiving Inspiration

I learned something interesting about myself this week – I do not like corn bread stuffing. I love corn, corn muffins, corn bread, and corn fritters. I eat a ridiculous amount of corn when it’s in season. I even once made a sweet corn ice cream. But I do not like corn bread stuffing.

I guess it comes down to what you’re raised with – sort of how some families are the Crest kind of people and some families are the Colgate kind. Some families are loyal to Miracle Whip, while others will only use mayonnaise. Some families have corn bread stuffing at Thanksgiving and some families have white bread stuffing. Our family was always a Crest, mayonnaise, and white bread stuffing sort of family.

The four things I am most thankful for.

I didn’t realize how ingrained this inclination towards white bread stuffing was until I set about preparing a corn bread stuffing earlier this week. It should’ve been delicious, with crispy bits of bacon, tender dates, shallots, and celery. It was supposed to be a new recipe to feature in this post about Thanksgiving ideas. But I didn’t like it. I can’t even tell you if it was good or not, as far as corn bread stuffings go. I am just a white bread stuffing girl through and through and I couldn’t wrap my taste buds or my heart around that corn bread stuffing. I’m not sharing the recipe.

But I am going to share this round-up of wonderful, tried and true Thanksgiving ideas, in plenty of time to add them to your Thanksgiving menu…

Give thanks for good food, friends.

APPETIZERS

Cranberry Chipotle Meatballs

Corn and Bacon Fritters with Smoked Salmon

Bacon-Wrapped Dates stuffed with Bleu Cheese

THE MAIN EVENT

Herb-Roasted Turkey Breast with Pan Gravy (and tips for roasting a whole turkey)

Bacon and Cider Braised Turkey Drumsticks (and garlicky creamed spinach)

Spiced Sweet Potato Puree with Pecan Streusel

Sausage, Apple, and Leek Stuffing

Cranberry-Orange Sauce

Green Beans Almondine

Roasted Brussels Sprouts with Bacon and Walnuts

Hot Doughy Buns

DESSERTS

Chocolate Pecan Pie

Pumpkin Coconut Pie

A Few Variations on Apple Pie (in an all butter pie crust)

Caramel Apple Cake

Turkey-Shaped Sugar Cookies

Caramel Apple Tartlets

Spiced Mango Upside Down Cake

Cannoli Cheesecake

Spiced Mango Upside Down Cake

When I think of mangos, my first thoughts are of tropical flavors. I’m pretty sure the mango belongs somewhere in that song with the lime and the coconut. I think of seafood and summery flavors, like fish tacos and spicy mango salsa (with mango margaritas on the side). I think of mango creamsicle smoothies, chilled mango cucumber soups, or even barbecue bacon mango pizzas. It’s certainly never occurred to me to combine mango with the aromatic spices of the holiday season, like cinnamon, ginger, nutmeg, or cloves.

So, when the National Mango Board offered to send me a sampling of mangos along with some ideas for pairing mangos with festive holiday flavors, my interest was piqued. I accepted their offer, eager for the opportunity to experiment with one of my favorite fruits in a novel way.

The shipment of perfectly ripe mangos arrived last week. Along with the selection of vibrant mangos, the National Mango Board provided a sampling of seasonal spices and a few recipe cards for inspiration. One of those recipe cards grabbed my attention in a way I couldn’t resist; Mango Upside Down Cake.

This festive spiced mango upside down cake is a definite keeper. The cake is moist and flavorful with a satisfying texture, the result of folding beaten egg whites into the batter; an extra step worth taking. And I’m fairly certain I could be happy eating nothing but the tender mango and caramelized top of this cake for the rest of my life. Seriously, the gooey top layer of this cake is something that epic poems should be written about.

This cake would work well any time of year, though I think it would be make a perfect addition to any Thanksgiving or Christmas dessert spread. The glazed top and artful mango star make it truly show-stopping and worthy of the festive season!

Today’s Focus on Technique – Folding in Egg Whites

Beaten egg whites can be folded into a variety of dishes, such as cake, mousse, souffle, and waffles for a lighter, fluffier result. The goal of folding in the egg whites, as compared to just stirring them in, is to maintain as much of the air, which has been beaten into the egg whites, as possible.

To begin, start by carefully separating the yolks from the whites, taking care not to allow any yolk to mix with the whites. (This can prevent the egg whites from getting properly light and fluffy.) Beat the egg whites using an electric mixer at medium/medium-high speed until soft peaks form. To incorporate the egg whites into your batter, start by adding about 1/3 of the beaten egg whites. Holding your spatula in an almost horizontal position, gently turn the mixture over the egg whites until the egg whites are incorporated. (This first 1/3 helps to lighten the batter, making it easier to incorporate the remaining 2/3). Add another 1/3 of the mixture, gently lifting and turning the batter over the egg whites. Add the remaining 1/3 of the egg whites, using the same gentle lifting and turning maneuver, just until the egg whites are blended and no longer. Over-mixing the egg whites into the batter will diminish the lightening effect of the beaten egg whites.

Spiced Mango Upside Down Cake

Ingredients

  • 1 1/2 sticks (12 tablespoons) unsalted butter, softened (divided)
  • 1/2 cup light brown sugar
  • 1 large mango, peeled, pitted and sliced ¼-inch thick
  • 1 1/2 cups all-purpose flour
  • 1 teaspoon baking powder
  • 1/4 teaspoon salt
  • 1/4 teaspoon ground cloves
  • 1/4 teaspoon ginger
  • 1/2 teaspoon cinnamon
  • 1 cup granulated sugar
  • 1/2 teaspoon orange zest
  • 3 eggs, separated
  • 1 teaspoon vanilla extract
  • 1/3 cup mango nectar or mango puree
  • 1/3 cup milk

Directions

Preheat oven to 350 degrees. Butter a 9-inch round cake pan, set aside.

In small saucepan, melt ½ stick of butter and stir in brown sugar, simmer for about 2 minutes. Pour mixture into prepared cake pan and top with sliced mango, creating a circular fan pattern.

In medium bowl, stir  together flour, baking powder, salt, cloves, and cinnamon. Set aside.

In another bowl, using an electric mixer, beat remaining 1 stick softened butter, granulated sugar and orange zest on high until pale yellow and fluffy, about 5 minutes. Add whole egg yolks, one at a time until well blended. Add vanilla. Decrease speed to low and add half of flour mixture. Mix in mango nectar (or mango puree) and milk and then remaining flour mixture.
In another bowl, beat egg whites until soft peaks form. Fold one third of the egg whites into the batter. Repeat with another third of the egg whites. Finally, fold the remaining third of egg whites into the batter, taking care not to over-mix.

Carefully pour cake batter over mangos, spreading evenly. Bake for about an hour, or until toothpick inserted into center of cake comes out clean. Cool in pan for 15 minutes then invert cake onto plate. Cool completely.

Garnish with whipped cream or vanilla ice cream and candied orange peel, if desired.

*Recipe slightly modified from the one provided by the National Mango Board

The National Mango Board provided me with a box of mangos and sampling of spices, which I used to prepare this recipe.

Pumpkin Bread Pudding with Cream Cheese Icing

Bread pudding is sort of a strange love of mine. It’s not something I grew up eating. In fact, I don’t think I’d even heard of it until sometime in adulthood when I ran across it on the dessert table at one of my favorite restaurant’s brunch buffets. I was more than apprehensive at first. Soggy bread?? Yuck. And it certainly didn’t look like any ‘pudding’ I’ve ever seen before. No, thank you.

Then, one day (after a few breakfast mimosas) I felt brave. I took a small scoop of that bread pudding. And forevermore wondered why I hadn’t tasted it earlier.

I’ve made a few variations of bread pudding over the past few years, each time trying to determine what it is that makes me love it so darn much. And I finally figured it out… It tastes like french toast; a big scoop of warm, comforting french toast. But the thing which makes it even better than french toast, especially for serving a crowd, is that the whole mix gets thrown in a dish and baked with little mess or fuss.

Bread pudding also lends itself quite well towards getting creative – and I love a dish that likes to be played with. Make it with French bread or muffins or challah. I’ve even made it out of donuts! Add vanilla or dried fruits or chocolate chips.

Or seize the pumpkin spice mania and make this pumpkin bread pudding with cream cheese icing. This comforting bread pudding tastes like a cross between a spiced pumpkin pie and a slice of french toast. It’s best served warm, but after more than a few stolen spoonfuls from the leftovers in the fridge, I can tell you with confidence that it tastes pretty fantastic cold too!

For more variations on bread pudding, check out my Cinnamon Raisin Donut Bread Pudding, Fluffernutter Bread Pudding, and Spiced Fruit Bread Pudding

Today’s Focus on Technique – Easy Disposable Pastry Bag

It’s easy to make a pastry bag in a pinch by simply using a plastic baggy. This technique works best for fairly soft dressings, fillings, or icings. (Plastic baggies may not hold up well with very firm fillings.) Simply fill the plastic baggy with your dressing, filling, or icing. Squeeze it into one corner of the baggy. Twist the top of the baggy to hold the filling in place. Then, clip the corner with scissors, large or small, depending on your purpose. Now you’re all set to easily squeeze fillings into cupcakes or attractively drizzle dressings, sauces, or icings. The best part about plastic baggy pastry bags is that they’re disposable…no messy clean-up!!

Pumpkin Bread Pudding with Cream Cheese Icing

Ingredients

  • Approximately 10 cups day-old French bread, cut into chunks
  • 2 cups milk
  • 1 15-ounce can pumpkin puree
  • 1/2 cup white sugar
  • 1/4 cup brown sugar
  • 4 eggs
  • 1 teaspoon cinnamon
  • 1 teaspoon vanilla extract
  • 1/2 teaspoon ginger
  • 1/4 teaspoon salt
  • 1/4 teaspoon nutmeg
  • Pinch of ground cloves

For the icing

  • 4 ounces cream cheese, softened
  • 3 tablespoons powdered sugar

Directions

Preheat oven to 350 degrees.

Arrange the chunks of bread in a large baking dish. In a large bowl, whisk together the milk, pumpkin puree, sugars, eggs, cinnamon, vanilla, ginger, salt, nutmeg, and cloves until well-blended. Pour the mixture over the bread chunks. Press down on the mixture so the most of the bread is submerged. (I like to leave a thin layer of unsoaked bread at the top for a nice crust layer.) Allow the mixture to soak for at least 15 minutes. (You can leave it to soak overnight, in the fridge, if desired.)

Bake for 45-50 minutes.

For the icing, combine the cream cheese and powdered sugar until well blended. Spoon the mixture into a plastic baggy. Squeeze the baggy in your hands for a few seconds to soften the icing. Squeeze the mixture into one corner of the baggy, then twist the top of the baggy to hold the icing in place. Using scissors, clip a small bit of the corner, then drizzle the icing over the warm bread pudding. Serve warm.

Cannoli Cheesecake

I was undecided – and frankly, feeling a bit resentful over the implication that we undecided folks were either not paying attention or have the intellect of potatoes. I’d paid attention, done my research, weighed the pros and cons, and reflected on my personal tastes. And yet, I was still undecided; twisted by my contrary desires, unable to decipher the antsy feeling in my gut.

I take important decisions such as these quite seriously, you know.

But how in the world is a person supposed to choose between cheesecake and cannoli?? (Oh, did you think I was talking about the presidential election?) I mean, the cheesecake is rich and refined – maybe a little too rich for my tastes – but an intriguing option nonetheless. The familiar cannoli is a bit rougher around the edges and sometimes messy to consume, yet it calls to me. I wanted both; I wanted neither. My stomach churned with restless indecision. What if I wanted something different? Another choice on the menu? A third-party option of sorts?

So I decided not to choose between the cannoli or the cheesecake. I wanted something else. So I voted for the cannoli cheesecake instead.

This cannoli cheesecake isn’t going to be making any speeches come inauguration day, but it’s a definite winner in my book. Creamy, sweetened ricotta is blended with cream cheese and hints of chocolate, candied orange, and cinnamon, then baked in the form of a decadent cheesecake with a graham cracker crust. The end result is lighter than a traditional New York style cheesecake, with the subtle texture of ricotta cannoli filling. It’s presidentially delicious.

Author’s Note – By no means is this post intending to compare our presidential candidates to delicious Italian desserts. That would just be silly. I did, in fact, vote for an actual candidate in today’s election; not a cannoli cheesecake. Though if this cannoli cheesecake were on the ballot, it probably would have had my support.

Today’s Focus on Technique – Cooking with a Bain Marie

Cooking in a bain-marie refers to using a water bath. The purpose of using a water bath is to moderate the oven heat so that delicate ingredients cook more slowly and evenly. The water provides a moist, indirect heat that allows for a more gentle cooking process, which is ideal for many egg-based desserts, such as cheesecake, custard, and creme brulee.

No special equipment is required for a bain-marie set-up. You can make use of a regular roasting pan, baking dish or baking pan. Place the pan or ramekin you’re cooking in within the larger baking dish or baking pan. Place the entire set up in the oven, then fill the outer pan with a layer of warm water. (Placing the set-up in the oven before filling it with water is usually the easiest approach.)

*Always wrap the bottom of springform pans to prevent water from seeping into the bottom.

Cannoli Cheesecake

Ingredients

  • 1 1/2 cup graham crackers, finely crushed
  • 3 tablespoons sugar
  • 8 tablespoons unsalted butter, melted
  • 1 pound cream cheese (2 8-ounce bars), softened to room temperature
  • 1 15-ounce container ricotta cheese
  • 1 1/4 cups sugar
  • 1 teaspoon vanilla extract
  • 1/4 teaspoon cinnamon
  • 1/4 cup candied orange peel, finely diced
  • 4 eggs
  • 1/2 cup mini chocolate chips

Directions

Preheat oven to 350 degrees.

For the crust: Combine the graham cracker crumbs, sugar, and melted butter. Press the mixture into the bottom of a 10 inch springform pan*. Place the pan in the oven for 5 minutes to set the crust. Remove the pan from the oven and cool while you prepare the filling. (Leave the oven on.)

For the filling: Beat together the cream cheese and sugar until smooth. Add the ricotta cheese, vanilla extract, cinnamon, and orange peel. Beat for another minute until well blended. Add the eggs one at a time and beat just until blended. Stir in the chocolate chips.

Securely wrap the bottom of the cooled springform pan with foil (to prevent water from seeping into the pan).

Pour the filling into the springform pan. Place the pan within a large baking sheet or baking pan. Place the water bath set-up on the middle oven rack, then pour a small layer of warm water into the baking sheet/baking pan, so that it comes about 1/2″ up the side of the springform pan.

Bake for 60-65 minutes. The filling will still be slightly jiggly in the center when done. Cool the cake for 30 minutes at room temperature, then refrigerate until completely chilled.

*You can use a smaller springform pan, but the cooking time will vary.

The Gourmand Mom

Good food, seasoned with a dash of life