RSS Feed

Tag Archives: chocolate

Rainbow Cookie Cake

Is anybody else planning on getting their two-year-old a Harry & David fruit basket for Christmas this year??

I’m guessing I might be the only one, and yet, I’m 99.99% certain that it will be his favorite gift, by far. The kid is ridiculously in love with fruit.

IMG_1887

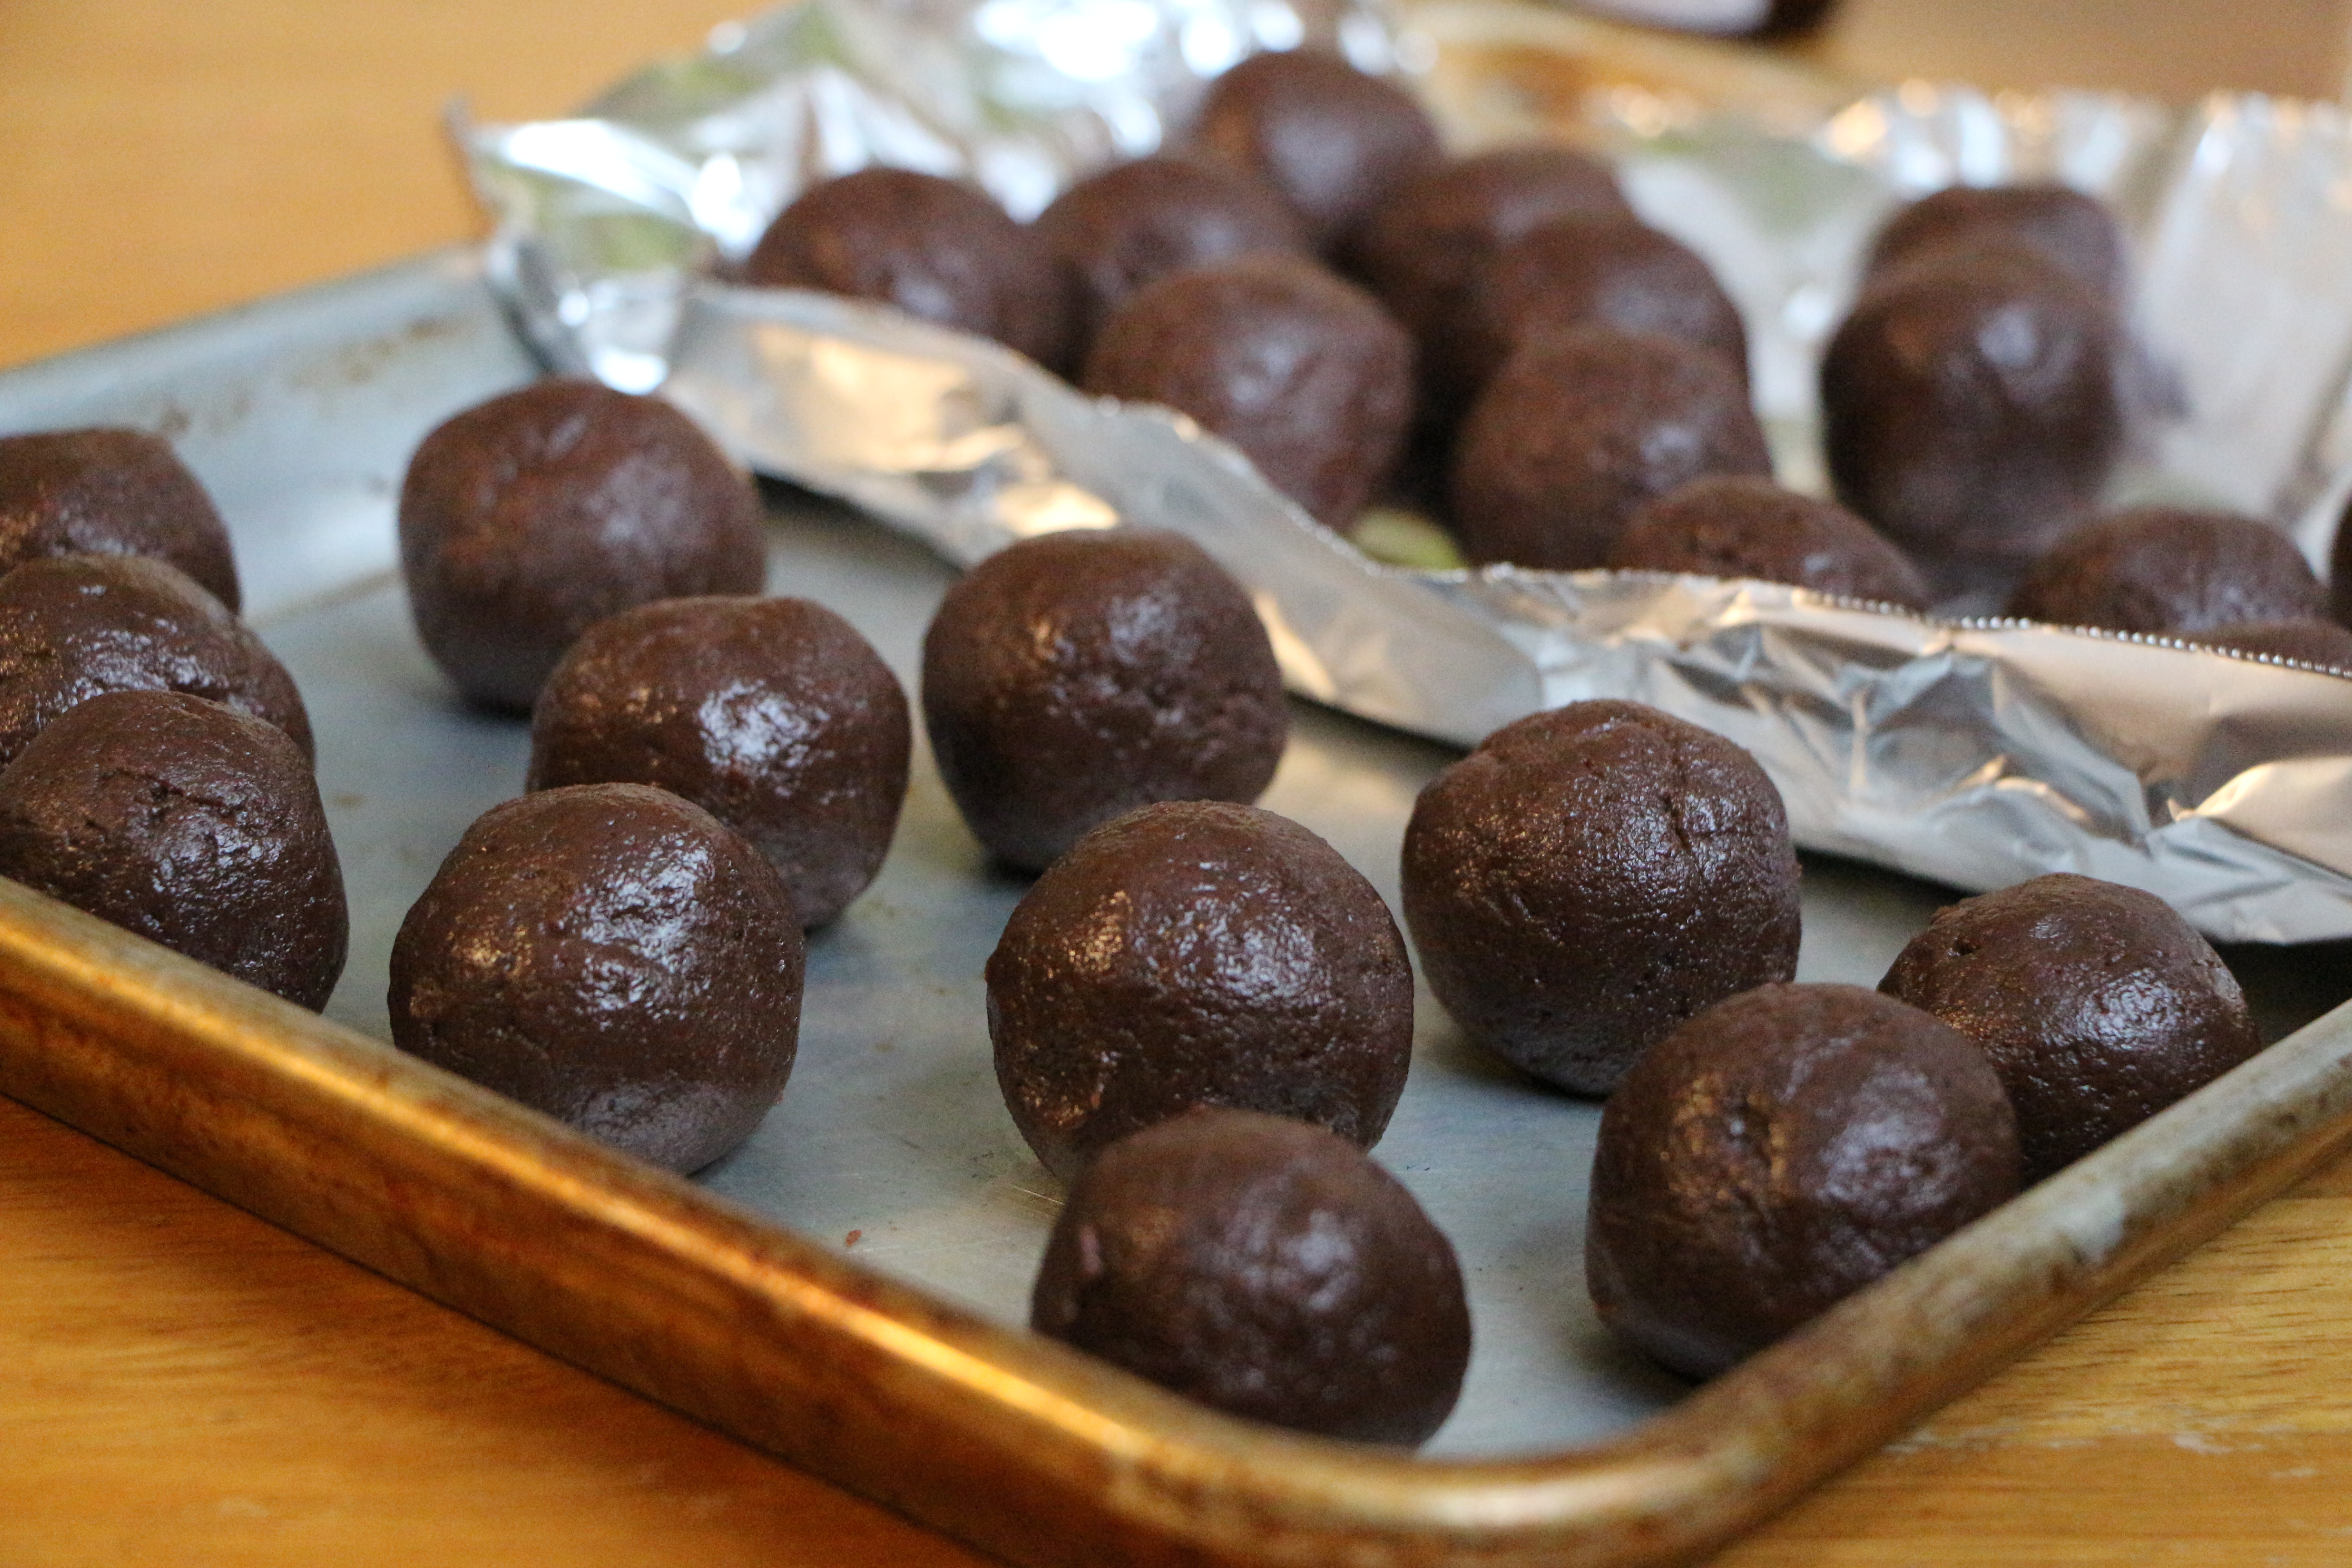
In fact, on Halloween, we stopped by my sister’s house to trick-or-treat. She handed each of the boys a piece of candy from the bowl of treats by her door, before remembering that she had an ultra-ripe Harry & David pear for my littlest guy. She ran into her kitchen to grab the foil-wrapped gem, then handed it to my little James, who literally threw the piece of candy over his shoulder like a piece of worthless garbage, in exchange for the tender pear.

I expect him to be as excited over his Harry & David fruit basket as the other boys will be over their massive Lego castle and Minecraft video game.

IMG_1898

When it comes to Christmas, I am like Walt Disney, carefully masterminding magical moments. While James revels in the magic of an assortment of unusually large, perfectly ripened fruit, I expect the other two boys to be doing giggling backflips over the two-foot-long gummy worm I plan to order or the giant rice krispie treat I found at Target.

IMG_1920

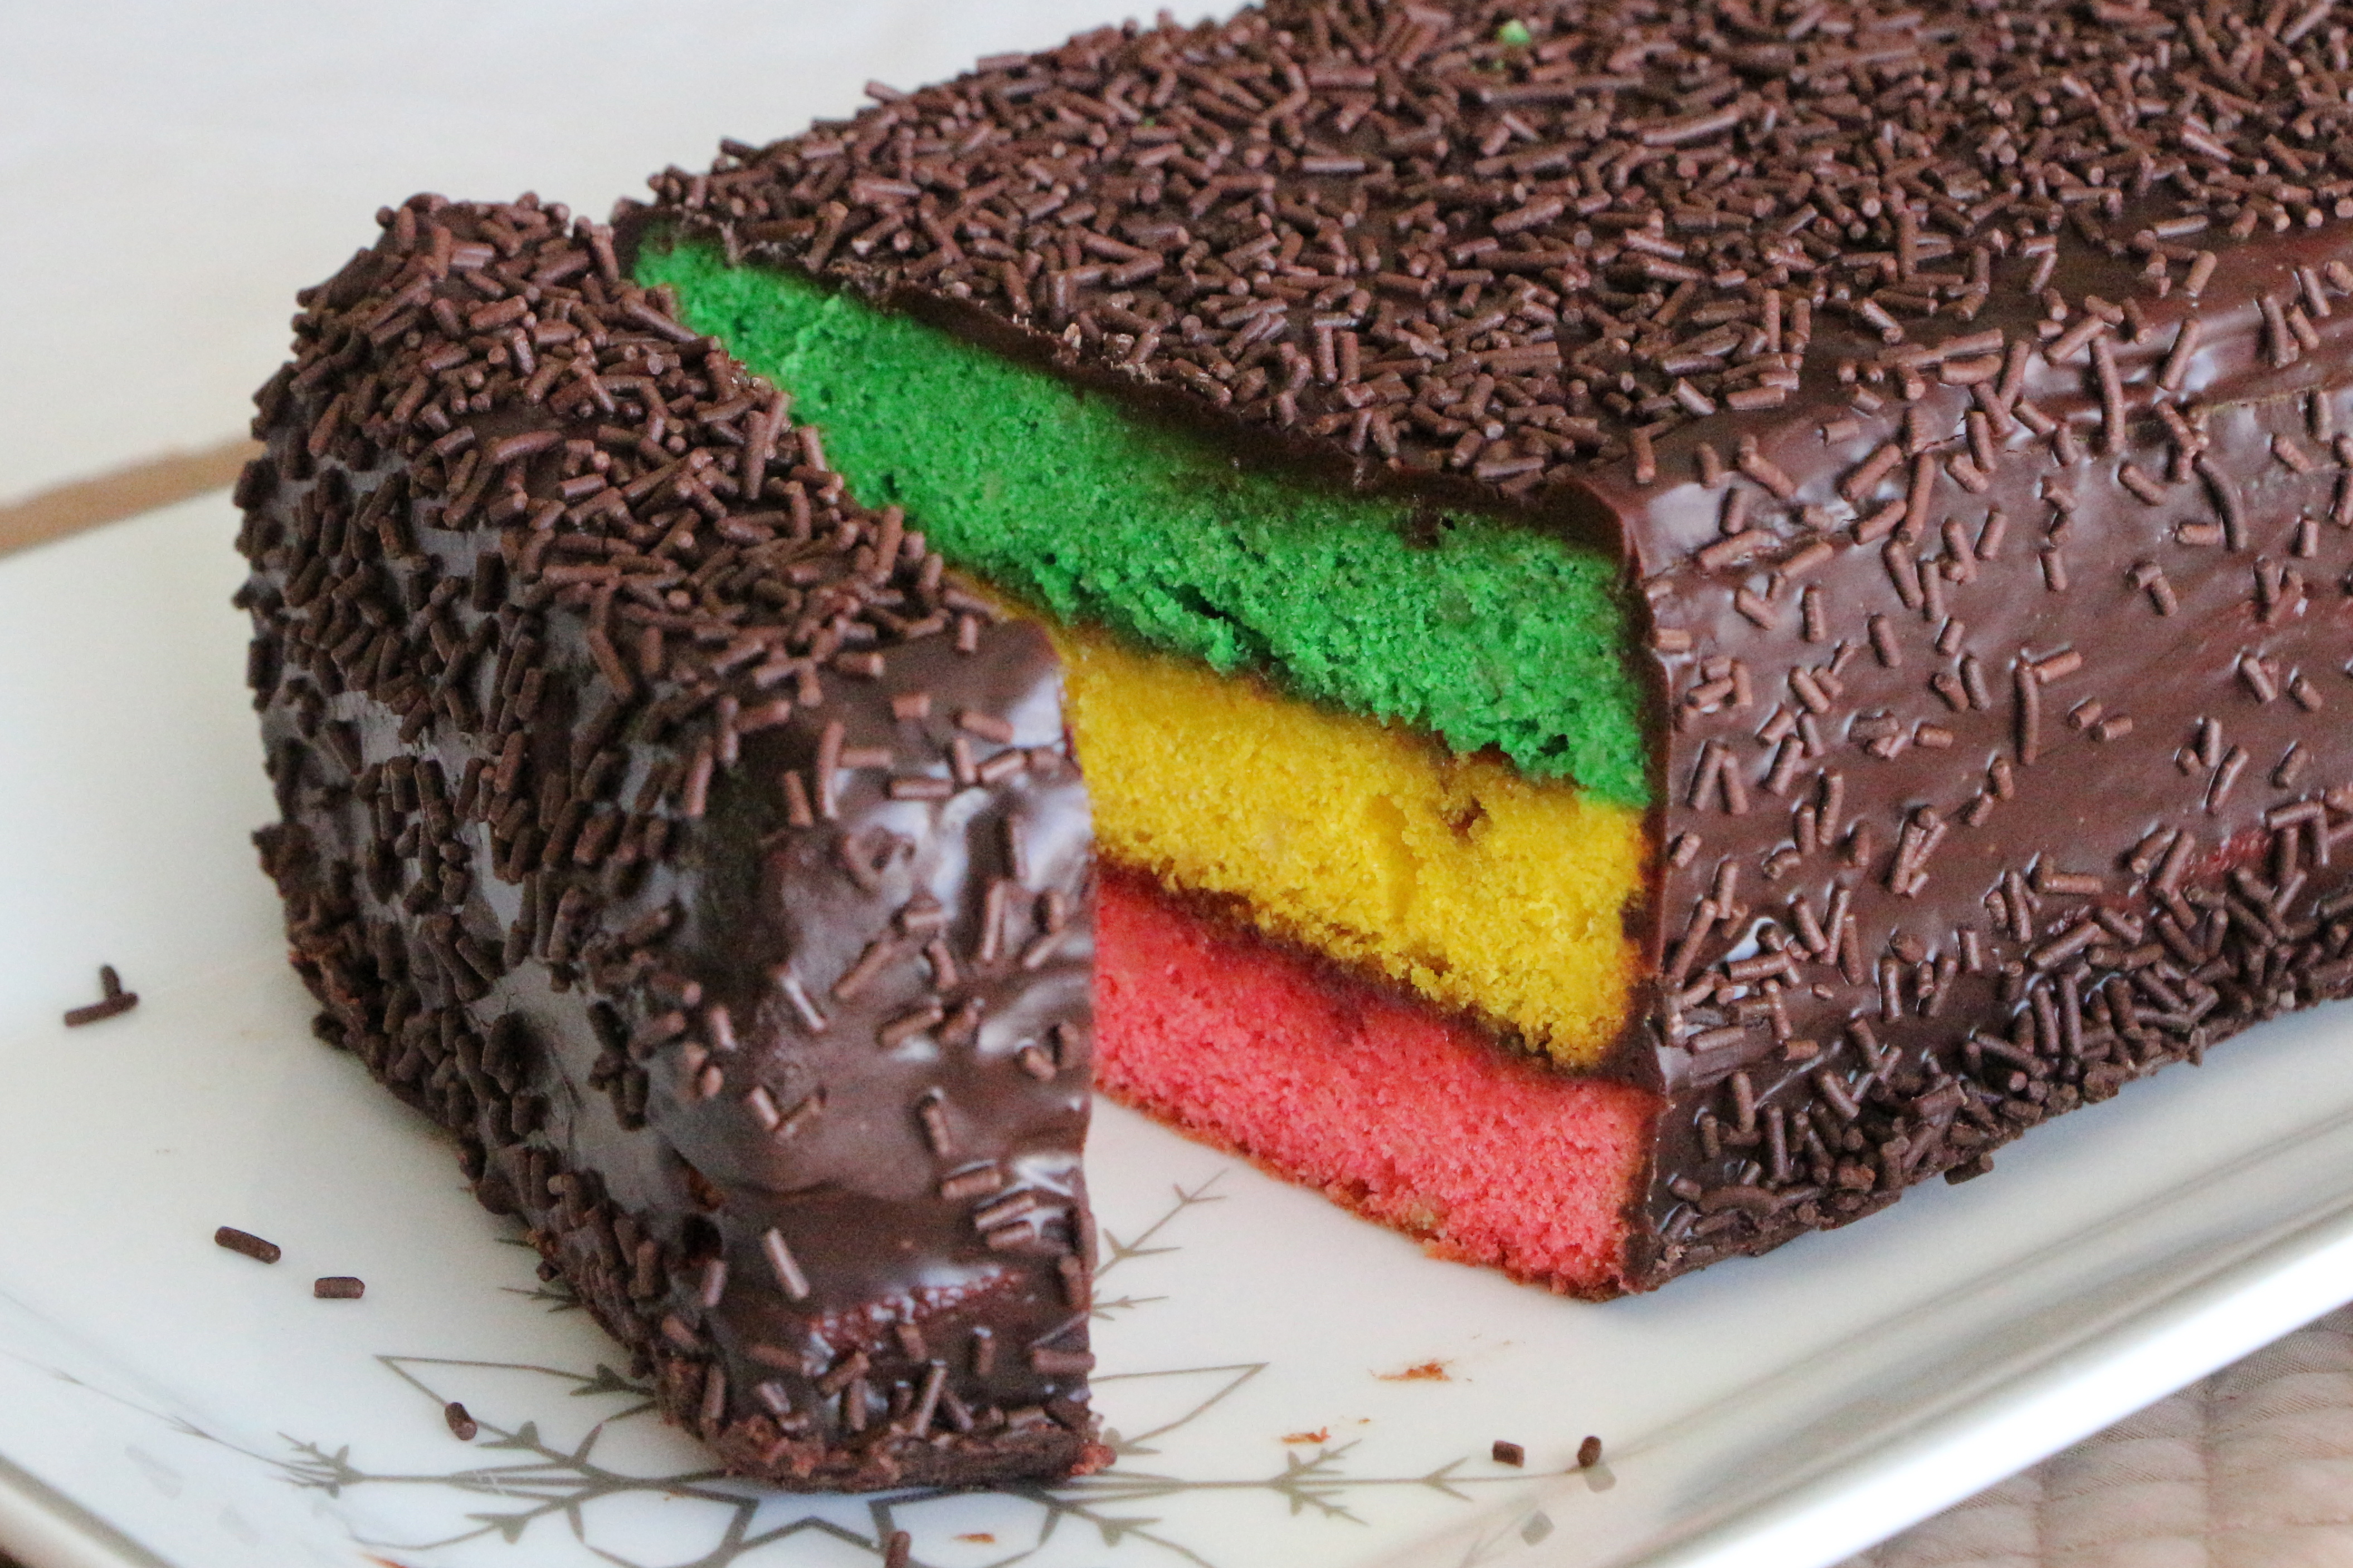
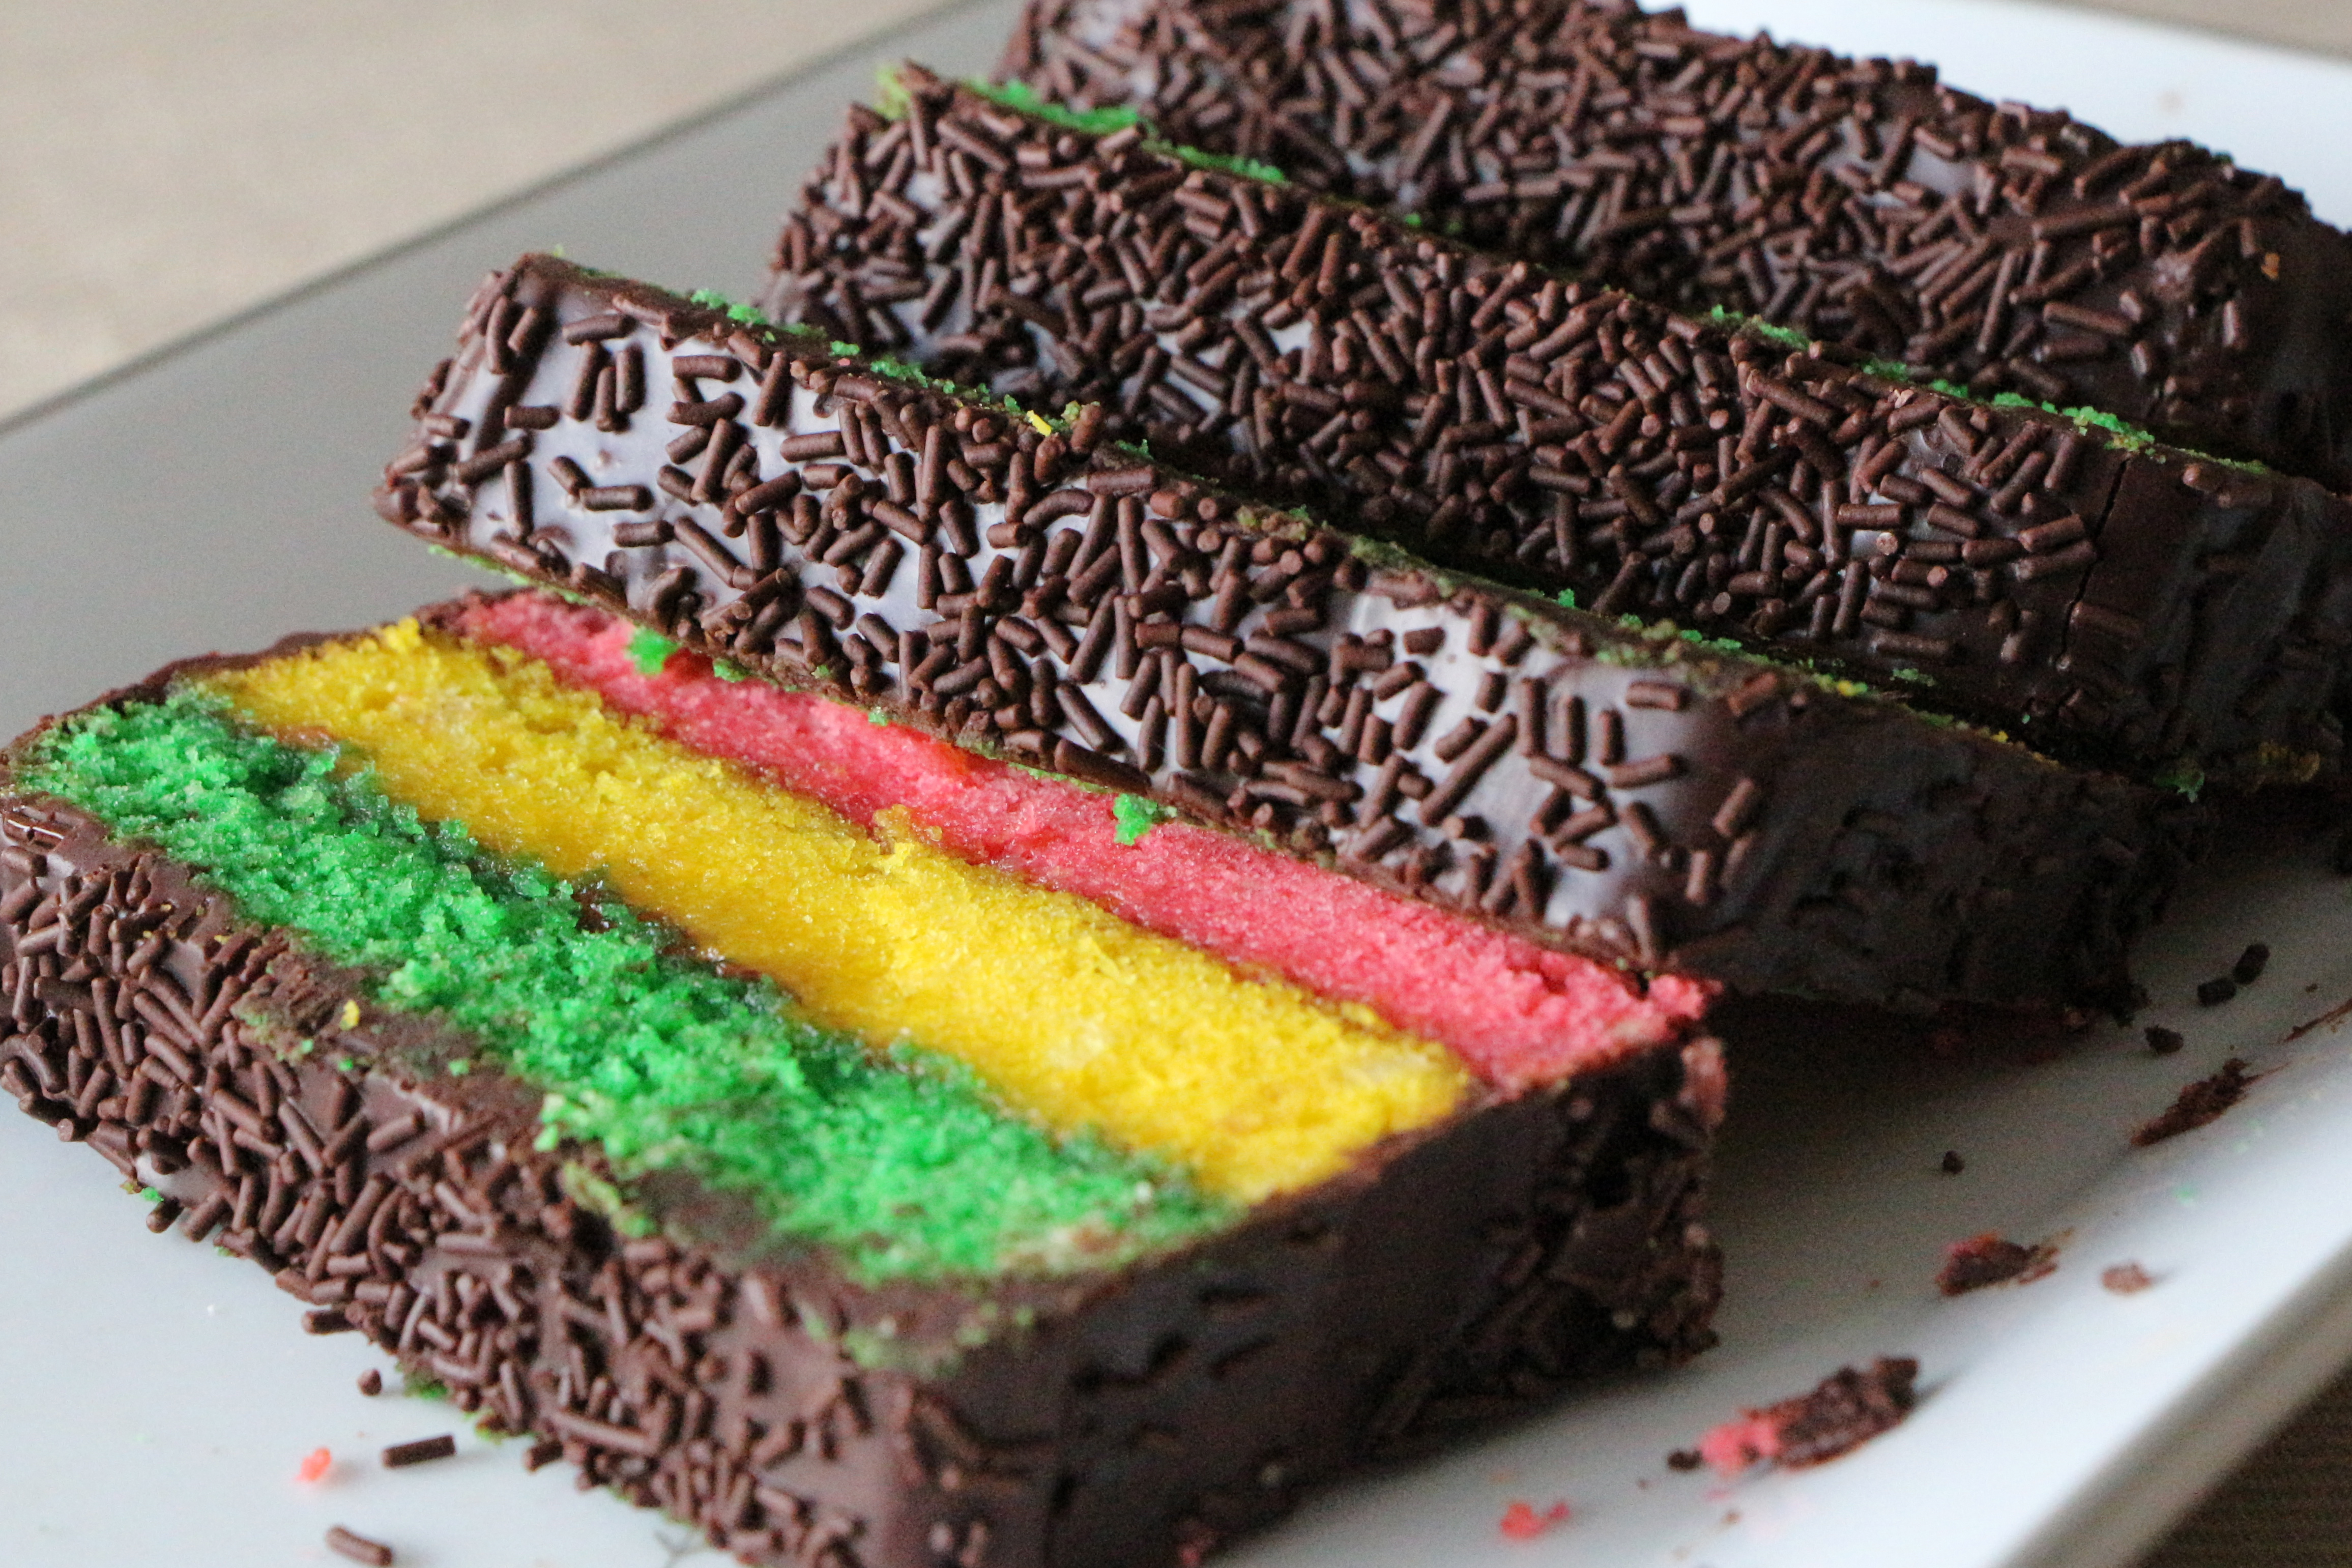
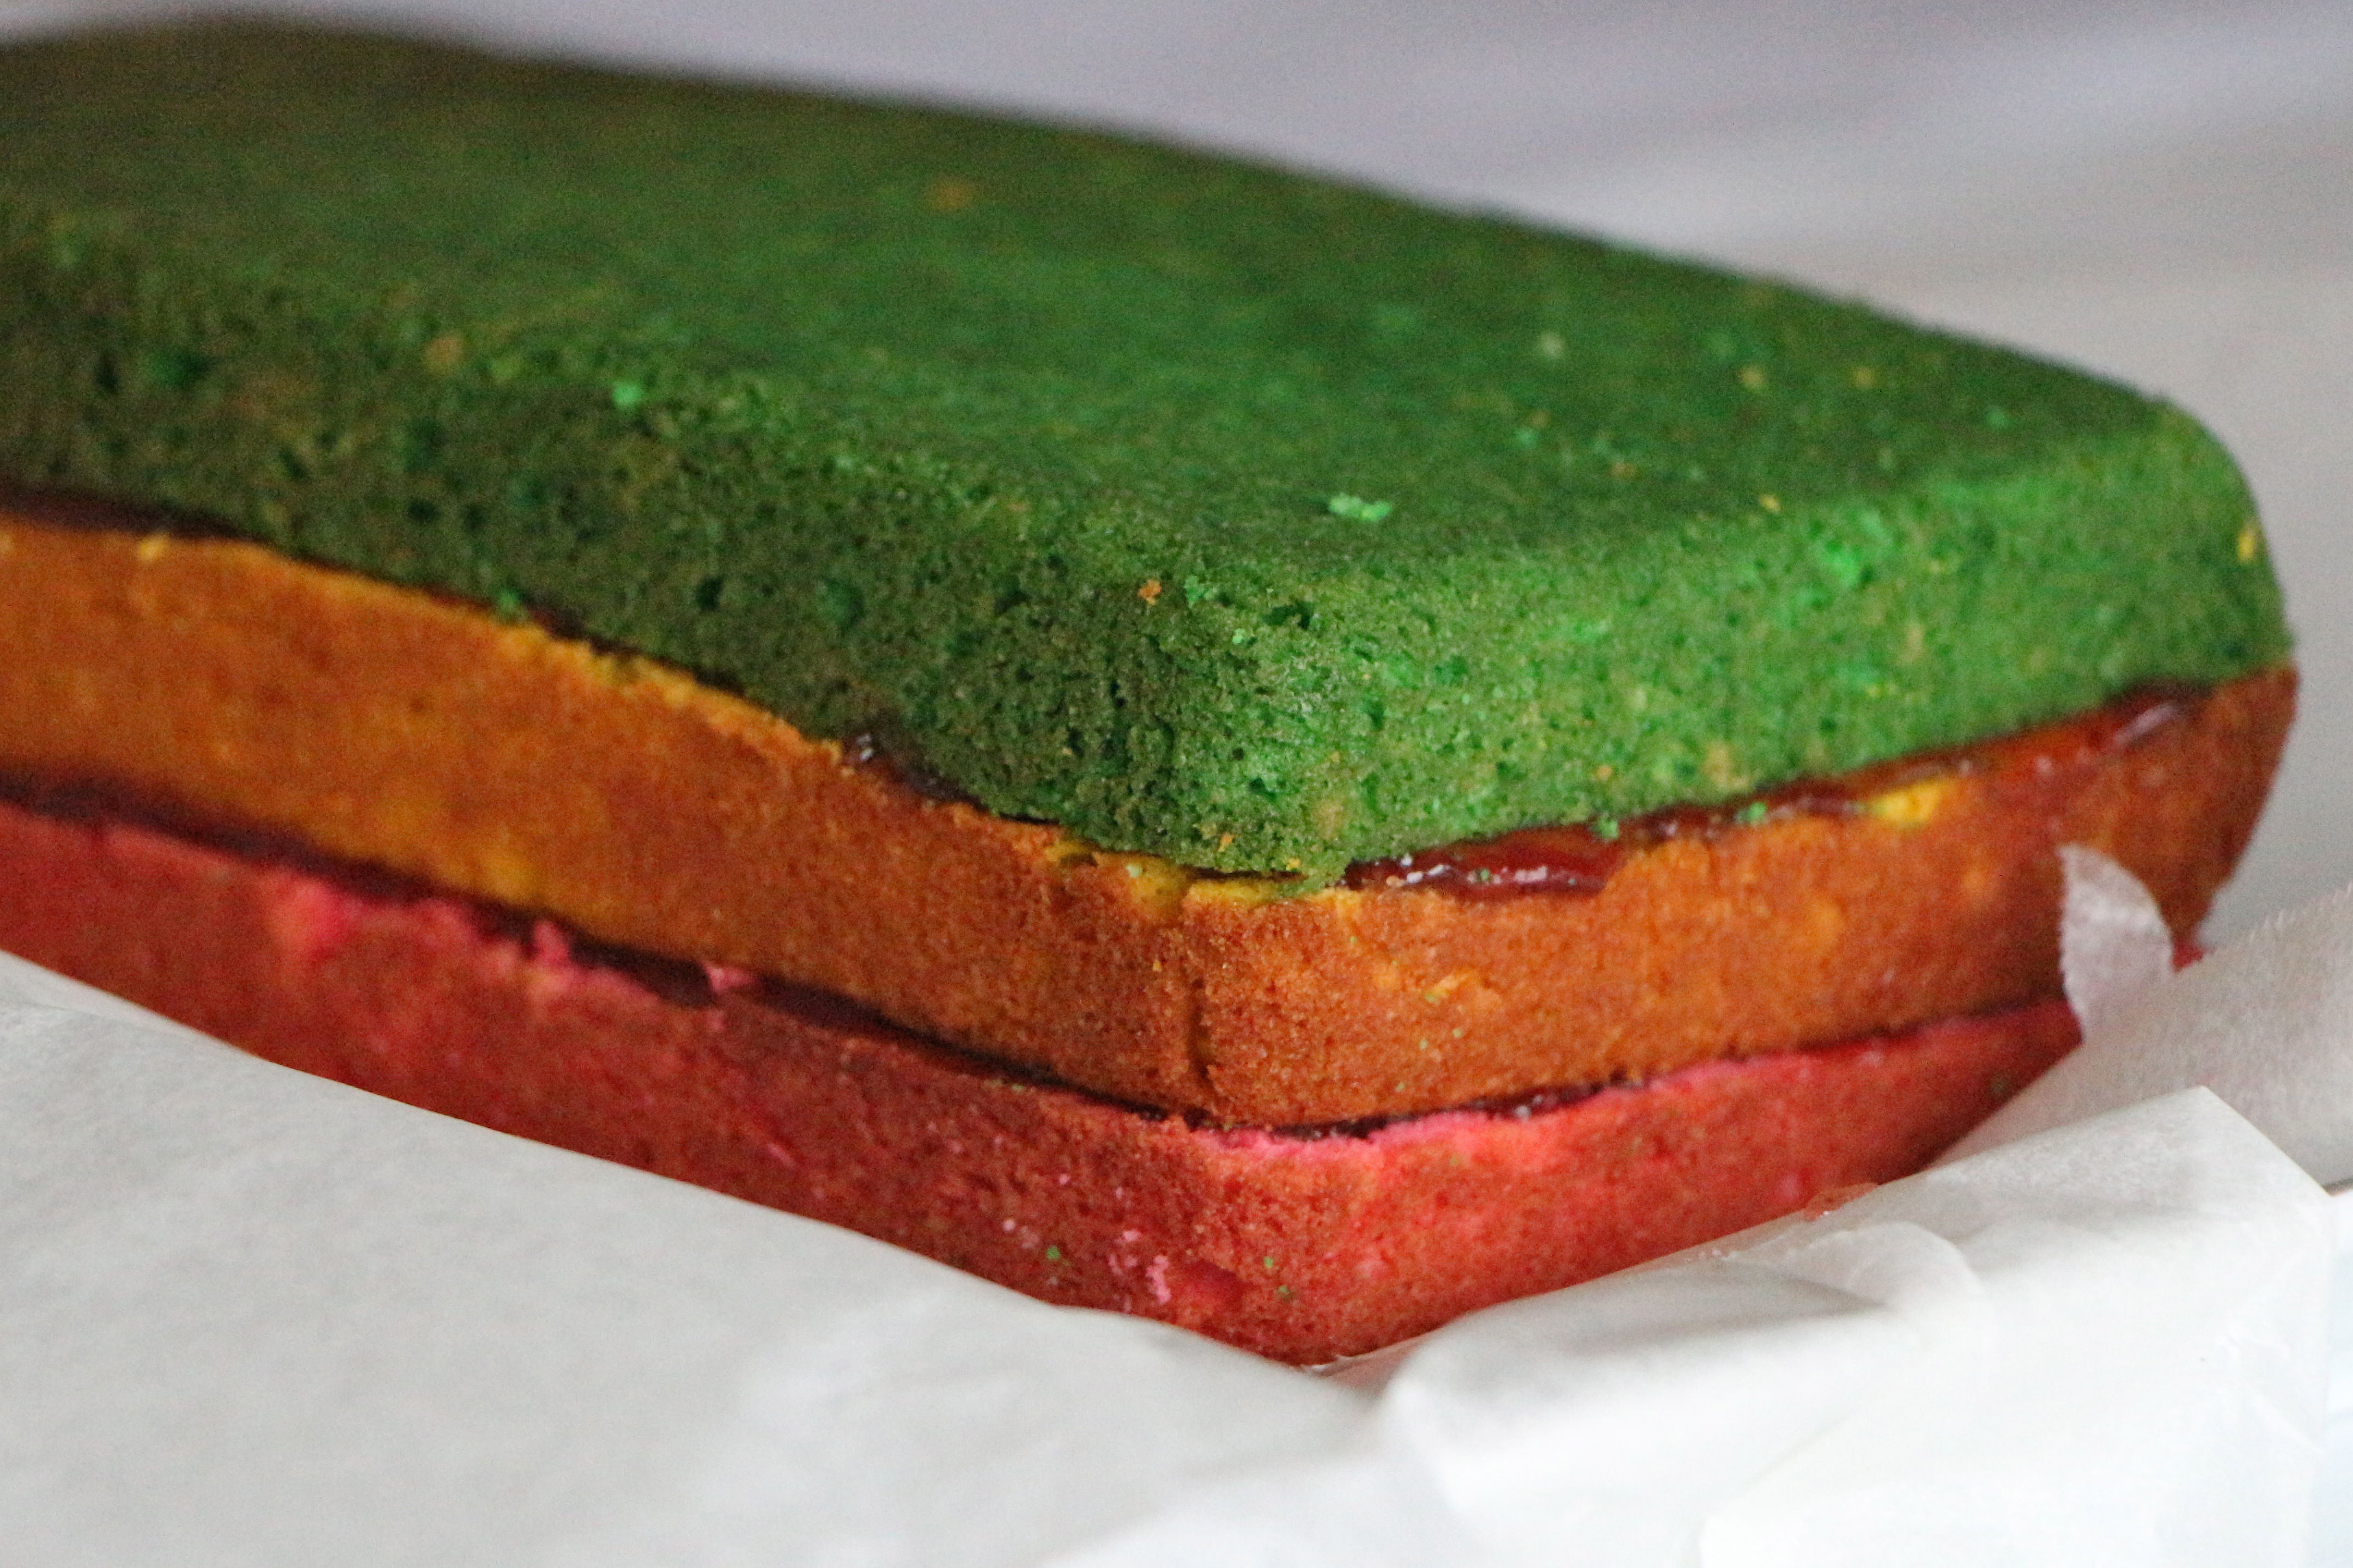
In the spirit of magical, over-sized treats, I think you’ll enjoy this oversized rainbow cookie cake. It’s like those addictingly delicious, almondy rainbow cookies, only it’s the size of an entire cake. It’s like one, giant rainbow cookie, and I wouldn’t blame you if you ate the whole darn thing.

I started with a recipe for rainbow cookies, then lighted it up just a bit with an additional egg, a bit more flour, and a teaspoon of baking powder. It’s got the dense lusciousness you expect to find in a rainbow cookie, just a bit more cake-like.

IMG_1915

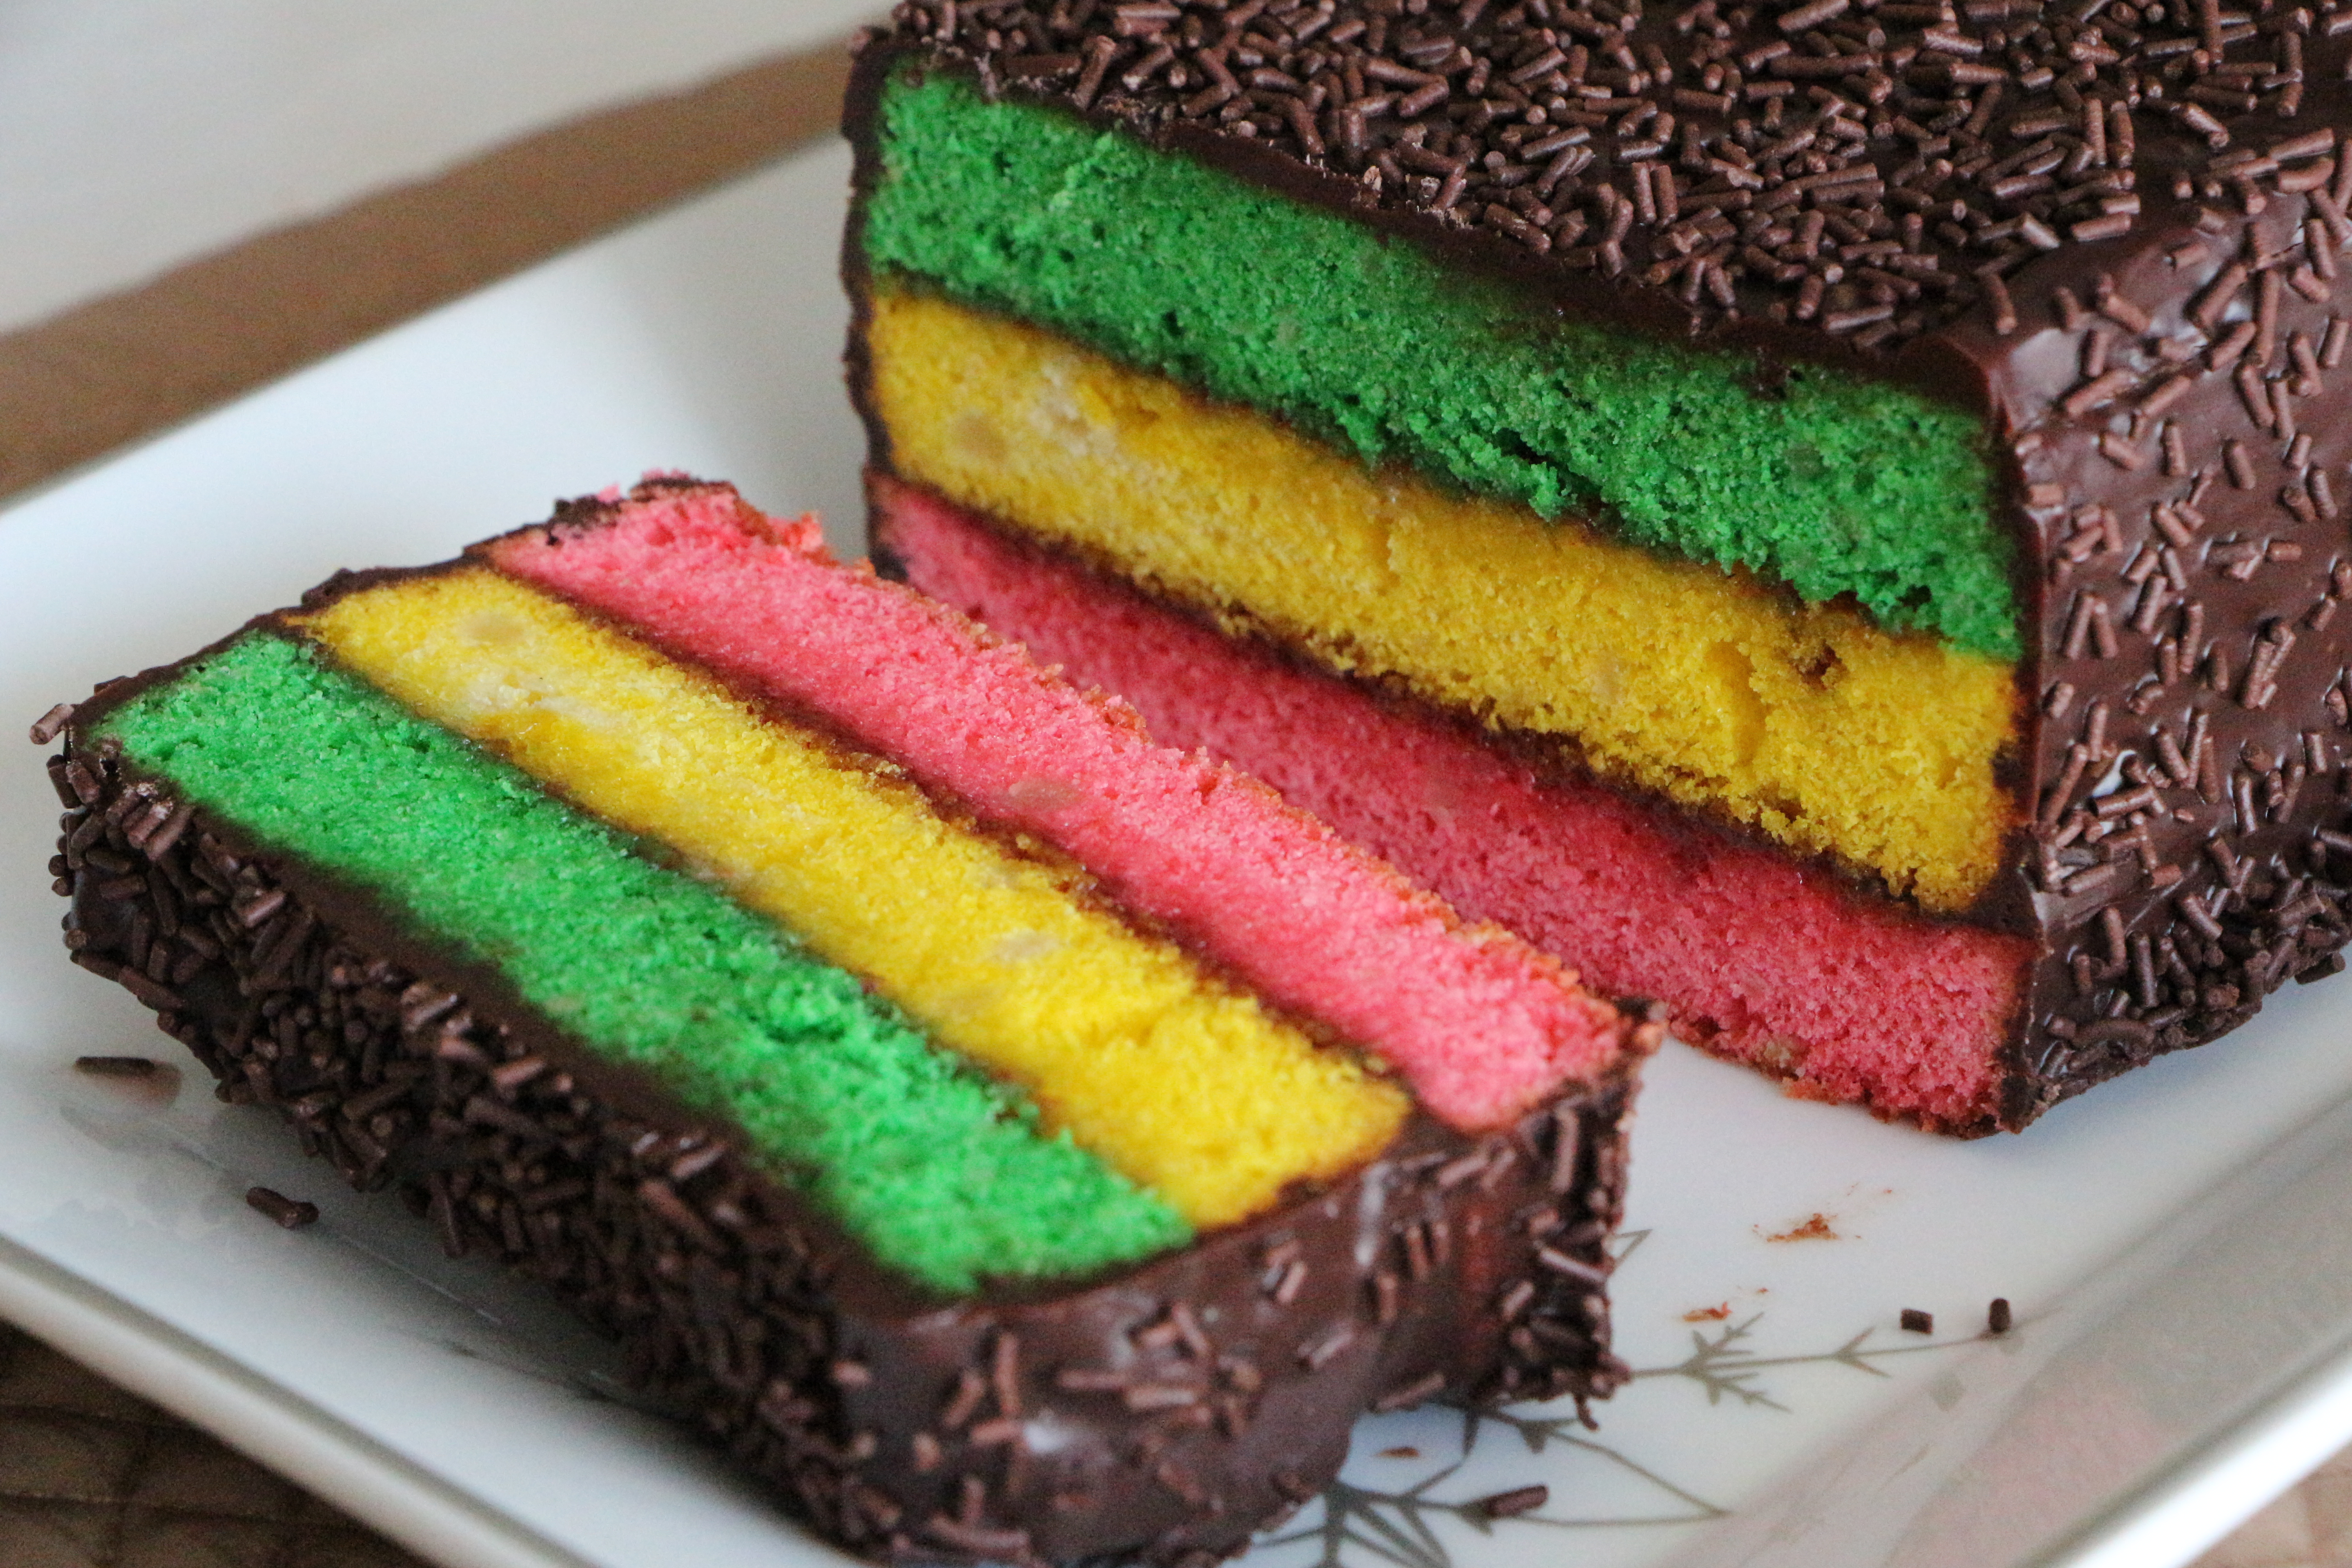
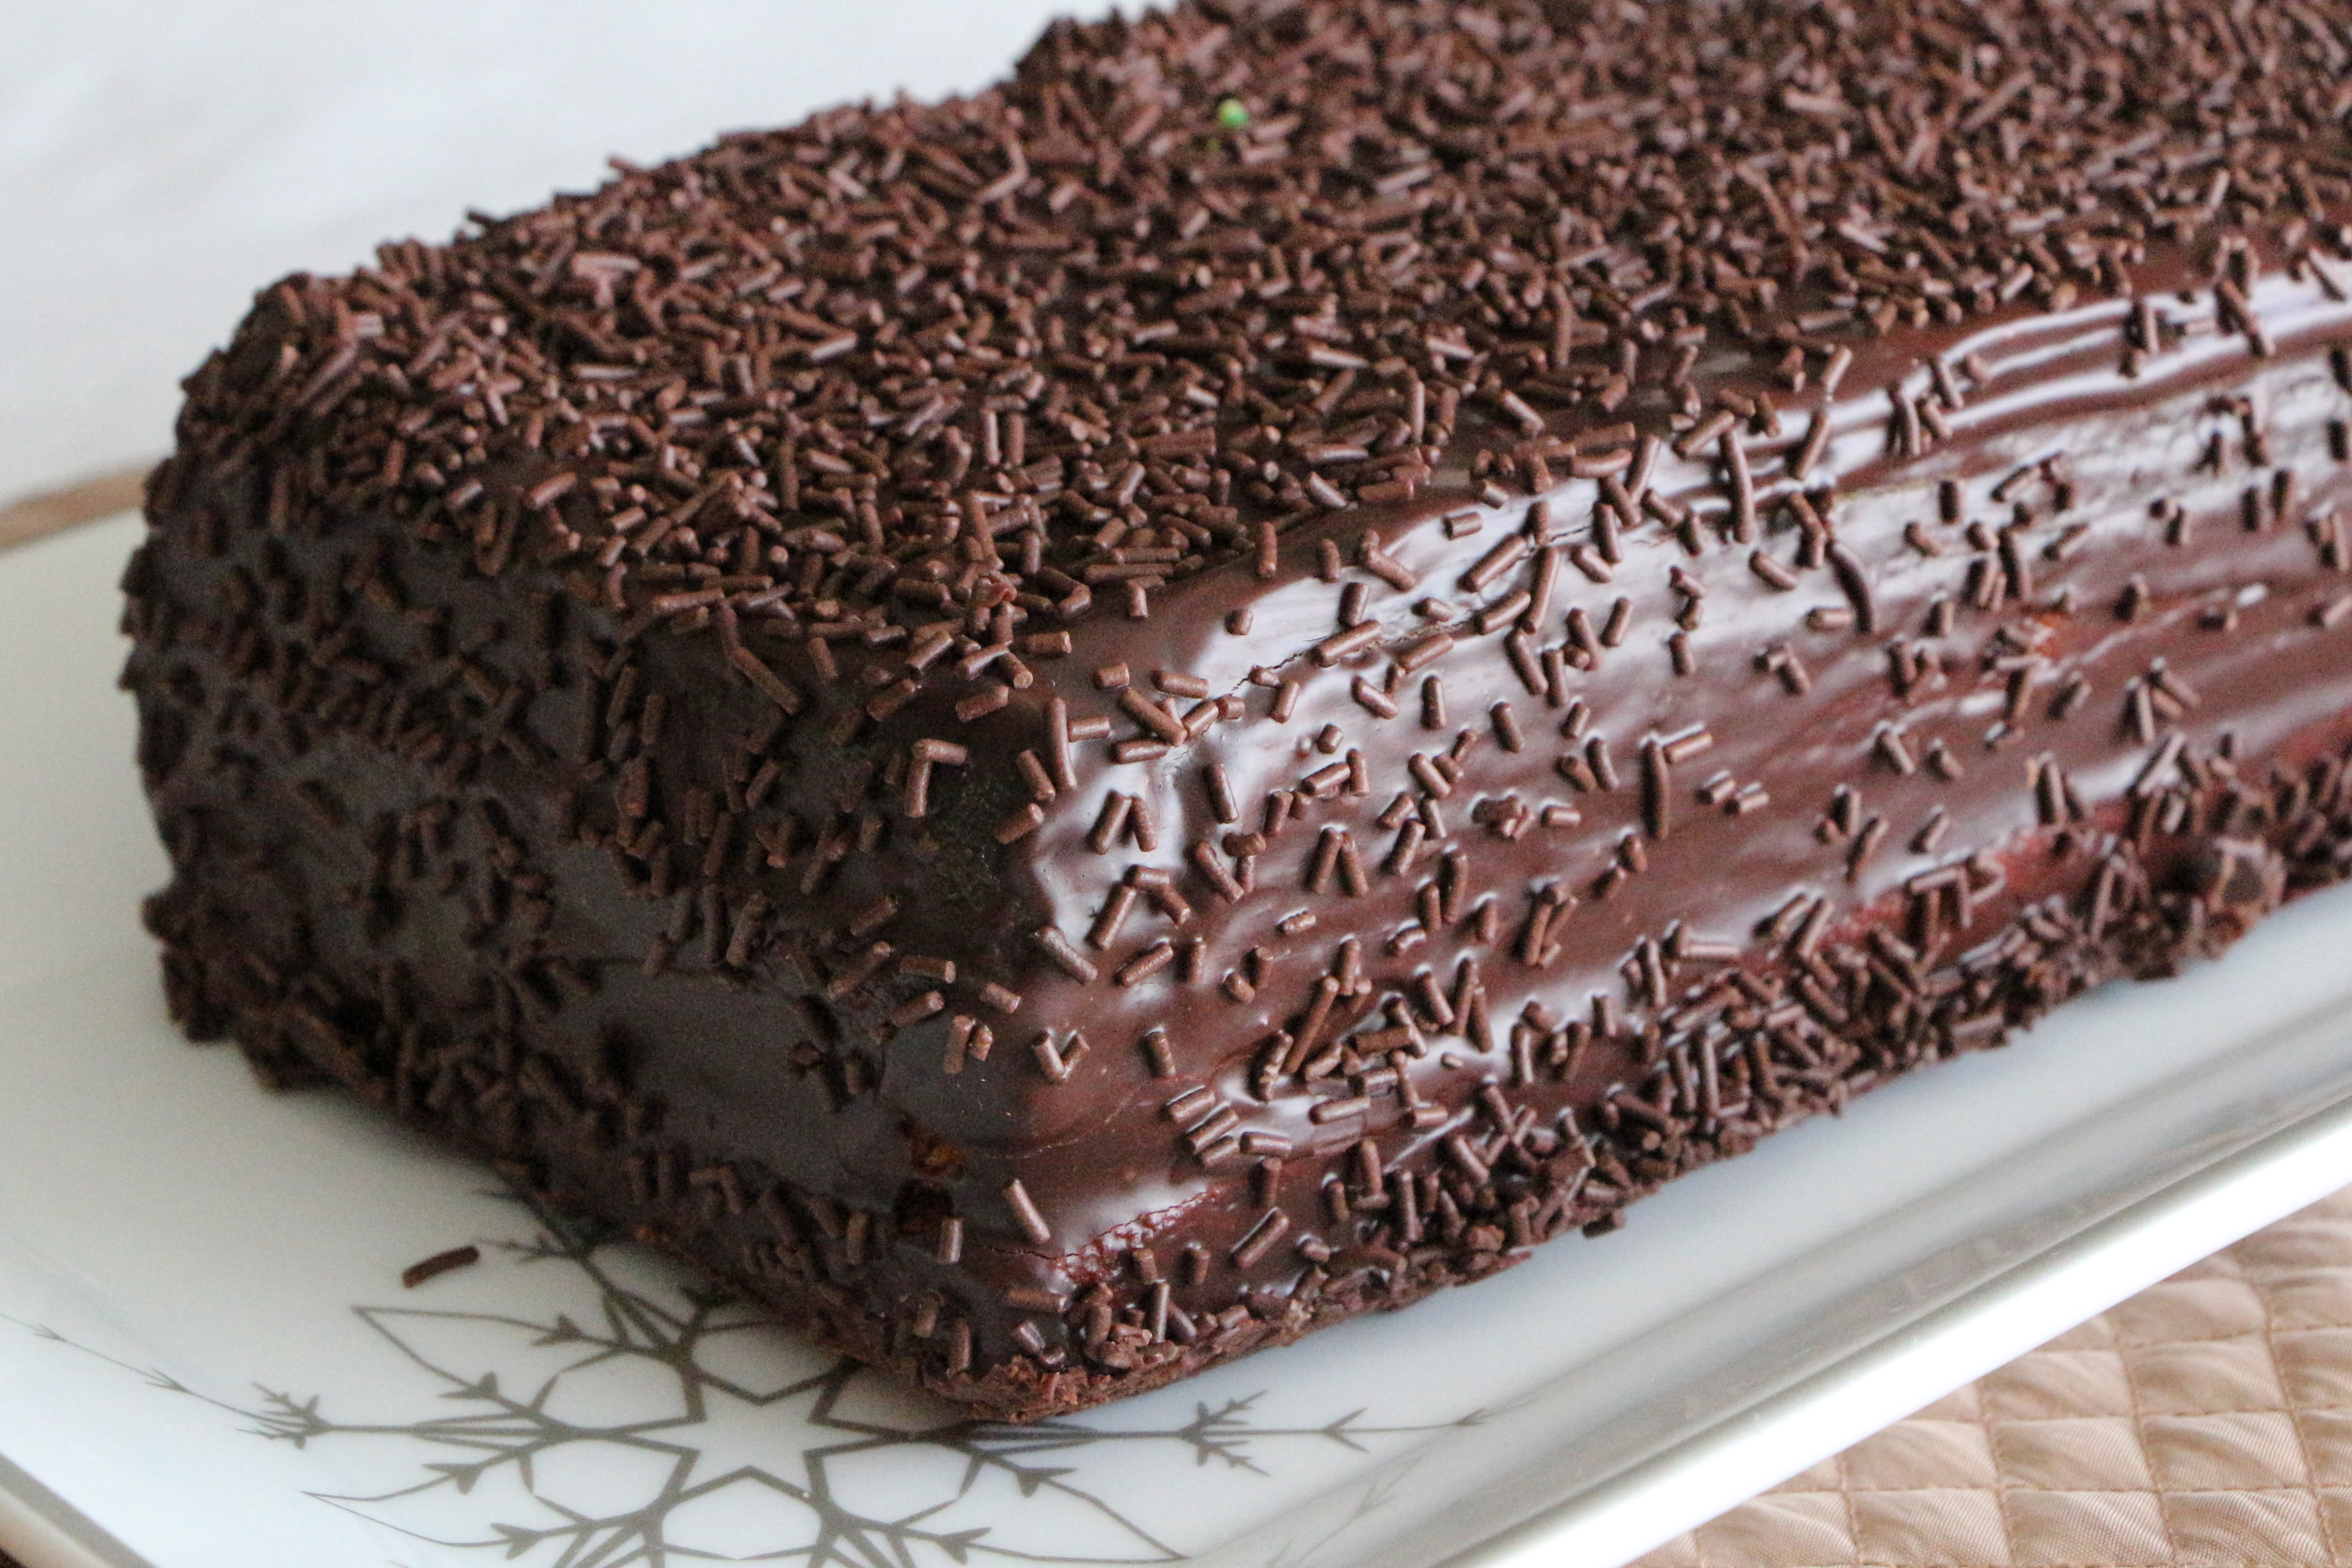
This rich, chocolate-drenched cake is a must-have on any holiday table.

Rainbow Cookie Cake

Ingredients

  • 5 eggs, separated
  • 1 8-ounce can almond paste
  • 1 1/4 cups sugar
  • 2 1/2 sticks butter, softened to room temperature
  • 1 teaspoon almond extract
  • 2 1/2 cups flour
  • 1 teaspoon baking powder
  • 1/4 teaspoon salt
  • Green food coloring
  • Red food coloring
  • Yellow food coloring
  • Seedless raspberry jam
  • Apricot jam
  • 4 ounces semi-sweet chocolate
  • 1/4 cup heavy cream
  • Chocolate sprinkles

Directions

Preheat oven to 350 degrees. Spray three 9×5 inch loaf pans with baking spray.

Place the five egg whites into a clean bowl. Beat with an electric mixer until stiff peaks form. Set aside.

Use a fork to break up the almond paste into smaller pieces. In a large bowl, combine the almond paste and sugar with an electric mixer until there are no large lumps. Add the butter and beat until well combined. Add the egg yolks and almond extract and beat until blended.

In a separate bowl, stir together the flour, salt, and baking powder.

Gradually beat the flour mixer into the wet ingredients. The dough will be quite thick.

Stir one third of the beaten egg whites into the dough. This will slightly lighten the mixture. Then, fold in the remaining egg whites until well blended.

Divide the dough into three equal portions. Use a few drops of food coloring to color one portion red, another portion green, and the remaining portion yellow. *Gel food coloring has the best effect.

Use a spatula to spread each portion of dough into the three prepared baking pans.

Bake on the middle rack of your oven for 20-25 minutes, until the cakes are set and the edges just begin to turn golden.

Allow the cakes to cool for a few minutes in the pans, then carefully invert the cakes onto cooling racks. Cool completely.

Use a long serrated knife to level the cakes, removing as little cake as necessary.

Spread a layer of raspberry jam over the red layer. Place the yellow layer over the jam, then spread the apricot jam on top. Top with the red layer.

Chop the semisweet chocolate. Heat the heavy cream in a small saucepan or in the microwave, just until boiling. Pour the hot cream over the chocolate, then stir until smooth. Use a spatula to spread the chocolate ganache over the top and sides of the cake. Garnish liberally with chocolate sprinkles.

Refrigerate to set, but remove the cake from the fridge before serving, so it comes up to room temperature.

IMG_1949

Thanksgiving Menu Ideas

Hey, folks…

Reposting last year’s round-up of Thanksgiving ideas for a little menu-planning inspiration!

~Amy

APPETIZERS

Cranberry Chipotle Meatballs

Corn and Bacon Fritters with Smoked Salmon

Bacon-Wrapped Dates stuffed with Bleu Cheese

THE MAIN EVENT

Herb-Roasted Turkey Breast with Pan Gravy (and tips for roasting a whole turkey)

Bacon and Cider Braised Turkey Drumsticks (and garlicky creamed spinach)

Spiced Sweet Potato Puree with Pecan Streusel

Sausage, Apple, and Leek Stuffing

Cranberry-Orange Sauce

Green Beans Almondine

Roasted Brussels Sprouts with Bacon and Walnuts

Hot Doughy Buns

DESSERTS

Chocolate Pecan Pie

Pumpkin Coconut Pie

A Few Variations on Apple Pie (in an all butter pie crust)

Caramel Apple Cake

Turkey-Shaped Sugar Cookies

Caramel Apple Tartlets

Spiced Mango Upside Down Cake

Cannoli Cheesecake

Pasta with Ham and Mushrooms in a Creamy Spinach Ricotta Sauce

Posted on

If you celebrate Easter, it’s likely that come Sunday, you may find yourself with an excess of boiled eggs, some ham, and maybe even some candy. With that in mind, I’ve gathered up a few tasty ideas on how to make delicious use of those leftovers, including a brand new, super-simple recipe for pasta with ham and mushrooms in a creamy, cheesy spinach ricotta sauce.

What to do with Leftover Boiled Eggs…

Creole Deviled Eggs

029

Deviled Egg Salad

img_5869

Pasta with Bacon, Eggs, and Spinach

img_5924

What to do with Leftover Candy…

Cadbury Creme Crepes

img_3593

What to do with Leftover Ham…

Ham and Corn Chowder

img_5965

Grilled Peach and Prosciutto Salad with Creamy BBQ Dressing (use sliced ham in place of prosciutto)

img_9310

Grilled Brie, Prosciutto and Apricot Sandwiches (use ham in place of prosciutto)

img_4685

Chicken Cordon Bleu Panini

img_3708

Pasta with Ham and Mushrooms in a Creamy Spinach Ricotta Sauce

Ingredients

  • 1-2 tablespoons olive oil, plus more if necessary
  • 1/2 medium onion, finely diced
  • 1 teaspoon garlic, minced
  • 2 cups baby bella mushrooms, sliced
  • 2 cups ricotta cheese
  • 1 1/2 cups milk
  • 1 cup parmesan cheese, grated
  • 1 6-ounce bag baby spinach leaves, chopped
  • 2 cups leftover ham, diced
  • Salt and pepper, to taste
  • 1 pound pasta, cooked al dente
  • Additional parmesan cheese and crushed red pepper, for garnish

Directions

Heat the olive oil in a large pan over medium heat. Add the mushrooms. Cook for 7-10 minutes until tender and lightly caramelized. Remove the mushrooms from the pan and set aside. Add a touch more olive oil to the pan, if necessary, then add the onion. Cook for 5-7 minutes until tender and golden. Add the garlic and cook for another 1-2 minutes. Add the ricotta cheese, milk, and parmesan cheese. Cook for a few minutes, stirring frequently, until hot and well blended. Add the mushrooms, ham and spinach. Gently simmer for a few minutes until the spinach is wilted. Taste and season with salt and pepper, as desired. Pour the sauce over cooked pasta and toss to combine. Garnish with crushed red pepper and additional parmesan cheese, if desired.

IMG_6410

Irish Mocha Chip Ice Cream

Posted on

Well, hello there! Long time, no see.

IMG_5145

I hadn’t intended to abandon the blog for any length of time, but life sort of sucked me into its unpredictable time warp. Between the kids and appointments and work and all of the other business of being a family of five, the weeks just flew by. Oh, and I joined a local gym, which has a ‘Kids Korner’, that the kids actually love going to. Ninety bucks bought me up to two hours of time for myself, every day, forever. Best childcare deal out there, folks. I’ve rarely missed a day since I joined. The getting in shape aspect almost feels like the bonus of going, not the very purpose itself.

IMG_6057

But, it’s come to my attention that one of my favorite holidays is rapidly approaching. So, I’ve pulled myself out of life’s time warp in order to bring you an appropriately Irish themed recipe. This is one for the grown-ups, as it’s chock full of caffeine and festively spiked with a bit of Irish Cream. Interestingly, it was my five year who inspired the whole ice cream idea, while I was pondering aloud about some Baileys twist on panna cotta or chocolate mousse. “It should be an ice cream,” he insisted. And with the approaching spring season peppering our days with warmer weather, he was right-on with that suggestion. I may need to reward him with a decaf, alcohol-free version of this recipe soon.

IMG_6102

The look your child may make when you prepare an ice cream, just for grown-ups.

If you’re looking for some more traditional Irish ideas, like Corned Beef and Cabbage, Irish Soda Bread, Shepherd’s Pie or even a low-carb twist on Cottage Pie, check out last year’s St. Patty’s Day recipe round-up HERE.

Have fun and most importantly, be safe, in all of your St. Patty’s Day festivities!

Today’s Focus on Technique – The Difference Between Ice Cream and Frozen Custard

The main difference between ice cream and frozen custard (also known as French-style ice cream or French custard ice cream) is the addition of egg yolks. Technically, to be considered a frozen custard, it must contain at least 1.4% egg yolks by weight. The USDA has lengthy documents which define all of the characteristics of ice cream, frozen custard, gelato, sherbet and something called mellorine, but basically, the difference between ice cream and frozen custard comes down to the egg yolks. The egg yolks in a frozen custard add a rich, silky creaminess to the end result. When adding the egg yolks to the ice cream mixture, it is important to temper the eggs by very gradually adding the hot cream mixture to the yolks. This allows the temperature of the eggs to rise to meet the temperature of the hot cream mixture without scrambling the eggs. The egg mixture is then returned to the pan and gently heated until the eggs are cooked to a safe temperature. For more info on tempering eggs into hot liquids, click here. I haven’t calculated the percent weight of egg yolks in the following recipe, but I’d venture to say it falls technically in the family of frozen custards.

IMG_6146

Irish Mocha Chip Ice Cream

Adapted from Emeril’s Coffee Ice Cream 

Ingredients

  • 1 1/2 cups heavy cream
  • 1 1/2 cups whole milk
  • 2/3 cup sugar
  • 1 1/2 tablespoons instant coffee granules
  • 1 1/2 tablespoons unsweetened cocoa powder
  • 3-4 tablespoons Baileys Irish Cream*
  • 4 egg yolks
  • 2/3 cup mini chocolate chips

*TIP – When cooking with liquors or liqueurs that you don’t frequently use, see if your liquor store carries the mini bottles (like they have on airplanes), to avoid having leftovers go to waste. 

Directions

Combine the cream, milk, sugar, coffee, and cocoa powder in a medium saucepan. Bring to a gentle boil over medium heat, stirring until sugar, coffee and cocoa are dissolved. Remove from the heat.

In a medium bowl, lightly beat the egg yolks with a fork. In a slow steady stream, gradually whisk about 1 cup of the hot mixture into the egg yolks. Then, gradually add the egg mixture to the remaining mixture in the pan. Cook the mixture over medium-low/low heat, stirring frequently, for 5-8 minutes, until it just begins to bubble. (You can use an instant read thermometer to check that the mixture is at least 170ºF.) Remove from the heat. Cool slightly at room temperature, then transfer to a bowl and cover with plastic wrap, pressing down against the surface to prevent a skin from forming. Refrigerate until completely chilled, about 2-3 hours. Stir in the Baileys Irish Cream and chocolate chips just before freezing in the ice cream maker.

Transfer the cooled mixture to your ice cream maker. Freeze according to your ice cream maker’s instructions. The ice cream will still be semi-soft (and lusciously creamy) coming out of the ice cream maker. It will harden a bit further after a few hours in the freezer.

*This recipe would make a perfectly delicious mocha chip ice cream without the Bailey’s. You could also use decaf instant coffee grounds if you’d prefer to skip the caffeine.

IMG_5140

Treat Your Valentine

Treat your valentine to a day’s worth of mouth-watering meals. Here are three ideas for each meal, from super simple to more elaborate. Click on the pictures or the links to see the recipes!

You can also check out the Recipes section at the top of the page for more ideas to delight your sweetie.

Breakfast

Super Simple: Strawberry and Nutella Stuffed French Toast

img_4248

A Bit More Complex: Cinnamon Raisin Donut Bread Pudding

img_7310

Manageably Elaborate: Eggs Benedict

0721

Lunch

Super Simple: Sausage, Bean, and Rapini Soup

10-26-10-042

A Bit More Complex: Smoked Salmon and Cucumber Salad

img_3389

Manageably Elaborate: Quiche Lorraine

074

Dinner

Super Simple: Penne a la Vodka

110

A Bit More Complex: Pork Chops with Fontina and Marsala

0371

Manageably Elaborate: Slow-Braised Beef Short Ribs with Figs over Creamy Brie Potatoes

img_8548

Dessert

Super Simple: World’s Simplest Fudgey Brownies with Raspberry Coulis

img_4317

A Bit More Complex: Chocolate Raspberry Torte

img_2783

Manageably Elaborate: Fresh Berry Mousse with Vanilla Panna Cotta

mousse-and-panna-cotta-in-cup

Cherry Cordial Brownie Bites

My Lucas is charismatic, enigmatic, and profusely loving. There’s just something insanely captivating about him. He’s a heart-melter for sure, with his big blue eyes, sweet dimples, and long, dark lashes. And he’s mine. More than anyone or anything in the whole world (except perhaps Ninjago legos), he loves me. Not sure how I got so lucky!

IMG_1649

Just look at that face!

The kid says, “I love you sooooo much,” so many times each day that I’d begun to suspect it was just a filler statement; simply something to say when there was nothing else to be said. He even says it in his sleep, when I sneak in at night to kiss his little head before I tuck myself into bed. “Mommy, I love you so much.”

But I’ve come to realize that his words are so much more than sounds to fill the silence. He recently turned to my husband and began to say, “Daddy, I love…” I’d expected the statement to end with his predictable “…you soooo much.” But it didn’t. It was quite beautifully, “Daddy, I love Mommy soooo much.” He’s my precious little lovebug.

IMG_5788

On a recent trip to the grocery store, as we walked hand in hand through the parking lot, he squeezed my hand and expressed his sweet statement of love. I returned the sentiment, then we continued into the store. An older woman, who’d been coming from her car, caught the exchange as we passed. I saw her pause and hold her heart for a moment. We ran into that woman as we made our way through the store and she stopped to comment on my sweet boys. I thanked her and she parted with a friendly, “God bless.” As we began to walk away, she shouted back, “What am I saying? Clearly, He already has.”

He certainly has. I have been so generously blessed in love; a family who cherishes and supports me, a husband I can laugh with, children whose love is more contagious than the flu, and the most beautiful friends, who persistently raise me up. This Valentine’s Day, I will celebrate every bit of that priceless, precious love.

IMG_5790

Sweet treats are the perfect way to celebrate the sweetest people in your life, like these absolutely decadent, truffle-like cherry cordial brownie bites. They start with my World’s Simplest Fudgey Brownies, which are then blended with a bit of cream cheese, until rich and smooth. The luscious brownie mixture is then rolled into small balls with a Grand Marnier (or orange juice, for the kiddies) soaked cherry in the center, before being dipped in smooth, melted chocolate. A drizzle of melted pink candy and sprinkles provide the perfect final touches.

Today’s Focus on Technique – Using a Double Boiler

The process of cooking with a double boiler (also called a bain marie) is an ideal technique to use when preparing delicate sauces, such as hollandaise, or when melting chocolates. In a double boiler set-up, the food is placed in a bowl which is suspended above simmering water. The water provides a gentle, consistent, indirect heat which prevents finicky foods from breaking (separating) or burning. It works in a similar manner as using water bath to prepare custards and other delicate egg-based dishes. No special equipment or dedicated ‘double boiler’ is required to utilize a double boiler technique. Simply fill a saucepan with an inch or two of water. Place a stainless steel or glass mixing bowl on top of the pot, so that the bottom of the bowl dips into the pot, but does not touch the water. Place the food you’re preparing in the bowl, bring the water to a simmer, and you’re set to go!

For more useful tips, techniques, and culinary photo guides click HERE.

IMG_5804

Cherry Cordial Brownie Bites

Ingredients

For the brownies:

  • 1 stick of butter
  • 1 cup chocolate chips
  • 1 cup sugar
  • 1 cup flour
  • 2 eggs
  • 1/4 teaspoon salt

For the brownie bites:

  • 1/4 cup Grand Marnier or orange juice (approximately)*
  • 3 dozen dried cherries
  • 4 ounces cream cheese, softened to room temperature
  • 2 cups chocolate chips (semi-sweet or milk chocolate)
  • Pink or red candy melts and sprinkles, for decorating (optional)

*Be aware that no alcohol will be cooked off in the preparation of these candies, so it would be wise to use the orange juice for children, pregnant women, or anyone who is avoiding alcohol intake.

Directions

To prepare the brownies:

Preheat oven to 350 degrees. Spray an 8×8 baking dish with cooking spray. In a saucepan over medium-low heat, melt the chocolate chips and butter until smooth, stirring constantly. Turn off the heat. Stir in the sugar and salt until dissolved. Stir in the flour. Add the eggs and stir until well blended. Pour the mixture into the prepared pan and bake for about 35 minutes.

To prepare the brownie bites:

Soak the dried cherries in approximately 1/4 cup of Grand Marnier or orange juice for at least an hour.

Once the brownies are cool, crumble into small pieces, then place in a food processor. Add the cream cheese and pulse until well-blended and smooth. (A food processor would work best for this task, but it can also be done by hand. If combining by hand, cut off the crispy brownie edges before blending, for a smoother result. If using the food processor, it’s not necessary to cut off the brownies edges.) Roll the mixture into small balls (less than 1″ diameter), inserting a soaked cherry in the center as you roll. Refrigerate until well chilled.

Melt the chocolate chips in a double boiler, stirring frequently, until smooth. Use a fork to lower each brownie ball into the melted chocolate. Shake off the excess chocolate, then place on a baking sheet, which has been lined with parchment paper or wax paper. Refrigerate until the chocolate has set. If desired, drizzle the brownie bites with melted pink or red candy melts and decorate with sprinkles.**

**Click HERE to see an easy pastry bag technique, which can be used for drizzling the brownie bites.

Makes 2.5 – 3 dozen candies

IMG_5841

Thanksgiving Inspiration

I learned something interesting about myself this week – I do not like corn bread stuffing. I love corn, corn muffins, corn bread, and corn fritters. I eat a ridiculous amount of corn when it’s in season. I even once made a sweet corn ice cream. But I do not like corn bread stuffing.

I guess it comes down to what you’re raised with – sort of how some families are the Crest kind of people and some families are the Colgate kind. Some families are loyal to Miracle Whip, while others will only use mayonnaise. Some families have corn bread stuffing at Thanksgiving and some families have white bread stuffing. Our family was always a Crest, mayonnaise, and white bread stuffing sort of family.

The four things I am most thankful for.

I didn’t realize how ingrained this inclination towards white bread stuffing was until I set about preparing a corn bread stuffing earlier this week. It should’ve been delicious, with crispy bits of bacon, tender dates, shallots, and celery. It was supposed to be a new recipe to feature in this post about Thanksgiving ideas. But I didn’t like it. I can’t even tell you if it was good or not, as far as corn bread stuffings go. I am just a white bread stuffing girl through and through and I couldn’t wrap my taste buds or my heart around that corn bread stuffing. I’m not sharing the recipe.

But I am going to share this round-up of wonderful, tried and true Thanksgiving ideas, in plenty of time to add them to your Thanksgiving menu…

Give thanks for good food, friends.

APPETIZERS

Cranberry Chipotle Meatballs

Corn and Bacon Fritters with Smoked Salmon

Bacon-Wrapped Dates stuffed with Bleu Cheese

THE MAIN EVENT

Herb-Roasted Turkey Breast with Pan Gravy (and tips for roasting a whole turkey)

Bacon and Cider Braised Turkey Drumsticks (and garlicky creamed spinach)

Spiced Sweet Potato Puree with Pecan Streusel

Sausage, Apple, and Leek Stuffing

Cranberry-Orange Sauce

Green Beans Almondine

Roasted Brussels Sprouts with Bacon and Walnuts

Hot Doughy Buns

DESSERTS

Chocolate Pecan Pie

Pumpkin Coconut Pie

A Few Variations on Apple Pie (in an all butter pie crust)

Caramel Apple Cake

Turkey-Shaped Sugar Cookies

Caramel Apple Tartlets

Spiced Mango Upside Down Cake

Cannoli Cheesecake

Cannoli Cheesecake

I was undecided – and frankly, feeling a bit resentful over the implication that we undecided folks were either not paying attention or have the intellect of potatoes. I’d paid attention, done my research, weighed the pros and cons, and reflected on my personal tastes. And yet, I was still undecided; twisted by my contrary desires, unable to decipher the antsy feeling in my gut.

I take important decisions such as these quite seriously, you know.

But how in the world is a person supposed to choose between cheesecake and cannoli?? (Oh, did you think I was talking about the presidential election?) I mean, the cheesecake is rich and refined – maybe a little too rich for my tastes – but an intriguing option nonetheless. The familiar cannoli is a bit rougher around the edges and sometimes messy to consume, yet it calls to me. I wanted both; I wanted neither. My stomach churned with restless indecision. What if I wanted something different? Another choice on the menu? A third-party option of sorts?

So I decided not to choose between the cannoli or the cheesecake. I wanted something else. So I voted for the cannoli cheesecake instead.

This cannoli cheesecake isn’t going to be making any speeches come inauguration day, but it’s a definite winner in my book. Creamy, sweetened ricotta is blended with cream cheese and hints of chocolate, candied orange, and cinnamon, then baked in the form of a decadent cheesecake with a graham cracker crust. The end result is lighter than a traditional New York style cheesecake, with the subtle texture of ricotta cannoli filling. It’s presidentially delicious.

Author’s Note – By no means is this post intending to compare our presidential candidates to delicious Italian desserts. That would just be silly. I did, in fact, vote for an actual candidate in today’s election; not a cannoli cheesecake. Though if this cannoli cheesecake were on the ballot, it probably would have had my support.

Today’s Focus on Technique – Cooking with a Bain Marie

Cooking in a bain-marie refers to using a water bath. The purpose of using a water bath is to moderate the oven heat so that delicate ingredients cook more slowly and evenly. The water provides a moist, indirect heat that allows for a more gentle cooking process, which is ideal for many egg-based desserts, such as cheesecake, custard, and creme brulee.

No special equipment is required for a bain-marie set-up. You can make use of a regular roasting pan, baking dish or baking pan. Place the pan or ramekin you’re cooking in within the larger baking dish or baking pan. Place the entire set up in the oven, then fill the outer pan with a layer of warm water. (Placing the set-up in the oven before filling it with water is usually the easiest approach.)

*Always wrap the bottom of springform pans to prevent water from seeping into the bottom.

Cannoli Cheesecake

Ingredients

  • 1 1/2 cup graham crackers, finely crushed
  • 3 tablespoons sugar
  • 8 tablespoons unsalted butter, melted
  • 1 pound cream cheese (2 8-ounce bars), softened to room temperature
  • 1 15-ounce container ricotta cheese
  • 1 1/4 cups sugar
  • 1 teaspoon vanilla extract
  • 1/4 teaspoon cinnamon
  • 1/4 cup candied orange peel, finely diced
  • 4 eggs
  • 1/2 cup mini chocolate chips

Directions

Preheat oven to 350 degrees.

For the crust: Combine the graham cracker crumbs, sugar, and melted butter. Press the mixture into the bottom of a 10 inch springform pan*. Place the pan in the oven for 5 minutes to set the crust. Remove the pan from the oven and cool while you prepare the filling. (Leave the oven on.)

For the filling: Beat together the cream cheese and sugar until smooth. Add the ricotta cheese, vanilla extract, cinnamon, and orange peel. Beat for another minute until well blended. Add the eggs one at a time and beat just until blended. Stir in the chocolate chips.

Securely wrap the bottom of the cooled springform pan with foil (to prevent water from seeping into the pan).

Pour the filling into the springform pan. Place the pan within a large baking sheet or baking pan. Place the water bath set-up on the middle oven rack, then pour a small layer of warm water into the baking sheet/baking pan, so that it comes about 1/2″ up the side of the springform pan.

Bake for 60-65 minutes. The filling will still be slightly jiggly in the center when done. Cool the cake for 30 minutes at room temperature, then refrigerate until completely chilled.

*You can use a smaller springform pan, but the cooking time will vary.

Chocolate Peanut Butter Chocoflan

Posted on

I lied to you a little, about the whole not needing a wine rack because we drink our wine too fast. That statement is mostly true. We buy our regular wine in the big 1.5 liter bottles. It’s sold two for twenty bucks and it’s pretty darn tasty for that price. We are not wine snobs, as you can tell. I mean, we appreciate a fine wine, but we’ll gladly drink the cheap stuff too, as long as it doesn’t taste like grape juice mixed with well vodka. We pick up a few of those big bottles each week and we drink them promptly. Wine storage isn’t really a concern for us.

But we do actually have a small collection of wine in our wine cellar…errr, I mean the basement storage room, right next to the bins of Christmas decorations and miscellaneous crafting supplies. There are probably ten or so bottles down there; mostly wines we were given as gifts, a few mementos from our wedding, and some we picked up on wine tours. For the most part, they are white wines, which are spared from drinking due to our preference for red and the fact that they live unchilled in our basement.

There was a bottle of red down there. Was. I hadn’t forgotten about it. Many a night, I’ve thought about that bottle of wine. We bought it on a wine tour in Virginia, one weekend that we spent at this great little spa hotel. The concierge paired us with another couple and we shared a limo as we toured some the area’s wineries. We tasted several wines that day, including one with an aroma of tobacco that one of our new wine tour friends described as smelling of Colonial Williamsburg. Oddly, we all knew exactly what she meant. None of us purchased that wine. But we also tasted a delicious red called Ameritage Reserve at Pearmund Cellars; a blend of their best malbec, petite verdot and cabernet sauvignon. We were told it would be an ideal wine for aging. So we bought it and we aged it…for 9 years. We probably would have aged it forever if I hadn’t reminded my husband of its existence last night.

But, we were about to start the final episode of Downton Abbey’s second season and we’d exhausted our big bottle of cheapo red. We’d already watched two episodes that evening and were feeling quite regal by that point, as if we were destined for a life of fine wine. We do have a bottle of red, I heard myself say. Well, crack it open, was my husband’s response. And then we cracked open the bottle of 9 year old red. The cork practically crumbled as I pulled it from our precious aged wine. We traded in our standard drinking tumblers for actual wine glasses and took a sip. It was beautiful. It tasted as elegant as the halls of Downton Abbey. I may or may not have spoken with an English accent for the remainder of the evening.

It’s going to be hard to go back to drinking our budget wine this evening.

That wine was a special treat. No regrets.

I’ve got a treat for you too. Sometime in the weeks before our little Mexican fiesta, I picked up a Better Homes and Gardens magazine which featured all Mexican recipes. As I was flipping through the mag, I came across a recipe for a minted cake with a layer of dulce de leche flan on the top. Honestly, the combination of mint and dulce de leche did nothing to excite my taste buds, but in the description of this recipe, it mentioned something called chocoflan. Chocolate cake and creamy, caramelly flan??  Yup. I could get behind that idea. I found a recipe for chocoflan on the Food Network website and made it for my fiesta.

As far as baking goes, this is a pretty cool cake to make. The flan mixture gets poured over the cake mixture and sometime during the baking, the cake rises to the top, while the flan gently cooks in the bottom of the bundt pan. I followed the original recipe exactly as written, as I often do when I’m baking something unfamiliar. Baking is a much more exact process than cooking, so it’s a bit more important not to play around too much with ingredients and procedures until you have a better sense of what you’re working with. So, when the recipe instructed me to ‘giggle a little’, I giggled as told, even though I’m guessing the actual intention was to jiggle the cake.

The end result is delicious and show-stoppingly gorgeous. The cake is rich and dense, almost like a brownie. The flan is as decadent and satisfying as that aged wine; a perfect complement to the chocolatey cake. Though perfect as is, I toyed around with the recipe on my second attempt, substituting creamy melted peanut butter and warm fudge sauce for the dulce de leche in the original recipe. A handful of peanut butter chips, added to the cake batter, spreads peanut buttery flavor throughout the rich dessert.

This cake doesn’t really fall in line with my desire to lose a few pounds, but man is it worth the splurge! Just cut yourself a really, really skinny slice!

Chocolate Peanut Butter Chocoflan

Adapted from Marcela Valladolid’s Chocoflan

 Ingredients

For the Cake

  • 10 tablespoons butter, softened (plus additional butter for pan)
  • 1 cup sugar
  • 1 egg
  • 1 3/4 cups flour
  • 3/4 teaspoon baking powder
  • 3/4 teaspoon baking soda
  • 1/3 cup cocoa powder
  • 1 1/4 cups buttermilk
  • 1/3 cup peanut butter chips

For the Flan

  • 1 (12-ounce) can evaporated milk
  • 1 (14-ounce) can sweetened condensed milk
  • 4 ounces cream cheese, softened to room temperature
  • 3 eggs
  • 1 tablespoon vanilla extract

Garnish

  • 1/3 cup peanut butter, melted
  • 1/3 cup prepared fudge sauce, warmed
  • 1/4 cup chopped peanuts

Directions

Preheat oven to 350 degrees.

Rub the inside of a 12-cup bundt pan with butter to prevent sticking.

To prepare the cake: Using an electric mixer, beat the butter and sugar together until light and fluffy. Add the egg and beat for another minute. In a separate bowl, combine the flour, baking powder, baking soda and cocoa powder. Beat a third of the flour mixture into the butter mixture, followed by half of the buttermilk, followed by another third of the flour mixture, then the remaining buttermilk, and ending with the remaining flour mixture. Stir in the peanut butter chips. Spread the cake mixture in an even layer on the bottom of the prepared bundt pan.

To prepare the flan: Combine all flan ingredients in a blender and blend until well-combined. Pour the flan mixture over the cake batter. (Don’t worry if the cake batter mixes a bit with the flan. They will separate during baking.)

Cover the bundt pan with foil. Place the bundt pan inside a larger roasting pan or large skillet. Carefully fill the roasting pan or skillet with about an inch or so of hot water. (The hot water bath will help the flan custard to cook gently.)

Place the pan on the middle oven rack and bake for about 90 minutes*, until the top of the cake is firm and a toothpick inserted comes out clean. Carefully remove the pan from the oven, remove the bundt pan from the water bath, and cool for at least an hour at room temperature. Then, give the bundt pan a little jiggle to ensure the cake and flan are loosened. Place a large serving plate over the top and invert the cake onto the serving plate. Refrigerate for several hours before serving.

To garnish, drizzle the top of the cake with the melted fudge sauce and peanut butter. Sprinkle with the chopped peanuts.

*The original recipe calls for a cooking length of one hour, but it actually takes a good 90 minutes, as I’ve noted in my adaptation of the recipe.

Water bath set-up

Simple S’mores Pudding Cups

Posted on

In bizarrely timely fashion, a friend of mine posted this quote, just as I was drafting this post, How much of this stuff has anything to do with who you are now and who you are becoming? Words to purge by…

I yearn for the simple life, a life with minimal clutter and limited complications. Just an uncluttered life focused on family, friends, and enjoying this beautiful world. But sometimes it seems practically impossible to achieve this state of uncomplicated living. We seem to accumulate stuff at twice the rate I can use it, gift it, donate it or trash it. And, my goodness, do kids come along with a lot of accessories…even after you’ve said no to the wipe warmers, diaper genies, bottle sterilizers, sleep positioners, and the tap-dancing monkeys that Babies R Us told you were newborn essentials. Honestly, I don’t even need bottles. I don’t need a swing or a special baby food maker. Heck, we barely used the baby’s crib for the first year of his life. Just give me my baby, a few onesies, a soft blanket, and a ridiculous quantity of baby wipes. (I’m not sure I could live without baby wipes.)

But kids amass stuff no matter how hard you try to avoid it. Puzzles and action figures and five million tiny legos. And little plastic toys from happy meals and musical instruments and samurai castles. And cars and books and stuffed toys and train sets. And a toy kitchen, a toy workbench, and something called bonkazonks. And coloring books, sticker collections, broken crayons, and cowboy hats.

And I’m also to blame for our accumulation of stuff. Because I need matching dishes and glasses. And I needed a sombrero for my Mexican fiesta (which will now live in the basement just in case I want to throw another fiesta). And we couldn’t possibly have had a lemonade stand without a proper lemonade dispenser. And my life wouldn’t be complete without those little metal nest candleholders and turquoise birdie candles. It all seemed so important at the time, but now it achieves nothing besides making me feel claustrophobic in my own home.

I don’t even want to think about the paperwork we collect. Bills and important forms and certificates. A million pages of important paper to file and save, just in case. Just in case.

And then the sasquatch ate mommy and daddy…

How in the world did complicated and cluttered become the norm of our existence? It takes actual effort to not accumulate stuff and not to feed into the expectations we’ve grown to have about what we need. Certainly, those brightly colored, beautifully photographed magazines from Pottery Barn and Anthropologie aren’t doing anything to help limit my stuff accumulation. I know, I know…waa, waa, waa, I have too much stuff. Talk about a first world problem! Believe me, I don’t take it for granted.

I just think that our well-intentioned culture has a tendency to overcomplicate life to the point of chaos. I want to simplify. Let go of clutter. Live in an environment of minimalistic zen. Focus on what’s important. And so this is the summer of the purge! I’m moving from room to room and closet to closet to eliminate the clutter. We’ll hold a garage sale to sell what we can, then donate the rest. Goodbye handheld carpet cleaner I’ve never used. Goodbye racks and racks of dvds we will probably never watch. Goodbye duplicate copies #2, #3, and #4 of The Giving Tree. I love you, but we only need one of you. Goodbye all three 50 Shades of Grey books. You weren’t worth the time it took to read you. May you live happily in someone else’s home. And goodbye wine rack. I drink my wine way too fast to ever put you to use.

My minimalistic impulses carry over into my feelings about food. I like simple fresh flavors, short ingredient lists, and uncomplicated preparation methods. I’m totally intrigued by the whole arena of molecular gastronomy…gelification, spherification, foamification and whatnot(ification). I want to eat that food and marvel over the cleverness of the chef. But my personal approach to food is much simpler. No fancy tools, no futuristic techniques…just a sharp knife, a few simple tools, and a good set of pots and pans. It’s really all you need.

A few nights ago, my husband and the boys pitched a tent in the backyard for a summer campout. They built a fire and we roasted marshmallows, which we layered with chocolate and graham crackers for a classic s’mores treat. The boys entertained us with campfire songs and spooky stories involving mommy and daddy getting eaten by a sasquatch. And then they snuggled up in the tent and slept the night away. It was an idealistic evening. It’s the simple things in life, isn’t it?

But a few days earlier in the week, the boys had a craving for s’mores. So I came up with these little individual s’mores pudding cups…for those nights when you don’t have a marshmallow roastin’ fire roaring in the backyard. Rich, homemade chocolate pudding gets layered with mini marshmallows and crumbled graham crackers. Nothing fancy, but what a crowd-pleaser! Simple pleasures.

Simple S’mores Pudding Cups

Ingredients

  • 1/2 cup sugar
  • 1/4 cup unsweetened cocoa powder
  • 3 tablespoons cornstarch
  • 1/8 teaspoon salt
  • 2 cups milk
  • 1/3 cup semisweet chocolate chips
  • 1 teaspoon vanilla extract
  • 1 cup mini marshmallows
  • 3 graham cracker sheets, crushed

Directions

Sprinkle about half of the graham cracker crumbs and half of the marshmallows onto the bottom of six individual serving bowls or glasses. Reserve the remaining crumbs and marshmallows.

In a saucepan, mix together sugar, cornstarch, cocoa, and salt. Whisk in the milk, stirring until combined. Continue whisking over medium heat until the mixture begins to bubble and thicken, about 5 minutes. Whisking constantly, continue cooking for another minute or two. Be careful to whisk into the corners and along the sides of the pan. Remove from heat. Whisk in the chocolate chips and vanilla, stirring until fully melted. Carefully pour the hot pudding over the marshmallows and graham cracker crumbs. While the pudding is still hot, scatter the remaining marshmallows over the top and sprinkle with the remaining graham cracker crumbs. Refrigerate until chilled.

Serves 6 

The Gourmand Mom

Good food, seasoned with a dash of life