RSS Feed

Category Archives: Main Course

Baked Asian Sticky Wings

Teaching children to make good choices is one of the greatest responsibilities and most intense challenges of being a parent. Young children are clever, creative, and sneaky; oh so sneaky. Succeeding at this task requires the snooping skills of Sherlock Holmes, the vigilance of an air traffic controller, and the patience of Mother Teresa. You must watch, wait, anticipate, and react. You must act quickly to intervene before irreversible damage is done and you must sniff out clues like Scooby Doo to unravel mysteries. And most importantly, you must maintain a straight face; calm, but firm and consistent; in the face of discipline.

IMG_5751

But kids are devious and unpredicatable. Don’t be fooled by their sweet little button noses and soft, furry backs. They are constantly testing their limits and devising new methods for mischief. Stay sharp, captain.

My husband and I should have known something was up when we noticed that the stack of plastic kid plates was diminishing. We knew it was peculiar. And yet we just shrugged our shoulders in puzzled confusion and moved on. But all misdeeds come to light eventually, as did the mystery of the missing plates.

IMG_5764

It started when I was changing the baby’s diaper. I laid him down on the carpet which sits in the center of our living room. In the center of that carpet is a large trunk-style coffee table, with legs that raise it about three inches off the floor; just high enough for toys and things to slip beneath, but not tall enough to easily vacuum under. In the position I was in, sitting on the carpet with the baby, I saw what had previously been hidden. Peeking out from the edge of the table were the two plates I’d served the boys breakfast on, which they ate at their snack tables in front of the aforementioned coffee table. A small pile of discarded scrambled eggs sat on one of the plates. I scolded the boys for their lazy behavior and asked them if they thought we lived in a barn (’cause that’s what you’re supposed to say, right??). They hung their heads in appropriate shame and brought their plates to the sink.

IMG_5770

In retrospect, I don’t know why I didn’t put the pieces together at that point. I should have peeked under the table, but I didn’t. We moved on with our day. Then dinner time came along and I served the boys some of my new Asian sticky wings. Chicken wings don’t make frequent appearances on our menu, so I’d anticipated some normal apprehension. When serving something unfamiliar, I make a practice of always including something known and loved on the boys’ plates, so everyone has a chance to fill their bellies with something they like, while also having the opportunity to try something new. I don’t make a big deal about finishing everything on their plates or eating big portions of food they don’t enjoy. I only ask that they take a small taste of each new item, with the idea that over time, as their taste buds mature, they will enjoy a wide variety of foods. No pressure.

So, what happened next never should have happened.

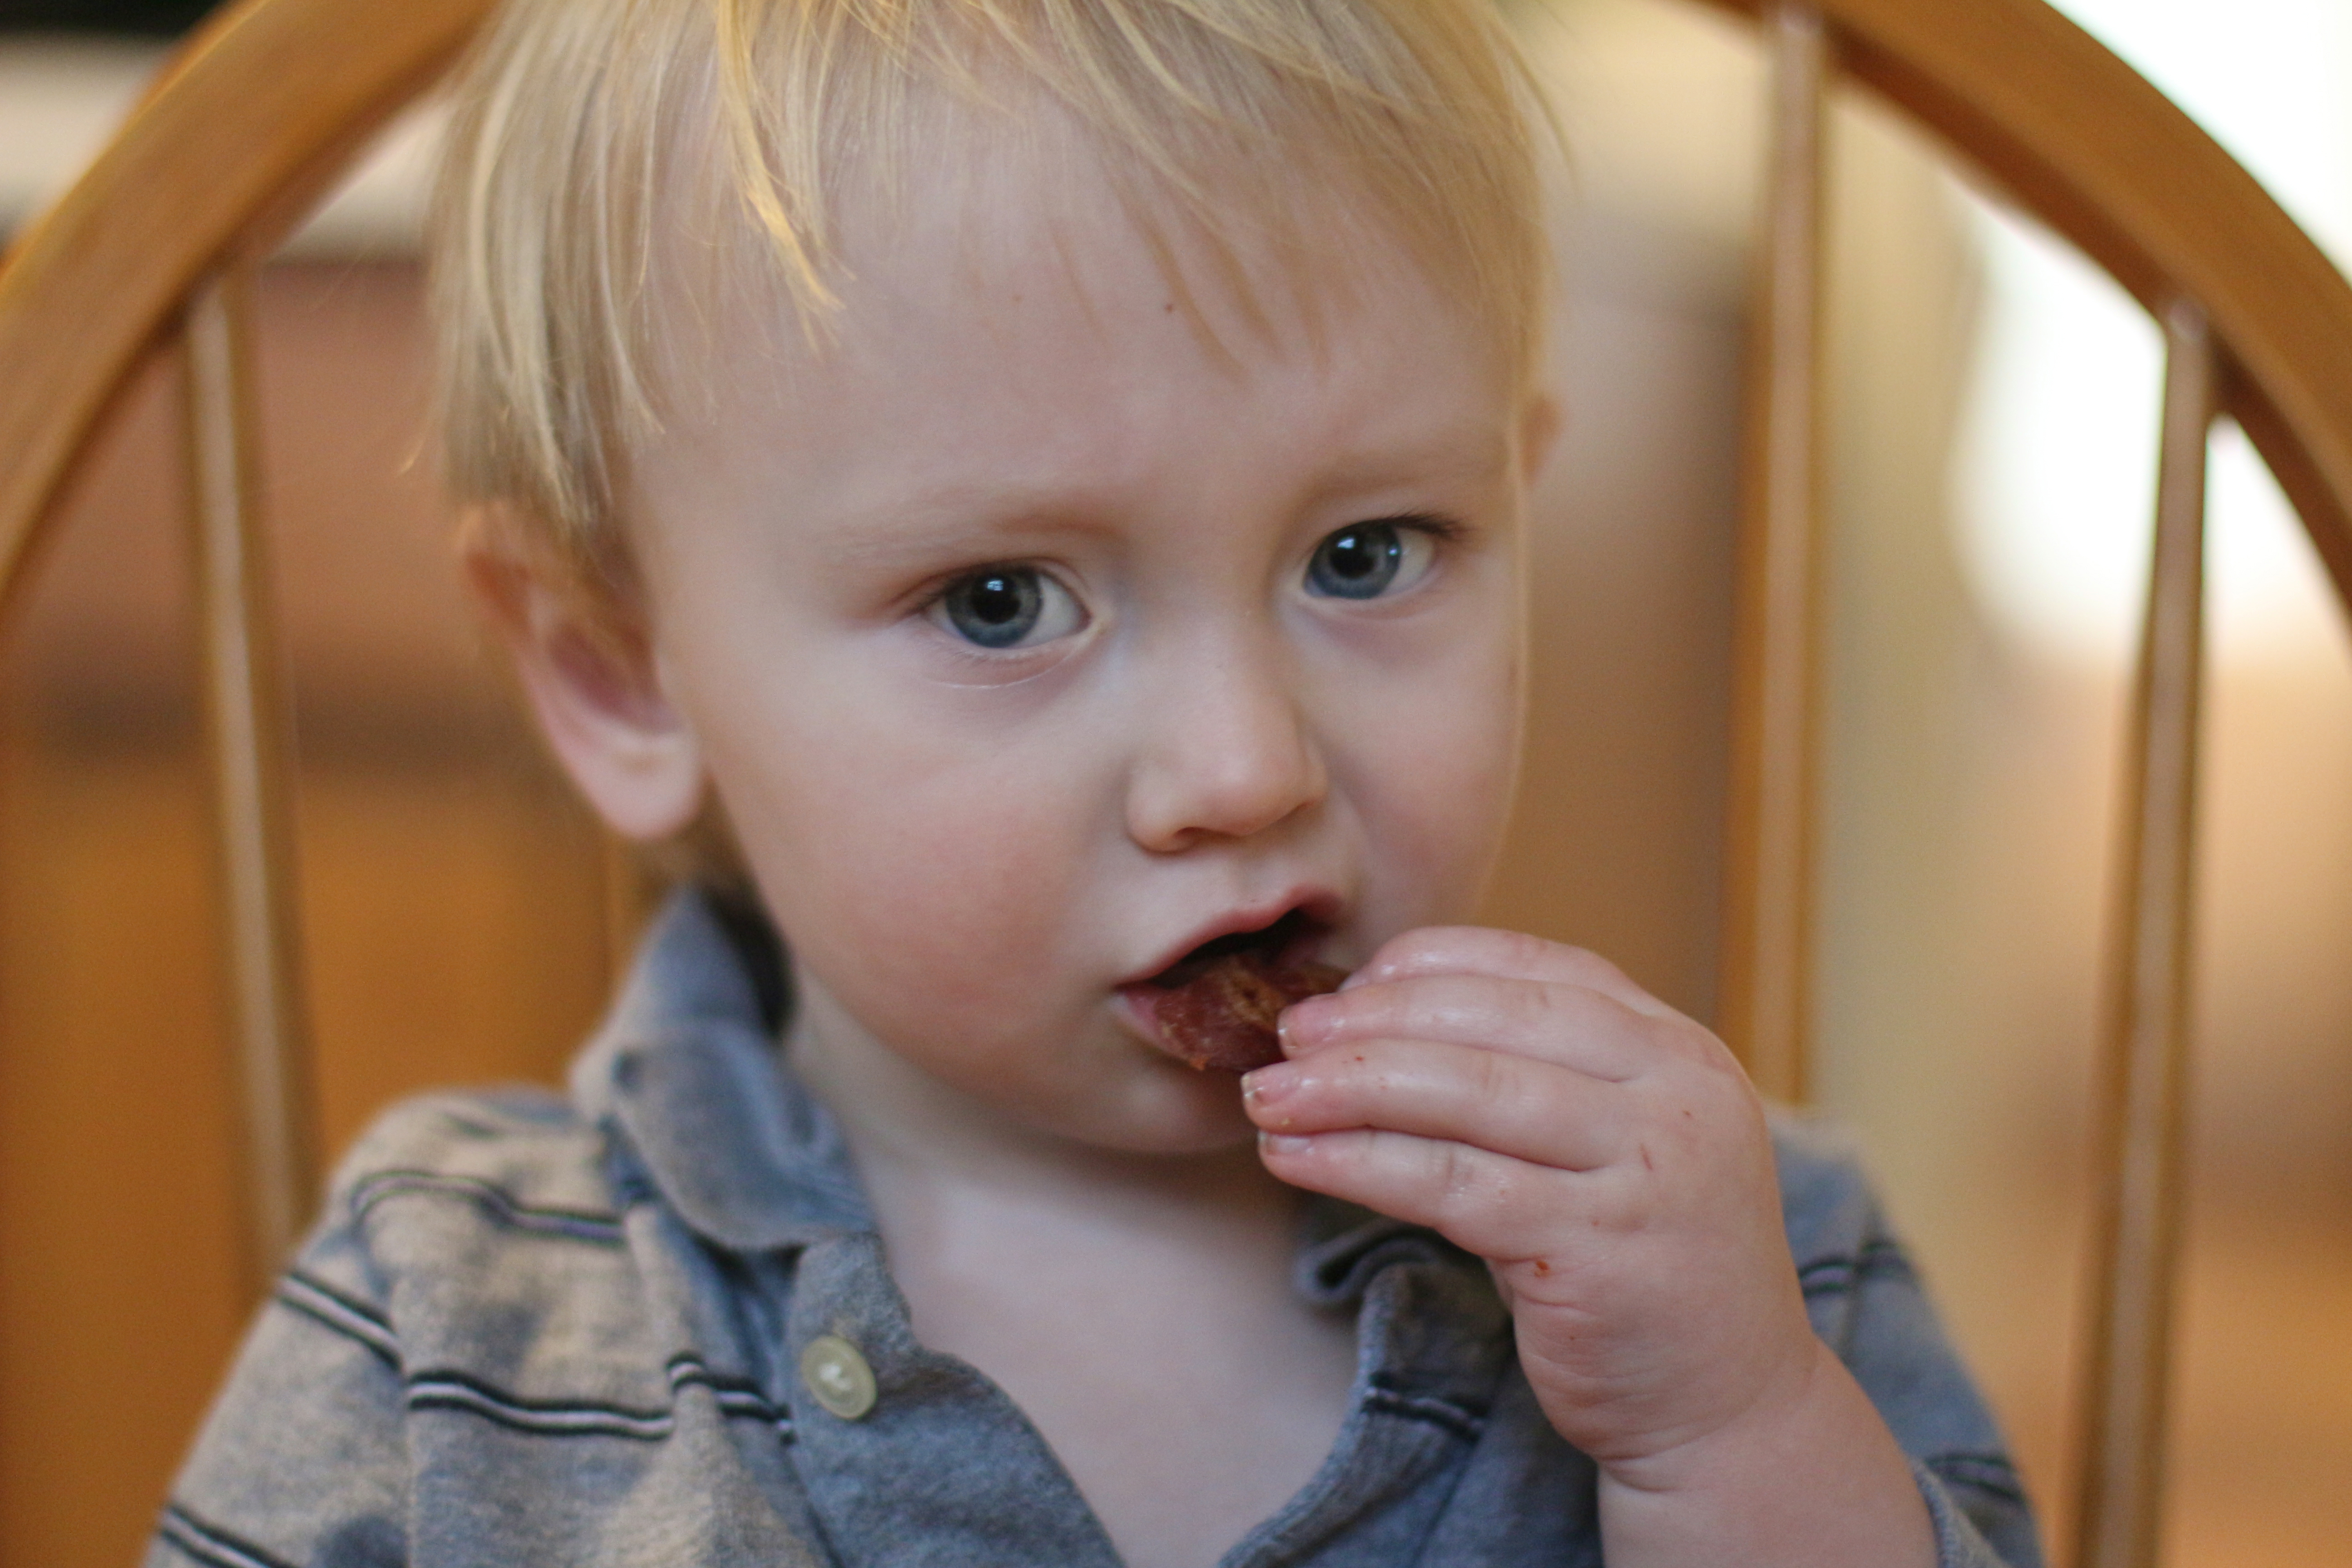
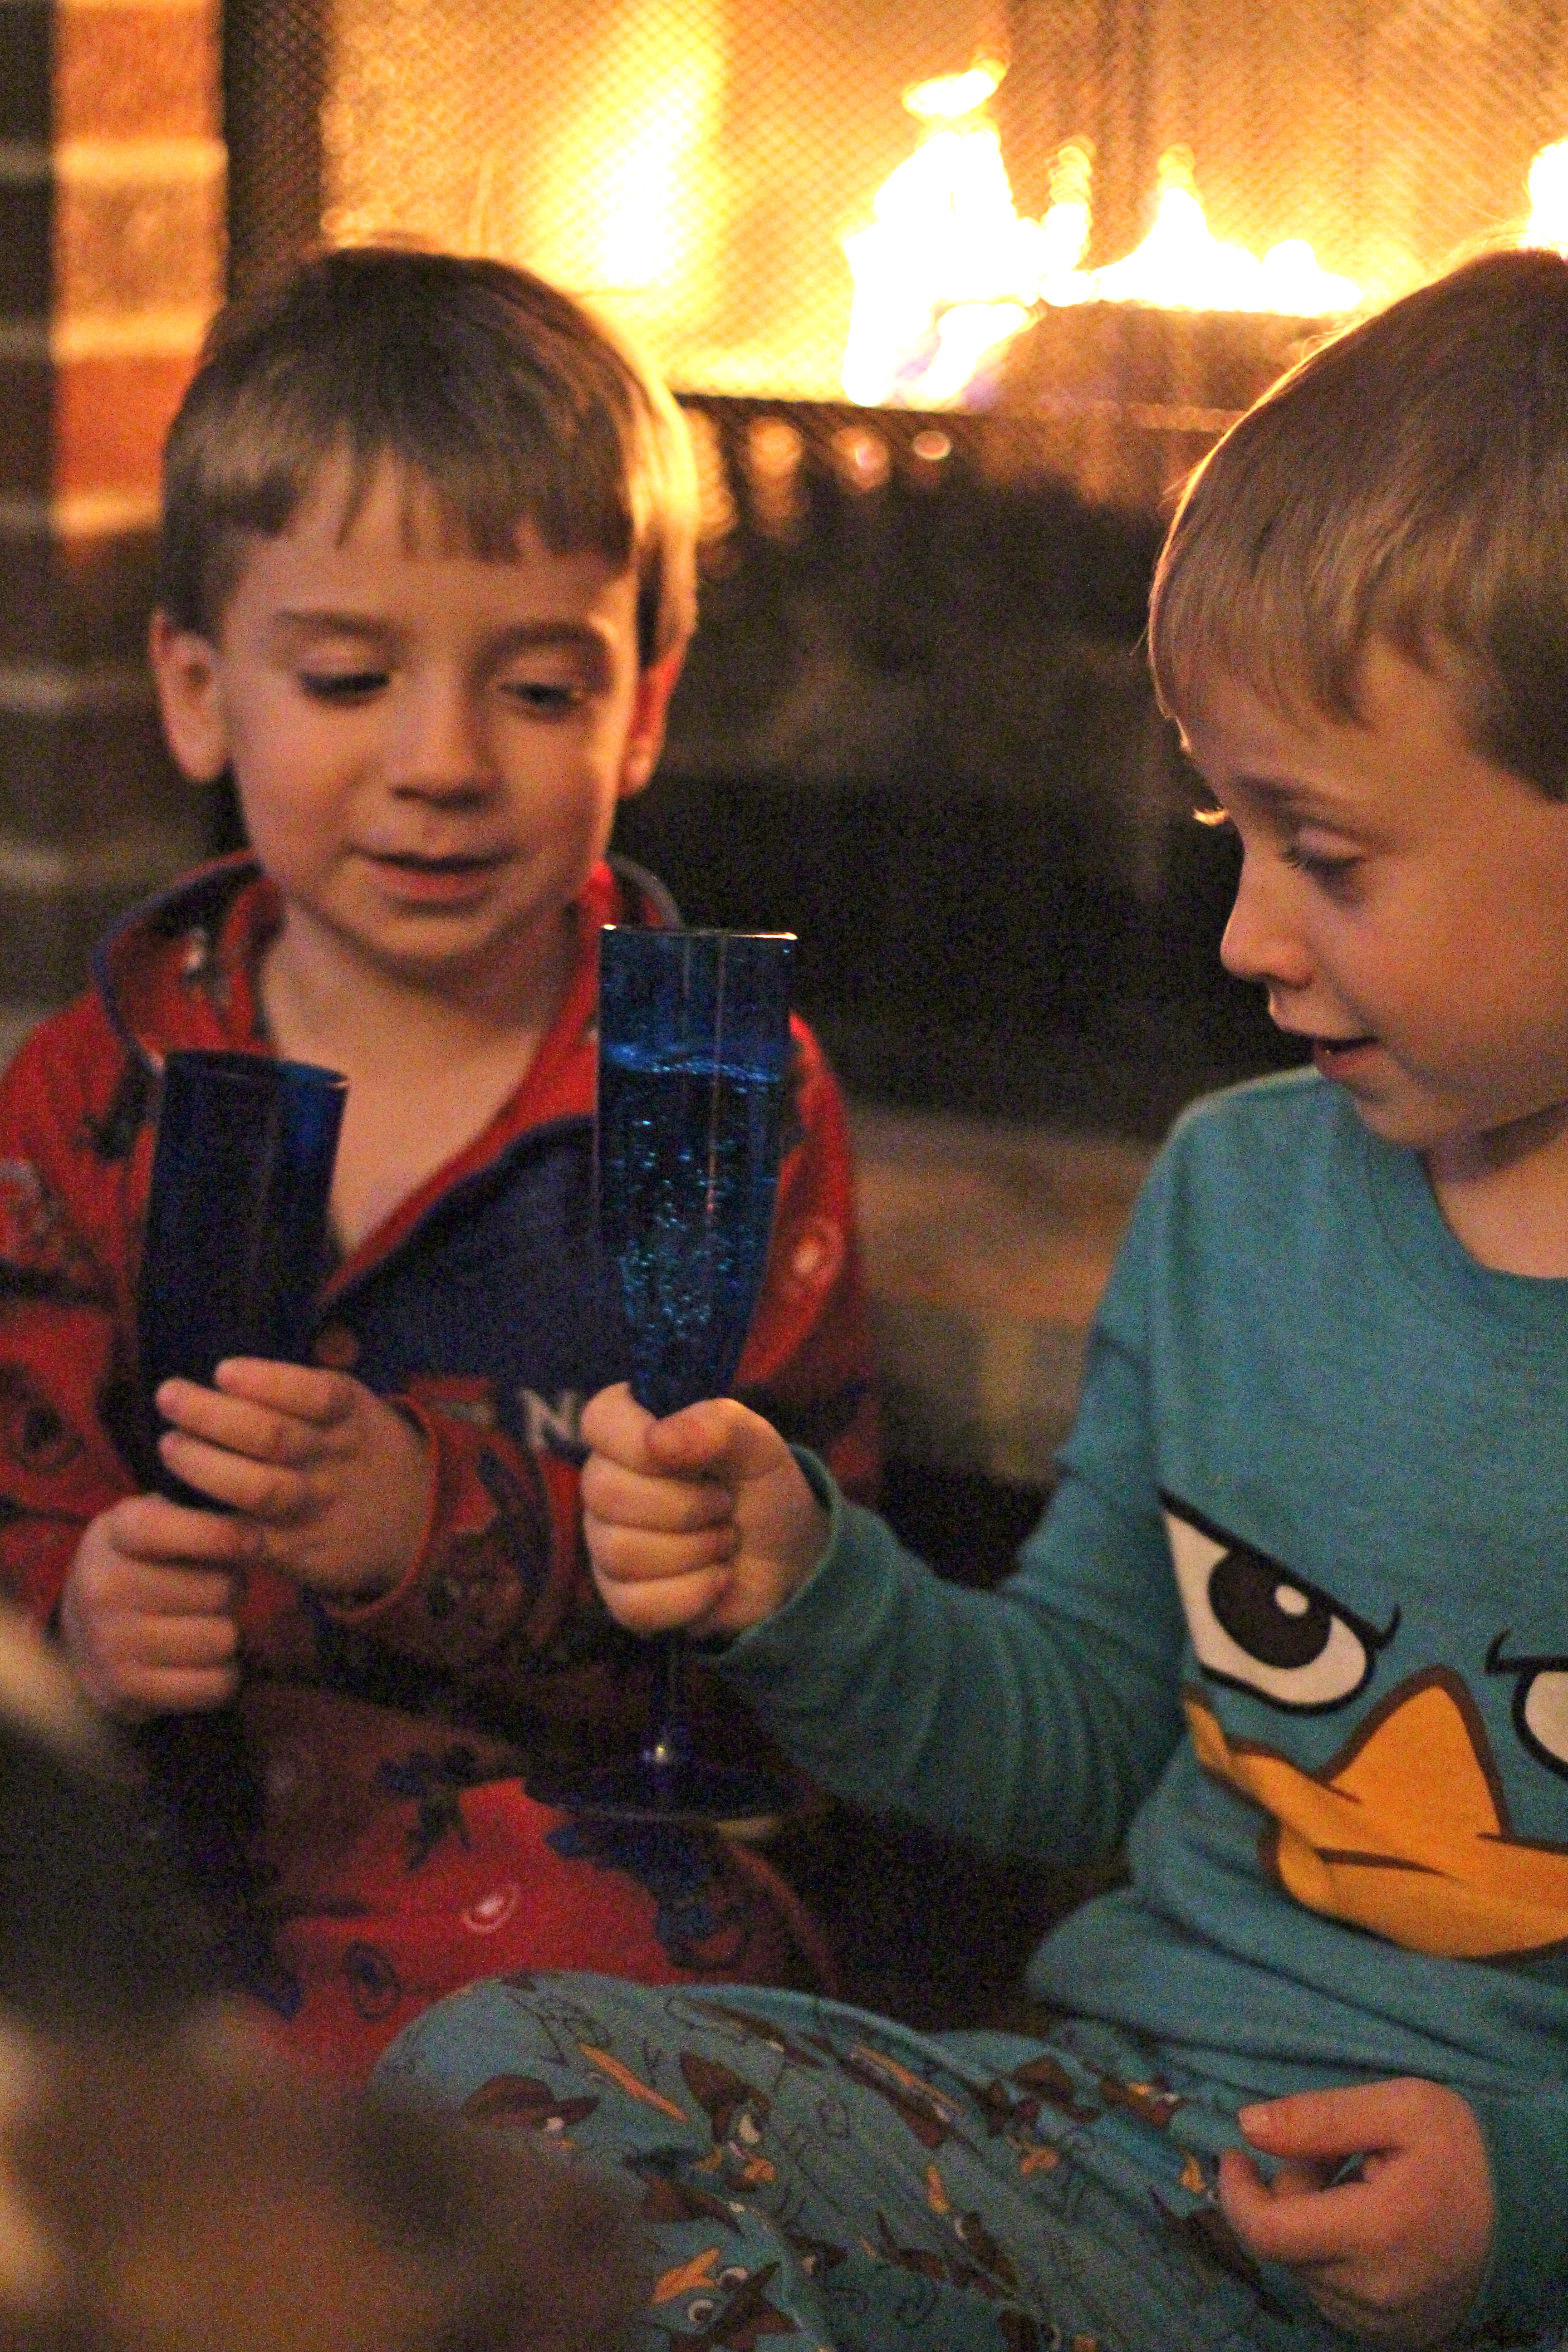
Liam stood up with his dinner plate, proud to show me that he’d eaten everything on it and making a point that he was going to put it properly in the sink. The rice, the sugar snap peas, the yogurt, and the chicken wings were all gone. You catch that?? The chicken wings were all gone. “Where are the bones?” I asked. “Huh…the bones?” came his innocent reply. “Yes, the bones. Where are the bones?” And then he proceeded to explain that he’d eaten the bones. Clever lady that I am, I knew this could not be the case. I had a hard time keeping that ever-important straight face by this point. I knelt by the edge of the table to find the discarded chicken wings before the dog did. I found those wings under the table. I also found five of the kids’ plates. Another mystery solved, Scooby.

IMG_5668

But the wings…the wings are delicious, even if Liam wasn’t interested in them. I’ve been watching what I eat in the new year, but whereas in the past I’ve messed up by going all-in from the start, then losing steam, I’m trying to take a more long-term balanced approach this time. I’m making smart choices most of the time, but not denying myself the opportunity to enjoy some good food and drinks when the opportunity is ripe, like during a girls’ night out with my besties. On our most recent girls’ night out, at one of our favorite local joints, we ordered the Asian sticky wings, which became the inspiration for this recipe.

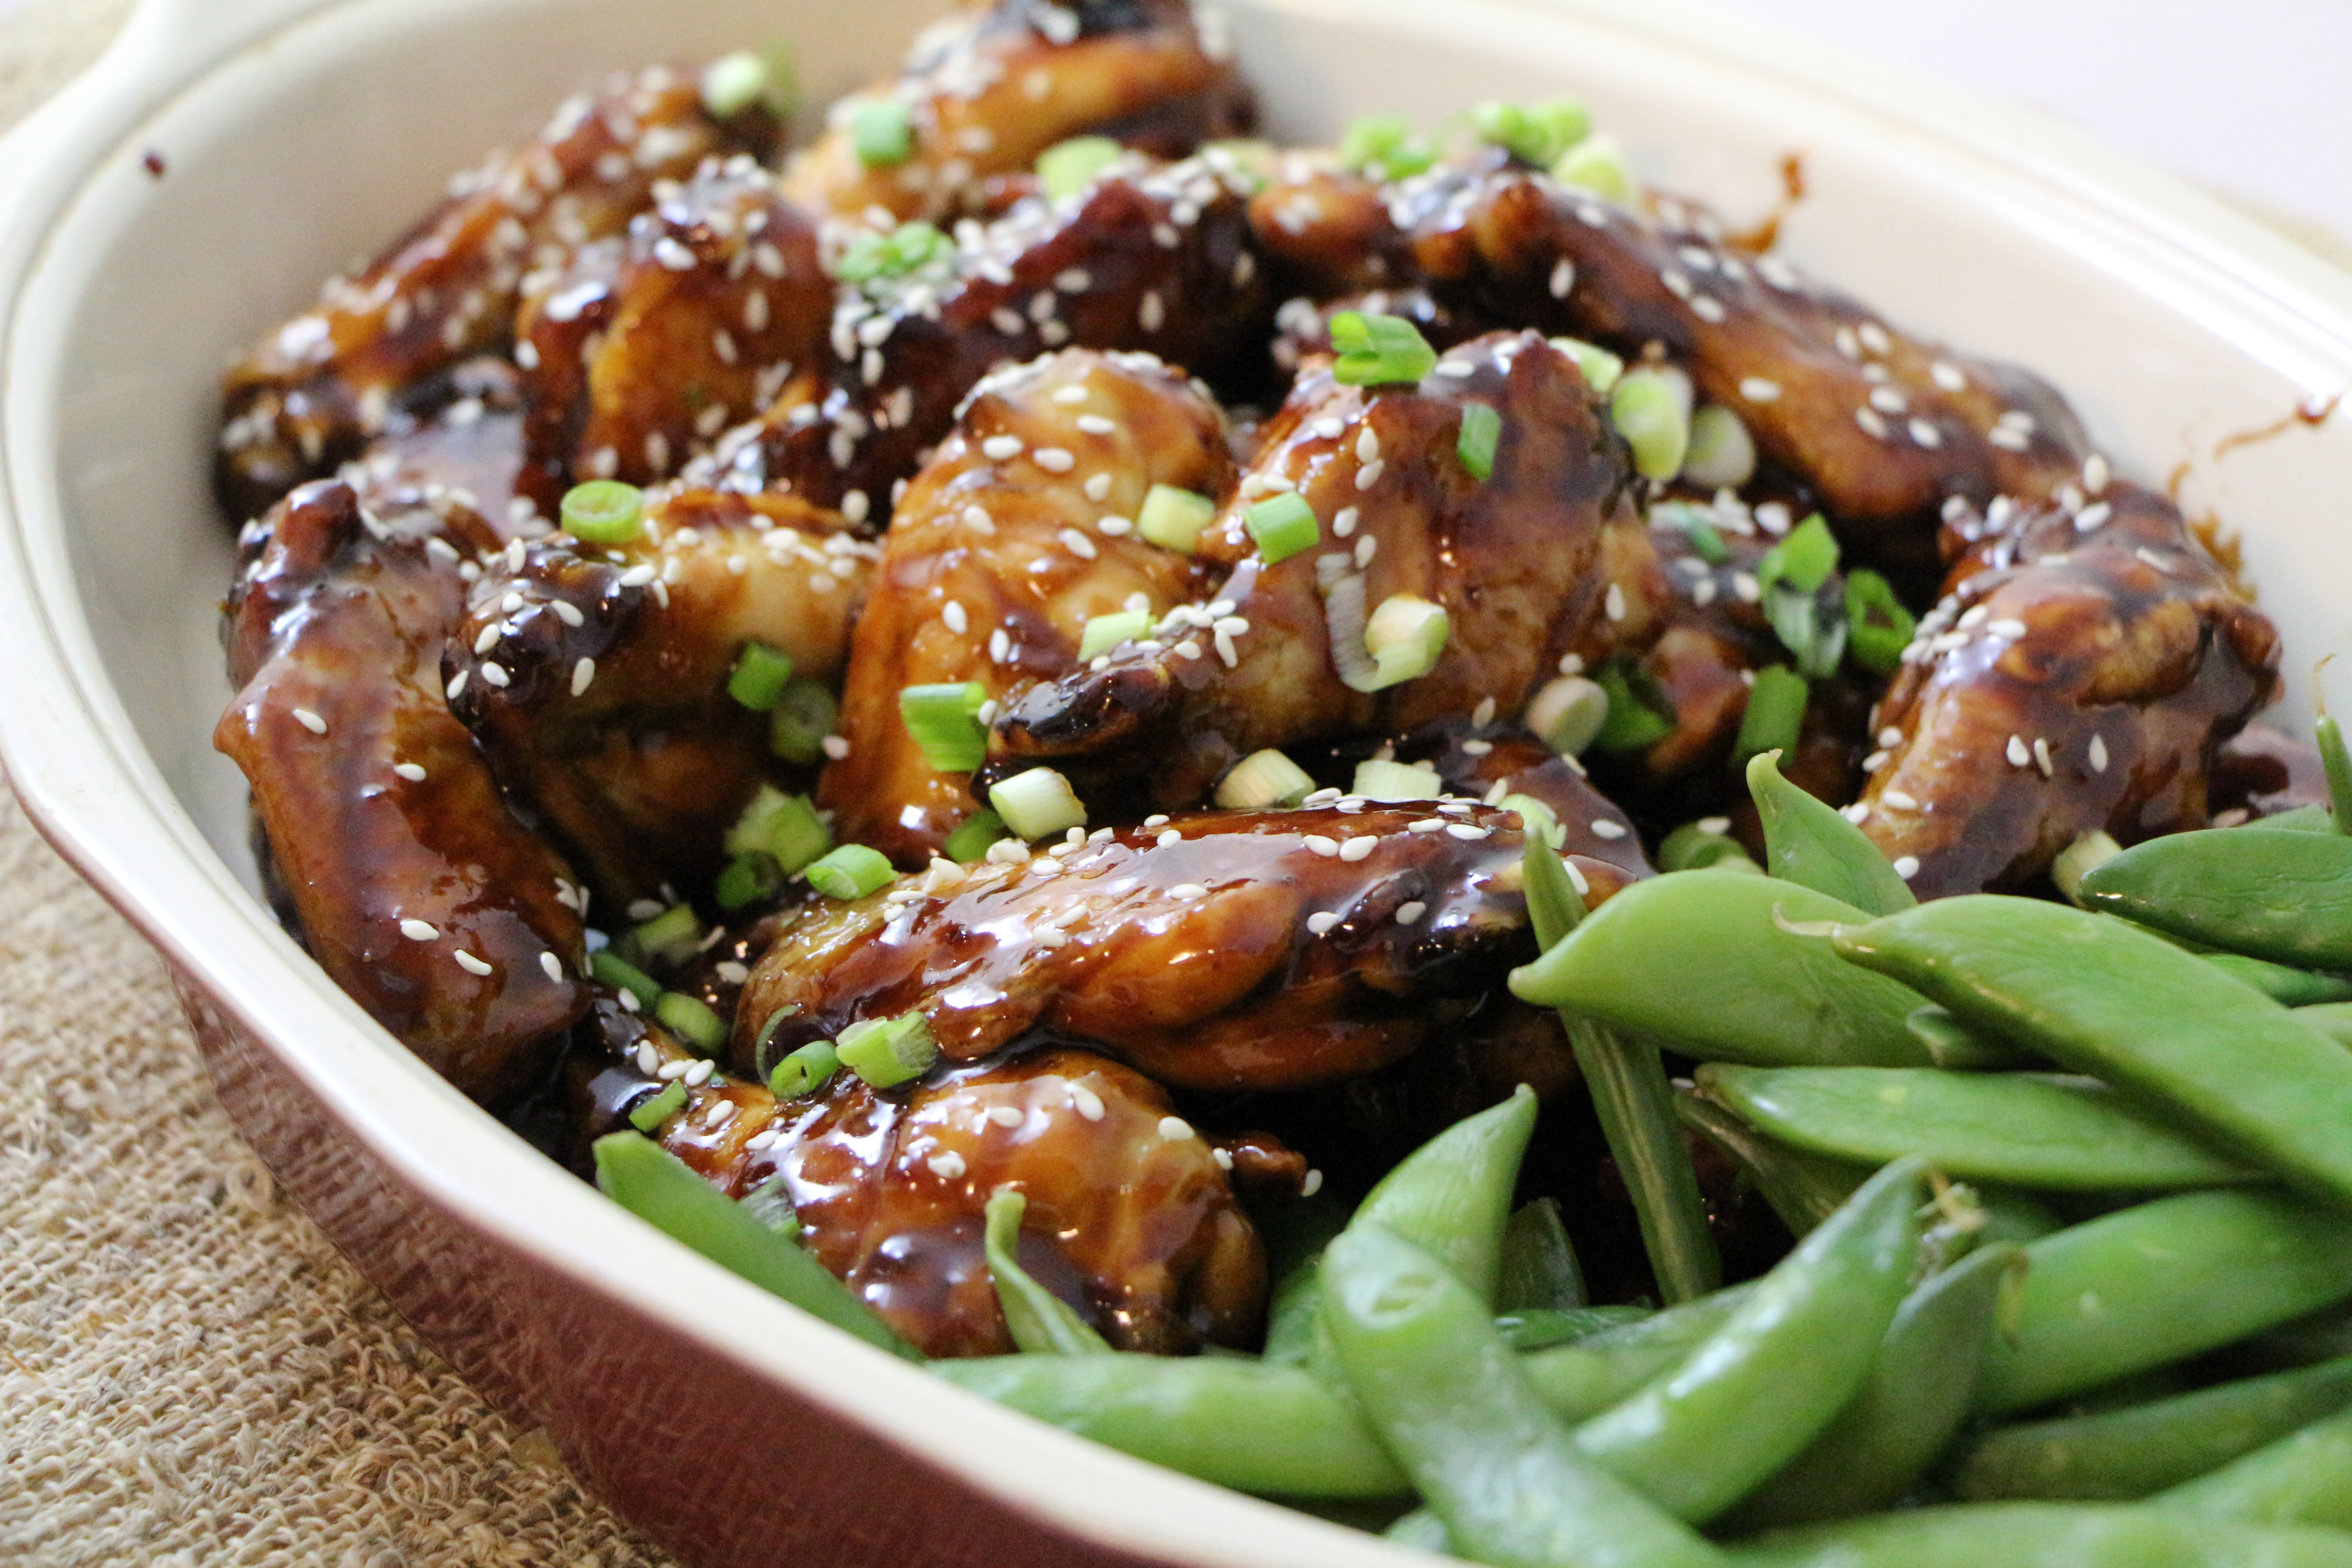
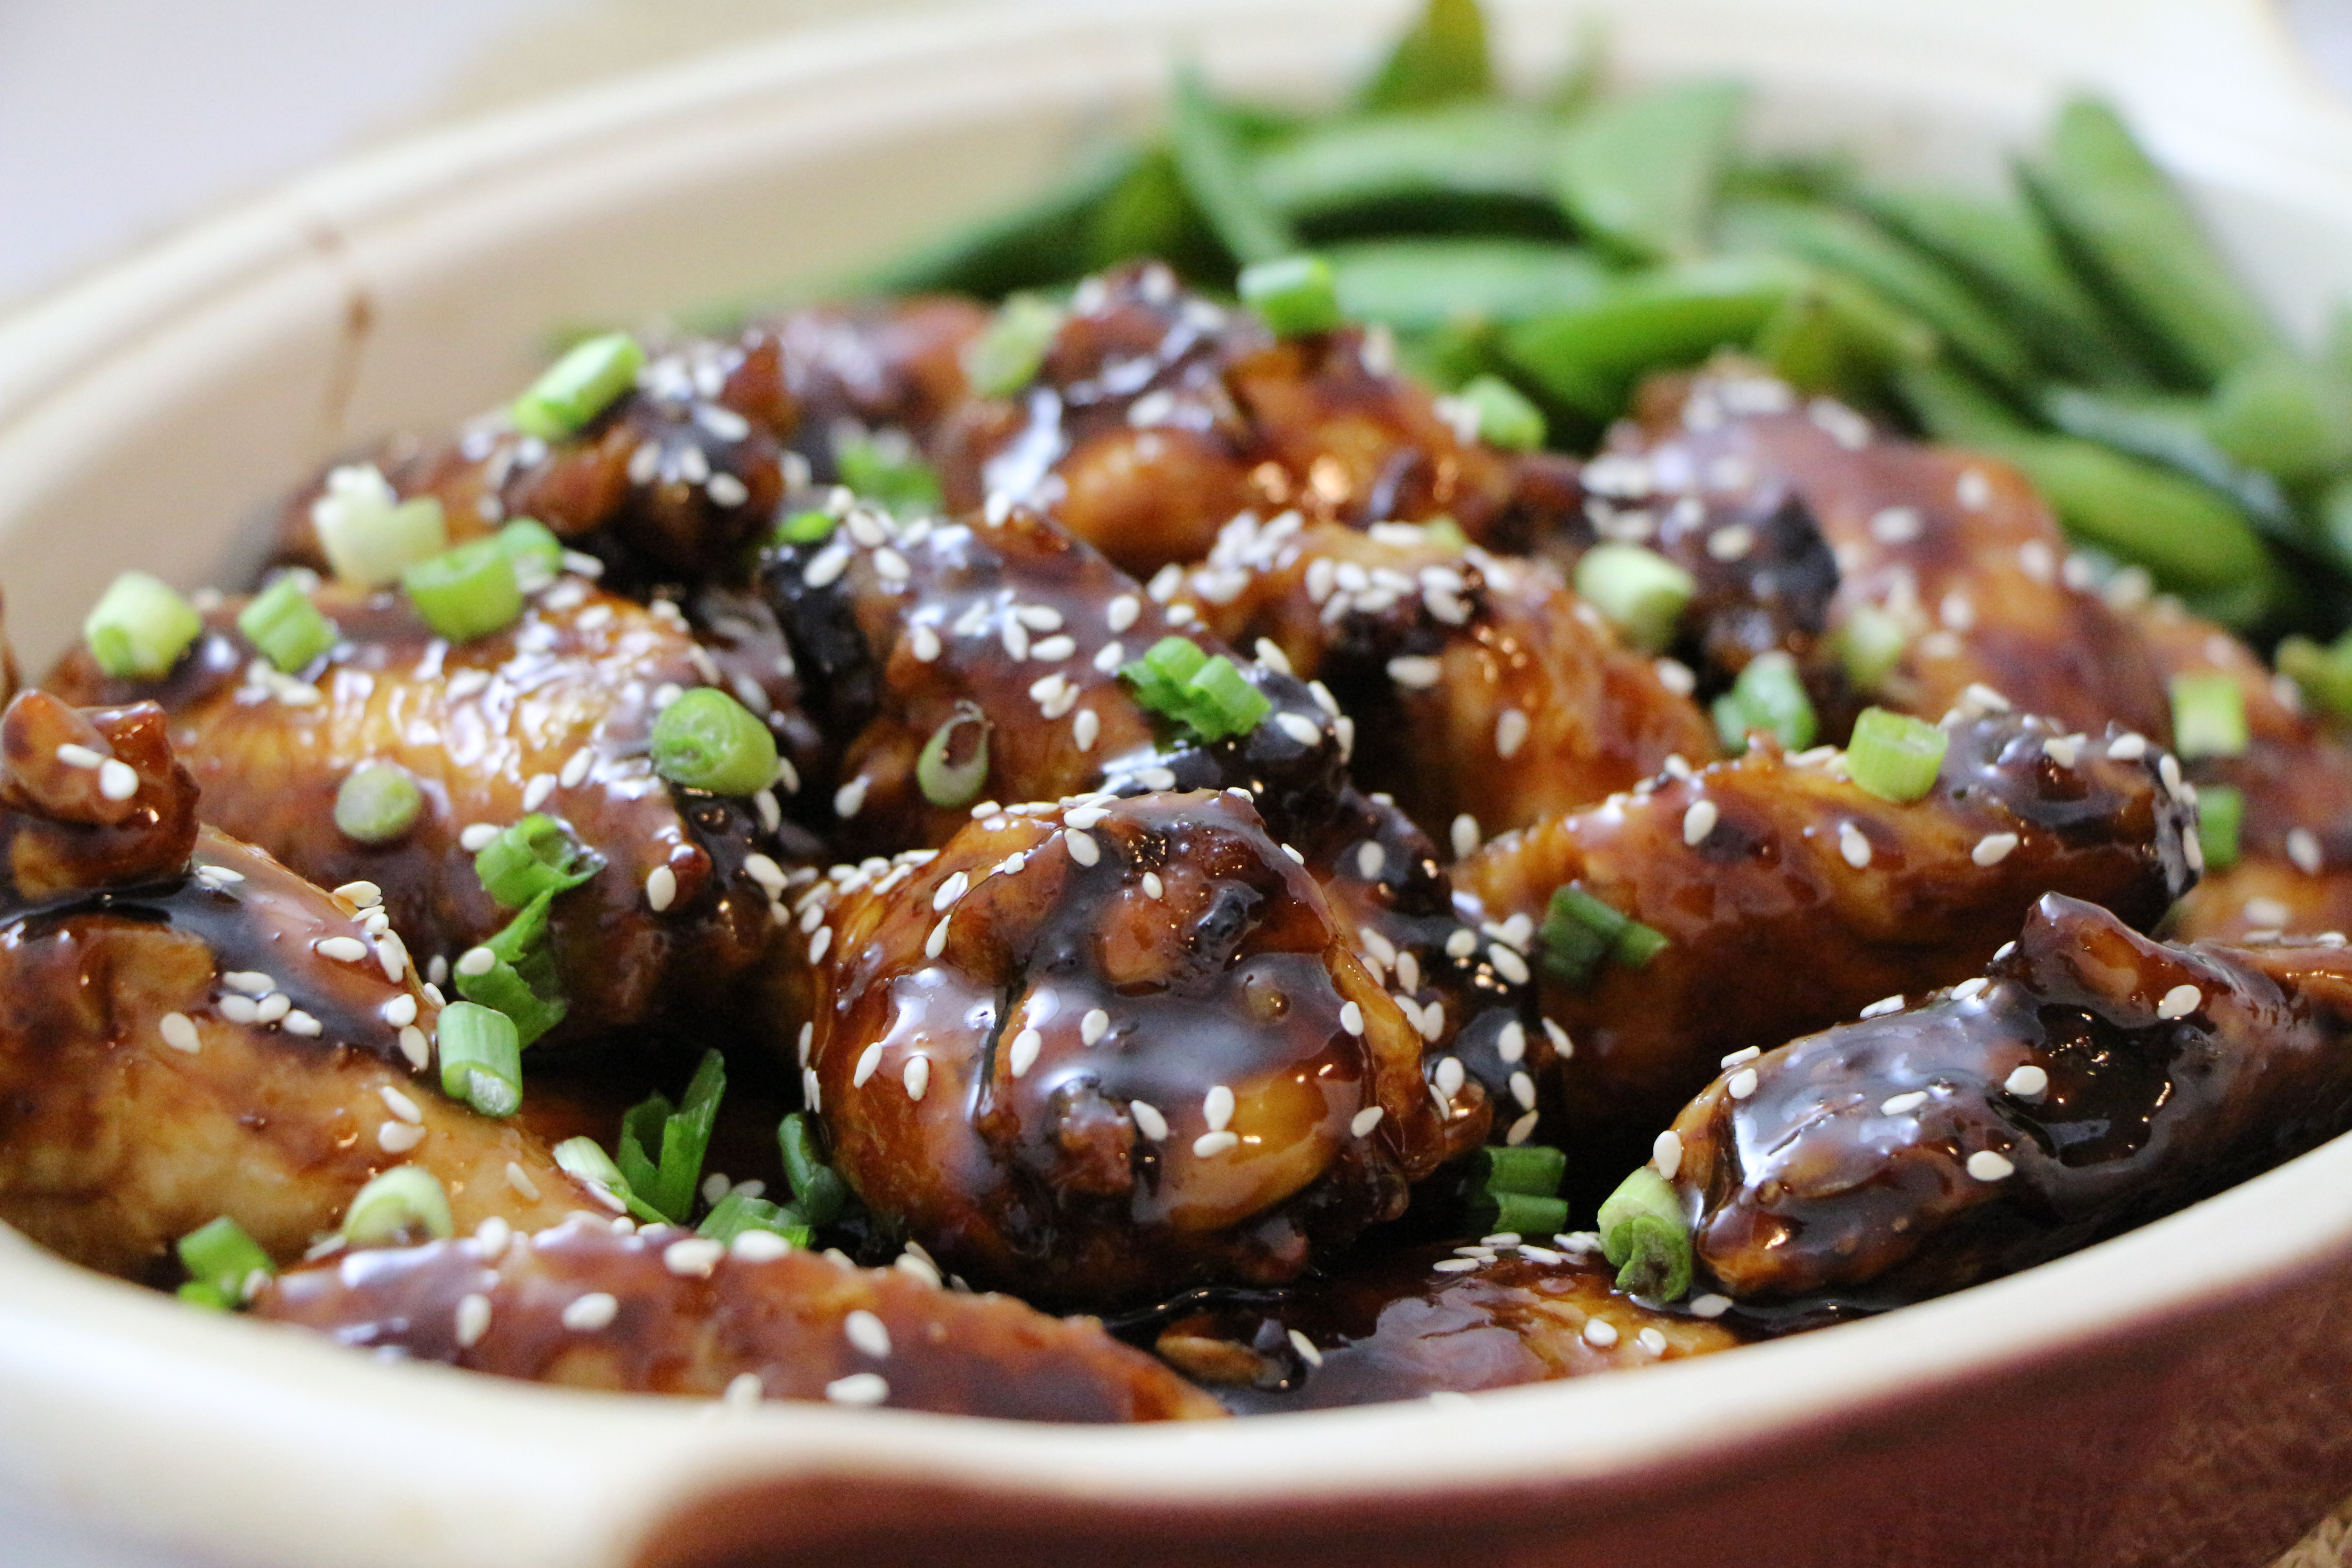
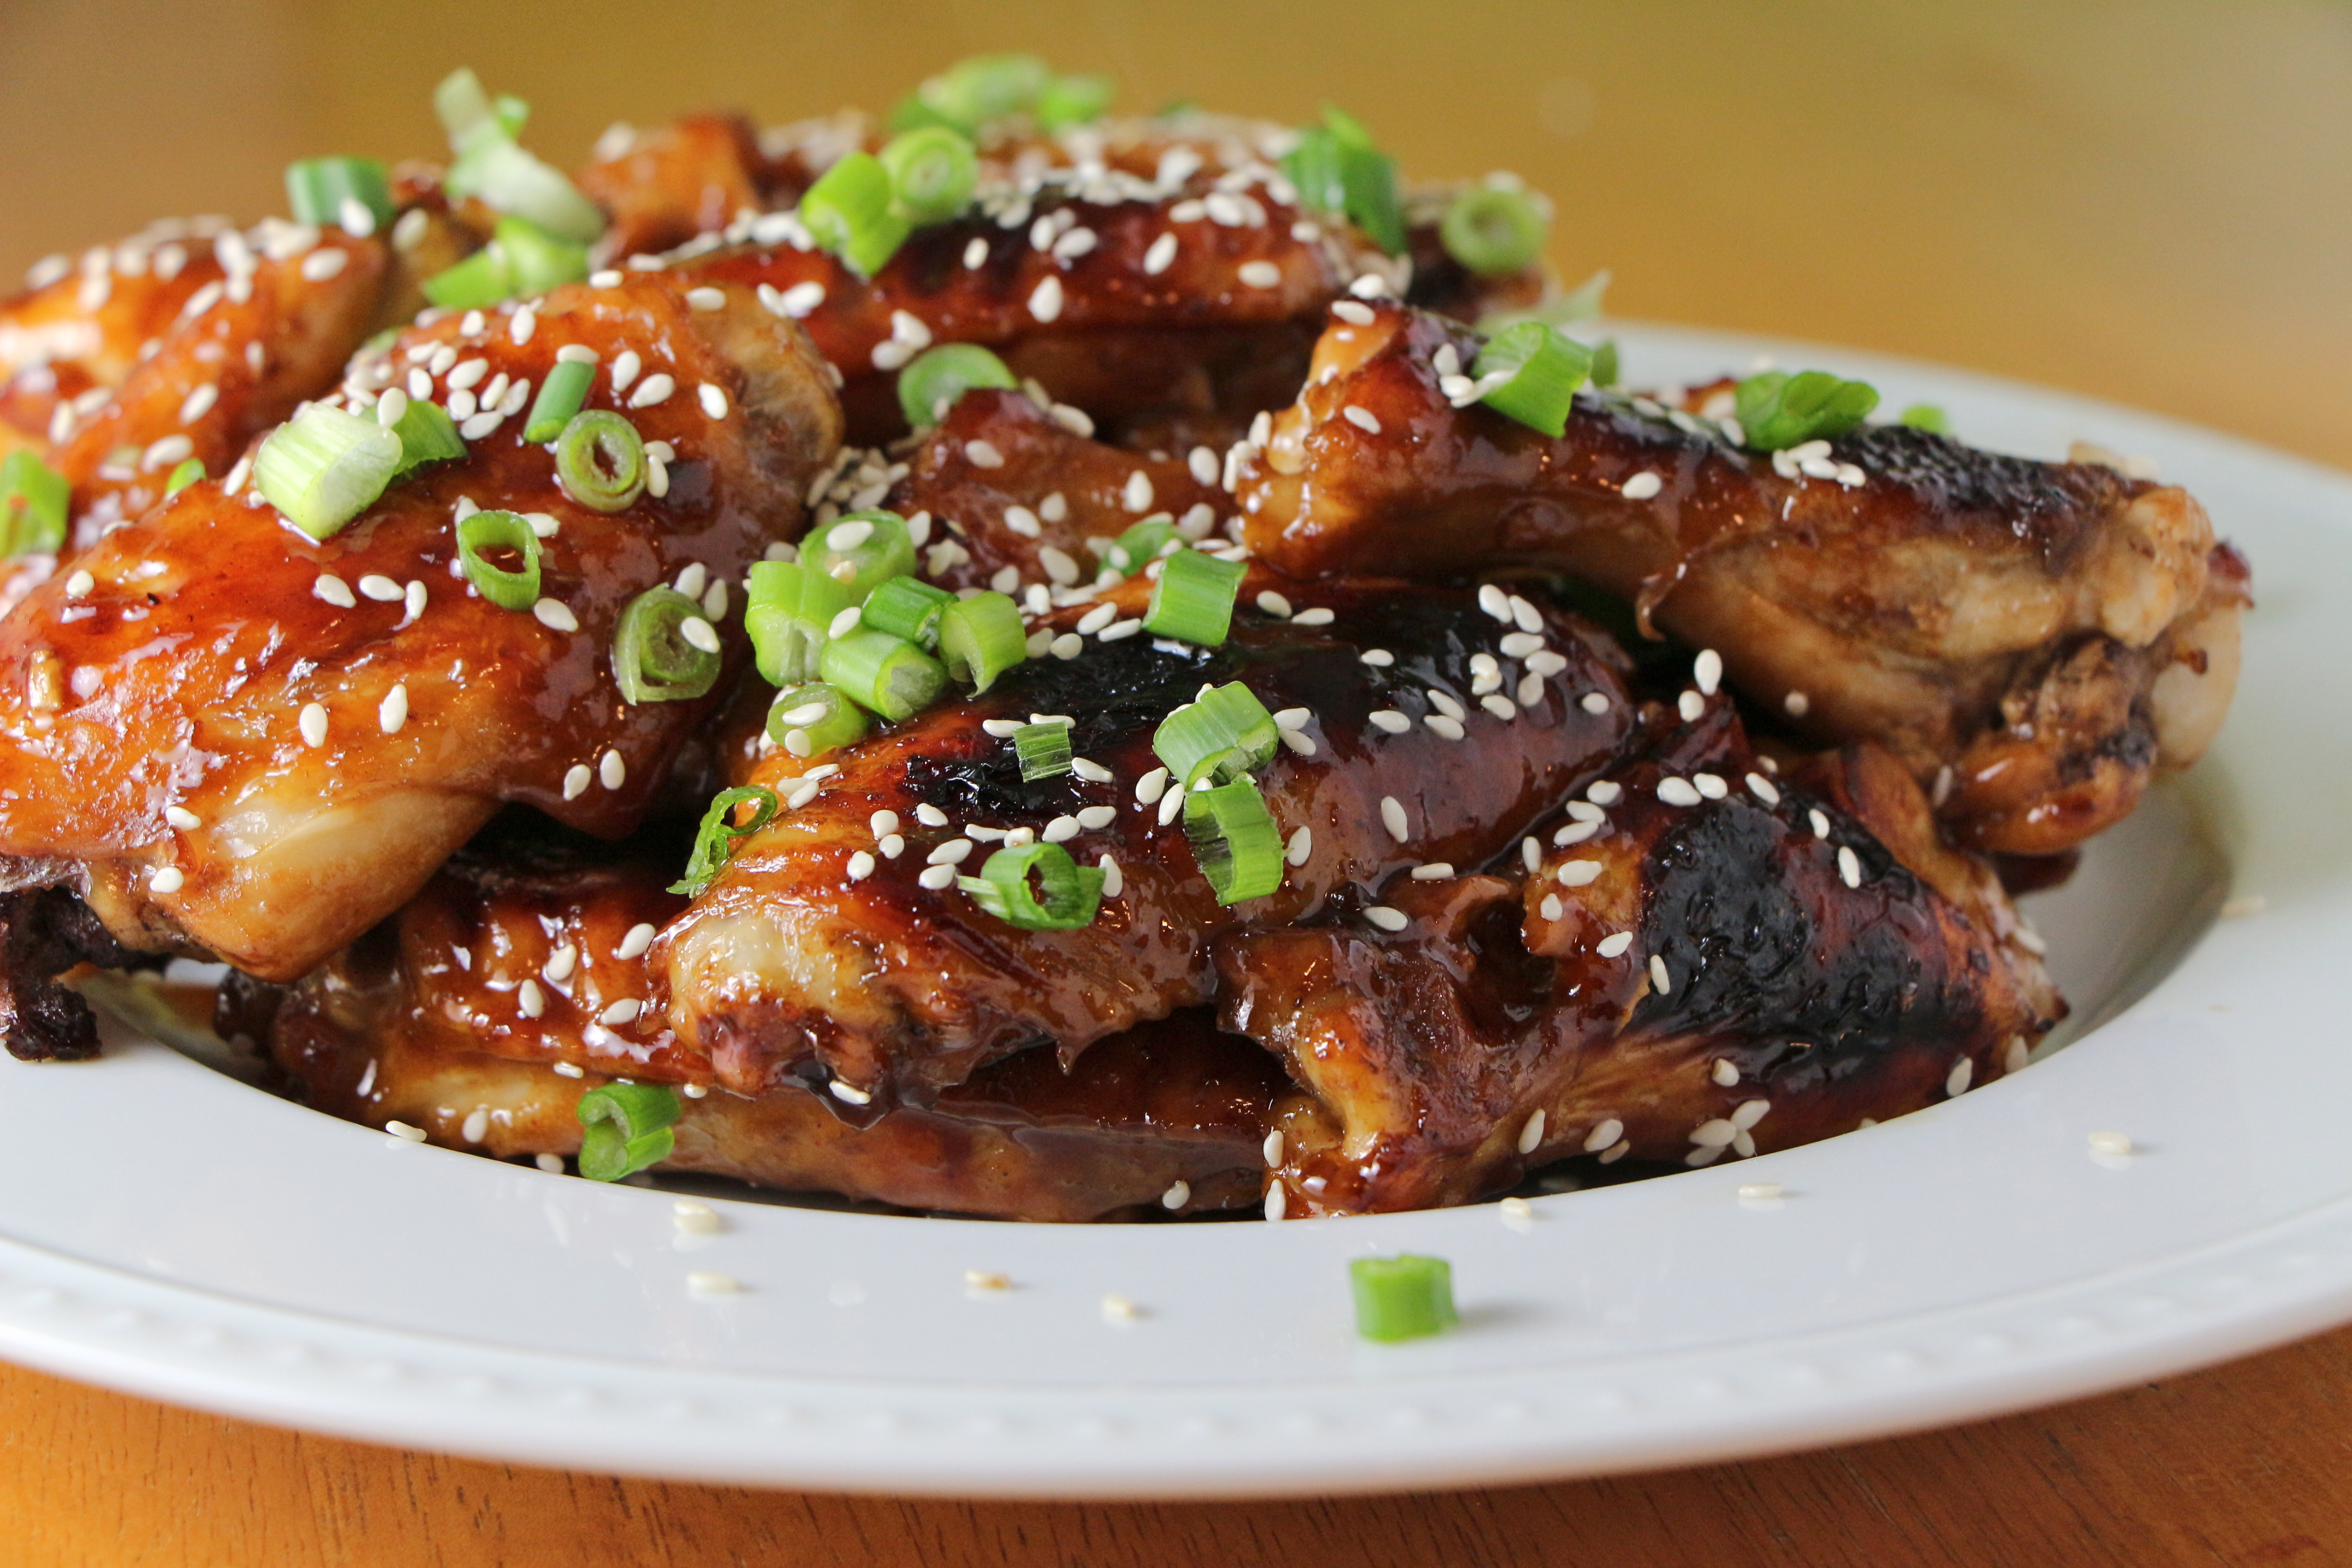
Healthy goals in mind, these wings are baked, rather than fried. I tried two different techniques in search of the crispiest result. While the resulting crispiness of the winning technique doesn’t quite match what you’d get from a fryer, they come pretty darn close. The secret is baking the wings on top of a rack, so that the excess juices drip below the wings, allowing the skin to become firm. A final few minutes under the broiler seals the deal with a golden brown exterior. Once cooked, the wings are tossed in a sweet Asian-style sauce, which has been reduced into a sticky, delicious glaze. They’d make a perfect addition to any super bowl menu!!

IMG_5677

Today’s Focus on Technique – Reductions

Cooking a flavored liquid by reduction is a method used in order to thicken the liquid and intensify flavors. It is typically used to prepare glazes and full-flavored sauces. To reduce a liquid, simply bring it to a boil in an uncovered pan. As the liquid evaporates, the remaining sauce will become thicker and more flavorful. It’s a wonderful technique for elevating the flavor-profile of a sauce. Using a pan with a wider base will spread the liquid over a greater surface area and increase the rate at which a liquid reduces.

Baked Asian Sticky Wings

Ingredients

  • Approximately 2 dozen chicken wings and legs
  • Juice from 1 orange (approximately 1/3 cup)
  • Zest from 1 orange
  • 1/2 cup honey
  • 1/2 cup hoisin sauce
  • 1/3 cup soy sauce
  • 1 1/2 teaspoons sambal oelek (or crushed red pepper, to taste)
  • 1 teaspoon garlic, minced
  • 1″ ginger root, grated (or 1/2 teaspoon ground ginger)
  • Sliced green onions and sesame seeds, for garnish

Directions

Preheat oven to 400 degrees. Set a rack on top of a baking sheet.  Arrange the chicken pieces in a single layer on top of the rack. Sprinkle with salt and pepper. Bake for about 40 minutes, then turn on the broiler. With the chicken several inches below the broiler, cook for 5-10 more minutes, until the exterior is golden brown and crisp.

While the chicken is cooking, prepare the glaze. Combine the orange juice, zest, honey, hoisin sauce, soy sauce, garlic, ginger, and sambal oelek in a saucepan. Bring the mixture to a bubbling boil over medium heat, stirring frequently. Allow the mixture to bubble away, uncovered, for approximately 10 minutes until the mixture has thickened to a glazy consistency. Taste and adjust flavor with additional honey, if a sweeter result is desired.

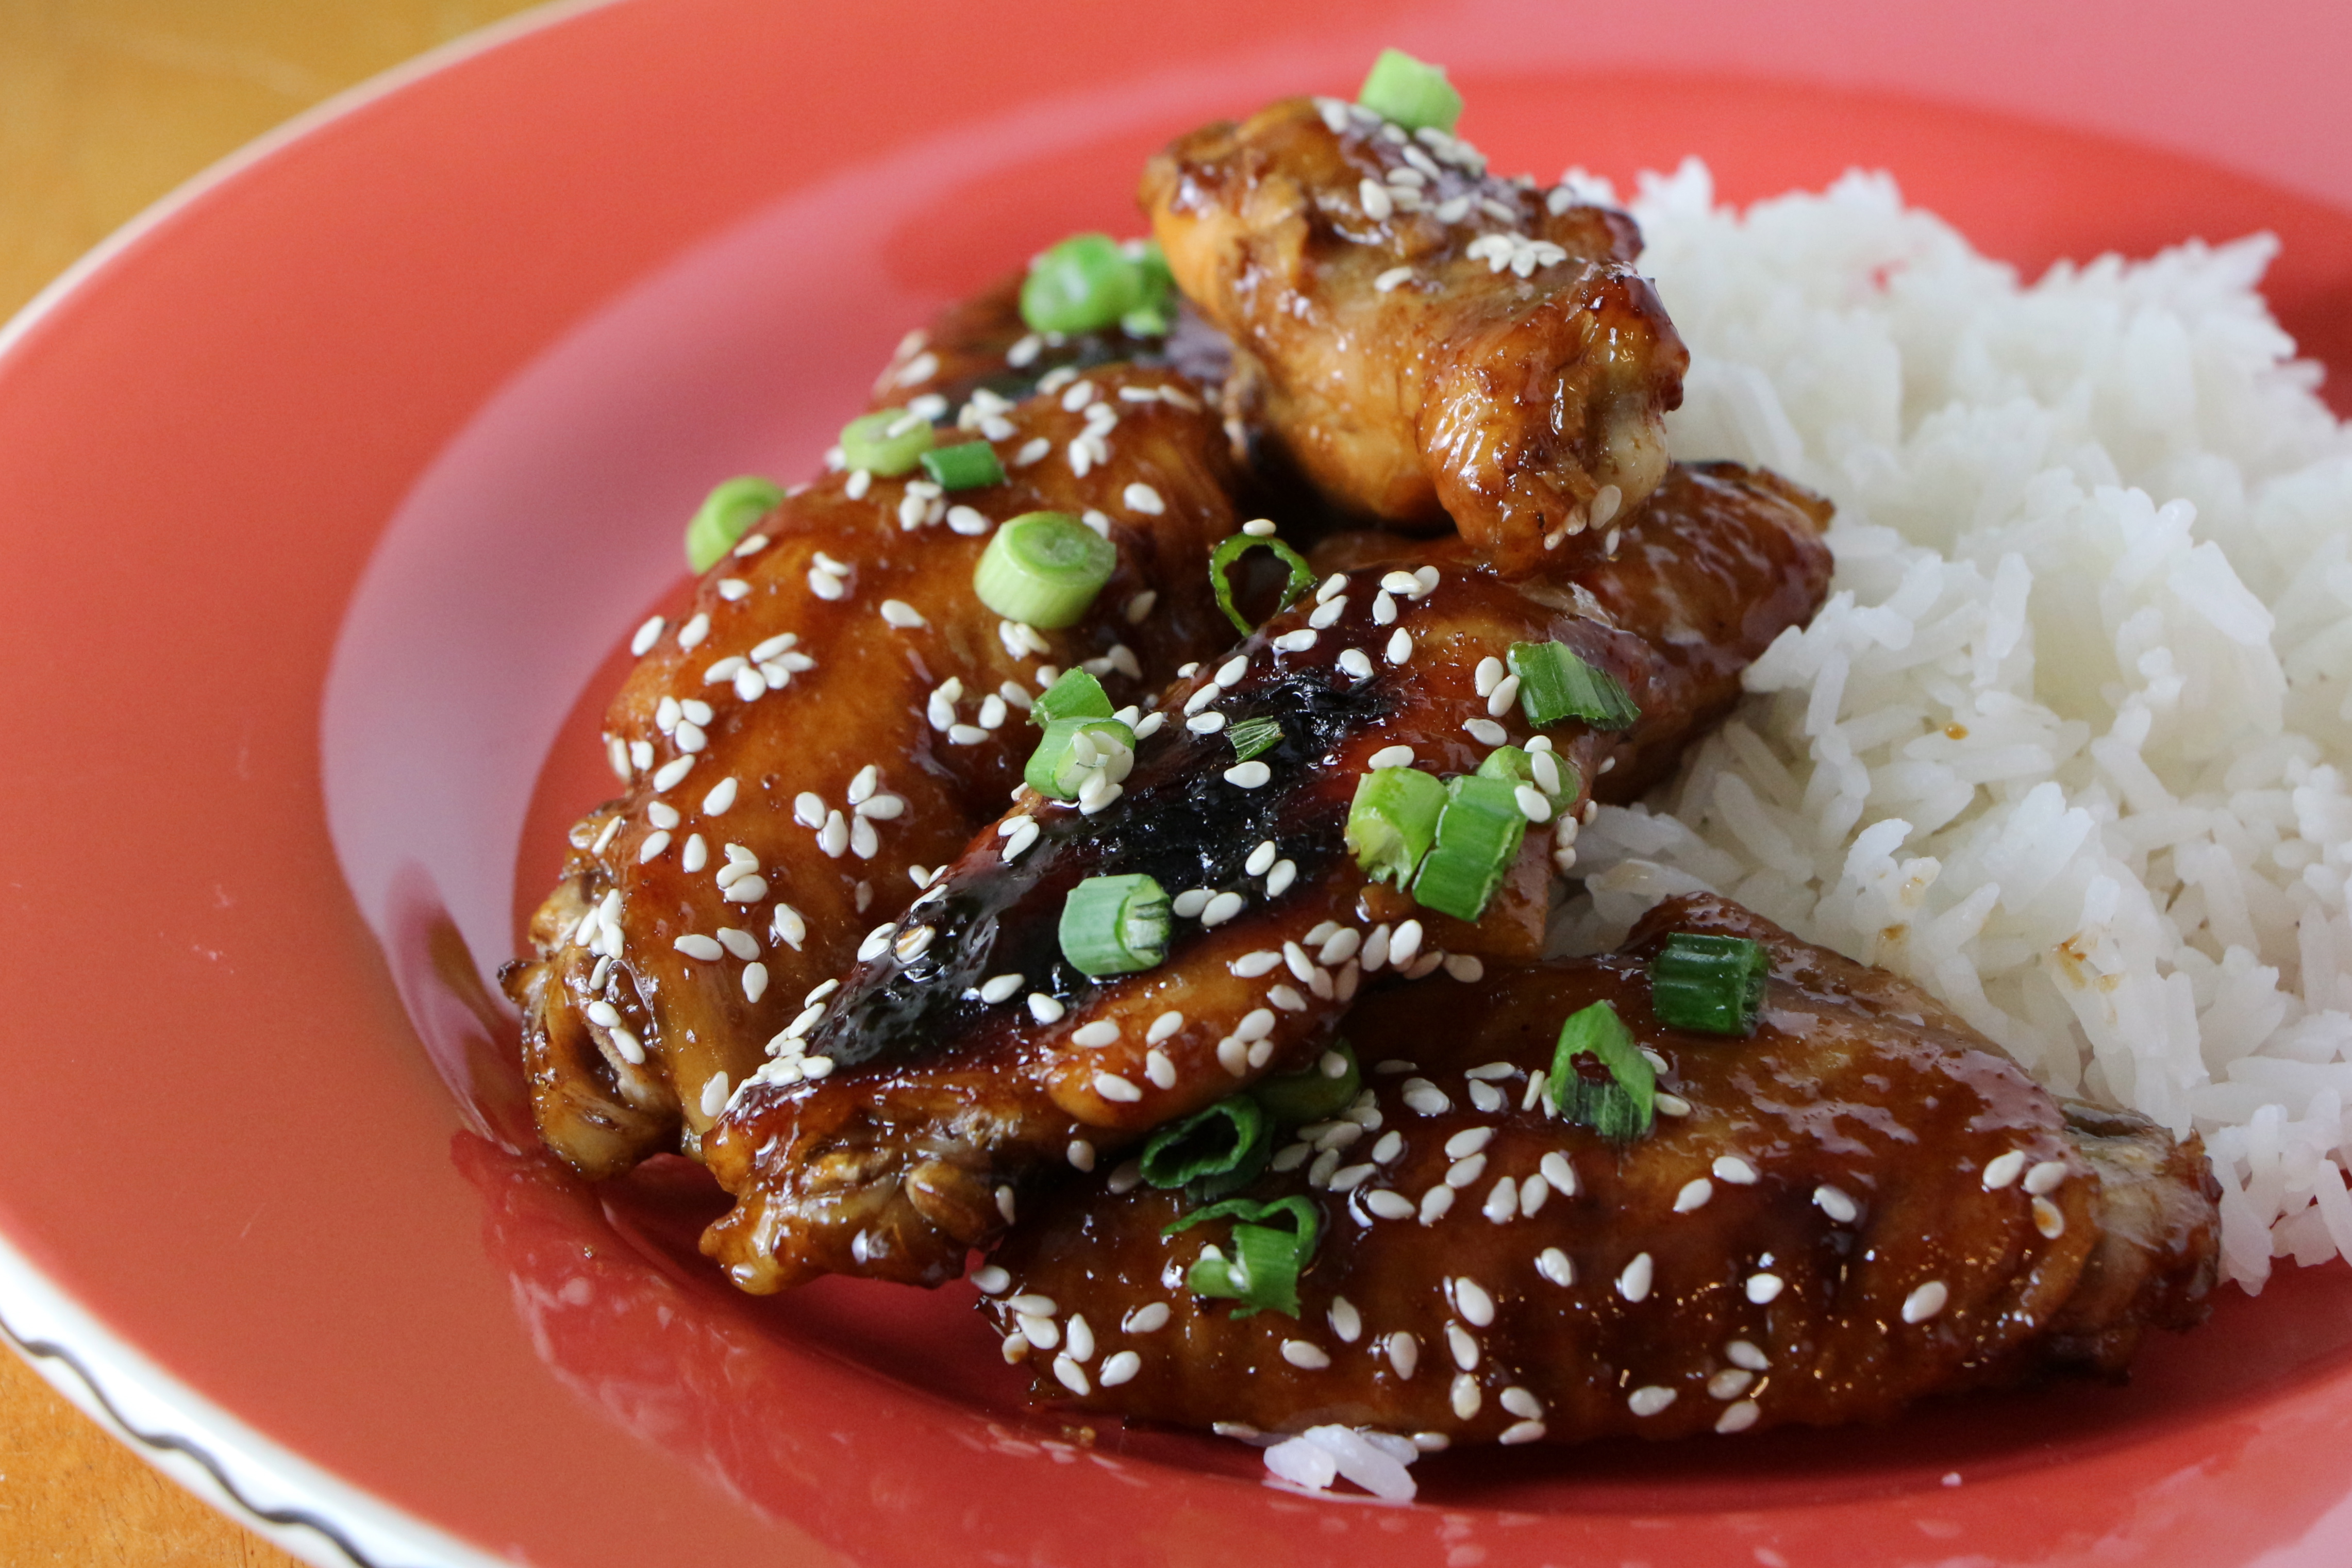
Toss the cooked wings in the warm glaze, then garnish with sesame seeds and sliced green onions. Serve with rice and/or steamed sugar snap peas.

Advertisement

Sweet and Spicy Honey Chipotle Infused Beets

Between the three boys’ birthdays, holidays, and my general love of entertaining, we host a good number of parties each year. So, it’s no surprise that we make regular trips to our local Party City.

IMG_5380

The curious thing is that visits to Party City have become high on the boys’ lists of favorite things to do. They ask for trips to Party City as rewards for good behavior. Musings about trips to Party City have even showed up in the boys’ school work. I’ve collected all varieties of art involving their favorite party supply store. Liam even listed it as his favorite place to visit in his kindergarten ‘All About Me’ book. And on last year’s Mother’s Day card, where every child in Liam’s class listed a reason they love their mother; things like She gives the best hugs, and She kisses all my boo-boos, and Her smile is brighter than the sun; Liam’s contribution was, She takes me to Party City. Clearly, I win the mother-of-the-year award.

IMG_5390

It’s like this mystical, magical land of party supplies and costumes. It’s pure fun, brightly displayed in a warehouse setting, with golden oldies playing in the background. There’s a wall covered in balloons, buckets full of candy and toys, and a whole rack of wacky sunglasses. What kid wouldn’t love Party City? But my boys take their love further than most.

So, I shouldn’t have been surprised about what happened as we were walking past Party City on a recent excursion for boots. We’d exited Famous Footwear, with James in his stroller and the boys in tow. As we neared Party City, the energy become palpable. James’ Elmo-radar activated at the sight of a 9-foot tall cardboard Elmo in the window. He began manically chanting Elmo, Elmo, Elmo as the boys bounced ahead of us. Liam and Lucas were buzzing on pure adrenaline by this point. As we began to make our pass, the automatic doors to Party City opened, as if by command of the boys’ enthusiasm. Keep moving, I instructed. Keep moving.

IMG_5410

But they didn’t keep moving. They just stood there; the two boys, side by side in the open doorways of their beloved Party City, as the cold winter weather rushed into the warm dreamland of party supplies. And then, in eerily perfect unison, they shouted into the bellows of the party warehouse, WE LOVE YOU, PARTY CITY!! WE LOVE YOU!!!!!!!!!!!

What I would give to see the security footage of that moment!

IMG_5486

Like many others, I’ve been watching what I eat in the new year. As such, I’ve been dining on more salads than sandwiches and more scrambled egg whites than pancakes. But I need bold, satisfying flavors in my salads to keep me interested and keep me on track with my goals. Tender, slow-roasted beets which are infused with the sweet and spicy flavors of honey and chipotle have been providing exactly the sort of intense flavor I desire in a salad. Combine them with a bit of crisp and salty applewood-smoked bacon and a few crumbles of goat cheese, on top of a big pile of mixed greens tossed in a white balsamic vinaigrette and you’ve got a salad I would crave no matter what my fitness goals!

Today’s Focus on Technique – Uses for Beet Greens

Don’t let those gorgeous beet greens go to waste! They are delicious and good for you too! Use them in the same way you might use spinach, kale, or collard greens. Add them to salads, soups, sandwiches, or smoothies. Sauteé them with a bit of olive oil and garlic or bake them up like crispy kale chips.

Sweet and Spicy Honey Chipotle Infused Beets

Ingredients

  • 5-6 medium-sized beets
  • 1 cup apple cider vinegar
  • 1/2 cup honey
  • 2 chipotle peppers (from a can of chipotle in adobo), very finely diced or pureed

Directions

Preheat oven to 350 degrees. Cut the top and bottom off of each beet. Rinse the beets, them securely wrap them in a piece of aluminum foil. Place the foil packet into a baking dish, then bake for about 90 minutes, until the tip of a knife inserts easily. Allow the beets to cool at room temperature. When cool enough to handle, use your fingers to slip the skins from the beets. (This will work best when they’re still slightly warm.) Alternately, you can use a knife to remove the skin. Cut the beets into fourths or eighths. Place them in a bowl. In a separate container, whisk together the apple cider vinegar, honey, and chipotle, until well blended. Pour the mixture over the beets, so that they are covered by the marinade. Refrigerate for a few hours.

Serving Suggestion – Serve your roasted, flavor-infused beets as part of a salad. Toss mixed greens (throw in the beet greens too) in a white balsamic vinaigrette (like the one used here). Top the greens with the beets, crumbled bacon, and a few crumbles of goat cheese. Vegetarians can substitute a small handful of pistachios for the bacon for equally delicious salty flavor and crunch.

IMG_5463

Bacon-Mushroom Stuffed Chicken Breasts

One evening, when my sisters and I were young, my parents left us eating our dinner at the kitchen table. My father was in the swimming pool, cleaning it from the inside with one of those large nets for fishing out fallen leaves. My mother was standing outside the pool, chatting with him as he worked. And we, my two younger sisters and I, were calmly enjoying our dinner. Calmly, that is, until our youngest sister dug her fingers into either side of the stick of butter which sat on the table, grabbing handfuls of butter in each hand, which she then proceeded to eat. Straight up mouthfuls of cold butter.

My sister and I were appalled…the fingers in the communal food…the ingesting of pure milk fat. We were certain that our parents would want to be informed of this major dining transgression. If they’d taken away my sister’s knife privileges after she’d licked a butter knife, they would almost certainly take butter away from our youngest sis. Right?? And like many young siblings, we smugly delighted in the prospect of the other’s consequences for poor choices.

So, my sister and I go running outside, shouting, “Mommy, mommy, mommy,” who was in the middle of a conversation with our father and promptly shooed us away. “But, Mommy…” we persisted, confident in the righteousness of our interruption. She again directed us back to our dinners. So we just shouted it, “She’s dug her fingers into the butter.” We enthusiastically demonstrated, with an Oscar worthy tattle-telling performance. “And she’s eating it.”

Our mother ended her conversation mid-sentence and quickly moved into the kitchen to deal with our sister and her butter-slathered fingers. I can’t remember if she lost her butter privileges or not. What I do remember is our mother’s immediate shift from being inconvenienced by our interruption to urgently dealing with the incident at hand. We’d proven our cause to be worthy of interrupting.

IMG_5124

I had a parenting butter incident of my very own a few days ago. I had been trying to prepare dinner and the boys were in rare form; wildly running around the kitchen, stealing components of their dinner from their plates before I’d finished, and engaging in all manners of daredevil mischief which further diminished the odds that I’d ever complete dinner. I shooed them all into the living room. “Go watch tv. Leave me alone for a minute so I can get dinner on the table.”

Liam and Lucas reluctantly complied. James stuck around in the kitchen going about his normal business of pushing chairs around to access countertop supplies and opening the fridge in search of his beloved apple slices. I could see him out of the corner of my eye, standing in the light of the open fridge doors, chanting “Apple, apple, apple, apple…” I went about the dinner preparations, with my back turned to him. He became quiet and I’d assumed he’d temporarily given up his quest for precious apples.

And then Lucas comes into the kitchen, whining “Mommy, mommy, mommy…” I shooed him away in the same manner my mother had shooed me away at the pool. “But, Mommy…” he continued. I was becoming annoyed. I sent him away. He persisted, “But Gooba (our pet name for the baby) is eating bacon.”

I spun around, with the same swift shift of my mother at the pool. And sure enough, the baby was standing there with two handfuls of cooked bacon, which had been sitting on a plate in the fridge, happily snacking on his discovered fridge treasure.

I let him eat the bacon. It’s bacon, after all, and I’m not some kind of monster who steals bacon from babies. He was a smart baby to recognize the value of his find.

IMG_5134

Providing your baby doesn’t steal your bacon before you get a chance to use it, you should make this spectacular bacon-mushroom stuffed chicken. This recipe is fully inspired by a friend, who chopped up and stuffed some leftover bacon-stuffed mushrooms I’d made for her holiday party, into a few chicken breasts for an easy day-after-party dinner. Genius use of leftover stuffed mushrooms. Taking that lead, I modified my recipe for Bacon-Stuffed Mushrooms to be intentionally used as a filling for chicken and paired it all with a creamy sour cream and mushroom gravy for a simple and satisfying dinner.

Today’s Focus on Technique – Stuffed Meat Safety

When cooking stuffed meats, it is important to ensure that both the meat and the stuffing are cooked to a safe temperature. This is one of the major challenges with cooking larger stuffed items, like a whole turkey, where it will take much longer for the center stuffing to reach a safe temperature, while the surrounding turkey overcooks. In smaller cuts, like a stuffed chicken breast, it’s easier to bring both components to a safe temperature without overcooking the meat. To check for a safe temperature, it is important to test the temperature of both the meat and the stuffing. Do this by inserting an instant-read meat thermometer into both components of the dish. Poultry is safely cooked at 165 degrees.

Bacon-Mushroom Stuffed Chicken Breasts

Ingredients

  • 8 ounces mushrooms (about 10-12 medium-sized mushrooms)
  • 1/4 cup sour cream
  • 1/8 cup onion, finely diced
  • 1/2 teaspoon garlic, minced
  • 1/8 cup bread crumbs
  • 4 slices bacon, cooked and crumbled
  • 1/8 cup parmesan cheese
  • Salt and pepper, to taste
  • 3-4 large boneless, skinless chicken breasts
  • Paprika

For the Sour Cream-Mushroom Sauce

  • 2 1/2 tablespoons butter
  • 2 1/2 tablespoons flour
  • 1 cup chicken broth
  • 1/4 cup sour cream
  • Salt and pepper

Directions

Preheat oven to 375 degrees.

Using a damp paper towel, wipe the mushrooms clean. Remove the stems from the mushroom caps. Finely dice the mushroom stems and about half of the mushroom caps. Slice the remaining mushroom caps and set aside.

In a bowl, combined the diced mushrooms, sour cream, onion, garlic, bread crumbs, bacon, and parmesan cheese. Taste the mixture, then season with salt and pepper, as desired. The stuffing should be fairly thick.

Slice the chicken breasts almost all the way through to create a wide pocket. Generously fill each pocket with some of the stuffing mixture. Spray a baking sheet with non-stick spray, then place the stuffed chicken breasts on the sheet. Sprinkle each chicken breast with a pinch of paprika, salt, and pepper. Bake for approximately 30 minutes. Check for doneness with an instant-read meat thermometer. Test both the chicken and the stuffing. Both components are safely cooked at 165°F.

While the chicken is cooking, prepare the sauce. Melt the butter in a small pan over medium heat. Add the reserved sliced mushroom caps. Cook for 5-7 minutes until tender and slightly golden. Sprinkle the flour over the mushrooms. Stir to even coat the mushrooms. Cook for about a minute, then gradually whisk in the chicken broth until well combined. Bring the mixture to a simmer. Simmer for a couple minutes until it has thickened to the consistency of a gravy. Stir in the sour cream. Taste and adjust seasoning with salt and pepper, as desired.

Pour some of the sauce over each chicken breast before serving.

IMG_5357

Bacon Thief

New Year Bean and Bacon Soup

The afternoon following my last post, I picked the boys up from school, acutely grateful for their safety while we were apart. On the way home, we stopped by the craft store to pick up two spools of a delicate, iridescent ribbon. After completing homework, snack, and our other normal after-school routines, we moved into the living room, where we used the ribbon to tie small bows to the boughs of our Christmas tree; one for each of the victims at Sandy Hook.

I spoke the name of each child and teacher aloud as we wrapped and tied each delicate bow, allowing a moment for their lives to be remembered. As I worked, the boys mostly bounced around the living room in their typical manner, half attending to the names I spoke and half lost in their own important business of being kids. They’d alternate between chat about their Christmas wish lists and comments about how about how they know Dylans and Chases and Jacks and Noahs; friends in their pre-k and kindergarten classes, children not much younger than the Dylan and Chase and Jack and Noah lost at Sandy Hook.

IMG_4625

It was a small thing to tie those little bows, but it felt cathartic to be doing something, anything, to honor those tragically lost lives. The bows remained on our tree as we hosted all varieties of holiday celebrations; a quiet way to keep the suffering Newtown families in our prayers, even as we went about joyously celebrating the holidays.

I retied those bows a hundred times during the few weeks that the tree sat in our living room, each time trying not to become frustrated by the boys’ constant undoing of my work. Instead, I consciously replaced my frustration with appreciation of the fact that I had all my little boys with me to make their special brand of mischief in our home. Those little ribbons shimmered on the lit tree all throughout the holidays. My Liam commented that they reminded him of angels.

IMG_5026

Our holidays were beautiful. We had a revolving houseful of family and friends straight up until New Year’s Day. We enjoyed Dinosaur BBQ takeout on Christmas Eve, our now-traditional beef bourguignon for Christmas dinner, and a plentiful selection of finger foods on New Year’s Eve. I’m talking about mini crab cakes with chipotle remoulade, tiny quiche lorraines in puff pastry, stuffed mushrooms, cheese, and chicken wing dip. For three weeks, our recycling bins overflowed with gift packaging and emptied bottles of wine and champagne; evidence of our prosperity in family, love, and life.

IMG_5076

I was inspired by a friend’s recent comments about bean soup and its symbolism for prosperity in the new year. I must admit that the connection between beans and prosperity was not something I’d been aware of, but the description of her soup had me sold. This incredibly simple soup utilizes canned beans, which makes it super easy to throw together. It’s a hearty, comforting, and delicious way to celebrate the new year. Serve it with a nice, crusty chunk of French bread.

Wishing you all a prosperous 2013!

Focus on Technique – Canned Beans vs. Dried Beans

Both canned and dried beans offer the same high-protein, high-fiber, antioxidant-rich nutrition, which makes them a great addition to any diet. Dried beans offer the advantages of being lower in sodium, free of preservatives, and requiring less space for storage. Additionally, dried beans can be cooked to your personal preference, whereas pre-cooked canned beans come as they are, at the risk of being mushy. The downside of using dried beans is the length of time required for soaking and cooking, which requires advance planning and preparation. If ease and convenience is the name of your game, canned beans are the way to go. (Admittedly, I almost always use canned beans.)

Bean and Bacon Soup

Ingredients

  • 1 pound bacon, chopped
  • 1 small onion, finely diced
  • 1 teaspoon garlic, minced
  • 1 (15-ounce) can kidney beans, drained
  • 1 (15-ounce) can garbanzo beans, drained
  • 1 (15-ounce) can black beans, drained
  • 1 (15-ounce) can cannellini beans, drained
  • 2 (15-ounce) cans chicken broth
  • 1 bag (approximately 4 cups) baby spinach
  • Salt and pepper, to taste

Directions

In a large saucepan, over medium/medium-high heat, cook the bacon until crisp. Remove the cooked bacon with a slotted spoon and set aside. Reduce the heat slightly and add the onion and garlic to the pan. Cook, stirring frequently, for 5-7 minutes, until tender and golden. Carefully drain any leftover bacon grease. Add the beans and chicken broth to the pan, then add the spinach. Cook for a few minutes until the mixture begins to simmer and the spinach has wilted. Return the bacon to the soup. Taste, then season with salt* and pepper, as desired.

*The bacon and beans will both contribute a good amount of salty flavor to the soup. Depending on how salted or unsalted your chicken broth is, you may not need any additional salt. Give the soup a taste before seasoning. I added a little pinch of salt and a good dose of pepper.

IMG_5077

Eggplant Parmesan Pizza (and a Giveaway!)

Yikes! Where’d the past week go? Think I can blame my absence on a Thanksgiving tryptophan-induced coma?? Seriously though, once the dishes were cleaned from our Thanksgiving dessert, I felt myself melt into an unproductive pile of mush. I just needed a little time to recover from the rush of Thanksgiving and gear up for the holiday rush. I’m ready now. Mostly.

It wasn’t a completely unproductive week though. I decided to try my hand at making one of those adorable yarn wreaths I’ve seen pictured online. I made one, admired it for a bit, then got sucked into a major crafting time warp. I awoke covered in bits of yarn and a web of those stringy glue gun remnants. I made sixteen yarn wreaths, complete with handcrafted felt flowers and tiny green leaves, over the course of six days. I barely remember making them. They just sort of appeared in a pretty pile on my dining room table. It’s kinda weird. Almost everyone I know is getting a wreath for Christmas…even one of you!

IMG_3875

On top of manic crafting, I’ve been overfilling my calendar with holiday events, shopping lists, and cookie baking schedules. Suffice it to say, this is gonna be a busy month. And busy months require easy dinners  – the sort of stuff you can easily prepare by throwing together a few basic ingredients, while still resulting in a tummy-warming winter meal. This eggplant parmesan pizza fits the bill perfectly. You could even make it with frozen pre-fried eggplant, if you wanted to keep it super, super simple, though frying your own eggplant takes minimal effort. That crisp fried eggplant gets scattered on a pizza shell (make your own or buy pre-made, like I did) along with pizza sauce, ricotta cheese, parmesan, and melty mozzarella for a simple, satisfying meal.

IMG_3884

Today’s Focus on Technique – Salting Eggplant

It is often recommended to salt eggplant prior to frying it. This technique is best applied to larger eggplants which have been sitting in the grocery case for a bit. Baby eggplants or those that have been freshly picked will most likely be wonderful without salting. The purpose of salting the eggplant is to draw out some of the bitter liquid which collects in larger, older eggplants. The end result is better tasting, firmer eggplant which will absorb less oil as it’s fried.

To salt your eggplant, start by cutting or slicing your eggplant, as desired. Arrange the pieces or slices in a single layer on a baking sheet. Sprinkle the eggplant slices with a good amount of salt. Allow it to rest for approximately 20-25 minutes. Beads of liquid will begin appearing on the surface. Thoroughly rinse the eggplant and pat dry.

IMG_3896

Eggplant Parmesan Pizza

Ingredients 

  • 1 eggplant, sliced into 1/4″ slices
  • Salt
  • 1/2 cup flour
  • 2 eggs, lightly beaten
  • 2 cups seasoned bread crumbs
  • Vegetable or olive oil, for frying
  • 1 pizza crust (store-bought or homemade)
  • 1/2 cup ricotta cheese
  • 1/2 cup pizza sauce
  • 1/4 cup parmesan cheese
  • 1 cup mozzarella cheese, shredded

*All measurements are approximate. Actual measurements will vary depending on the size of your pizza crust. I used a 12″ store-bought crust.

Directions

Arrange the eggplant slices in a single layer. Sprinkle with a good amount of salt. Allow to rest for about 20 minutes. Rinse thoroughly, then pat dry.

Dredge each slice in the flour, then dip in egg, then dredge in the bread crumbs. Press the bread crumbs into the eggplant so that it is thoroughly covered. Heat a thin layer (about 1/8″) of oil in a large fry pan over medium/medium-high heat. Fry the eggplant slices for a minute or two on each side, until golden brown and crispy. Adjust the heat, as necessary, to prevent burning. Drain the fried slices on paper towels. Chop into small pieces.

To assemble the pizza: Preheat oven to 375 degrees. Spread the ricotta cheese in an even layer over the pizza crust. Spread the pizza sauce on top of the ricotta (I like to use a smooth and thick, tomato paste based pizza sauce.) Sprinkle about 1/2 of the mozzarella cheese over the sauce. Arrange some of the eggplant pieces around the pizza. (You may have extra eggplant remaining.) Sprinkle with the parmesan cheese and remaining mozzarella cheese. Bake for about 15-18 minutes, until hot and melty.

IMG_4324

I come bearing gifts… Want to win one of the 8″ wreaths I made? Keep it for yourself or cross someone off your shopping list! I’ll even try to match the winner up with a color scheme of your choice! If you’d like to enter to win a wreath, leave a comment about your favorite holiday tradition (any holiday) or your top tip for enjoying a stress-free holiday season. The contest will end at 12:00 noon EST on Saturday, December 8, 2012, when I will randomly select one winner. One entry per person. US mailing addresses only, please. Good luck!

Thanksgiving Takes Two, Three, and Four

Happy Thanksgiving, friends!

I’ve got a bird to throw in the oven and a parade to watch. Just wanted to pop in to share these previously posted ideas for your Thanksgiving leftovers.

I’ll be starting my holiday cookie baking soon with a few new recipes to share (including a chewy chocolate orange cookie, laced with grand marnier and bits of candied orange peel), but I’ll also be posting a few of my old favorite cookie recipes over on The Gourmand Mom facebook page during the next few weeks. If you don’t already follow The Gourmand Mom on facebook, click on over using the link on the right side of the page. See you there!

Bursting with thankfulness,

~Amy

Thanksgiving Leftover Variation #1 – Turkey Soup

Don’t let that turkey carcass go to waste! There’s so much flavor waiting to be extracted from those bones. Get the broth started right after dinner. Simply throw the whole turkey carcass into a large pot, cover with water, and simmer (partly covered) for 3-4 hours. Don’t worry if there’s still some meat or turkey skin hanging on the turkey! Just throw the whole thing in the pot and let it start working while you sit down to enjoy some pumpkin pie. Once it’s simmered, strain the broth and refrigerate overnight. The next day, you can finish making the soup. Click here for my step-by-step guide to making a basic chicken soup. You can follow the same process for turkey soup.

Thanksgiving Leftover Variation #2 – Open-faced Thanksgiving Sandwich

In my opinion, this is the best way to use leftovers on the day after Thanksgiving, when you’ve still got a bit of everything in the fridge. Simply reheat some leftover turkey, stuffing, and mashed potatoes. Spread some cranberry sauce on a lightly toasted slice of thick, doughy bread. Then, top the cranberry sauce with the hot turkey, stuffing and mashed potatoes. Drizzle hot gravy over the entire thing and enjoy. This is a knife and fork kind of sandwich; simple, hearty, and satisfying.

Click here for more details on making an open-faced turkey sandwich any time of year.

Thanksgiving Leftover Variation #3 – Roast Turkey, Brie, and Homemade Apple Butter Melts

This is my new personal favorite. Such a perfect combination of flavors. I happen to love apple butter; always have and probably always will. You can find it in most grocery stores, usually near the  jams and jellies. Look for one which doesn’t contain a lot of unnecessary added sugar or corn syrup. Apple butter really doesn’t need anything other than apples and a bit of apple cider or apple juice. Apple butter is a cinch to make at home. So, if you can’t find any at your store, follow my simple recipe to make your own. And, if apple butter just isn’t your thing, substitute some leftover cranberry sauce on these sandwiches. It will pair beautifully with the brie.

For the sandwiches, thinly slice brie and spread it onto a sturdy piece of bread. I prefer to use ciabatta or pain de campagne, but any doughy, crusty bread should work. Spread apple butter (or cranberry sauce) onto another piece of bread. Place a few slices of roasted turkey breast between the bread slices. Loosely wrap the sandwich in foil and bake for about 20-25 minutes in a 350 degrees oven, until the cheese has melted, the bread feels slightly toasted, and the turkey is warm.

Homemade Apple Butter

Ingredients

  • 5-6 apples, peeled, cores removed, and coarse chopped
  • 1 1/2 cups apple cider
  • Cinnamon stick (optional)

Directions

Preheat oven to 250 degrees. Simmer the apple pieces in the apple cider for about 20 minutes. If desired, add a cinnamon stick to simmer with the mixture. Then, puree the apples until smooth. Pour the puree into an oven-safe covered pan and place in the oven for about 5 hours. The apple butter will darken to a rich brown as it cooks.

Thanksgiving Leftover Variation #4 – Turkey Salad Sandwiches

Turkey salad is a simple and delicious way to breathe new life into the remainder of your turkey leftovers. I love it on a lightly toasted bagel with a slice of swiss cheese. To make a basic turkey salad, simply chop or tear your leftover turkey into small pieces. Add some finely diced onion and celery. Combine with just enough mayonnaise and mustard to bind the salad. Season with salt and pepper, as desired. Stir in some dried cranberries for an extra tasty touch!

Thanksgiving Inspiration

I learned something interesting about myself this week – I do not like corn bread stuffing. I love corn, corn muffins, corn bread, and corn fritters. I eat a ridiculous amount of corn when it’s in season. I even once made a sweet corn ice cream. But I do not like corn bread stuffing.

I guess it comes down to what you’re raised with – sort of how some families are the Crest kind of people and some families are the Colgate kind. Some families are loyal to Miracle Whip, while others will only use mayonnaise. Some families have corn bread stuffing at Thanksgiving and some families have white bread stuffing. Our family was always a Crest, mayonnaise, and white bread stuffing sort of family.

The four things I am most thankful for.

I didn’t realize how ingrained this inclination towards white bread stuffing was until I set about preparing a corn bread stuffing earlier this week. It should’ve been delicious, with crispy bits of bacon, tender dates, shallots, and celery. It was supposed to be a new recipe to feature in this post about Thanksgiving ideas. But I didn’t like it. I can’t even tell you if it was good or not, as far as corn bread stuffings go. I am just a white bread stuffing girl through and through and I couldn’t wrap my taste buds or my heart around that corn bread stuffing. I’m not sharing the recipe.

But I am going to share this round-up of wonderful, tried and true Thanksgiving ideas, in plenty of time to add them to your Thanksgiving menu…

Give thanks for good food, friends.

APPETIZERS

Cranberry Chipotle Meatballs

Corn and Bacon Fritters with Smoked Salmon

Bacon-Wrapped Dates stuffed with Bleu Cheese

THE MAIN EVENT

Herb-Roasted Turkey Breast with Pan Gravy (and tips for roasting a whole turkey)

Bacon and Cider Braised Turkey Drumsticks (and garlicky creamed spinach)

Spiced Sweet Potato Puree with Pecan Streusel

Sausage, Apple, and Leek Stuffing

Cranberry-Orange Sauce

Green Beans Almondine

Roasted Brussels Sprouts with Bacon and Walnuts

Hot Doughy Buns

DESSERTS

Chocolate Pecan Pie

Pumpkin Coconut Pie

A Few Variations on Apple Pie (in an all butter pie crust)

Caramel Apple Cake

Turkey-Shaped Sugar Cookies

Caramel Apple Tartlets

Spiced Mango Upside Down Cake

Cannoli Cheesecake

Chicken Cordon Bleu Panini

boy, n.
1. noise with dirt on it
 

Daylight savings time has done a number on my noisy boys’ sleep schedules. They’ve always been early risers, but now we’re talking about 4:30 in the morning early. And they don’t wake slowly. They wake with the force of a jack-in-the-box that someone has been cranking all night long. It’s startling…even when you know it’s coming.

And they’re loud; so incredibly loud. I can’t even begin to put words to the kinds of noises which come from their little bodies. As they come barging into our room making all manners of inexplicable noises, I bury my head under my pillow and wonder why little boys don’t come with volume controls.

But even as I’m hoarsely grumbling ‘go away’, I’m reminded to be thankful for all of that predawn noise; that noise which means we have three healthy, active little boys to be making it. In a month of thanks giving, I am thankful for that.

Thursday nights are crazy nights for our noisy little family. For the few hours preceding the boys’ bedtime, it’s a revolving door of activity. The boys have ninja training (karate class) right about the time we’d normally be eating dinner, so we eat early. My husband gets home from work shortly after we return, then runs off to rock and roll training (band practice) just after the boys get to bed. At that point, I curl up onto the couch for my extremely informal sommelier training (glass of red).

So, everyone eats dinner in a rush and at a different time on Thursdays, making it essential that Thursday night dinners are simple and easy to reheat. This satisfying chicken cordon bleu panini fits the bill perfectly! Breaded chicken breasts are sliced and combined with salty prosciutto and a creamy gruyere sauce, then pressed together, wrapped in foil, and heated until it’s hot and melty. Every part of this sandwich can be made ahead of time (even the night before). Best yet, it can be wrapped in individual portions, which are ready to pop in the oven whenever your future ninja, rockstar, or sommelier gets hungry!

Today’s Focus on Technique – Bechamel Sauce

A bechamel sauce is one of the five French ‘mother sauces’, which means that it is a base sauce from which many variations can be made. Bechamel sauce is a simple white sauce made with a combination of roux (butter and flour) and milk. It’s typically seasoned with salt, pepper, and a pinch of nutmeg. Bechamel sauces can be made thinner or thicker by varying the amount of roux used in the sauce. A basic bechamel can be seasoned in a multitude of ways and used in lasagna, as the base of a cheese (mornay) sauce for macaroni and cheese, or as the start of a creamy soup.

The process of making a bechamel is simple. Combine equal parts butter and flour in a pan over medium heat, whisking constantly for a minute or two to remove some of that raw flour taste. Gradually add milk to the roux, whisking constantly. (Ideally, the milk should be warm or hot when it’s added to the roux, though I’ll admit that I rarely warm the milk and have never had a problem.) Whisk until well combined. Bring the mixture to a simmer. Cook for a few minutes, whisking constantly, until the milk is thickened. Season with salt, pepper, and nutmeg.

*1 tablespoon each of butter and flour to 1 cup of milk will produce a thin bechamel which makes a good base for a cheese sauce. Use 2-3 tablespoons each of butter and flour to 1 cup of milk for a thicker sauce.

Chicken Cordon Bleu Panini

Ingredients

  • 1 loaf of wide, flat crusty bread (such as ciabatta)
  • 1 pound boneless, skinless chicken breasts
  • 2 eggs, lightly beaten
  • 1 1/2 cups seasoned bread crumbs
  • Olive or vegetable oil
  • 3-4 ounces prosciutto (or ham)
  • 1 1/2 tablespoons butter
  • 1/2 teaspoon garlic
  • 1 1/2 tablespoons flour
  • 1 cup milk
  • 1/2 cup gruyere (or other swiss-style cheese), shredded
  • Salt and pepper
  • Pinch of nutmeg

Directions

For the chicken: Preheat oven to 375 degrees. Dip the chicken breasts in the beaten eggs, then press into the bread crumbs, until well coated. Heat a thin layer of oil in a fry pan over medium/medium-high heat. Cook the chicken for 2-3 minutes on each side, until golden brown. Transfer the chicken to a baking sheet. Place in the oven, until cooked through. (Chicken is fully cooked at 165 degrees. Cooking time will vary based on thickness of the chicken breasts and how well they’re cooked during the browning step. Mine took about 13 minutes in the oven.) *The chicken can be made ahead and refrigerated.

For the sauce: Melt the butter in a pan over medium heat. Add the garlic. Cook for a few seconds, being careful not to burn. Add the flour. Whisk to combine. Cook for a minute. Gradually add the milk, whisking constantly to combine. Bring the mixture to a simmer. Cook for a minute or two, until thickened. Reduce the heat. Add the cheese and whisk until melted. Season with a pinch of nutmeg and salt and pepper, to taste. *The sauce can be made ahead and refrigerated. It will thicken as it cools.

To assemble the sandwiches: Slice the loaf of bread in half. Spread a layer of sauce onto each half. Arrange the prosciutto in a thin layer on the bottom half. Slice the breaded chicken breasts into thin pieces. Arrange them on top of the prosciutto. Cover with the top half. Tightly wrap the sandwich in foil, pressing down to flatten the sandwich. If desired, you can pre-cut the sandwich and wrap in individual servings. Bake in a 375 degrees oven for about 20 minutes until hot and melty. *The entire sandwich can be made ahead of time. If cooking from cold, allow for extra cooking time.

Buffalo Chicken Pasta Bake (and Giveaway Winner!!)

Well, we did it! We made it through Halloween. I enjoy Halloween, especially now that I have kids to celebrate it with – but to be honest, for me it’s mostly just the gateway holiday to Thanksgiving and Christmas. Those are the holidays which really have my heart. I’ll admit, a small tear of joy may have run down my cheek when I walked into Target the other day to find the first of their holiday decorations hung from the ceiling. I have no problem with celebrating Christmas even as we prepare for Thanksgiving. The two go hand in hand for me.

But Halloween was fun this year. Really fun. The boys dressed up for the pre-Halloween party at their school. There was a dj, a disco ball, and hundreds of costumed children, half-blinded by masks, crashing into each other on the school gym dance floor. All varieties of goblins, ghouls, princesses and superheroes roamed the school cafeteria with slices of pizza and pumpkin cookies hanging from their mouths.

On Halloween, the boys put on their costumes for their school parade. Liam was Harry Potter, a costume I’m certain he selected for the pretend glasses it came with. Lucas was a terrifying werewolf, a costume I believe he selected for the shredded jeans it would give him a reason to wear. The kid’s got a weird love for jeans, as long as they have a real, functional button and zipper…none of those faux buttoned, elastic-waisted toddler jeans for him!

After school, we attended a pre-trick-or-treating party at our friends’ house. I dressed as a princess with baby James as my frog prince. We brought along a bucket of spooky eyeball cake pops, which everyone enjoyed after the delicious dinner served by our friend. There was pasta and meatballs, a vibrant pasta salad, Italian bread and butter, jumbo shrimp, fresh veggies with dip, cheese and crackers, baked ziti and chicken wings.

And that’s when the seedling of an idea began to take root, right there surrounded by ninjas and vampires – baked ziti and chicken wings…

Y’all know I’ve got a little thing for inserting buffalo chicken wing flavor into all varieties of other foods…chicken wing dip, buffalo chicken lasagna, buffalo chicken monkey bread, buffalo chicken pizzabuffalo chicken meatballs, buffalo chicken potato skins… so, why not buffalo chicken baked ziti? As my sister put it, “Why have we not eaten that before???” It’s a practically ludicrous idea to consider. Fortunately, we no longer need to commiserate over the absence of buffalo chicken baked ziti in our lives. I made it last night and my hybrid baked ziti-buffalo chicken world is now beautifully complete.

Focus on Technique – Poaching Chicken

It’s common to find recipes calling for poached chicken. Poaching is simply the process of very gently simmering a food until it’s cooked. Eggs, poultry, and fish all responded well to poaching. Foods can be poached in a variety of liquids, including water, milk, wine, and broth/stock. Various herbs and seasonings can be added to the poaching liquid to impart delicious flavor into the chicken. When poaching, it’s important to control the heat in order to keep the liquid at a gentle simmer.

Properly poached chicken breasts remain moist and tender. Poached chicken works well on its own, in chicken salad, on pizza, in soup, or mixed in with pasta.

To poach chicken breasts, place the chicken in a pot large enough for the chicken to fit comfortably. Cover the chicken with cool water (or chicken broth). Over medium heat, bring the liquid to a gentle boil. Adjust the heat so that the liquid maintains a gently bubbling simmer. Cook for about 10-15 minutes, until the chicken is cooked through. An instant read meat thermometer is the most effective way to determine doneness. Chicken is done once it’s reached 165 degrees.

Buffalo Chicken Pasta Bake

Ingredients

  • 1 pound pasta
  • 1 pound of chicken, poached and chopped into small pieces
  • 1/2 cup celery, chopped
  • 1 cup Frank’s Red Hot hot sauce (or your other favorite hot sauce)
  • 1 cup blue cheese dressing (I always recommend Marie’s)
  • 3/4 cup ricotta cheese
  • 2 cups mozzarella cheese, shredded
  • 1/4 cup blue cheese, crumbled (optional)
  • Salt and pepper (optional)

Directions

Preheat oven to 375 degrees.

Cook the pasta for about a minute less than the package directions call for. Strain and rinse with cool water to prevent overcooking. Return the cooled, strained pasta to the pot. Add the chicken and chopped celery.

In a bowl, combine the hot sauce and blue cheese dressing. Pour the mixture over the pasta. Add the ricotta cheese and 1 cup of the mozzarella. Stir to combine. Taste and adjust seasoning with salt, pepper, or additional hot sauce, as desired.

Transfer the pasta mixture into a large 13×9 baking dish. Sprinkle the remaining 1 cup of mozzarella cheese and the crumbled blue cheese (optional) over the top. Bake for about 30 minutes.

*You can prepare the entire dish, up to the baking step, ahead of time. If preparing ahead of time and refrigerating, allow for approximately 10-15 minutes of extra cooking time. 

Werewolf and the frog prince

GIVEAWAY WINNER!! We have a winner! Using http://www.random.org to select a number at random, out of the 28 entries received for the dairy-themed gift bag giveaway, the winner is #12 , Jessica M. Congratulations, Jessica!! I’m going to send you an email at the address provided with your comment to get the information necessary to send you out your prize!!

Moroccan-Spiced Lamb Meatballs in Minted Apricot Glaze

Today’s recipe is brought to you by school taxes and my freezer stash. School taxes were due this month. It’s a tax worth paying for the high quality education that my school district offers, which my children will most likely benefit from in the near future. But it’s like a punch in the gut every time that bill arrives.

With Christmas practically knocking at our door, I’ve been trying to reduce the impact of that big extra tax bill by cutting a few other things in this month’s budget…like groceries. This means that we’re mostly feeding off the freezer this month.

My husband’s intense love for lamb burgers means that our freezer is well stocked with ground lamb. Our grocery store irregularly stocks ground lamb, so when they have it, I buy it. And when I opened my freezer in search of cheap dinner, ground lamb it was! But I just wasn’t feeling like lamb burgers or even gyro salad, though my husband would have been eager for either. I was in the mood to experiment.

So, playing off of Moroccan inspired flavors, I came up with these delectable meatballs, which my husband talked about for three days afterward. Ground lamb gets combined with dried apricots, a touch of sweet honey, cinnamon, and cumin. Sliced almonds add an interesting texture to the otherwise tender meatball. Then, they’re tossed in a buttery apricot glaze with a touch of fresh mint. I served mine over couscous. They were good. Really good. We’ll be eating them again soon.

Focus on Technique – Tips for Tender Meatballs

Everyone loves a tender, flavorful meatball. Here are a few tips for crave-worthy meatballs:

  • Use ground meat with a bit of fat. If using beef, look for 80/20 ground chuck. The fat will add flavor and moisture. If using a leaner meat, like ground chicken, add some additional vegetables, such as chopped onion, celery, or peppers to add moisture.
  • Increase your egg to meat ratio. I tend to use two eggs per each pound of meat. Add enough bread crumbs as necessary to bind the mixture. About 1/4 cup of bread crumbs per egg usually does the trick.
  • Be careful not to overwork the mixture. Mix only enough to evenly disperse the ingredients. To reduce the need for over-mixing, combine all of your other ingredients before adding the meat.
  • Season, season, season – salt, pepper, garlic, cheese…give those meatballs some flavor!
  • Try adding a slice of soaked, then crumbled day-old bread to your meatballs. Though I have not personally tried this strategy, it’s a sworn by trick to others…so there’s got to be something to it!

What are your favorite meatball tips?

Moroccan-Spiced Lamb Meatballs in a Minted Apricot Glaze

Ingredients

  • 1 small or 1/2 medium onion, very finely diced
  • 10 dried apricots, finely diced
  • 1/4 cup thinly sliced almonds
  • 1 teaspoon honey
  • 1/2 teaspoon salt
  • 1/2 teaspoon cinnamon
  • 1/8 teaspoon cumin
  • 1/8 teaspoon black pepper
  • 2 eggs, lightly beaten
  • 1/2 cup bread crumbs
  • 1 pound ground lamb

For the glaze

  • 2 tablespoons butter
  • 1/4 cup apricot preserves
  • 3-4 fresh mint leaves

Directions

Preheat oven to 375 degrees. Wipe a baking sheet with a little oil or spray with nonstick cooking spray.

Combine the chopped onion, apricots, almonds, honey, salt, cinnamon, cumin, black pepper, eggs and bread crumbs (everything except the meat) in a large bowl, until evenly blended. Add the meat. Use your hands to combine the mixture, just enough to evenly disperse the ingredients.

Form the mixture into balls, about 1 1/2″ in diameter. Place them on the prepared baking sheet. Bake for 20-25 minutes, until cooked through.

For the glaze, combine butter, apricot preserves and mint leaves in a pan over medium heat. Stir until well combined and warmed, about 3 minutes. Toss the meatballs in the glaze before serving.

Makes about 24 small meatballs

Secrets of An Avon Beauty Boss

Achieving Beautiful Dreams with Avon

The Gourmand Mom

Good food, seasoned with a dash of life

%d bloggers like this: