RSS Feed

Tag Archives: cheese

Pumpkin Gingersnap Bars with Gingered Cream Cheese Topping

Halloween blew my two years old’s mind. Totally blew it. For weeks we’d been talking about how he would be Captain America on Halloween, while his brothers would be Hulk and Thor. Daddy would be Iron Man and Mommy would be Black Widow. We’d go door to door, collecting candy, which we would deposit in plastic pumpkins.

Though clearly flummoxed by this odd outline of what would happen on Halloween, he walked around telling anyone who would listen that he was going to “be Captain America”. (When he says it, it sounds a lot more like “Captain Murder”.)

As Halloween unfolded, every last bizarre detail came to fruition. He became Captain America. He was handed a plastic pumpkin. He said the magic words as he trotted from door to door. He got candy. Somehow, he managed to collect twice as much candy as either of his older brothers, having visited the same number of houses.

Be Captain America. Get Candy.

IMG_1503

Meanwhile, Lucas, my five-year-old Hulk, obsessed over the accuracy of every minute detail of his costume. My initial money-saving plan of picking up a fleece Hulk hat, t-shirt, and green face paint was met with a long list of concerns about muscles, green arms, purple ripped pants, and green legs.

I abandoned my frugal plan once the details overwhelmed me, in lieu of an official store-bought muscles-included hulk costume. Far from solving the problem, this purchase was quickly met by concerns over not having green feet or enough teeth in his partially toothless mouth. A hefty dose of gamma radiation may have saved us all a few headaches.

Learn from my experience, folks… If you stick three little boys in superhero costumes and call them The Avengers, you’d better expect some major chaos. Thor’s hammer was revoked almost instantly. Somehow, we made it through the day, by the skin of our superhero teeth.  Next year, I may dress our whole clan as librarians, monks, and sloths.

IMG_1541

American Dairy Association and Dairy Council Fall Dairy Tour – Part 1

Thankfully, the very next day, I had the pleasure of departing for a weekend of dairy education and wine and cheese tasting, hosted by the American Dairy Association and Dairy Council. Last year’s event was such an amazing experience. (You can read about it here.) I couldn’t wait to see what ADADC had in store for us this year.

This year, the event began at the beautiful Geneva on the Lake in Geneva, New York, which is located on the northwest side of Seneca Lake. Nestled in the New York Finger Lakes wine country, the manicured grounds of this elegant villa-inspired resort are absolutely stunning.

IMG_1548

After a comfortable night’s sleep in a spacious jacuzzi suite, we awoke for a continental breakfast at the resort. From there, we departed for Cornell University, where we spent the day touring Cornell’s state of the art dairy farm and dairy production plant. We met with experts in the fields of dairy farming, food science, and dairy production.

Going a step beyond the dairy farms, we learned about ice cream, cheese, and yogurt making and how Cornell University partners with local cheese artisans and other small business to help them develop and promote their dairy products.

Part of our ‘learning’ required tasting a variety of ice creams, frozen yogurt, homemade yogurt, and cheese. I had no choice but to eat that delicious ice cream and a second helping of cheese. Twist my arm already!

IMG_1642

I couldn’t possibly do the weekend justice in a single post, so I’m going split my thoughts into a few posts, each post paired with seasonal, dairy-inspired recipe. Think cheese, yogurt, ice cream, and creamy chowder…

For today, let’s start at the beginning, with the cows. During our time at Cornell, we had a chance to visit their state of the art dairy farm, where approximately 150 cows roam within the freestall barn, resting on comfortable beds of beach sand and enjoying pleasant back-scratching from the automatic back scratchers placed throughout the barn.

IMG_1688

Any mom who has ever nursed a baby knows that milk production is at its best when the mom is well-nourished, well-rested, and comfortable. Same applies to dairy cows. Happy cows means more milk and these dairy farmers have mastered the art of keeping cows happy and healthy to maximize production.

Cornell’s dairy barn, which is designed for maximum ventilation, sanitation and cow-comfort, sets an example for the dairy industry and provides a hands-on learning opportunity for its dairy students.

IMG_1694

Three times a day, Cornell’s cows are brought to the milking parlor, where their milk is collected for use within the school’s very own dairy production plant, where Cornell’s own ‘Big Red’ cheddar is made, as well as yogurt and ice cream for the university’s dining halls.

Twice daily milking is standard for most dairy farms, but Cornell’s cows, much like its students, are overachievers. Each cow produces an average of 95 pounds of milk daily, putting them in the top 95th percentile for milk production. I’d expect nothing less from an Ivy-league cow!

As each cow arrives in the milking parlor, its health records are electronically reviewed to ensure that the milk from any cow being treated for an illness is never mingled with the rest of the milk supply. Maintaining the safety of the food supply, from milking to production is a top priority.

IMG_1645

The level of careful planning and practice which goes into the entire process of dairy farming is seriously impressive. As a dairy consumer, it’s comforting to get a closer look into where my food comes from. And as someone who has a soft spot for animals, it’s reassuring for me to learn that cow comfort is intrinsically linked to milk production. Happy cows really do produce the most milk.

IMG_1831

In Part 2 of my dairy adventure, I’ll talk about two things which I love dearly: cheese and Wegmans. For today, enjoy some pumpkin gingersnap bars.

These seasonally perfect pumpkin bars pair a spicy gingersnap cookie crust with a layer of luscious baked pumpkin custard. Creamy half and half (half cream/half milk) lends a satisfying richness to these tiny bites of gingery pumpkin bliss. Cream cheese, another of dairy’s mouth-watering contributions to the world of food, provides the perfect finishing touch.

Pumpkin Gingersnap Bars with Gingered Cream Cheese Topping

Ingredients

  • 2 cups crushed gingersnap crumbs
  • 6 tablespoons unsalted butter, melted
  • 2 cups pumpkin puree fresh or canned (1 – 15 oz can will do the trick)
  • 1/2 cup white sugar
  • 1/3 cup brown sugar
  • 1 1/2 cups half and half
  • 2 eggs
  • 1 teaspoon vanilla
  • 1 teaspoon cinnamon
  • 1 teaspoon ginger
  • 1/2 teaspoon salt
  • 1/4 teaspoon nutmeg
  • Pinch of cloves
  • 1 tablespoon cornstarch
  • 6 ounces cream cheese, softened to room temperature
  • 1/4 cup powdered sugar
  • Pinch of ground ginger
  • Extra gingersnap crumbs for garnish

Directions

Preheat oven to 375 degrees.

Combine the crushed gingersnap crumbs with the melted butter. Press in an even layer into the bottom of a 13×9 inch baking dish. Bake for 7-8 minutes. Remove from the oven.

Meanwhile, whisk together the pumpkin, the sugars, half and half, eggs, vanilla, cinnamon, ginger, salt, nutmeg, and cloves, until well blended. In a small dish, combine the cornstarch with about 1/4 cup of the pumpkin mixture, until the cornstarch is completely dissolved. Whisk the cornstarch mixture into the pumpkin mixture. Pour the pumpkin mixture over the gingersnap crust.

Bake for about 40 minutes.

Remove from the oven. Cool at room temperature until no longer hot. Then, cool completely in the refrigerator. Cut into small 1- 1 ½” squares.

Combine the cream cheese, powdered sugar, and a pinch of ground ginger. Use a pastry bag to pipe a bit of the cream cheese topping onto each square. Sprinkle with extra gingersnap crumbs.

IMG_1827

This dairy tour and wine and cheese getaway weekend was hosted by the American Dairy Association and Dairy Council. As part of this event, they provided me with accommodations, meals, and compensation towards travel expenses. I was under no obligation to the ADADC, Cornell University, Geneva on the Lake or any other agency. All opinions and observations are my own.

Chipotle Shredded Beef Flatbread Sandwiches

Posted on

My husband’s band was out of town for a gig on Saturday night, leaving me to get up early with the kids on Mother’s Day, as they eagerly attempted to prepare me my traditional, once-a-year breakfast-in-bed. My breakfast tray featured a half-eaten chocolate donut, sitting on top of a frozen pancake, which was elegantly placed on the foil wrapper from the plastic tub of the Frosted Flakes they prepared for me. (My boys prepare a classy breakfast tray.) They decided to toast only half of the bagel and gave up on spreading the too-thick cream cheese. The baby stayed occupied during the breakfast preparation by dipping an Elmo spoon into my cup of orange juice, taking small sips, then repeating. I enthusiastically ate all of my perfectly imperfect breakfast, of course.

IMG_6951

Following breakfast, the three boys proceeded to spin cyclones of chaos around the house in a flurry of special day excitement equivalent to that of Christmas morning. I spent a good part of the morning chasing after them, picking up garbage and toys from the floor, in a fruitless attempt at maintaining some semblance of order. At some point, caught between equal parts desire to live in a tidy house and lack of desire to pick up any more toys or fight with the kids to do it, compounded by my longing for a restful Mother’s Day, I fell apart. I sat on the stairs and had myself a good cry, equal parts disappointed that my day wasn’t going as I envisioned it would and angry at myself for being unable to just settle into the chaotic messiness of the morning.

Being a mom isn’t easy and it’s not always fun, not even on Mother’s Day, but what else can you do besides keep on keeping on. So, I stood up, waited for my eyes to be not so red, dressed the kids and brought them to Home Depot to purchase gardening supplies. When we got home, we planted a small fruit and vegetable garden in the backyard. We needed something to do to keep busy and the boys like dirt, plain and simple. I took a picture of our new little garden.

IMG_7785

The nature of the moments we capture on film lend themselves towards the good times: achievements, celebrations, vacations, something beautiful, or something funny; a graduation from school, a birthday party, an escape to Barbados, a stunning rainbow, a hand-made quilt, smiling faces, evidence of loving and of being loved, a garden. We share these images and it paints a portrait of an idyllic life, filled with joyful events and beautiful moments.

And life is beautiful, but it is far from the perpetually blissful existence that any one person’s photo album might suggest. We just don’t capture the ugly, frustrating, tearful moments on film, because those are the moments we are simply getting through. We’re not picking up the camera when the kids are fighting, because we’re busy playing referee. We’re not picking up the camera when the baby is smearing yogurt on the wall, because we’re busy grabbing paper towels. We’re not picking up the camera when the entire load of folded laundry has just been dumped on the floor, because we’re busy refolding it. We’re not picking up the camera when the house is covered in toys and the kids are all in time-out for refusing to pick them up, because we’re sitting on the stairs crying in frustration over something that shouldn’t be nearly as frustrating as it somehow feels in that moment.

IMG_6941

The experience of being a mom is a lot like planting that little fruit and vegetable garden. Successfully done, the plants will grow and thrive and produce photo-worthy, sweet fruits and nourishing veggies. I’ll proudly share those photos with family and friends, evidence of my gardening prowess. What the photos will not show however, are my tears of frustration that led to the trip to Home Depot, my dirt stained knees, the sun burn on the back of my neck, the muscle aches from cutting through the roots of an old tree as I prepared the garden bed, or the dirt collected under my fingernails. Yet all of those things were part of the experience.

My point is this… We share the fruit. We don’t often share the pains it took to get there. Being a mom can be messy and ugly. Like planting a garden, it’s hard work, but every so often, we get to harvest our fruit. Those are the moments we capture on film to remember why we do what we do, day in and day out. In between those moments, we’ve got tears on our face and dirt under our nails. As moms, we have a tendency to look at photos of other mom’s gardens and wonder why our own garden doesn’t seem as bountiful, forgetting that in between harvesting their fruit, that mom has got tears on her face and dirt under her nails too. We’re all living this perfectly imperfect life together.

I hope every mom out there had a beautiful Mother’s Day with a few perfect moments of bliss. Keep on keeping on. Your garden is growing and thriving as a result of everything you do in all of the moments between the photo-worthy ones.

IMG_6955

I’ve been hanging on to this recipe for a while and now seems like the right time to share this tasty treat. This is a multi-component recipe which takes a bit of time to assemble, but everything can be prepared ahead of time. The best part about the components of this dish is that you can mix and match the pieces in a million ways. Enjoy the corn and bean relish as part of this sandwich or with a bowl of tortilla chips or used as a bed for shrimp burgers. Enjoy the queso drizzled over a hamburger, tossed with macaroni or straight-up with chips. The tender, spicy beef is fantastic on this sandwich, but would stand alone beautifully too, served with a side of mashed potatoes.

IMG_6962

Chipotle Shredded Beef Flatbread Sandwiches

Ingredients

  • 4-6 flatbreads
  • 1 ripe avocado, sliced (Click here for a photo guide on slicing avocado)

For the Chipotle Braised Beef

  • 2 tablespoons olive oil
  • Approximately 3-lb beef chuck roast
  • 1 can chipotles in adobo (only use a few for a less spicy result)
  • 1/2 red onion, coarse chopped
  • 3 cloves garlic, smashed
  • 2-3 cups beef broth
  • Salt

For the Corn and Bean Relish

  • 1 1/2 cups sweet corn kernels  (defrosted frozen corn kernels will do the trick)
  • 1 15-ounce can black beans, drained and rinsed
  • 1/2 red onion, finely diced (Click here for a photo guide on dicing onions)
  • 1 red bell pepper, ribs and seeds removed, finely diced
  • 1 teaspoon garlic, minced
  • 2-3 green onions, chopped
  • 1/4 cup fresh cilantro, chopped
  • Juice from 1/2 lime
  • Salt and pepper, to taste

For the Homemade Queso

  • 2 tablespoons butter
  • 1 poblano pepper, ribs and seeds removed, finely diced
  • 1 jalapeno peppers, ribs and seeds removed, finely diced
  • 1/2 red onion, finely diced
  • 1 teaspoon garlic
  • 1 1/2 tablespoons flour
  • 1 cup milk
  • 1 cup Mexican cheese blend, shredded
  • 1 tomato, finely diced
  • Salt and cayenne pepper, to taste

Directions

For the Chipotle Braised Beef – Preheat oven to 325 degrees. Trim the chuck roast of any excess exterior fat. Season generously with salt. In a large dutch oven or oven safe pan, heat olive oil over medium/medium-high heat. Place the meat in the pan and brown on all sides, about 2-3 minutes per side. Add the beef broth, red onion, garlic, and as many chipotles as desired (I used all of them). The beef broth should come almost to the top of the meat, but not cover it. Bring the liquid to a simmer, then cover the pan and place it in the oven. Cook for 3.5 hours. Remove from the oven and allow to cool slightly. Using your fingers or a fork, pull the tender beef into small pieces, discarding any fatty bits.

For the Corn and Bean Relish – Combine  the corn, black beans, red pepper, green onions, red onion, garlic, and cilantro in a medium sized container. Squeeze half a lime over the mixture and toss to combine. Season with salt and pepper, as desired.

For the Queso – In a saucepan, melt the butter over medium heat. Add the peppers, onion, and garlic. Cook for about 5 minutes, until tender. Sprinkle the flour over the mixture and stir to coat. Cook for another minute or two. Gradually add the milk and whisk to combine. Bring the mixture to a gentle simmer and cook for a few minutes until the milk thickens. Turn the heat down to low and add the cheese. Stir until the cheese has melted into the sauce. Stir in the chopped tomato. Season with salt and cayenne pepper, to taste.

To Assemble the Sandwiches – Warm the flatbreads for a few minutes in a 350 degrees oven. In the center of each flatbread, place a generous mound of the braised beef. Drizzle the beef with warm queso. Top with the corn salsa and slices of fresh avocado.

Makes 4-6 Sandwiches

Cheesecake-Swirled Carrot Cake

Posted on

Every so often, I get an idea for a recipe which I’m certain is so genius that no home cook or master chef has thought of it yet. 99.9999% of the time, it turns out that someone else has already covered that ground. It’s really challenging to come up with something truly novel and unique in the culinary field…at least for me it is.

IMG_6415

Such is the case with this cheesecake-swirled carrot cake. The idea came to me as I was brainstorming for some interesting twist on carrot cake to share as Easter approaches. The way I figured it, if carrot cake and sweet vanilla cream cheese frosting are delicious together (and they are), and cheesecake is also made with cream cheese, sugar, and vanilla (which it is), then carrot cake and cheesecake would be delicious together. If A and B, then C sort of logic…or something like that anyway.

IMG_6446

I initially contemplated stacking layers of carrot cake with cheesecake, but the idea seemed too similar to a basic carrot cake with cream cheese frosting. That was the point where I decided I’d bake the two cakes together in one pan, intermingled to create one grand cheesecake-swirled carrot cake. It was in my research phase of concocting this delicious confection that I discovered The Cheesecake Factory already beat me to the punch. Having been to The Cheesecake Factory a grand total of one, maybe two times in my life, probably about ten years ago, this was news to me. Perhaps you’ve already had theirs??

IMG_6564

So, turns out my grand idea isn’t nearly as revolutionary as I’d initially thought, but it is spectacularly delicious, nonetheless. Rich, moist carrot cake gets twisted with a creamy classic cheesecake to create a treat which is sure to be the hit of the Easter dessert buffet. Ol’ Peter Rabbit might even forego his basket of candy in favor of a slice of this carroty beauty.

IMG_6503

Cheesecake-Swirled Carrot Cake

Ingredients

For the Carrot Cake

  • 1 3/4 cups flour
  • 3/4 teaspoon baking powder
  • 3/4 teaspoon baking soda
  • 3/4 teaspoon cinnamon
  • 1/4 teaspoon ginger
  • Pinch of nutmeg
  • 1/2 teaspoon salt
  • 2 sticks unsalted butter, softened to room temperature (plus more for greasing pan)
  • 2/3 cup dark brown sugar
  • 1/3 cup white sugar
  • 1 1/2 teaspoon vanilla
  • 2 eggs
  • 1/3 cup water
  • 2 cups finely grated carrots (approximately 4 medium-sized carrots)
  • 3/4 cup golden raisins (optional, but recommended)

For the Cheesecake

  • 3 8-ounce bars of cream cheese, softened to room temperature
  • 1 cup sugar
  • 3 eggs
  • 1 teaspoon vanilla

Directions

Preheat oven to 350 degrees. Grease a 10″ springform pan with butter.

For the Carrot Cake: In a large bowl, combine the flour, baking powder, baking soda, cinnamon, ginger, nutmeg and salt. In a separate bowl, beat together the butter and sugars until light and fluffy. Add the vanilla and the eggs, one at a time, beating between each addition. Add the water, then beat for another minute. Add the carrots, then beat for another minute. On low speed, gradually beat in the dry mixture until well blended. Stir in the raisins.

For the Cheesecake: Using an electric mixer, beat together the cream cheese and sugar until well blended. Add the vanilla and the eggs one at a time, beating until well blended.

To Assemble the Cake: Spread about 1/2 of the carrot cake batter over the bottom of the prepared springform pan. Drop large spoonfuls of about 1/2 of the cheesecake mixture on top of the carrot cake. Drop large spoonfuls of the remaining carrot cake mixture on top of and around the cheesecake. Pour the remaining cheesecake mixture over the top. Use a spatula to smooth the cheesecake on the top. Bake for about 55-65 minutes, until set.

Cool at room temperature for about an hour, then refrigerate for a few hours until completely chilled.

** Carrot cake portion of the recipe is adapted from Martha Stewart’s Carrot Cake recipe, found HERE.

Treat Your Valentine

Treat your valentine to a day’s worth of mouth-watering meals. Here are three ideas for each meal, from super simple to more elaborate. Click on the pictures or the links to see the recipes!

You can also check out the Recipes section at the top of the page for more ideas to delight your sweetie.

Breakfast

Super Simple: Strawberry and Nutella Stuffed French Toast

img_4248

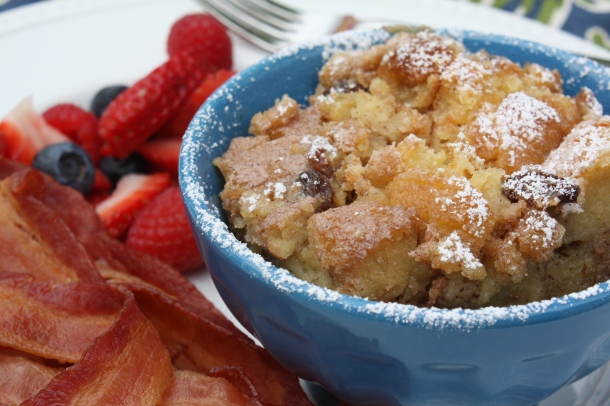
A Bit More Complex: Cinnamon Raisin Donut Bread Pudding

img_7310

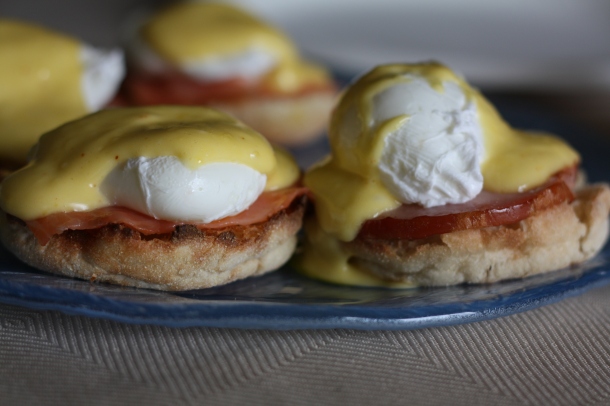
Manageably Elaborate: Eggs Benedict

0721

Lunch

Super Simple: Sausage, Bean, and Rapini Soup

10-26-10-042

A Bit More Complex: Smoked Salmon and Cucumber Salad

img_3389

Manageably Elaborate: Quiche Lorraine

074

Dinner

Super Simple: Penne a la Vodka

110

A Bit More Complex: Pork Chops with Fontina and Marsala

0371

Manageably Elaborate: Slow-Braised Beef Short Ribs with Figs over Creamy Brie Potatoes

img_8548

Dessert

Super Simple: World’s Simplest Fudgey Brownies with Raspberry Coulis

img_4317

A Bit More Complex: Chocolate Raspberry Torte

img_2783

Manageably Elaborate: Fresh Berry Mousse with Vanilla Panna Cotta

mousse-and-panna-cotta-in-cup

Huevos Rancheros Pizza

Back in the spring, I strong-armed a couple of my friends into taking Irish step dancing lessons with me. (I actually didn’t need to twist their arms too hard.) We three became the unlikeliest bunch of dancers you could imagine. It was a blast. We clobbered away through a few classes, along with an (almost) equally novice classmate, before the weather became too hot to continue in our dance space. At that point, we broke for the summer, with the intention of resuming classes come fall.

IMG_5639

Well, fall rolled around and I sent an email to our instructor expressing our eagerness to continue. But we never heard back. After a few months with no reply, we’d become fully convinced that we’d been silently dumped as a result of our utter hopelessness in the field of Irish dancing. We couldn’t really blame her. We truly are a hopeless bunch. But then, just as we were about to pack away our dancing shoes, I received a message explaining an email switch, along with an invitation to resume classes. We accepted, of course.

This time though, there are a few other adults in our class and a second instructor. Apparently, our new classmates danced all throughout their childhood and teen years. They’re just picking up where they left off, which is someplace lightyears ahead of the rest of us. While we practiced basic skips, intently concentrating on not running into each other, one of our new classmates gracefully danced circles around us, quite literally. It feels oddly like being stuck in the ‘guppies’ group, aside out advanced classmates in the ‘shark’ group. They’re reading War and Peace, while we struggle through Ted in a Red Bed. Us four clumsy guppies stick as close together as we can without kicking each other. It’s a level of comfort thing. We huddle close together, executing every drill as a unified group, in a fruitless attempt not to draw too much attention to ourselves.

IMG_5642

It’s a ridiculously fun time, swimming in our guppy group. I haven’t laughed so hard in a long while. Graceful, we are not. Skillful, we are not. Coordinated, we most definitely are not. But for all we lack in ability, we more than make up for it with enthusiasm. We will probably never have the graceful, swift-footed skills of our river-dancing role models, but we’re certainly having fun with it. And that’s what it’s all about, isn’t it??

The added bonus is that our weekly lesson and all the practice in between burns a bucketload of calories. Now, if I were smart, I’d save those burned calories and let them work their magic on a bit of weight loss. Oh, but I love food too much and the dancing leaves me ravenously hungry. So, I choose to ‘spend’ my burned calories on fun food, like this Mexican-inspired huevos rancheros pizza. Truth be told, this pizza is fully inspired by nothing more than my desire to cook a pizza with eggs baked into it. It starts with a cornmeal crust, in place of the corn tortillas which would typically be used in huevos rancheros. The homemade crust is then topped with beans, taco sauce, Mexican cheese, chiles, and tomatoes. Fresh eggs are then carefully cracked on top of the pizza before baking for a stunning and unique twist on pizza.

IMG_5656

Today’s Focus on Technique – Cooking with Baker’s Yeast

Baker’s yeast is a single cell organism, commonly used as a leavening agent in many breads, pretzel doughs, and pizza doughs. As the yeast feeds on the sugars in the dough, it releases carbon dioxide, which becomes trapped within the dough, causing it to rise and expand. The most common types of yeast used in baked goods are active dry yeast and rapid rise yeast. Rapid rise yeast is made up of smaller particles, which touch a greater surface area of the dough and typically require half as much time to rise. Many people feel that the long rise time required for active dry yeast recipes results in a more flavorful dough.

Typically, many yeast dough recipes begin by proofing the yeast. Proofing is simply a process of dissolving the yeast in lukewarm water. After a few minutes, the yeast should begin to foam, proving that it is alive and ready to work its leavening magic. If the yeast doesn’t foam, it’s time to buy some new yeast. The magic temperature for proofing yeast is somewhere between 110-115°F. To assure you’ve got the right temperature, it’s helpful to use an instant-read thermometer. I usually stick the thermometer in hot water from the tap, then wait until it reduces to the right range before adding the yeast.

Yeast doughs rise best in a draft-free area, on the warmer side of room temperature (around 70°F). If your house is chillier than that, allow extra time for rising. If time is an issue, I sometimes find it helpful to preheat the oven for a bit, then place the bowl of rising dough on top of or near the oven. You don’t need to keep the oven on throughout the rise time; just long enough to release a little extra heat near the rising dough.

** Lots of other interesting information about yeast can be found HERE.


Huevos Rancheros Pizza

Ingredients

  • 2/3 cup refried beans
  • 1/3 cup taco sauce
  • 2 cups shredded Mexican blend cheese
  • 2-3 tablespoons red onion, finely diced
  • 2-3 tablespoons green chile (fresh or canned), finely diced
  • 5-6 grape tomatoes, thinly sliced
  • 1/3 cup chorizo, chopped (optional)
  • 3 eggs
  • Additional taco sauce or hot sauce for drizzling (optional)
  • Cornmeal Pizza Dough (recipe from www.marthastewart.com)

Directions

Preheat oven to 450°F.

Prepare the cornmeal pizza dough according to the recipe found HERE, except do not divide the dough into smaller portions. Roll the entire dough into one large (approximately 12″) crust. Transfer the rolled dough to a baking sheet, which has been sprinkled with a bit of cornmeal.

Spread the refried beans onto the crust, leaving a 1/2″-1″ lip around the edge. Drizzle the taco sauce over the beans. Scatter about 1/2 of the cheese over the sauce, then sprinkle with the onion, chile, tomatoes, and chorizo. Scatter with the remaining cheese.

Use your fingers to create three shallow wells in the pizza toppings. Carefully crack an egg into each well.

Bake for approximately 15 minutes, until the toppings are hot and melty and the eggs are cooked to your desired doneness.

**Be aware that the egg whites and yolks will maintain a bright, glossy appearance as they bake. In this case, touching the eggs to check for doneness is a more reliable indicator than their appearance. (I made the mistake of relying on appearance and cooked my eggs past the cooked white/runny yolk I was aiming for. The yolks in the photos with this post are actually fully cooked, even though they appear runny.)

IMG_5659

Eggplant Parmesan Pizza (and a Giveaway!)

Yikes! Where’d the past week go? Think I can blame my absence on a Thanksgiving tryptophan-induced coma?? Seriously though, once the dishes were cleaned from our Thanksgiving dessert, I felt myself melt into an unproductive pile of mush. I just needed a little time to recover from the rush of Thanksgiving and gear up for the holiday rush. I’m ready now. Mostly.

It wasn’t a completely unproductive week though. I decided to try my hand at making one of those adorable yarn wreaths I’ve seen pictured online. I made one, admired it for a bit, then got sucked into a major crafting time warp. I awoke covered in bits of yarn and a web of those stringy glue gun remnants. I made sixteen yarn wreaths, complete with handcrafted felt flowers and tiny green leaves, over the course of six days. I barely remember making them. They just sort of appeared in a pretty pile on my dining room table. It’s kinda weird. Almost everyone I know is getting a wreath for Christmas…even one of you!

IMG_3875

On top of manic crafting, I’ve been overfilling my calendar with holiday events, shopping lists, and cookie baking schedules. Suffice it to say, this is gonna be a busy month. And busy months require easy dinners  – the sort of stuff you can easily prepare by throwing together a few basic ingredients, while still resulting in a tummy-warming winter meal. This eggplant parmesan pizza fits the bill perfectly. You could even make it with frozen pre-fried eggplant, if you wanted to keep it super, super simple, though frying your own eggplant takes minimal effort. That crisp fried eggplant gets scattered on a pizza shell (make your own or buy pre-made, like I did) along with pizza sauce, ricotta cheese, parmesan, and melty mozzarella for a simple, satisfying meal.

IMG_3884

Today’s Focus on Technique – Salting Eggplant

It is often recommended to salt eggplant prior to frying it. This technique is best applied to larger eggplants which have been sitting in the grocery case for a bit. Baby eggplants or those that have been freshly picked will most likely be wonderful without salting. The purpose of salting the eggplant is to draw out some of the bitter liquid which collects in larger, older eggplants. The end result is better tasting, firmer eggplant which will absorb less oil as it’s fried.

To salt your eggplant, start by cutting or slicing your eggplant, as desired. Arrange the pieces or slices in a single layer on a baking sheet. Sprinkle the eggplant slices with a good amount of salt. Allow it to rest for approximately 20-25 minutes. Beads of liquid will begin appearing on the surface. Thoroughly rinse the eggplant and pat dry.

IMG_3896

Eggplant Parmesan Pizza

Ingredients 

  • 1 eggplant, sliced into 1/4″ slices
  • Salt
  • 1/2 cup flour
  • 2 eggs, lightly beaten
  • 2 cups seasoned bread crumbs
  • Vegetable or olive oil, for frying
  • 1 pizza crust (store-bought or homemade)
  • 1/2 cup ricotta cheese
  • 1/2 cup pizza sauce
  • 1/4 cup parmesan cheese
  • 1 cup mozzarella cheese, shredded

*All measurements are approximate. Actual measurements will vary depending on the size of your pizza crust. I used a 12″ store-bought crust.

Directions

Arrange the eggplant slices in a single layer. Sprinkle with a good amount of salt. Allow to rest for about 20 minutes. Rinse thoroughly, then pat dry.

Dredge each slice in the flour, then dip in egg, then dredge in the bread crumbs. Press the bread crumbs into the eggplant so that it is thoroughly covered. Heat a thin layer (about 1/8″) of oil in a large fry pan over medium/medium-high heat. Fry the eggplant slices for a minute or two on each side, until golden brown and crispy. Adjust the heat, as necessary, to prevent burning. Drain the fried slices on paper towels. Chop into small pieces.

To assemble the pizza: Preheat oven to 375 degrees. Spread the ricotta cheese in an even layer over the pizza crust. Spread the pizza sauce on top of the ricotta (I like to use a smooth and thick, tomato paste based pizza sauce.) Sprinkle about 1/2 of the mozzarella cheese over the sauce. Arrange some of the eggplant pieces around the pizza. (You may have extra eggplant remaining.) Sprinkle with the parmesan cheese and remaining mozzarella cheese. Bake for about 15-18 minutes, until hot and melty.

IMG_4324

I come bearing gifts… Want to win one of the 8″ wreaths I made? Keep it for yourself or cross someone off your shopping list! I’ll even try to match the winner up with a color scheme of your choice! If you’d like to enter to win a wreath, leave a comment about your favorite holiday tradition (any holiday) or your top tip for enjoying a stress-free holiday season. The contest will end at 12:00 noon EST on Saturday, December 8, 2012, when I will randomly select one winner. One entry per person. US mailing addresses only, please. Good luck!

Buffalo Chicken Pasta Bake (and Giveaway Winner!!)

Well, we did it! We made it through Halloween. I enjoy Halloween, especially now that I have kids to celebrate it with – but to be honest, for me it’s mostly just the gateway holiday to Thanksgiving and Christmas. Those are the holidays which really have my heart. I’ll admit, a small tear of joy may have run down my cheek when I walked into Target the other day to find the first of their holiday decorations hung from the ceiling. I have no problem with celebrating Christmas even as we prepare for Thanksgiving. The two go hand in hand for me.

But Halloween was fun this year. Really fun. The boys dressed up for the pre-Halloween party at their school. There was a dj, a disco ball, and hundreds of costumed children, half-blinded by masks, crashing into each other on the school gym dance floor. All varieties of goblins, ghouls, princesses and superheroes roamed the school cafeteria with slices of pizza and pumpkin cookies hanging from their mouths.

On Halloween, the boys put on their costumes for their school parade. Liam was Harry Potter, a costume I’m certain he selected for the pretend glasses it came with. Lucas was a terrifying werewolf, a costume I believe he selected for the shredded jeans it would give him a reason to wear. The kid’s got a weird love for jeans, as long as they have a real, functional button and zipper…none of those faux buttoned, elastic-waisted toddler jeans for him!

After school, we attended a pre-trick-or-treating party at our friends’ house. I dressed as a princess with baby James as my frog prince. We brought along a bucket of spooky eyeball cake pops, which everyone enjoyed after the delicious dinner served by our friend. There was pasta and meatballs, a vibrant pasta salad, Italian bread and butter, jumbo shrimp, fresh veggies with dip, cheese and crackers, baked ziti and chicken wings.

And that’s when the seedling of an idea began to take root, right there surrounded by ninjas and vampires – baked ziti and chicken wings…

Y’all know I’ve got a little thing for inserting buffalo chicken wing flavor into all varieties of other foods…chicken wing dip, buffalo chicken lasagna, buffalo chicken monkey bread, buffalo chicken pizzabuffalo chicken meatballs, buffalo chicken potato skins… so, why not buffalo chicken baked ziti? As my sister put it, “Why have we not eaten that before???” It’s a practically ludicrous idea to consider. Fortunately, we no longer need to commiserate over the absence of buffalo chicken baked ziti in our lives. I made it last night and my hybrid baked ziti-buffalo chicken world is now beautifully complete.

Focus on Technique – Poaching Chicken

It’s common to find recipes calling for poached chicken. Poaching is simply the process of very gently simmering a food until it’s cooked. Eggs, poultry, and fish all responded well to poaching. Foods can be poached in a variety of liquids, including water, milk, wine, and broth/stock. Various herbs and seasonings can be added to the poaching liquid to impart delicious flavor into the chicken. When poaching, it’s important to control the heat in order to keep the liquid at a gentle simmer.

Properly poached chicken breasts remain moist and tender. Poached chicken works well on its own, in chicken salad, on pizza, in soup, or mixed in with pasta.

To poach chicken breasts, place the chicken in a pot large enough for the chicken to fit comfortably. Cover the chicken with cool water (or chicken broth). Over medium heat, bring the liquid to a gentle boil. Adjust the heat so that the liquid maintains a gently bubbling simmer. Cook for about 10-15 minutes, until the chicken is cooked through. An instant read meat thermometer is the most effective way to determine doneness. Chicken is done once it’s reached 165 degrees.

Buffalo Chicken Pasta Bake

Ingredients

  • 1 pound pasta
  • 1 pound of chicken, poached and chopped into small pieces
  • 1/2 cup celery, chopped
  • 1 cup Frank’s Red Hot hot sauce (or your other favorite hot sauce)
  • 1 cup blue cheese dressing (I always recommend Marie’s)
  • 3/4 cup ricotta cheese
  • 2 cups mozzarella cheese, shredded
  • 1/4 cup blue cheese, crumbled (optional)
  • Salt and pepper (optional)

Directions

Preheat oven to 375 degrees.

Cook the pasta for about a minute less than the package directions call for. Strain and rinse with cool water to prevent overcooking. Return the cooled, strained pasta to the pot. Add the chicken and chopped celery.

In a bowl, combine the hot sauce and blue cheese dressing. Pour the mixture over the pasta. Add the ricotta cheese and 1 cup of the mozzarella. Stir to combine. Taste and adjust seasoning with salt, pepper, or additional hot sauce, as desired.

Transfer the pasta mixture into a large 13×9 baking dish. Sprinkle the remaining 1 cup of mozzarella cheese and the crumbled blue cheese (optional) over the top. Bake for about 30 minutes.

*You can prepare the entire dish, up to the baking step, ahead of time. If preparing ahead of time and refrigerating, allow for approximately 10-15 minutes of extra cooking time. 

Werewolf and the frog prince

GIVEAWAY WINNER!! We have a winner! Using http://www.random.org to select a number at random, out of the 28 entries received for the dairy-themed gift bag giveaway, the winner is #12 , Jessica M. Congratulations, Jessica!! I’m going to send you an email at the address provided with your comment to get the information necessary to send you out your prize!!

Bacon-Wrapped Dates Stuffed with Bleu Cheese

A few weeks ago, my five year old comes out of the dining room holding a little recipe book of cocktails, which he found while rummaging through a drawer in the hutch…the hutch that he’s not supposed to be in, but that’s another story entirely. Liam was holding this little black book of beverages with a page open to a generic looking bit of cocktail clip art. The recipe on the page was for kir royales. Something about the name rang a bell, but I couldn’t have told you what sort of drink a kir royale was. My best guess would have involved whiskey, which isn’t really my thing.

I began uttering my normal line of questioning. Where’d you get that? Why are in the hutch? What other sorts of mischief are you doing in there? But, Liam interrupted me, “I think you should invite some of your friends over for your birthday and make them these drinks”. I smiled briefly, because he’s sweet to think up plans for my birthday. Then I took another glance at that kir royale recipe. Turns out that kir royales are a champagne cocktail, champagne mixed with a bit of creme de cassis (blackcurrant liqueur).

Visions of champagne cocktails, wine, and cheese began dancing in my head. I mean, is there any more heavenly combination than wine and cheese? Wine, cheese, and chocolate, perhaps??

Did you know that 1/3 of all milk produced in the U.S. is used to make cheese?? We certainly love our cheese in this country! During my recent farm-to-table dairy-themed getaway, hosted by the American Dairy Association and Dairy Council, we had the opportunity to enjoy some of that delicious cheese in combination with some of New York’s tastiest wines.

After we returned from our morning at a local dairy farm, we were given a chance to clean off the eau de cow and change out of our farm attire. The group reunited at the New York Wine and Culinary Center, conveniently located next door to our accommodations at The Inn on the Lake in Canandaigua, NY. The New York Wine and Culinary Center is a really neat place. In addition to a bistro which showcases local ingredients, they have a wine tasting room where you can sample wines from all five of New York’s wine regions, a hands-on kitchen where they offer cooking classes, and an educational amphitheater for demonstration dinners.

New York Wine and Culinary Center

We began our experience in a private tasting room, where a personable wine instructor introduced us to the basics of wine tasting as we sampled a fantastic flight of New York wines. Then they brought out the cheese plate, a perfect way to make the farm to table connection during our dairy-themed adventure. We tasted each cheese on its own, then experimented with pairing each cheese with the variety of wines. Play with my food? Yes, please.

Following the wine and cheese tasting, we moved into the amphitheater, where a chef prepared a three-course meal before our eyes. We enjoyed ricotta and pancetta ravioli in a delicious cream sauce, bleu cheese port wine crusted beef tenderloin over root vegetables in a red wine reduction, and chocolate amaretto crème brûleé. Each course was perfectly paired with another New York wine. Wine, cheese, steak, and chocolate… I’d died and done to gastronomical heaven.

When I returned from my little dairy getaway, feeling fully inspired by cheese and wine, I began planning my kir royale birthday celebration. Pumped up with New York agricultural pride, I selected a few bottles of New York champagne. Then I set about planning the cheese selection…a little pepperjack and NY cheddar with crackers, some baked brie with marmalade on crostini, and a few simple bacon-wrapped, bleu cheese-stuffed dates. Liam was feeling pretty impressed with himself as he watched his brilliant idea become reality. I just barely caught him trying to sneak the cocktail recipe book into his backpack for kindergarten show and tell.

Focus on Technique – Entertaining with Cheese

Entertaining with a cheese-themed spread is effortlessly elegant and delicious.

A few tips for entertaining with cheese:

  • Keep it simple. Cheese has a way of speaking for itself.
  • Choose a variety of mild and pungent cheeses to please everyone’s palate. Try to serve a mix of aged (aged cheddar, gouda…), fresh (fresh mozzarella, chevre…), firm (provolone, monterey jack, gruyere, emmentaler…) and soft cheese (camembert, brie…). A creamy bleu cheese (stilton, gorgonzola, roquefort, maytag…) or spreadable port wine are other popular favorites.
  • Garnish your cheese plates with a variety of fresh and dried fruits, honey, nuts, and/or cured meats. Fresh mozzarella pleases the eyes and the taste buds when arranged on a platter with sliced tomatoes, fresh basil leaves, and a drizzle of balsamic vinaigrette or basil pesto.
  • Serve the cheese with an attractive variety of crackers, baguette slices, and crostini.
  • Consider serving a few warm cheese dishes, such as a cheese dip, baked brie wrapped in puff pastry, or the bacon-wrapped stuffed dates featured in this post. All of these items can be prepared ahead of time and simply thrown in the oven when your guests arrive.
  • Serve with a selection of wine and have fun experimenting with the way each wine and cheese complements each other.

*** Don’t forget to enter the dairy themed giveaway! You have until noon on Saturday, November 3. To enter, simply leave a comment on the Delicious Dairy Round-Up post. I’ll assign each comment a number, then use a random number generator to pick a winner. Lots of cute stuff in that gift bag. Check it out HERE

Bacon-Wrapped Dates Stuffed with Bleu Cheese

Ingredients

  • 24 pitted dates
  • 2-3 ounces bleu cheese
  • 8-12 slices bacon

Directions

Preheat oven to 400 degrees. Stuffed a bit of bleu cheese into the center of each date. Cut the bacon slices in half or thirds, depending on the length. Wrap a piece of bacon around each date, so it overlaps just slightly. Secure the bacon with a toothpick, then place on a baking sheet. Bake for approximately 20 minutes, until the bacon is cooked and crisp. Drain on a paper towel. Serve warm.

Birthday Kir Royales

Delicious Dairy Round-Up and a Giveaway!!

In many ways, I’m an overly trusting person. I’m an optimist by nature and I tend to assume the best in people, almost to the point of foolishness. It’s the way my brain (and maybe my heart?) works and it can be both a benefit and a curse. Because my personal belief system comes from a place of trusting that most people are honest, moral, ethically-minded people, I sometimes fail to ask the questions I ought to ask. And when it comes to the food I feed myself and my family, I really should be asking more questions.

View from The Inn on the Lake – Canandaigua Lake, NY

Like most of us, I strive to feed my family a well-balanced, nutritious diet which is mostly composed of whole foods. I try to stay aware of current findings in nutrition research and I use that information to make the choices I feel are best for my family’s needs. But sorting through the vast amount of information, which is easily accessible in today’s modern technological age, can be positively confusing. You can find a strongly-worded, research-based article full of references and evidence, to support or refute just about any claim. Add that to the fact that as technology changes and new information becomes available, widespread belief systems about what’s healthy or not change. Remember when eggs were bad for you? Or margarine considered healthy? Or fat-free products the ticket to healthy living? It’s a moving target. On top of all of that, you then need to contend with the difference between what medical professionals tell you and what you heard from your neighbor’s best friend’s former schoolmate. It’s absolutely overwhelming, even to a well-educated adult with a background in biochemistry and an avid interest in food.

Canandaigua Lake

Most of us want to do the right thing when it comes to our family’s well-being. But in an age of way too much information, where it’s almost impossible to sort fact from fiction from personal preference, identifying that ‘right’ thing can be downright perplexing. You can’t win. In fact, I stopped trying to win. Ultimately, I end up basing most of our choices on the bits of information which seem the truest and our own personal evidence. If my family appears and feels happy, healthy, and well-nourished, I consider our choices a success. If something isn’t working, we look for the culprit and go after it with our fiercest ninja moves.

Noblehurst Farms in Linwood, NY

For myself and my family, dairy products have always been a part of our diet, which we all enjoy and thrive on…our personal evidence. The kids drink milk, we use it in our cereal, we love ice cream and yogurt, and you might as well crown me the ambassador of cheese. (Make it an extra sparkly crown, please!) Convincing me to like dairy was never an issue. So, when I was invited to attend a NY Dairy Farm to Table event hosted by the American Dairy Association and Dairy Council, which would involve touring an upstate NY dairy farm, followed by eating cheese and drinking wine, along with two uninterrupted nights of sleep in a comfy hotel room, nobody had to twist my arm real hard.

Mama cow and her calf, just a couple hours after the birth, comfortably resting in a clean stall.

I eagerly accepted the invitation, certain it would be an enjoyable (and yummy) experience. What I hadn’t counted on was how positively eye-opening the experience would be and how it would answer so many of the questions I hadn’t taken the due diligence to ask.

I walked into the experience thinking about cheese, delicious cheese. I walked out of the experience feeling absolutely blown away by the level of planning, thoughtful practice, and monitoring, that goes into producing the safe and nutritious milk which ends up on our store shelves and is used in some of our other favorite dairy products. (Yes, I’m thinking about cheese again.) I have a new found appreciation for the animals who provide us with the food that many of us enjoy on a daily basis and for the hard-working farmers who care for those animals in order to get a plentiful supply of that food to our families’ tables.

I’ve tried really hard to prioritize my thoughts, but there are just so many things I want to share with you. So, pour yourself an icy cold glass of milk (perhaps a few cookies on the side for dunking) and stay tuned until the end, where I’ll share links to my top ten favorite Gourmand Mom recipes featuring dairy and an awesome giveaway!

One of the long spacious barns at Noblehurst Farms

We spent the morning at Noblehurst Farms in Linwood, NY. Noblehurst is a large, modern, seven-generation multi-family dairy farm. They care for and milk 1700 cows to produce a daily yield of approximately 15,000 gallons of milk. Most of the milk produced at Noblehurst Farms is sold to Steuben Foods in Elma, NY for yogurt production or Sorrento in Buffalo, NY for mozzarella cheese. Mmmm….cheese.

Seventh generation dairy farmer, Kitty Noble Rudgers, co-owner of Noblehurst Farms in Linwood, NY, (who I should note is currently thirty-six weeks pregnant with the eighth generation of Noble dairy farmers), hopped on a hayride along with Noblehurst’s cow nutritionist and dairy manager to show us how Noblehurst produces those 15,000 gallons each day. We toured their vast property from where they grow the food which feeds the cows, to where they ferment and store the cows’ food, to the digester that turns the cow’s waste into energy which can be transferred back into the power grid. We visited a large barn where many of the cows are housed, the milking parlor, and the barn where calves are born and raised. (I pet a baby cow. He mooed. I considered adopting it.) Afterward, we had the opportunity to meet with the veterinarian who cares for the herd as well as the CAFO (Concentrated Animal Feeding Operations) planner who works with the farm to ensure they are meeting or exceeding all standards for keeping our environment safe.

Young calf, resting with other young calfs.

Everyone we met was open and informative as our small group toured the farm’s operations. Here are a few of the highlights…

  • The vast majority of farms across NY and the nation are family owned and operated. This just makes me feel good when I’m thinking about the food I feed my own family. It sort of makes me think back to a time when every family owned their own cow for their family’s milk and eventually meat. Nowadays, very few people own their cow, but we’ve got these farm families who were born and raised on dairy farms and are now providing the rest of us with delicious dairy.
  • Anyone who’s ever nursed their baby can attest to the fact that comfortable, happy, and well-nourished moms make the most milk. Well, same goes for cows. Comfortable, stress-free, healthy cows produce the most milk, so if for no other reason than profitable business, it is in the best interest of the farmer to take darn good care of their cows. Cows are fed a carefully crafted blend of food which is optimized for their overall health, taste preferences, and milk production. Each cow eats approximately 90-100 pounds of food every day along with a bathtub’s quantity of fresh water. Holy cow…90-100 pounds?!?! I’m rethinking my desire to adopt a cow.
  • All dairy products are antibiotic-free. Sick cows on conventional dairy farms may be treated with antibiotics, when necessary, just as doctors may prescribe them for ourselves or our family members when needed. But milk from these cows is not allowed to enter our food supply. Multiple levels of safety screening occur at both the farm level and production plant level for every batch of milk to ensure that antibiotic-tainted milk does not end up on our store shelves. Loads of milk which test positive for antibiotics are dumped, at great cost to the farm, so it’s not something that anyone takes lightly.
  • The use of artificial growth hormones to increase milk production is a concern to many people, who worry it may enter the milk and cause adverse affects in our bodies. I hear ya! Though the FDA has found no significant difference in the quality of milk from cows treated with artificial growth hormones as compared to the milk from untreated cows, I’d always rather lean towards the side of extra caution when it comes to my family’s safety. The good news is that while use of these hormones is currently still allowed in the United States, most dairy farmers (including Noblehurst Farms) are responding to consumer demand by eliminating the use of artificial hormones in favor of optimal nutrition practices.

Weeeeeeee…a carousel ride for cows!

  • Dairy cows are not over-worked milk machines. In fact, they spend a very small amount of time being milked each day. Cows at Noblehurst Farms are milked three times each day on a rotary carousel milker. They step onto the slow moving carousel, are examined for any signs of infection or health concerns, are sanitized, then hooked up to the milkers. The milkers automatically fall off once the cow’s flow reduces to a certain level. They finish their ride on the carousel, then step off and spend the rest of their day eating their carefully crafted diets and resting on comfortable beds in their stalls. The entire process takes nine minutes. Multiply that by the three milking cycles each day for a total of twenty-seven minutes spent in the milking process. And on average, they get about two months off from milking each year. Doesn’t sound like such a bad deal to me! I nursed my three sons and let me tell you…I spent a heck of a lot more than twenty-seven minutes being milked each day and I certainly didn’t get all of that time for resting and eating in between or the two months of vacation time!
  • Rotary milkers aren’t the only modern technology being used for efficiently milking large groups of dairy cows. We met a pair of local dairy farmers who use robotic milkers. With robotic milking, the cows roam freely and can choose to enter the milking stalls as they wish, as often as they wish. Once in the stall, the robotic milking system automatically cleans the cow for milking, attaches, and effectively milks the cow. It’s even capable of recording coordinates for each individual cow so that it can more easily identify the correct placement of the milkers each time that cow enters the stall! How cool is that?? But the funny thing is that apparently, some cows enjoy this process so much, they choose to enter the stalls for milking many more times than necessary each day! Silly cows!
  • All milk is healthy, wholesome, and nutritious. – Whether you choose organic or conventional milk, whole, reduced-fat, or skim, you’re getting those nine essential nutrients: calcium, vitamins A, D and B12, protein, potassium, riboflavin, niacin and phosphorus. And did you know that whole milk is actually only 3.3% fat?? Personally, I’m a skim milk girl, but if you prefer the fuller body of whole milk, there can certainly be room for it within the framework of a healthy balanced diet.

Milking machines on the rotary milker at Noblehurst Farms

I loved dairy prior to this experience. It would have put a serious damper on my love affair with cheese to have observed anything other than the remarkably well-designed, efficient and sustainable production they’ve got in place at Noblehurst. Instead I walked away feeling more confident than ever about the dairy products I feed myself and my family. Seeing it all firsthand, I am reminded to be mindful of where our food comes from. It’ll be hard not to think about those adorable and generous cows every time I enjoy some delicious cheese!

In honor of this awesome experience, I’ve put together a round-up of some of my favorite recipes featuring delicious dairy! Give them a try!

Spicy Bacon Mac and Cheese

Cannoli Ice Cream

Mixed Berry Mousse with Vanilla Bean Panna Cotta

Quadruple Berry Muffins

Creamy Bacon Mushroom Soup

Three Cheese Fondue

Aged White Cheddar and Broccoli Soup with Chorizo

Spiced Fruit Bread Pudding

Bacon Cheddar Drop Biscuits

Strawberry Cheesecake Ice Cream

Want to win this???

GIVEAWAY TIME!!!

The American Dairy Association and Dairy Council is offering a gift bag of dairy-themed items for one lucky reader! It’s an awesome bag of goodies, including a cow print apron and oven mitt, a gorgeous wooden cheese board, cow cheese spreaders, a cow wine cork, little squishy cow toys, a sturdy cow-print lunch bag, and a Taste of New York cookbook! To enter, simply leave a comment on this post telling me your favorite cheese or favorite use of dairy products. The contest will close on Saturday, November 3 at 12:00pm EST, at which point a winner will be randomly selected. One entry per person, US mailing addresses only, 18 years or older please. 

Good luck, friends!

The American Dairy Association and Dairy Council hosted the NY Dairy Farm to Table event. As part of this event, they provided me with accommodations, compensation towards travel expenses, a gift bag of dairy-themed goodies, and a delicious evening at the NY Wine and Culinary Center. I was under no obligation to the ADADC, Noblehurst Farms, or any other agency to write this post or in any way share my experiences.

Barbecue Bacon Mango Pizza

Posted on

The sun is barely risen. I’m lying in bed and I can feel sweet warm breath rhythmically hitting my face. I slowly open my eyes and find myself nose to nose with Lucas, my three-year-old, who climbs into bed with me each morning. I put my arms around him, then close my eyes and pretend to be asleep. He plays with one of my earrings, trying to remove the small silver leaf from my ear. After a moment, he abandons the earring and begins running his tiny fingers over my eyebrows. Behind me, I can feel my five-year-old, Liam, trying to braid my excessively long hair. Lucas becomes bored with my eyebrows and begins trying to forcefully push my eyelids open. I roll over to face my Liam. Liam pushes his nose closer to mine and whispers, I love you, Mommy. I kiss his nose. The baby begins to peep through the monitor, wordlessly begging to join the family snuggle time. My husband rolls out of bed to grab the baby. Once in our bedroom, our sweet baby James crawls over his brothers to get on top of me. He puts his wide open mouth onto my cheek. I think it’s a kiss. A very sloppy kiss. Then he tries to jam his finger into my mouth to touch my teeth. I rouse myself then, to bring the boys downstairs for breakfast before my little amateur dentist gets too aggressive.

I’ve come to realize that I belong to my children as much as they belong to me. We belong to each other. It’s a thoroughly symbiotic relationship.

More than anything, I want my family to feel loved in the same way they so generously give their love to me. And one of the ways that I show my love is through fresh and delicious food, carefully crafted into delicious meals we can enjoy as a family, like this barbecue bacon mango pizza. This pizza is inspired by one of the recipes provided by The National Mango Board in a booklet they sent along with a shipment of beautiful ripe mangos. It instantly reminded me of a sweet and savory Hawaiian pizza, only substituting the ham for bacon and the pineapple for mango. Genius. Only I took that idea a little further by coming up with a homemade mango barbecue sauce, rather than slathering on something store-bought.

Though unplanned, the preparation of this pizza became a family affair. Small noses came running at the scent of bacon. Small hands stole said bacon. Small mouths gobbled up an entire mango before I had a moment to protest. We dubbed the afternoon Mangofest. There were tears when the last of the mango had been devoured, but smiles returned once this pizza was presented. Definitely a family pleaser! Best yet, the recipe for the barbecue sauce will make more than you need for the pizza…perfect for grilled mango barbecue chicken breasts the next day!!

Barbecue Bacon Mango Pizza

Ingredients

For the mango barbecue sauce

  • 1 tablespoon olive oil
  • 1/2 small red onion, chopped
  • 1 1/2 teaspoons garlic, minced
  • 1 (15-ounce) can tomato sauce
  • 1 1/2 cups fresh mango puree (2 medium mangos should do the trick)
  • 4 tablespoons tomato paste
  • 2 tablespoons brown sugar
  • 2 tablespoons apple cider vinegar
  • 1 tablespoon worcestershire sauce
  • 1 teaspoon dry mustard
  • 1/2 teaspoon cayenne pepper (plus more, if desired)
  • Salt (optional), as desired

For the pizza

  • 1 12″ pizza crust
  • 1/2 red onion, thinly sliced
  • 1 tablespoon olive oil
  • 1 mango, chopped*
  • 6-8 slices bacon, cooked and chopped
  • 3/4 cup mozzarella cheese, shredded
  • Fresh parsley, chopped

* Click HERE to see my photo guide on how to chop a mango.

Directions

To prepare the mango barbecue sauce: Heat the olive oil in a large pan over medium/medium-low heat. Add the onion and cook for 5-7 minutes until tender and translucent. Add the garlic and cook for another minute or two. Add all other barbecue sauce ingredients and stir to combine. Bring to a very gentle simmer, then reduce the heat to low and simmer for about 25 minutes, stirring occasionally to prevent burning. Allow the sauce to cool, then use a food processor or blender to puree until smooth. Taste the sauce and adjust seasoning as desired. Refrigerate until using.*

To prepare the pizza: Heat the oil in a small pan over medium/medium-low heat. Add the onion. Cook for about 15 minutes, stirring frequently to prevent burning, until the onions are tender, sweet, and lightly golden. Spread a thin layer of the sauce (approximately 1/2 cup) over the pizza crust. Scatter most of the bacon, mango, and onions over the sauce. Top with the shredded cheese. Scatter the remaining bacon, mango, onions, and parsley on top. Bake in a 400 degrees oven for about 12-15 minutes, until hot and melty.

*The barbecue sauce recipe will produce more sauce than is necessary for the pizza. You can use the sauce as you might use any barbecue sauce on grilled chicken, ribs, shrimp… It would also freeze nicely for later use.

The Gourmand Mom

Good food, seasoned with a dash of life