RSS Feed

Tag Archives: pumpkin

Pumpkin Gingersnap Bars with Gingered Cream Cheese Topping

Halloween blew my two years old’s mind. Totally blew it. For weeks we’d been talking about how he would be Captain America on Halloween, while his brothers would be Hulk and Thor. Daddy would be Iron Man and Mommy would be Black Widow. We’d go door to door, collecting candy, which we would deposit in plastic pumpkins.

Though clearly flummoxed by this odd outline of what would happen on Halloween, he walked around telling anyone who would listen that he was going to “be Captain America”. (When he says it, it sounds a lot more like “Captain Murder”.)

As Halloween unfolded, every last bizarre detail came to fruition. He became Captain America. He was handed a plastic pumpkin. He said the magic words as he trotted from door to door. He got candy. Somehow, he managed to collect twice as much candy as either of his older brothers, having visited the same number of houses.

Be Captain America. Get Candy.

IMG_1503

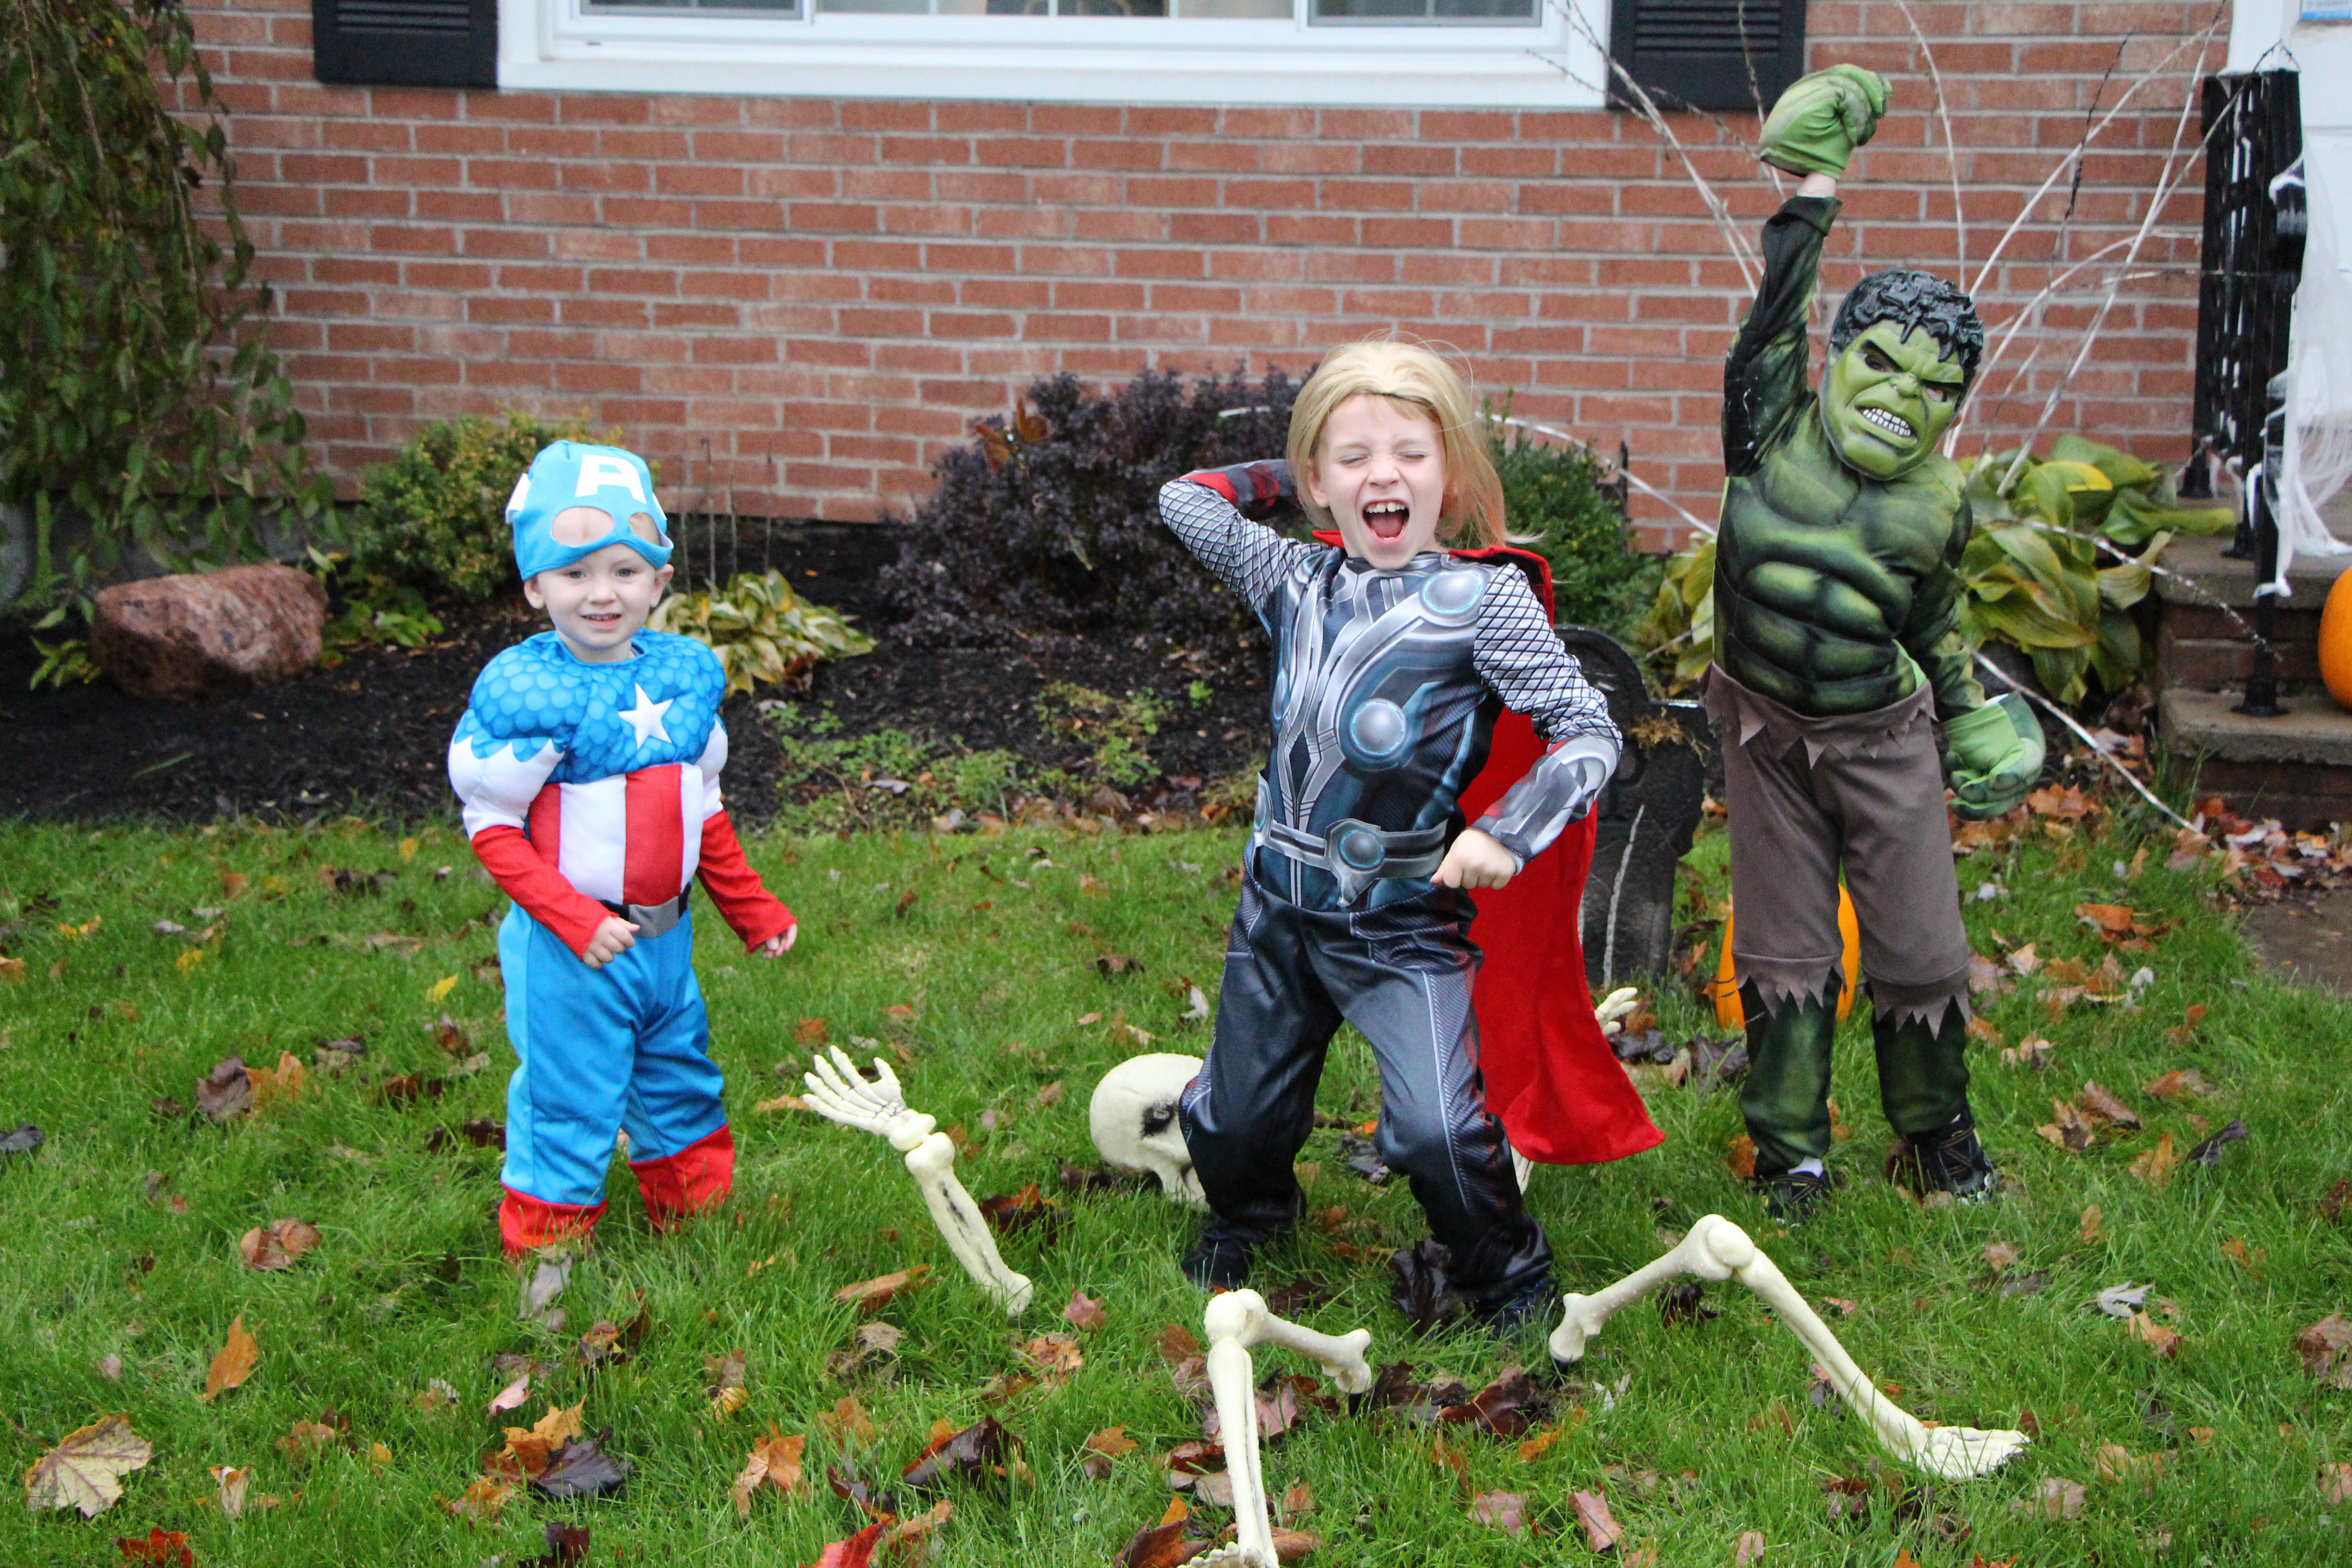
Meanwhile, Lucas, my five-year-old Hulk, obsessed over the accuracy of every minute detail of his costume. My initial money-saving plan of picking up a fleece Hulk hat, t-shirt, and green face paint was met with a long list of concerns about muscles, green arms, purple ripped pants, and green legs.

I abandoned my frugal plan once the details overwhelmed me, in lieu of an official store-bought muscles-included hulk costume. Far from solving the problem, this purchase was quickly met by concerns over not having green feet or enough teeth in his partially toothless mouth. A hefty dose of gamma radiation may have saved us all a few headaches.

Learn from my experience, folks… If you stick three little boys in superhero costumes and call them The Avengers, you’d better expect some major chaos. Thor’s hammer was revoked almost instantly. Somehow, we made it through the day, by the skin of our superhero teeth.  Next year, I may dress our whole clan as librarians, monks, and sloths.

IMG_1541

American Dairy Association and Dairy Council Fall Dairy Tour – Part 1

Thankfully, the very next day, I had the pleasure of departing for a weekend of dairy education and wine and cheese tasting, hosted by the American Dairy Association and Dairy Council. Last year’s event was such an amazing experience. (You can read about it here.) I couldn’t wait to see what ADADC had in store for us this year.

This year, the event began at the beautiful Geneva on the Lake in Geneva, New York, which is located on the northwest side of Seneca Lake. Nestled in the New York Finger Lakes wine country, the manicured grounds of this elegant villa-inspired resort are absolutely stunning.

IMG_1548

After a comfortable night’s sleep in a spacious jacuzzi suite, we awoke for a continental breakfast at the resort. From there, we departed for Cornell University, where we spent the day touring Cornell’s state of the art dairy farm and dairy production plant. We met with experts in the fields of dairy farming, food science, and dairy production.

Going a step beyond the dairy farms, we learned about ice cream, cheese, and yogurt making and how Cornell University partners with local cheese artisans and other small business to help them develop and promote their dairy products.

Part of our ‘learning’ required tasting a variety of ice creams, frozen yogurt, homemade yogurt, and cheese. I had no choice but to eat that delicious ice cream and a second helping of cheese. Twist my arm already!

IMG_1642

I couldn’t possibly do the weekend justice in a single post, so I’m going split my thoughts into a few posts, each post paired with seasonal, dairy-inspired recipe. Think cheese, yogurt, ice cream, and creamy chowder…

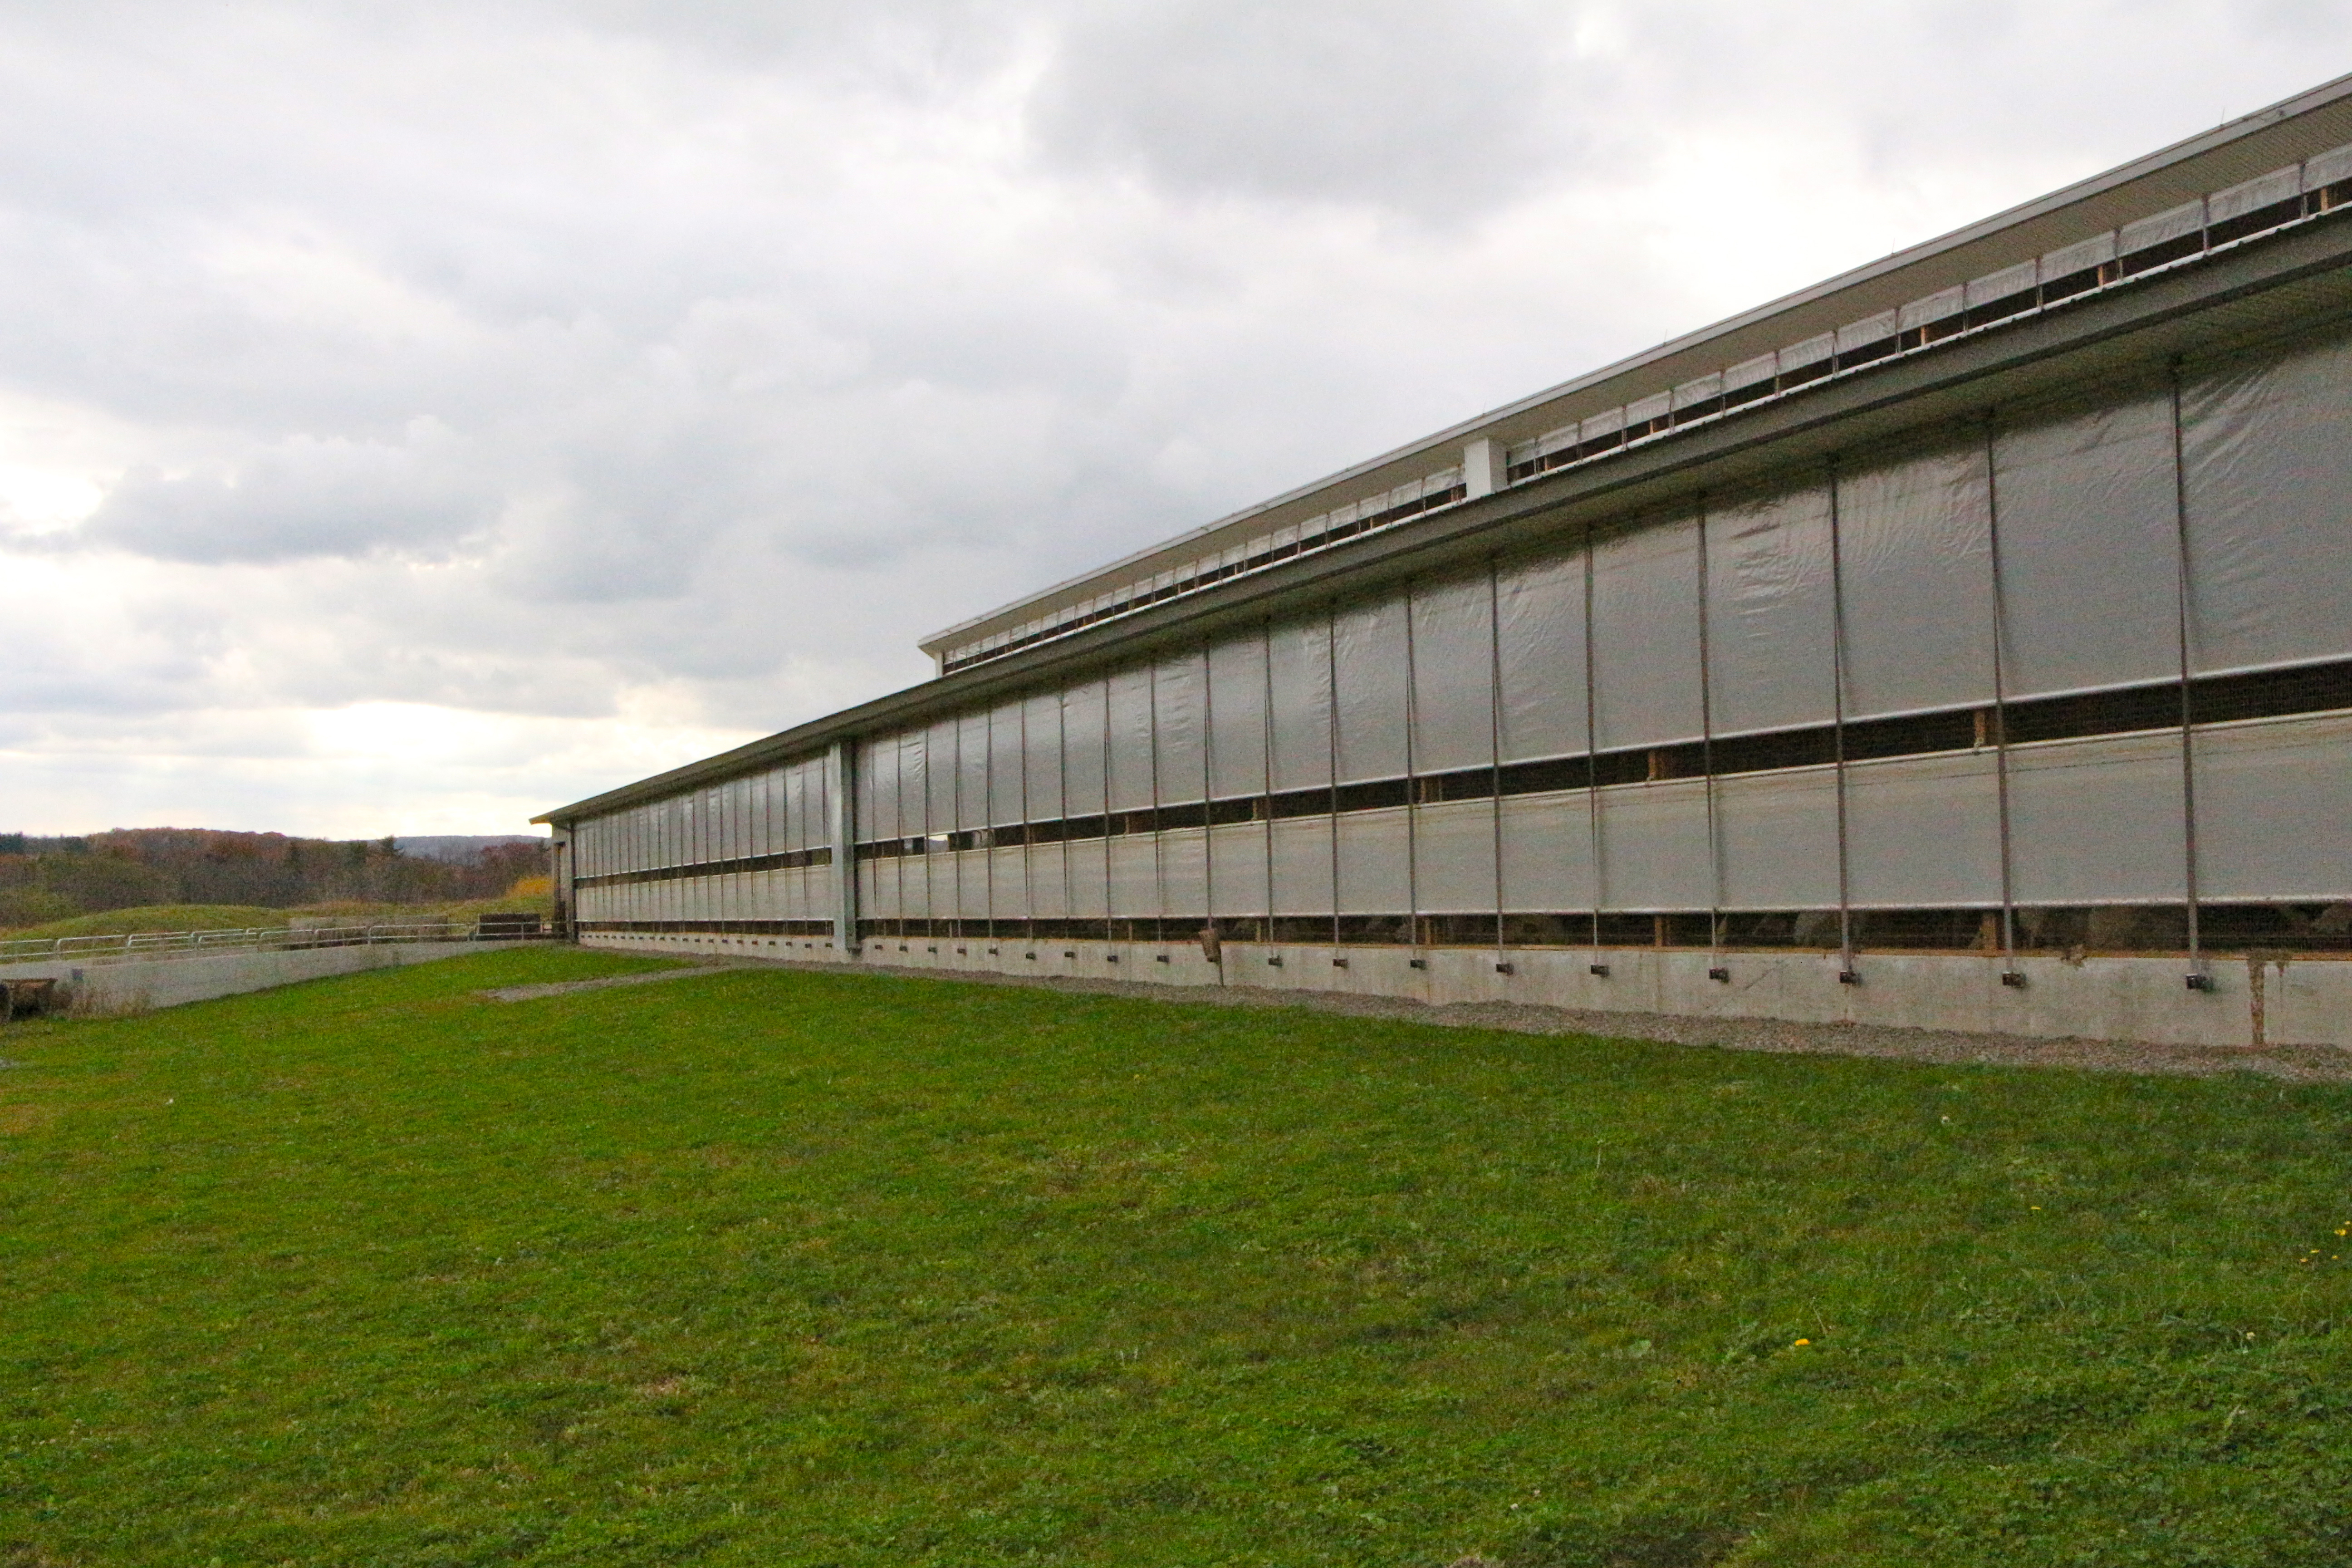
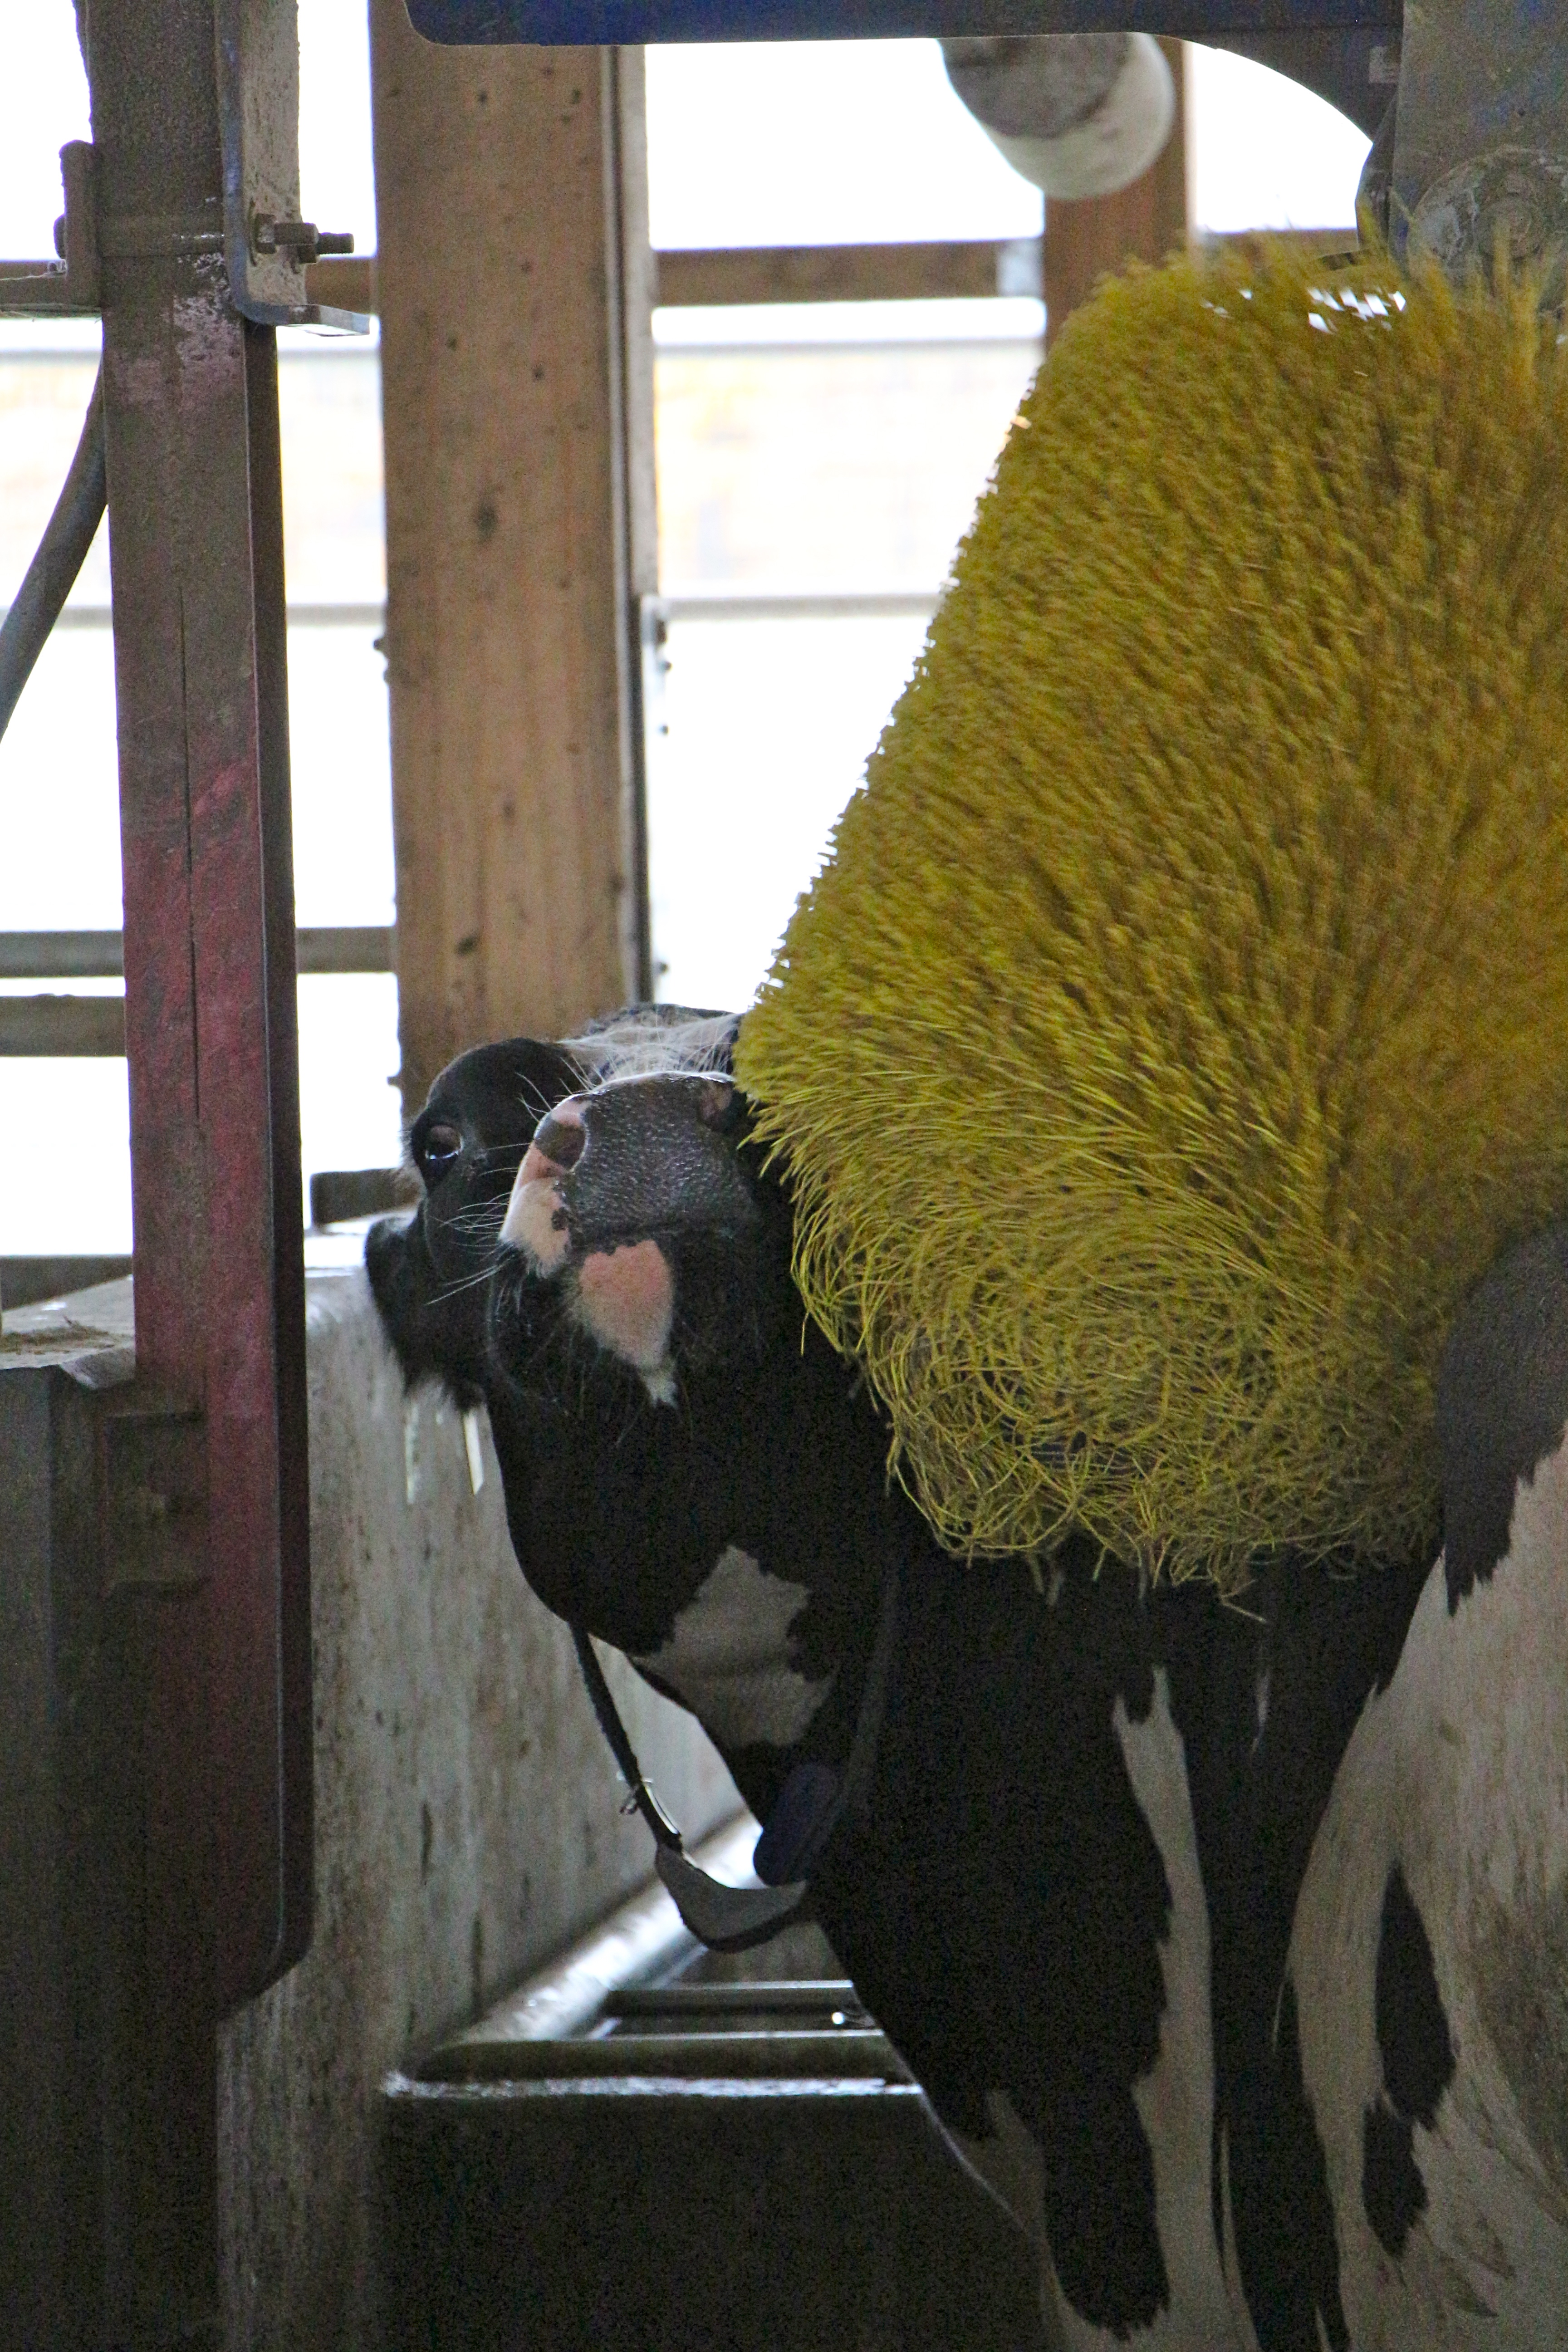
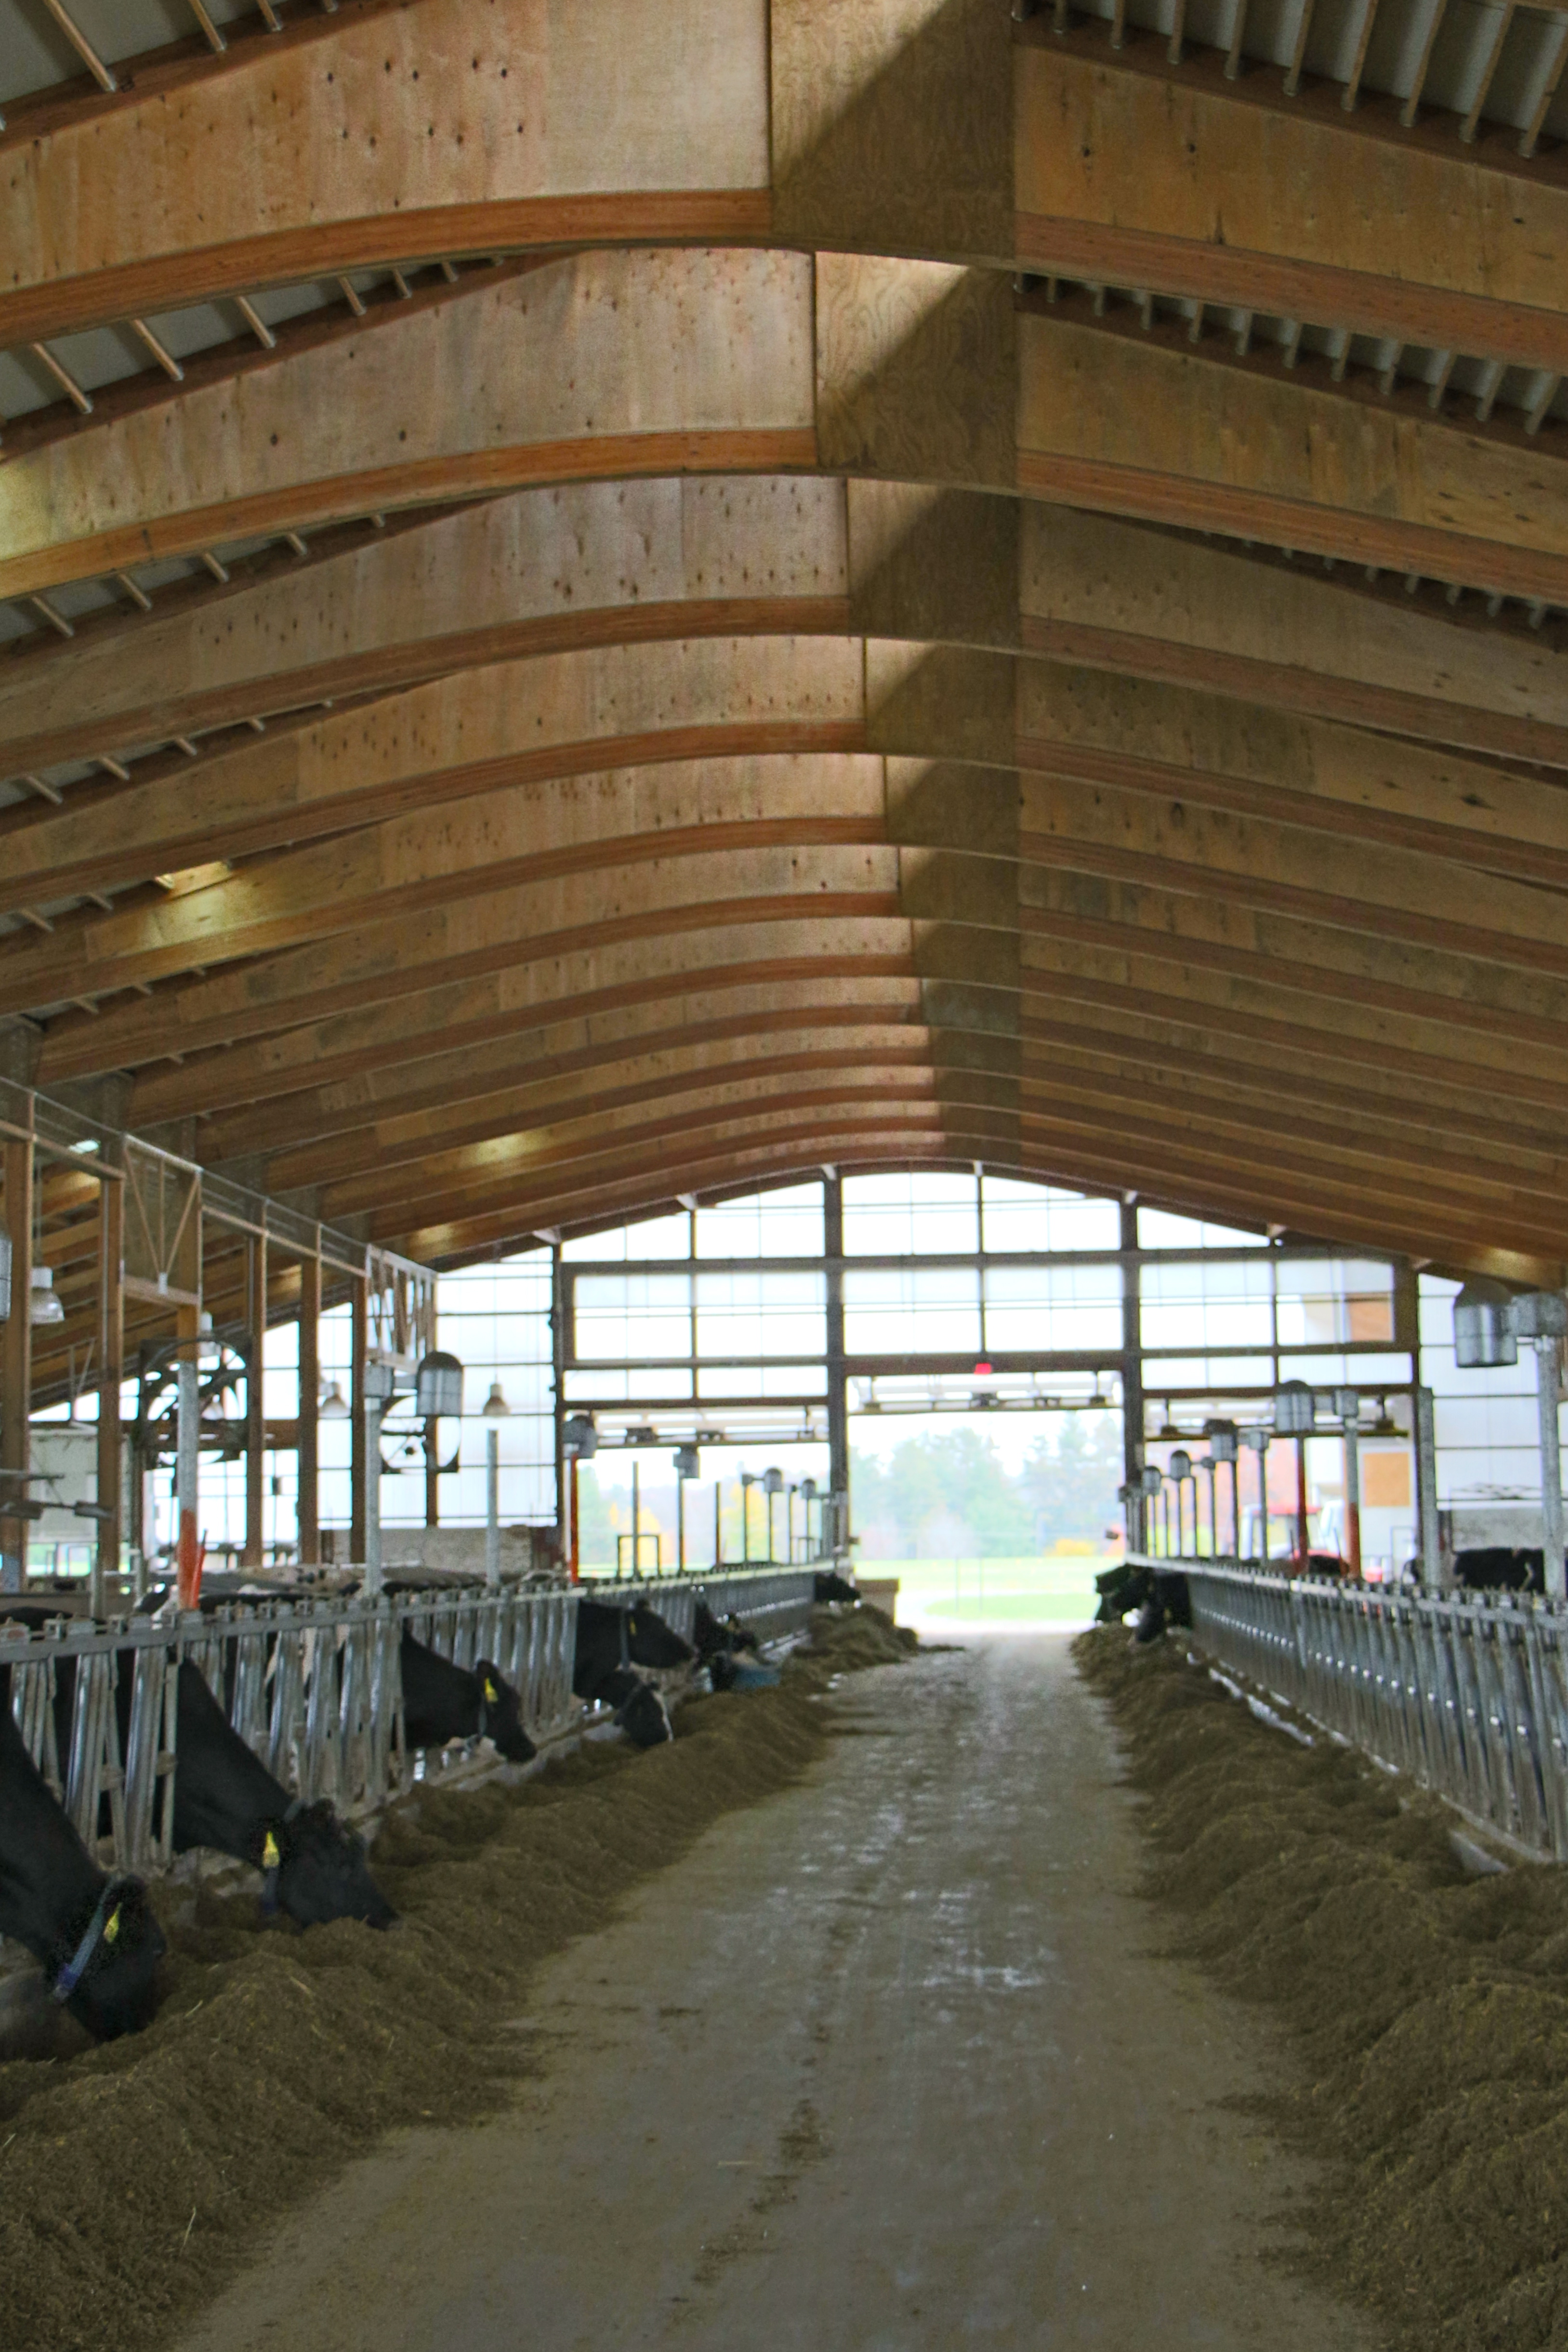
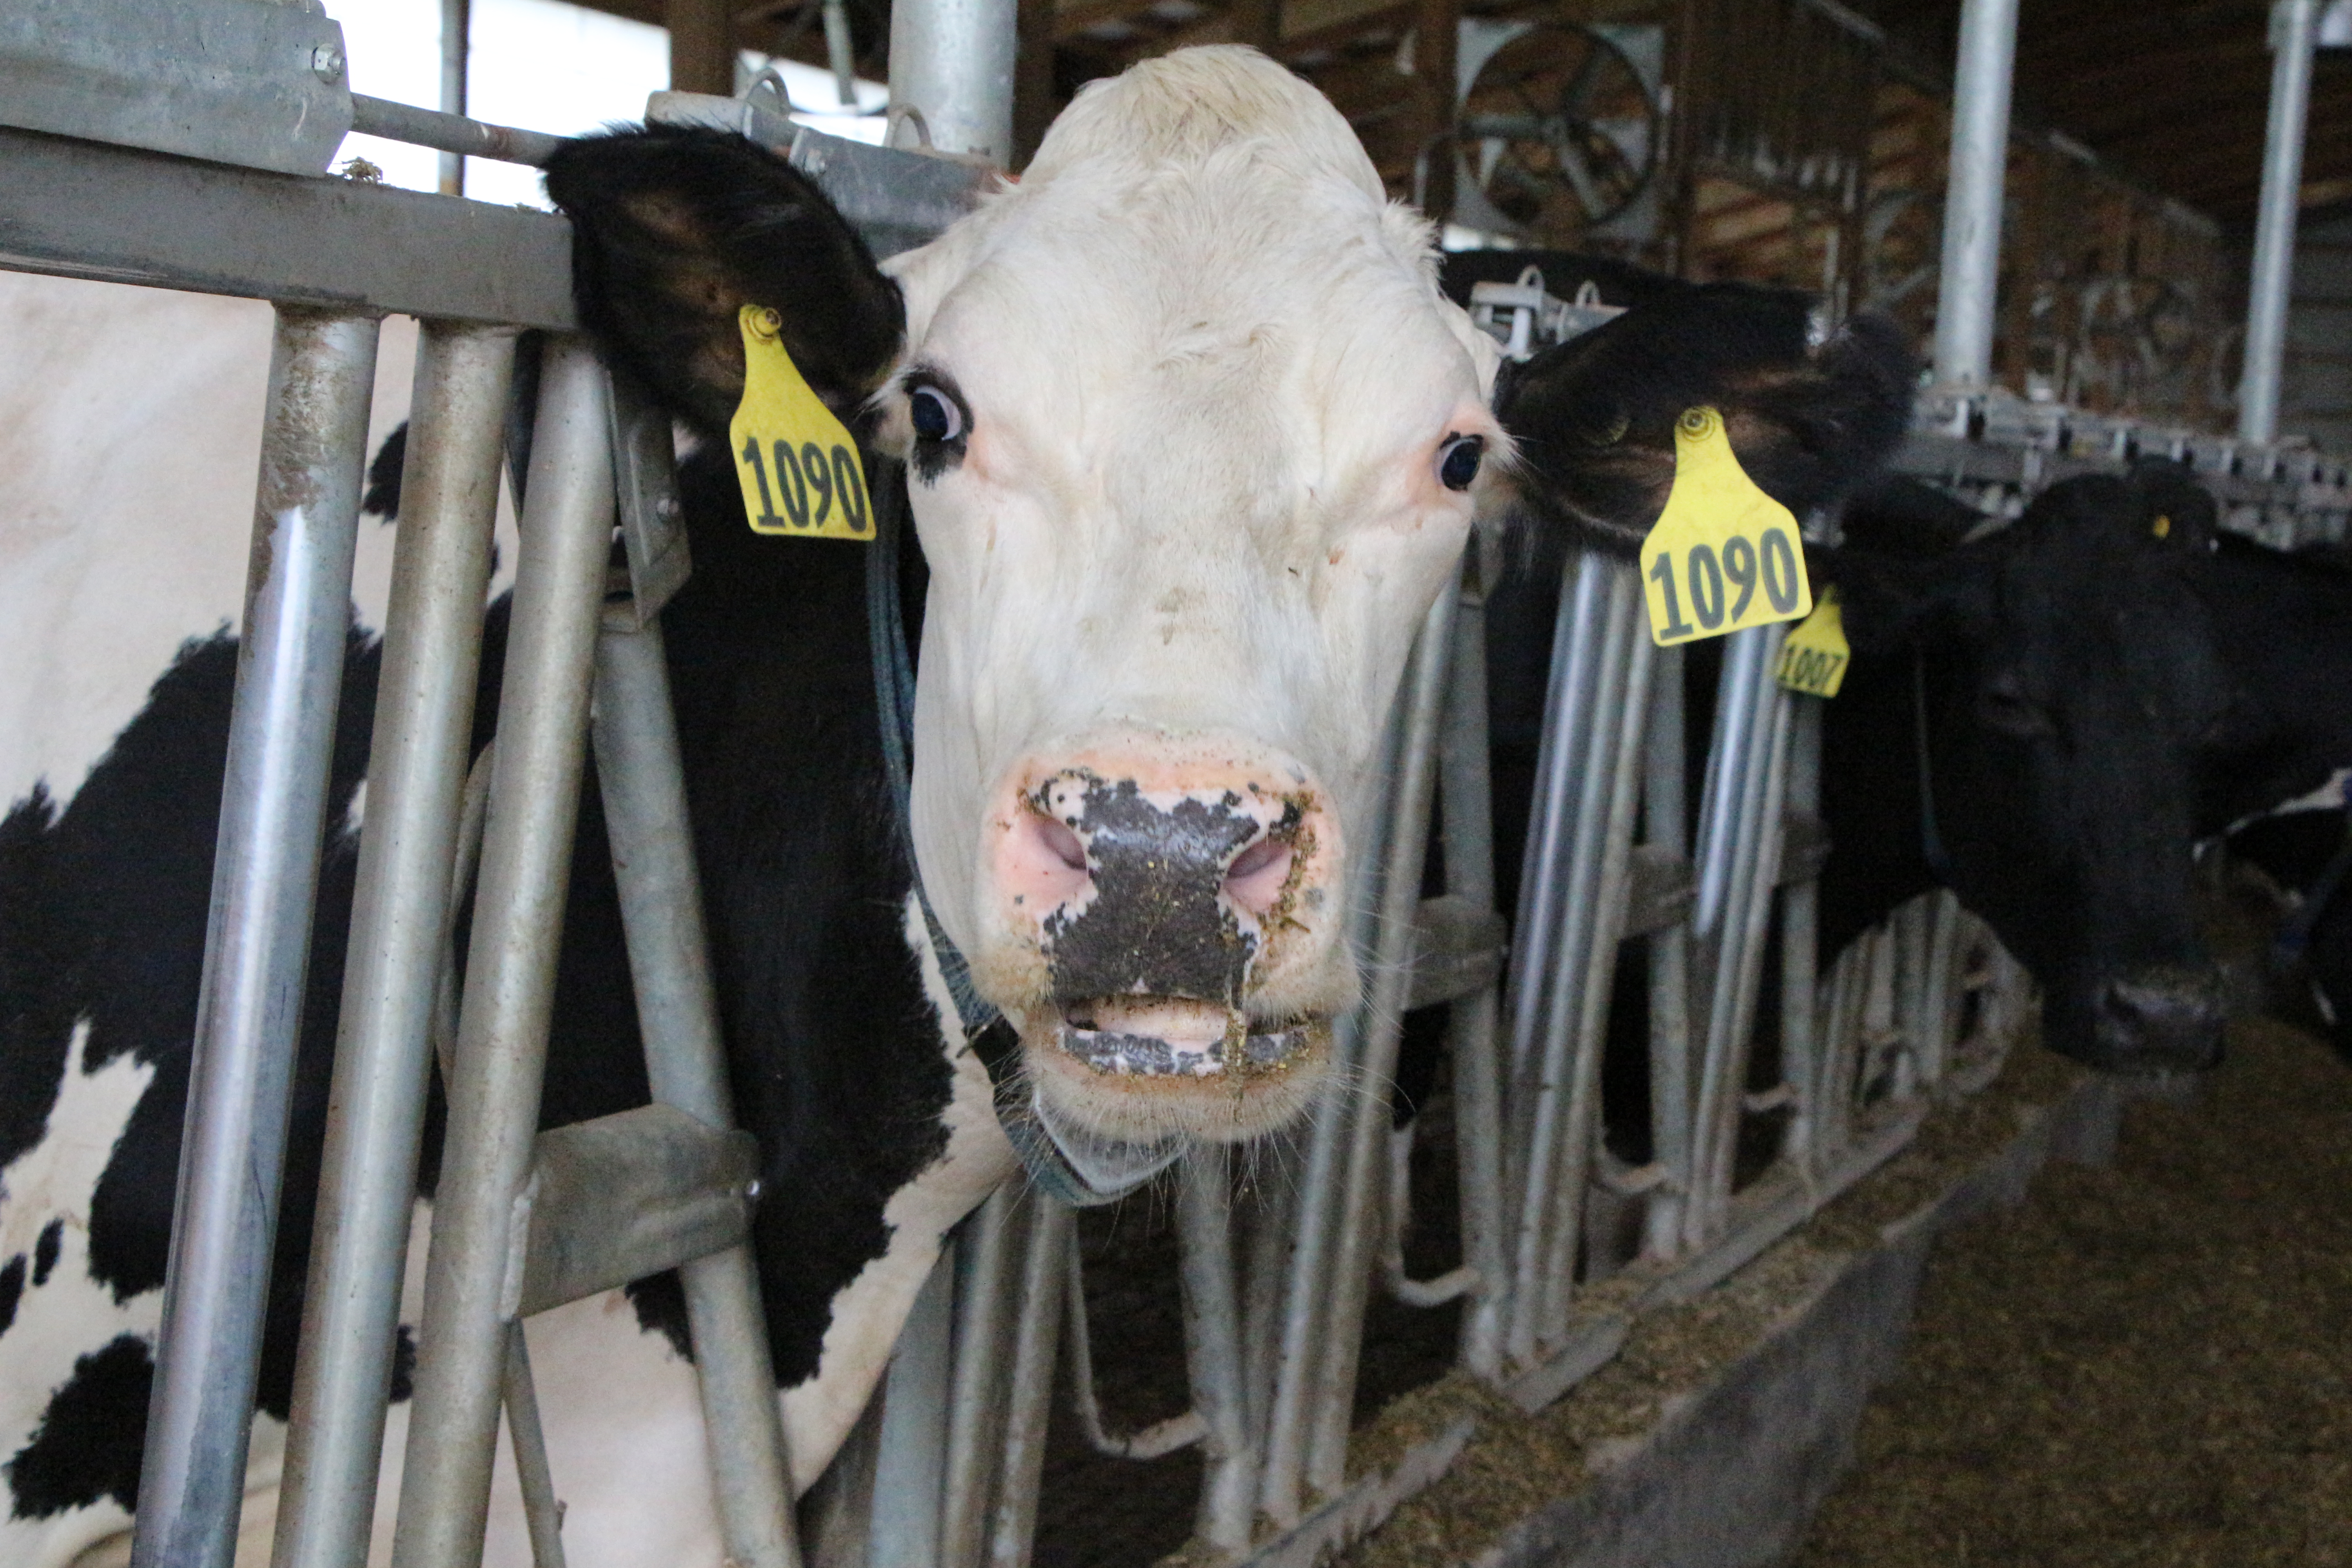
For today, let’s start at the beginning, with the cows. During our time at Cornell, we had a chance to visit their state of the art dairy farm, where approximately 150 cows roam within the freestall barn, resting on comfortable beds of beach sand and enjoying pleasant back-scratching from the automatic back scratchers placed throughout the barn.

IMG_1688

Any mom who has ever nursed a baby knows that milk production is at its best when the mom is well-nourished, well-rested, and comfortable. Same applies to dairy cows. Happy cows means more milk and these dairy farmers have mastered the art of keeping cows happy and healthy to maximize production.

Cornell’s dairy barn, which is designed for maximum ventilation, sanitation and cow-comfort, sets an example for the dairy industry and provides a hands-on learning opportunity for its dairy students.

IMG_1694

Three times a day, Cornell’s cows are brought to the milking parlor, where their milk is collected for use within the school’s very own dairy production plant, where Cornell’s own ‘Big Red’ cheddar is made, as well as yogurt and ice cream for the university’s dining halls.

Twice daily milking is standard for most dairy farms, but Cornell’s cows, much like its students, are overachievers. Each cow produces an average of 95 pounds of milk daily, putting them in the top 95th percentile for milk production. I’d expect nothing less from an Ivy-league cow!

As each cow arrives in the milking parlor, its health records are electronically reviewed to ensure that the milk from any cow being treated for an illness is never mingled with the rest of the milk supply. Maintaining the safety of the food supply, from milking to production is a top priority.

IMG_1645

The level of careful planning and practice which goes into the entire process of dairy farming is seriously impressive. As a dairy consumer, it’s comforting to get a closer look into where my food comes from. And as someone who has a soft spot for animals, it’s reassuring for me to learn that cow comfort is intrinsically linked to milk production. Happy cows really do produce the most milk.

IMG_1831

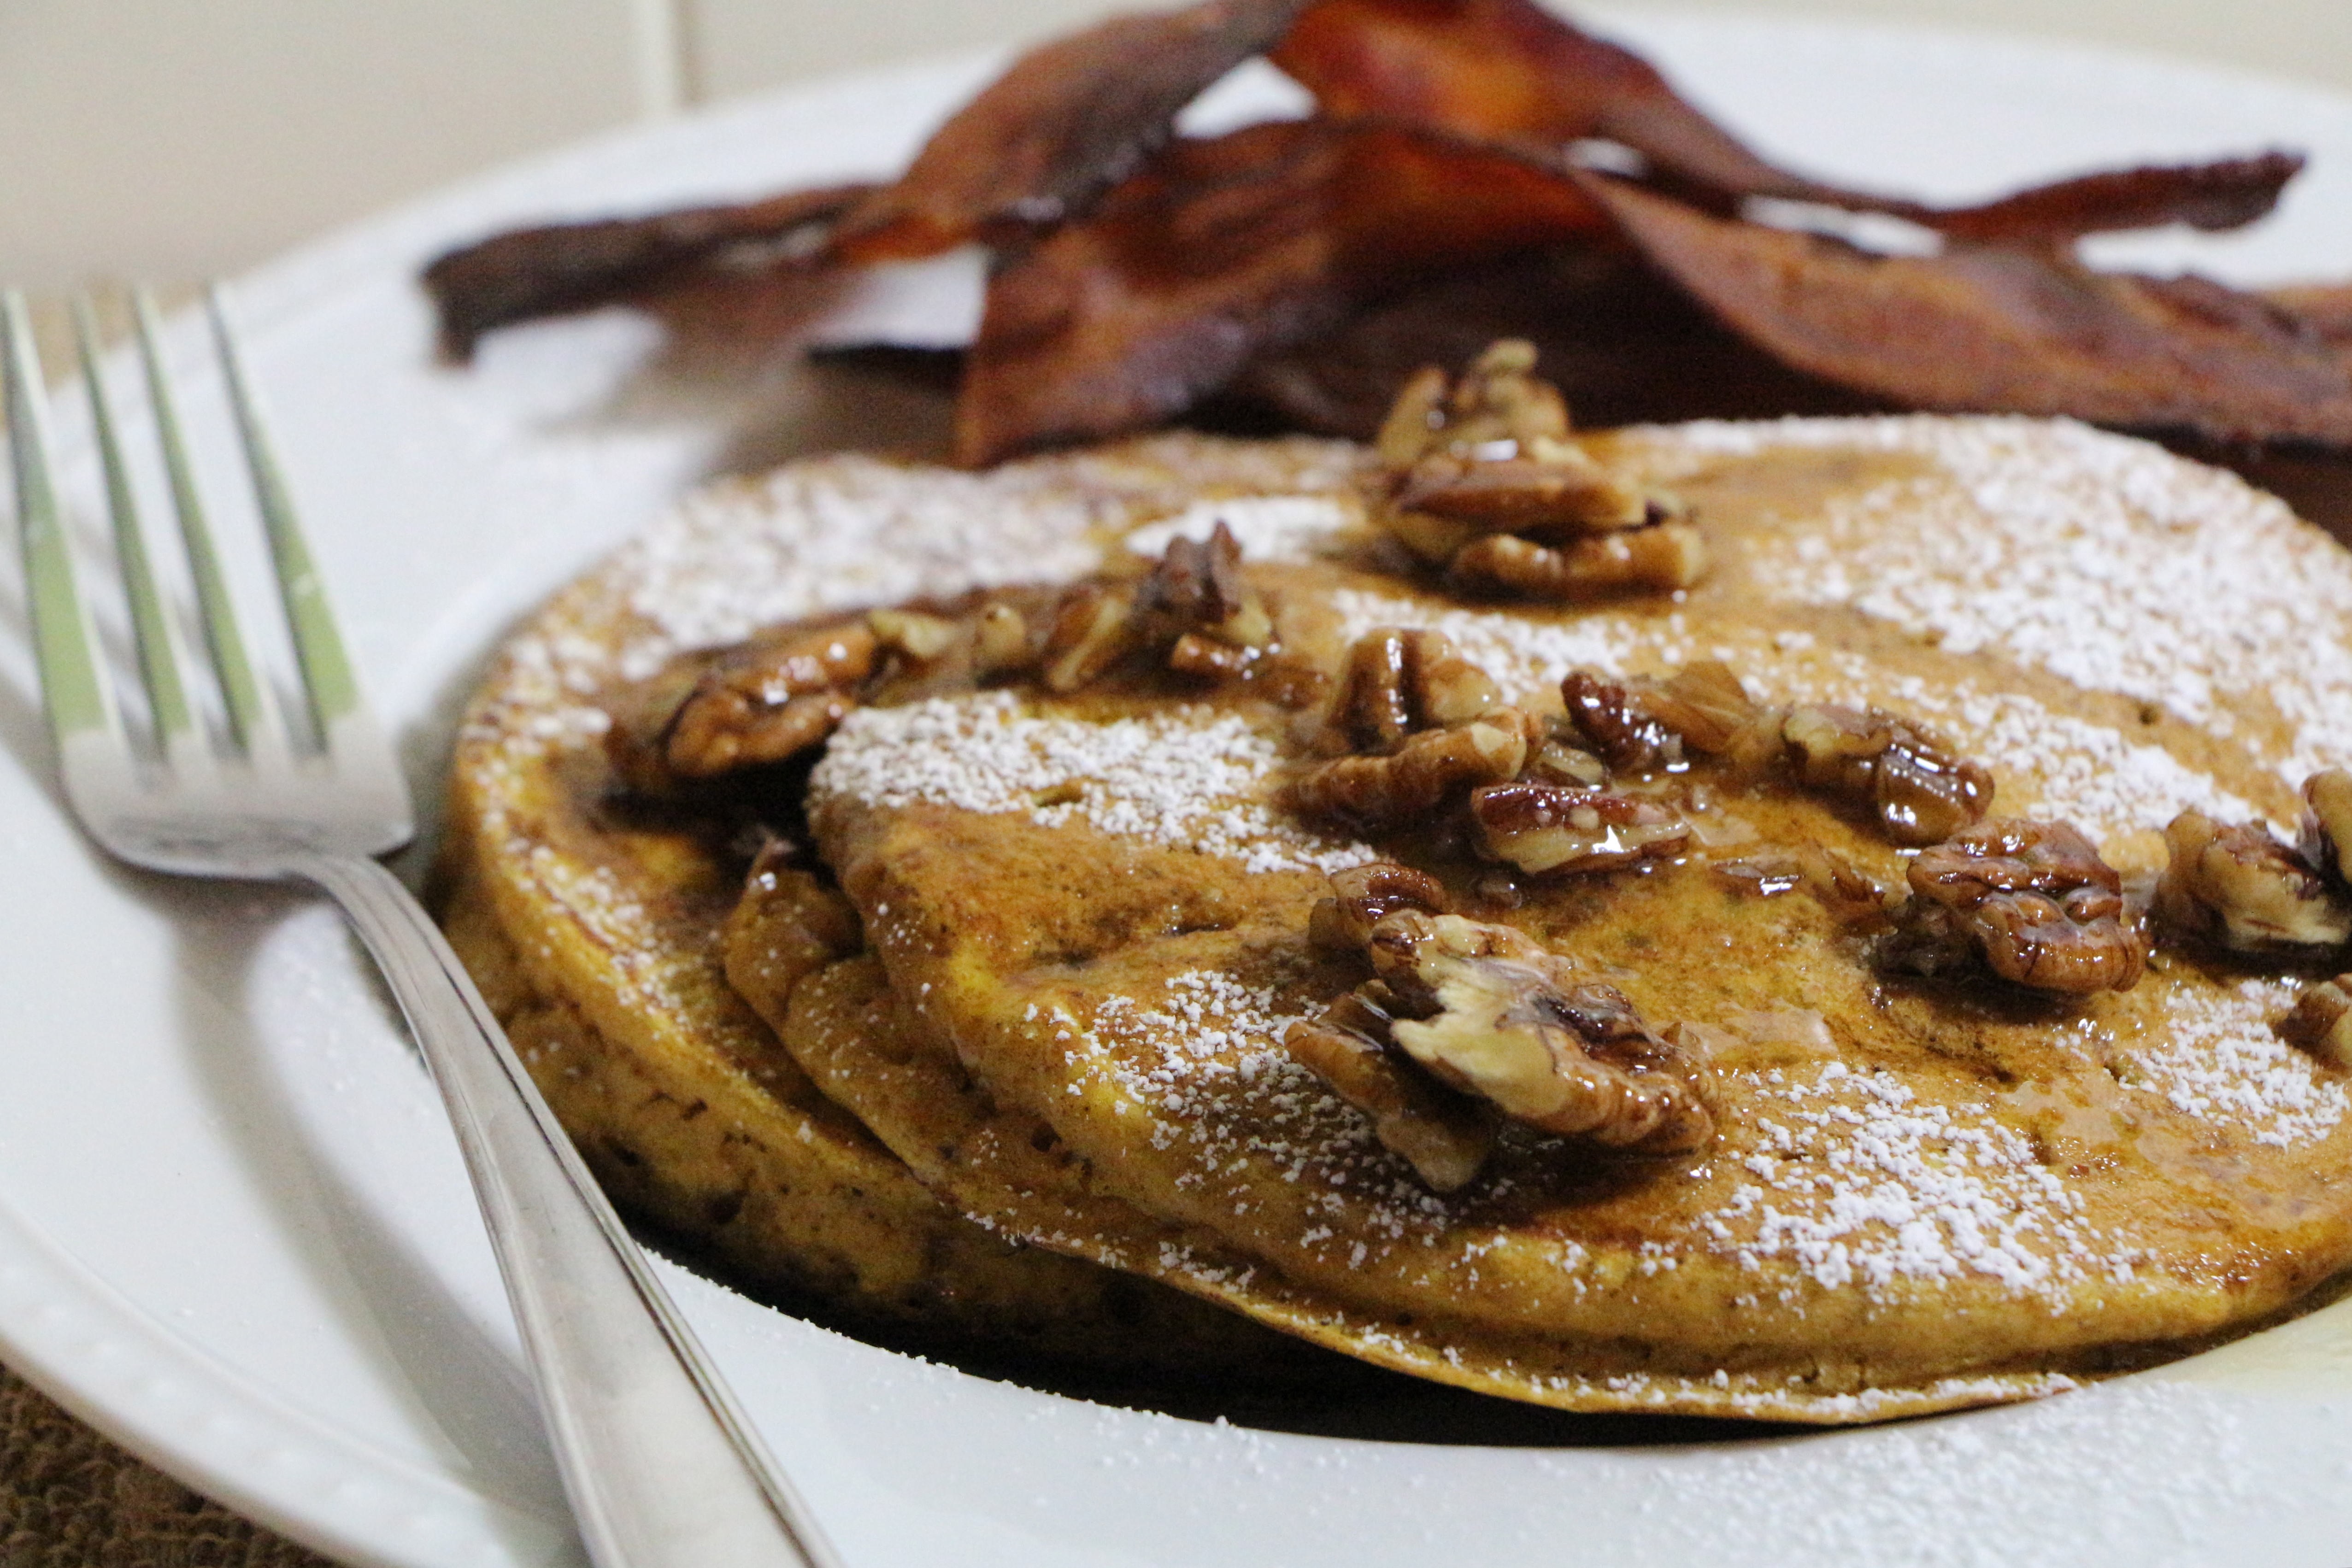
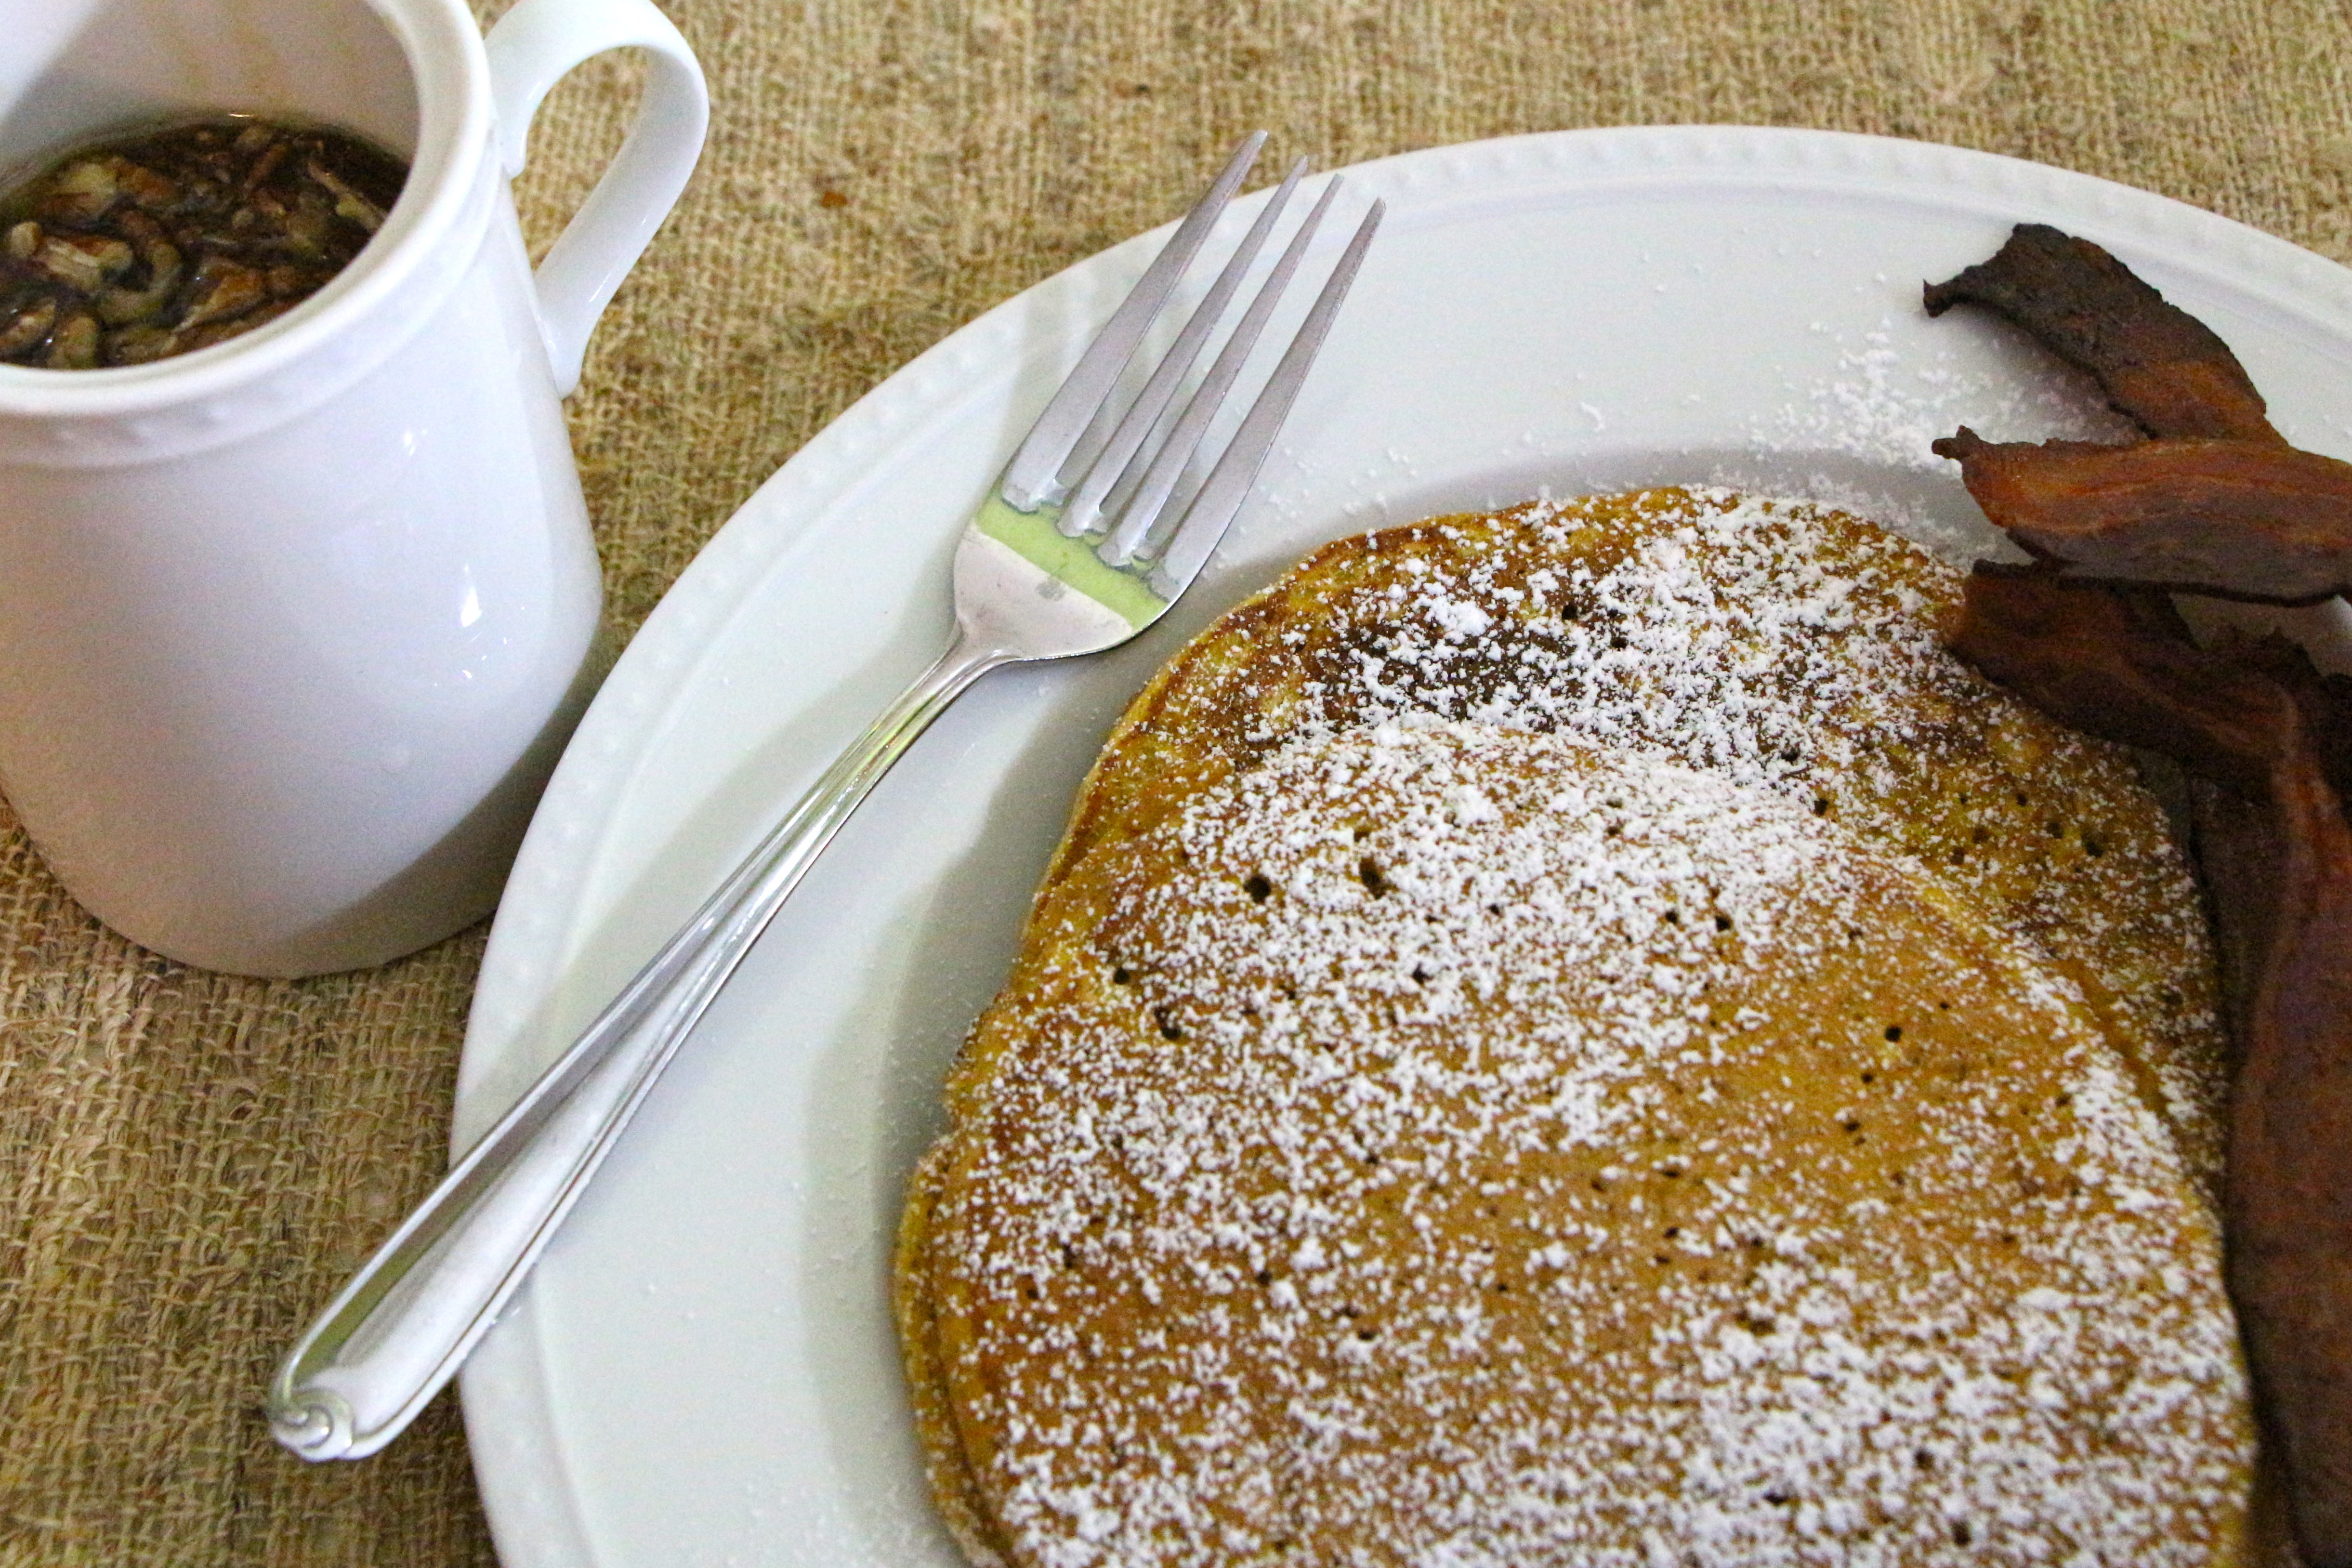
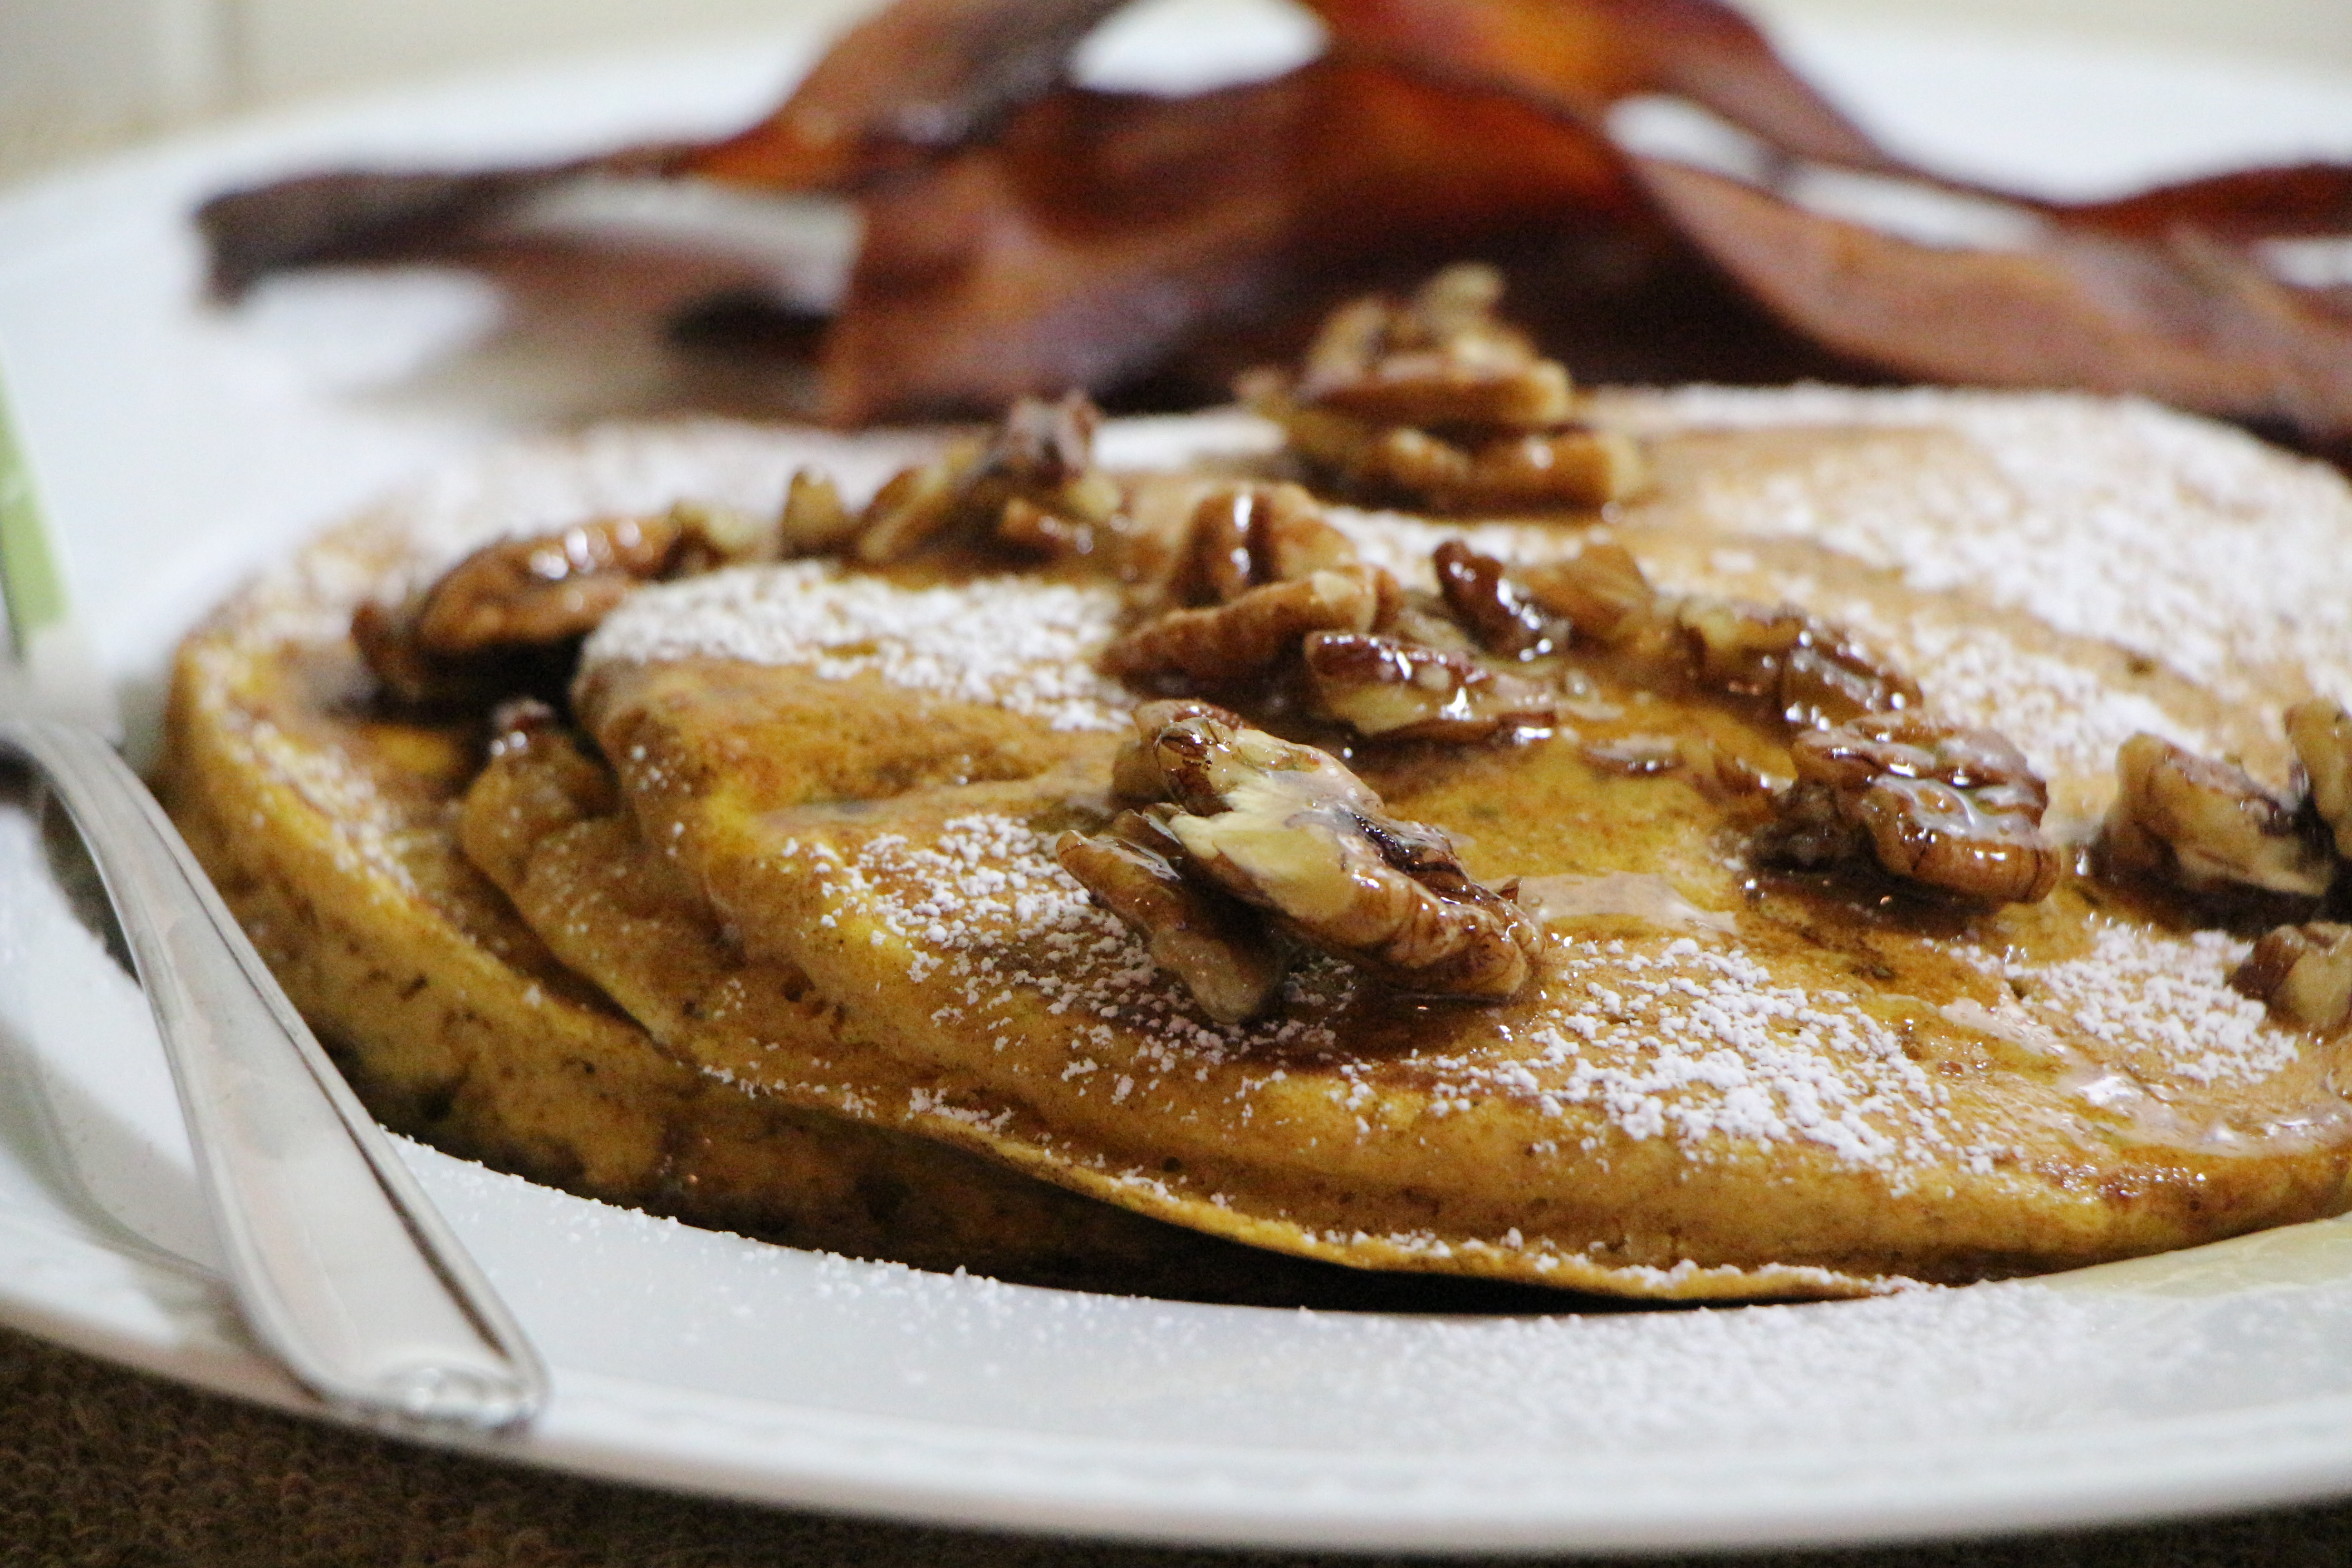
In Part 2 of my dairy adventure, I’ll talk about two things which I love dearly: cheese and Wegmans. For today, enjoy some pumpkin gingersnap bars.

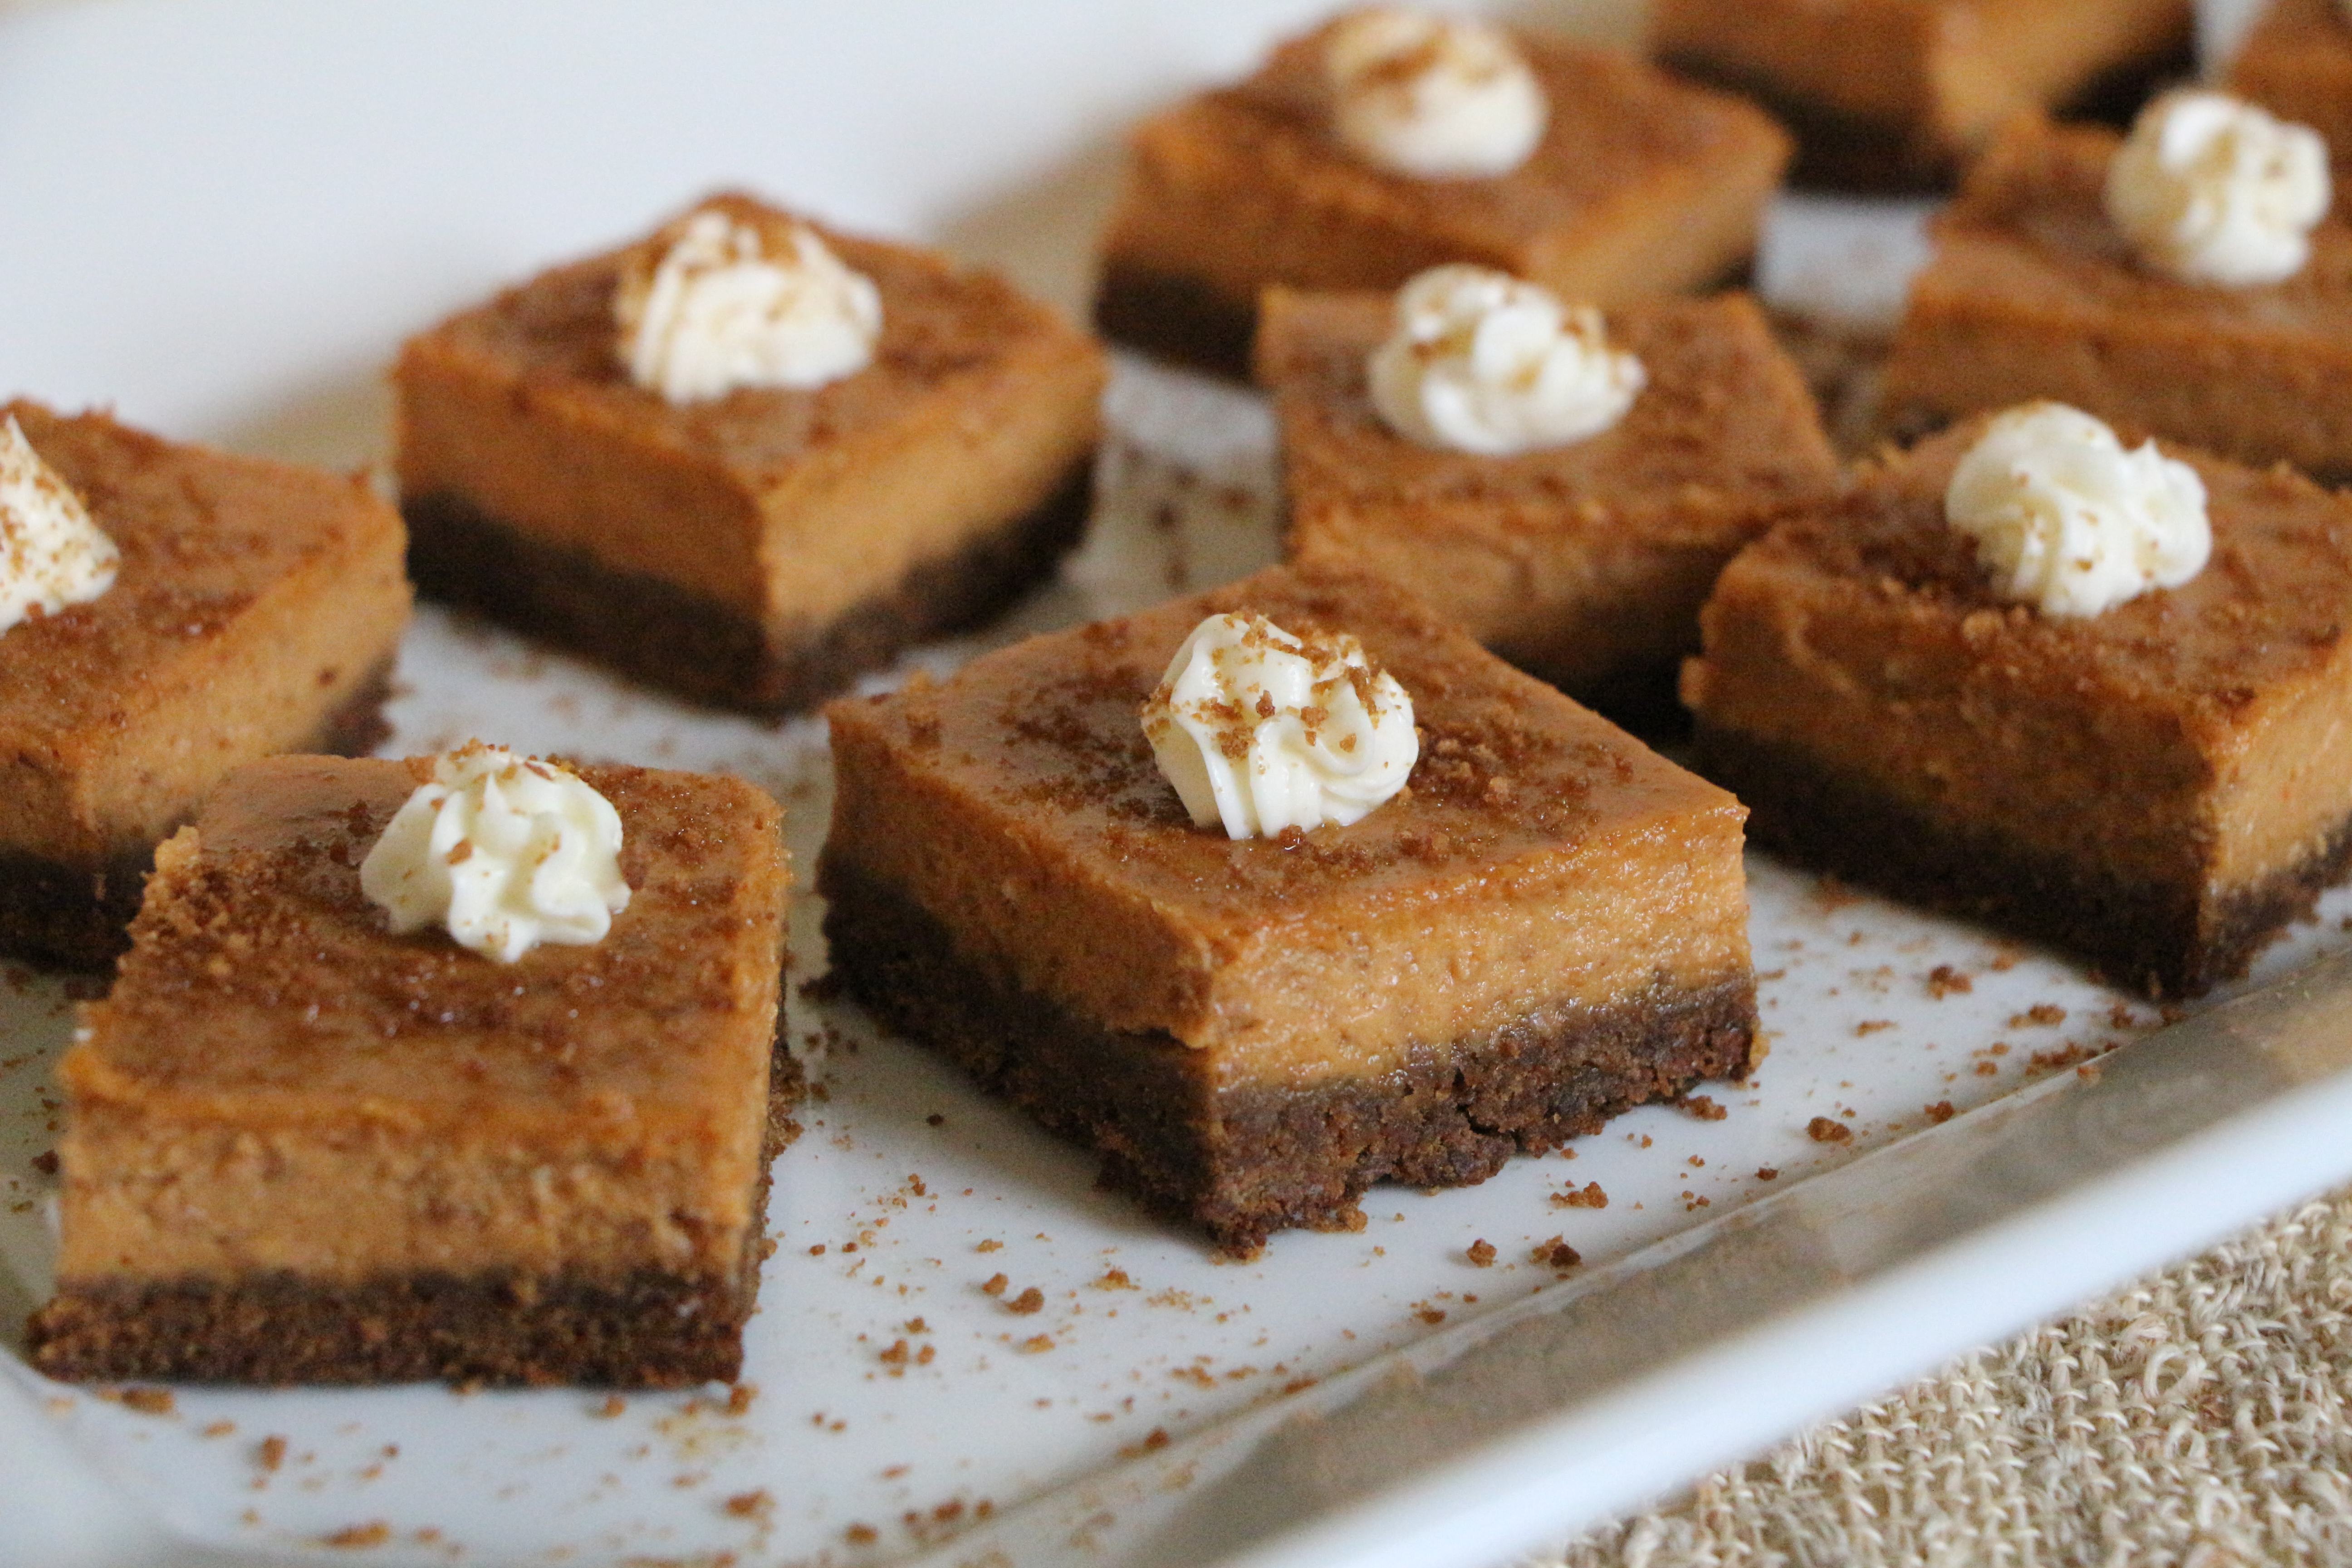
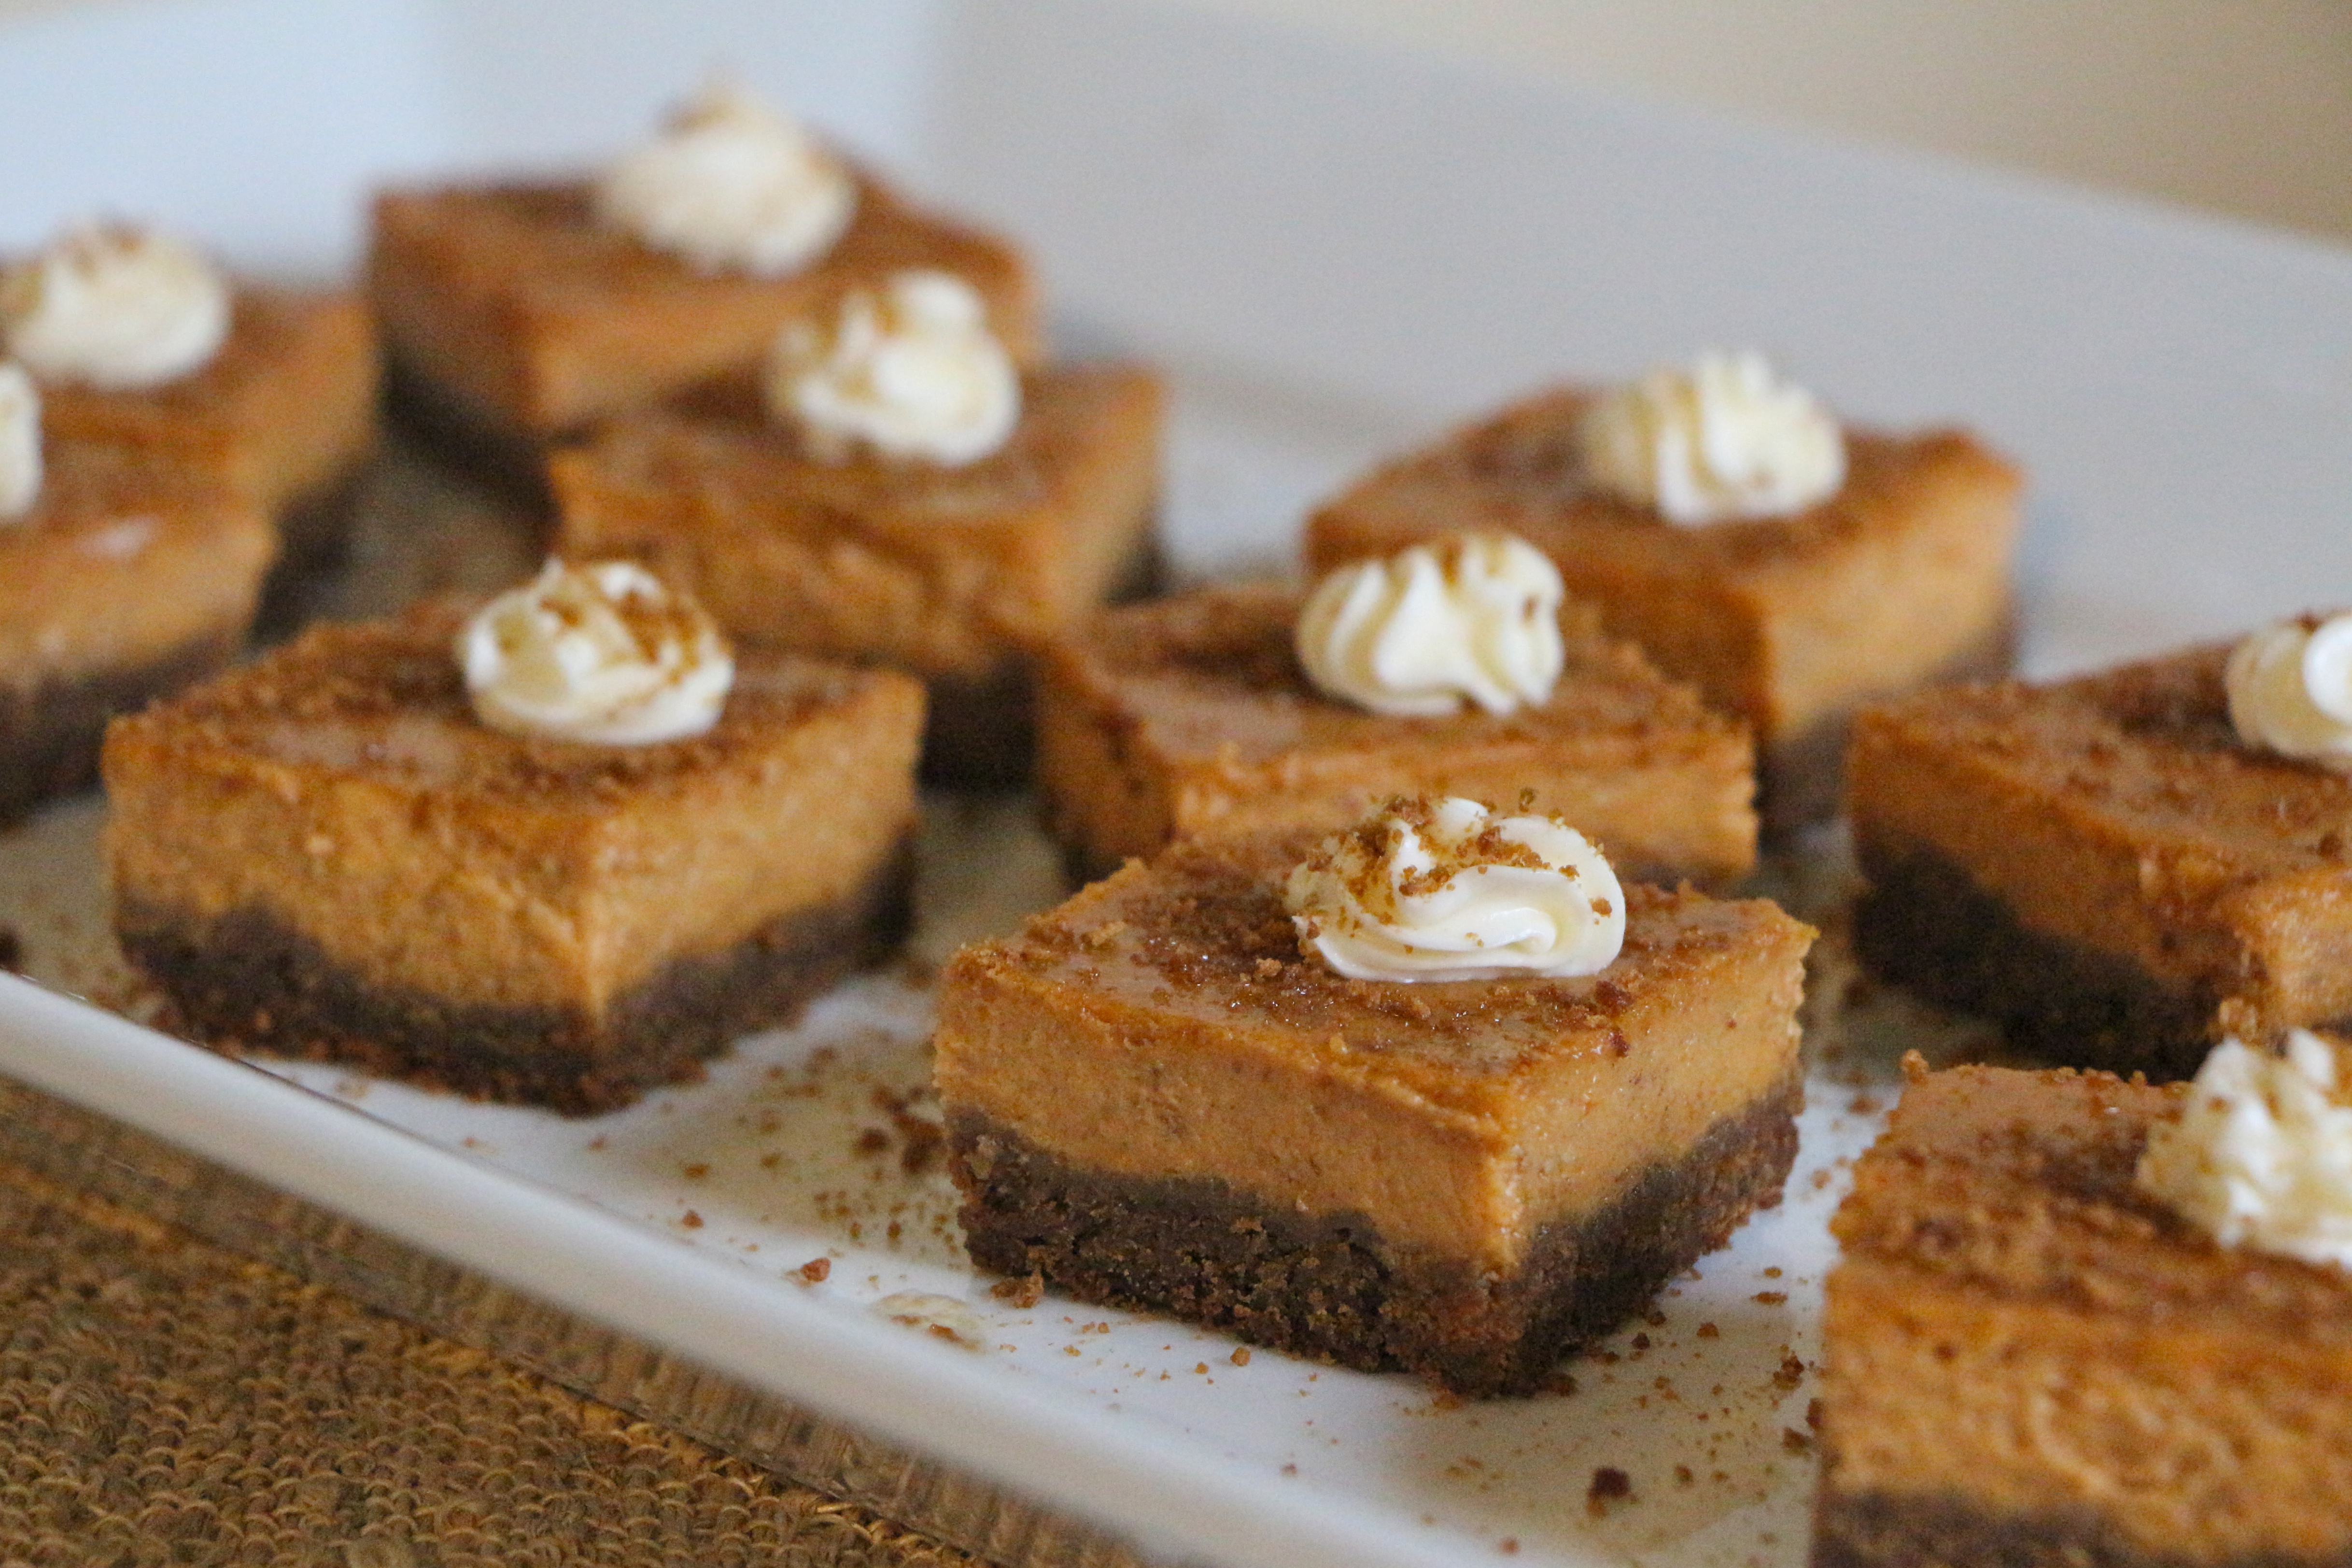
These seasonally perfect pumpkin bars pair a spicy gingersnap cookie crust with a layer of luscious baked pumpkin custard. Creamy half and half (half cream/half milk) lends a satisfying richness to these tiny bites of gingery pumpkin bliss. Cream cheese, another of dairy’s mouth-watering contributions to the world of food, provides the perfect finishing touch.

Pumpkin Gingersnap Bars with Gingered Cream Cheese Topping

Ingredients

  • 2 cups crushed gingersnap crumbs
  • 6 tablespoons unsalted butter, melted
  • 2 cups pumpkin puree fresh or canned (1 – 15 oz can will do the trick)
  • 1/2 cup white sugar
  • 1/3 cup brown sugar
  • 1 1/2 cups half and half
  • 2 eggs
  • 1 teaspoon vanilla
  • 1 teaspoon cinnamon
  • 1 teaspoon ginger
  • 1/2 teaspoon salt
  • 1/4 teaspoon nutmeg
  • Pinch of cloves
  • 1 tablespoon cornstarch
  • 6 ounces cream cheese, softened to room temperature
  • 1/4 cup powdered sugar
  • Pinch of ground ginger
  • Extra gingersnap crumbs for garnish

Directions

Preheat oven to 375 degrees.

Combine the crushed gingersnap crumbs with the melted butter. Press in an even layer into the bottom of a 13×9 inch baking dish. Bake for 7-8 minutes. Remove from the oven.

Meanwhile, whisk together the pumpkin, the sugars, half and half, eggs, vanilla, cinnamon, ginger, salt, nutmeg, and cloves, until well blended. In a small dish, combine the cornstarch with about 1/4 cup of the pumpkin mixture, until the cornstarch is completely dissolved. Whisk the cornstarch mixture into the pumpkin mixture. Pour the pumpkin mixture over the gingersnap crust.

Bake for about 40 minutes.

Remove from the oven. Cool at room temperature until no longer hot. Then, cool completely in the refrigerator. Cut into small 1- 1 ½” squares.

Combine the cream cheese, powdered sugar, and a pinch of ground ginger. Use a pastry bag to pipe a bit of the cream cheese topping onto each square. Sprinkle with extra gingersnap crumbs.

IMG_1827

This dairy tour and wine and cheese getaway weekend was hosted by the American Dairy Association and Dairy Council. As part of this event, they provided me with accommodations, meals, and compensation towards travel expenses. I was under no obligation to the ADADC, Cornell University, Geneva on the Lake or any other agency. All opinions and observations are my own.

Advertisement

Pumpkin Pancakes with Butter Pecan Syrup

After an extended period of unusually warm temperatures, autumn has taken its inevitable hold on our weather. There’s a definite chill in the air, which requires down jackets, more so than fleecy hoodies. As usual, the kids will trick-or-treat with winter coats stuffed under their costumes this year. It won’t be long before we see our first snow.

IMG_1382

Despite the chilly temps, this weekend was positively beautiful. The leaves are at their peak of vibrant color and the grass is still (mostly) green. And on this gorgeous weekend, I celebrated my birthday. We began our festivities on Saturday morning with these pumpkin pancakes, drizzled in warm butter pecan syrup. Then, we ended the weekend with a full turkey dinner at a crowded table of family and friends. I gave thanks a month early, for another year of good food, good family, and good friends.

IMG_1356

Warm butter pecan syrup seemed like the ideal accompaniment for these seasonally perfect pumpkin pancakes. My love for butter pecan syrup is so intense, that I have made trips to IHOP for the sole reason of dipping stuff in their famous syrup. A quick search for ‘copycat’ recipes for my fave IHOP syrup revealed numerous blends of sugar with water and a variety of artificial extracts. My version takes a more natural approach, using pure maple syrup, melted butter, and non-imitation vanilla extract. Toasting chopped pecans in a bit of butter brings out the buttery-nutty flavor in this crave-worthy pancake topper.

IMG_1373

Pumpkin Pancakes

Slightly modified from Martha Stewart’s Pumpkin Pancakes

Ingredients

  • 2 1/2 cup all-purpose flour
  • 1/3 cup sugar
  • 4 teaspoons baking powder
  • 1 1/2 teaspoon cinnamon
  • 1 teaspoon ginger
  • 1 teaspoon salt
  • 1/4 teaspoon nutmeg
  • Pinch of ground cloves
  • 2 cups milk
  • 3/4 cup pumpkin puree, fresh or canned
  • 4 tablespoons melted butter
  • 2 eggs

Directions

Combine the flour, sugar, baking powder, cinnamon, ginger, salt, nutmeg, and cloves in a large bowl.  In a separate bowl, whisk together the milk, pumpkin puree, melted butter, and eggs. Gradually pour the wet ingredients into the dry ingredients, whisking until well blended. Melt a little butter in a skillet over medium heat. Pour about 1/3 cup batter for each pancake. Cook pancakes approximately 3 minutes per side.

Makes about 12-15 pancakes

Butter Pecan Syrup

Ingredients

  • 1/2 cup pecans, chopped
  • 1 1/2 cups real maple syrup
  • 4 tablespoons butter
  • 1 teaspoon vanilla extract
  • Pinch of salt

Directions

Melt 1 tablespoon of the butter in a saucepan, over medium heat. Add the chopped pecans. Cook for about 3 minutes, until fragrant. Add the maple syrup, butter, and vanilla extract. Continue to heat over medium-low/medium heat until the butter has melted and blended with the syrup. Season with a pinch of salt. Serve warm.

Pumpkin Bread Pudding with Cream Cheese Icing

Bread pudding is sort of a strange love of mine. It’s not something I grew up eating. In fact, I don’t think I’d even heard of it until sometime in adulthood when I ran across it on the dessert table at one of my favorite restaurant’s brunch buffets. I was more than apprehensive at first. Soggy bread?? Yuck. And it certainly didn’t look like any ‘pudding’ I’ve ever seen before. No, thank you.

Then, one day (after a few breakfast mimosas) I felt brave. I took a small scoop of that bread pudding. And forevermore wondered why I hadn’t tasted it earlier.

I’ve made a few variations of bread pudding over the past few years, each time trying to determine what it is that makes me love it so darn much. And I finally figured it out… It tastes like french toast; a big scoop of warm, comforting french toast. But the thing which makes it even better than french toast, especially for serving a crowd, is that the whole mix gets thrown in a dish and baked with little mess or fuss.

Bread pudding also lends itself quite well towards getting creative – and I love a dish that likes to be played with. Make it with French bread or muffins or challah. I’ve even made it out of donuts! Add vanilla or dried fruits or chocolate chips.

Or seize the pumpkin spice mania and make this pumpkin bread pudding with cream cheese icing. This comforting bread pudding tastes like a cross between a spiced pumpkin pie and a slice of french toast. It’s best served warm, but after more than a few stolen spoonfuls from the leftovers in the fridge, I can tell you with confidence that it tastes pretty fantastic cold too!

For more variations on bread pudding, check out my Cinnamon Raisin Donut Bread Pudding, Fluffernutter Bread Pudding, and Spiced Fruit Bread Pudding

Today’s Focus on Technique – Easy Disposable Pastry Bag

It’s easy to make a pastry bag in a pinch by simply using a plastic baggy. This technique works best for fairly soft dressings, fillings, or icings. (Plastic baggies may not hold up well with very firm fillings.) Simply fill the plastic baggy with your dressing, filling, or icing. Squeeze it into one corner of the baggy. Twist the top of the baggy to hold the filling in place. Then, clip the corner with scissors, large or small, depending on your purpose. Now you’re all set to easily squeeze fillings into cupcakes or attractively drizzle dressings, sauces, or icings. The best part about plastic baggy pastry bags is that they’re disposable…no messy clean-up!!

Pumpkin Bread Pudding with Cream Cheese Icing

Ingredients

  • Approximately 10 cups day-old French bread, cut into chunks
  • 2 cups milk
  • 1 15-ounce can pumpkin puree
  • 1/2 cup white sugar
  • 1/4 cup brown sugar
  • 4 eggs
  • 1 teaspoon cinnamon
  • 1 teaspoon vanilla extract
  • 1/2 teaspoon ginger
  • 1/4 teaspoon salt
  • 1/4 teaspoon nutmeg
  • Pinch of ground cloves

For the icing

  • 4 ounces cream cheese, softened
  • 3 tablespoons powdered sugar

Directions

Preheat oven to 350 degrees.

Arrange the chunks of bread in a large baking dish. In a large bowl, whisk together the milk, pumpkin puree, sugars, eggs, cinnamon, vanilla, ginger, salt, nutmeg, and cloves until well-blended. Pour the mixture over the bread chunks. Press down on the mixture so the most of the bread is submerged. (I like to leave a thin layer of unsoaked bread at the top for a nice crust layer.) Allow the mixture to soak for at least 15 minutes. (You can leave it to soak overnight, in the fridge, if desired.)

Bake for 45-50 minutes.

For the icing, combine the cream cheese and powdered sugar until well blended. Spoon the mixture into a plastic baggy. Squeeze the baggy in your hands for a few seconds to soften the icing. Squeeze the mixture into one corner of the baggy, then twist the top of the baggy to hold the icing in place. Using scissors, clip a small bit of the corner, then drizzle the icing over the warm bread pudding. Serve warm.

Pumpkin Pie Frozen Custard

Our weather is forecast to hit 69 degrees tomorrow. It will probably be the last ‘warm’ day for a long while, as winter is already breathing its frosty breath down our necks. In the meantime we’ll appreciate whatever remaining moderate weather we have left. It won’t be long before we’re slicing cinnamon-spiced pumpkin pies at our Thanksgiving tables. But right now I’m still desperately trying to hold onto whatever remains of the warm season before we plunge into the winter abyss.

So, I thought, why not marry the autumny flavors of  pumpkin pie with my favorite warm weather treat…ice cream?? What more perfect way could there be to acknowledge what may well be the last day we can go without our winter coats, than with a rich and creamy pumpkin pie frozen custard, flavored with vanilla, ginger, nutmeg, and a generous dose of cinnamon. Your ice cream maker will thank you for giving it one last whirl before it’s tucked away for the season.

Frozen custard differs from ice cream in that it contains egg yolks. The egg yolks add an extra creaminess to the frozen treat. The following recipe would also work well without the eggs, so if you or a loved one have an egg allergy, just omit them and call it ice cream. The half-and-half will contribute a good amount of creaminess, but you can substitute light cream or heavy cream for an even richer result.

Focus on Technique – Tempering Eggs

Tempering eggs is a process by which egg yolks are gradually brought up to a higher temperature, by very slowing incorporating hot liquid. This is done to prevent the eggs from scrambling when they are incorporated into hot liquid…cause who wants to eat custard with the texture of scrambled eggs, right??? Tempering the egg yolks helps them to maintain a smooth, silky consistency. Egg yolks may be tempered for use in custards, puddings, sauces, or souffles.

To temper egg yolks, start by lightly beating the eggs with a fork. Then, take some of your hot liquid and very gradually, starting with just a few drips at a time, incorporate some of the hot liquid into the eggs, whisking constantly. After the first few drips, you can increase to a slow stream. Continue incorporating the hot liquid until the egg mixture is about the same temperature as the mixture you will be adding it to. Then, you can safely add the egg mixture to the remaining hot liquid and bring to a gentle simmer for a couple minutes to ensure the yolks are cooked.

Pumpkin Pie Frozen Custard

Ingredients

  • 1 1/2  cups half and half
  • 1/2 cup milk
  • 1 cup pumpkin puree (canned or fresh)
  • 1/2 cup sugar
  • 1 1/2 teaspoons vanilla
  • 1/2 teaspoon cinnamon
  • 1/8 teaspoon nutmeg
  • 1/8 teaspoon ginger
  • Pinch of salt
  • 2 egg yolks, lightly beaten

Directions

Combine the milk, pumpkin puree, sugar, vanilla, cinnamon, salt, nutmeg, and ginger in a saucepan. Bring the mixture to a simmer over medium heat, whisking frequently. Once the mixture begins to simmer, reduce the heat. In a separate bowl, lightly beat the egg yolks. Gradually whisk about 3/4 cup of the hot mixture into the egg yolks, starting with a very slow drizzle. Gradually whisk the tempered egg mixture into the remaining mixture in the pot. Bring to a very gentle boil over medium heat, whisking constantly for 2-3 minutes. Allow the mixture to cool for several minutes at room temperature, then refrigerate until completely chilled. Pour the mixture into your ice cream maker and freeze according to your maker’s instructions.

October Pumpkin Round-Up

Posted on

It’s a chilly October morning here in Syracuse. And I’ve got pumpkin on my mind.

Our first pumpkin has been sitting on our front steps since our little ninja party last weekend. It has the face of a ninja painted on it. Ninja pumpkin will be joined by other pumpkins in the next few weeks and our kitchen will take on the sweet and fragrant aroma of some of our favorite pumpkin recipes…of that I am certain.

Focus on Technique –  Pumpkin Puree

Preparing fresh pumpkin is a manageable process, which can be done in a number of ways. Small ‘pie’ pumpkins tend to produce the sweetest pumpkin flavor. Many people prefer to remove the skin, chop the pumpkin into chunks, boil the pieces until tender, then puree. My preferred strategy is to simply cut the pumpkin open, remove the seeds, roast the pumpkins until tender, then scoop out the smooth pumpkin and puree. It involves less tedious chopping than with the boiling method and produces a better end result, in my opinion. You can see my complete step-by-step photo guide HERE .

If you’re not up for preparing your own puree, canned pumpkin provides a convenient alternative. Most canned pumpkin puree is prepared without additional salt, sweeteners, or preservatives, but check the cans just in case.

Check out this round-up of previously posted pumpkin recipes and keep an eye out for a few new pumpkin recipes, coming up soon!

Fresh Pumpkin Coconut Pie

Autumn Harvest Buns

Pumpkin Chocolate Chunk Bread

Pumpkin Gingersnap Parfaits

How to Roast Pumpkin Seeds

Roasted Pumpkin Caramel Bisque

Fried Pumpkin Wontons

Pumpkin Vanilla Custard

Fettucine with Pumpkin Alfredo Sauce  

Pumpkin Vanilla Custard

I call myself a runner. In fact, I’m going to run a 5k race this upcoming Sunday. Pretty impressive, huh?? More accurately, I will partially run, partially walk, and partially crawl a 5k on Sunday.

I am, in fact, a terrible runner. I can’t breathe. My muscles ache. I’m slower than a crippled snail. It’s not in my genes to be a runner. And yet I run. Diehard runners would probably call what I do “casual jogging”. But when I’ve got my running sneaks on, I feel like a runner. And so that is what I consider myself.

I started running sometime after having my second son. I was looking for a quick calorie burn to get rid of some of the extra weight I was hanging onto, without giving up my favorite foods. But what started as a means for losing the baby weight quickly became a treasured part of my day. The solitude. A chance to be alone inside my head for a few minutes. It made me feel strong and capable. It gave me peace and helped me recover a bit of the sanity that small children seem determined to abolish. And in that way, it made me a better, calmer mom.

I’d hoped to continue running throughout my third pregnancy, but fatigue and the waning evening light had other plans. Now, after months of not running (and some extra lingering baby weight), it’s been an uphill battle (both literally and figuratively) to regain my running ability.

This Sunday will be my first race since having my baby. I’m not ready. Not even a little bit. But I’m going to tie on some bells and run the jingle out of that Jingle Bell race.

I can run for 10 minutes (most of a mile) before I feel like I’m going to die. During the 5 minutes which follow, I start talking a variety of nonsense to myself. You’re a superstar. You’re strong. You can do anything! By the time I get to 15 minutes, I’m desperate and fully out of my mind. I’m screaming the lyrics to Pink’s Perfect in my pitchy off-key voice. They don’t like my jeans! They don’t get my hair! Which makes no sense since I almost exclusively wear sweatpants and keep my hair in an incredibly non-controversial pony tail. I’m quite a sight. Panting, crazy eyes, accusatory lyric shouting. Not exactly sure how I’m going to complete this race on Sunday… Ay! What was I thinking??

Run, Amy! Run!

The run will be good for me though, no matter how long it takes me, because I’ve been enjoying more pumpkin treats and apple pie (post coming soon) than any person should. Including this delectable pumpkin vanilla custard. It’s like a pumpkin pie without the crust. And it’s really good. Good enough to add a few more calorie-burning minutes to that run!

Pumpkin Vanilla Custard

Ingredients

  • 2 cups milk*
  • 1 cup pumpkin puree
  • 1/2 cup sugar
  • 5 tablespoons cornstarch
  • 2 teaspoons vanilla
  • 1/2 teaspoon cinnamon
  • Pinch of salt
  • Pinch of nutmeg
  • Pinch of ginger
  • 4 egg yolks
*Skim milk would work fine if you’d like to reduce the fat and calories.

Directions

Combine the milk, pumpkin puree, sugar, cornstarch, vanilla, cinnamon, salt, nutmeg, and ginger in a saucepan. Bring the mixture to a simmer over medium heat, whisking continuously so that the sugar and cornstarch dissolve. Once the mixture begins to bubble and thicken, reduce the heat. In a separate bowl, lightly beat the egg yolks. Gradually whisk about 1/2 of the hot mixture into the egg yolks, starting with a slow drizzle. (Gradually incorporating the hot milk into the egg yolks tempers the eggs, allowing them to slowly rise in temperature without scrambling.) Gradually whisk the egg mixture into the remaining hot milk mixture in the pot. Bring to a gentle boil over medium heat, whisking constantly for about 3 minutes, until thickened and smooth. Pour the custard into individual serving dishes and refrigerate until set. Garnish with whipped cream and crushed vanilla wafers.

We all enjoy an occasional pat on the back for a job well done! And as a stay-at-home mom there are no pleased supervisors or satisfied co-workers passing out the pats..only little people who need more apple juice. Urgently. So, it was such a delight to be informed that The Gourmand Mom has been awarded the Editors’ Pick Best Food Blog award by the editors of Parents Magazine. What a fabulous recognition! Thank you, Parents Magazine!

You can check out the complete list of blog award winners here.

Fried Pumpkin Wontons

A few weeks ago, I found myself at the McDonald’s drive-thru. Fast food is a rarity for me (well, except for our regular Friday night Five Guys burgers and fries). But McDonald’s was running their annual Monopoly game and I got it in my head that I was going to win. I could practically smell the cash. I was feeling lucky.

I was wrong.

But on the occasion, when I stopped at my McDonald’s dreaming of Park Place and Boardwalk, I ordered one of those little apple pies. Heck, I was already throwing dietary caution to the wind. Why not add dessert too?

Imagine my surprise when I bit into a pumpkin pie, which had been packaged in an apple pie box. Ewww. I like pumpkin pie, but the taste and texture just didn’t compute with the bite of apple pie my mouth was anticipating. The second bite was better than the first, though it was nearly impossible to get past the bitter taste of disappointment over the boring St. Charles Place game piece I’d earned.

These little fried pumpkin wontons are sort of like those McDonald’s pumpkin pies, only smaller and much tastier. A guaranteed Park Place win! Perfectly crispy wonton ‘crusts’ hold a burst of smooth, spiced pumpkin in the center. If you’re interested in putting a different twist on the standard Thanksgiving pumpkin pie, these little goodies are the answer.

Make them for Thanksgiving or any time you need to satisfy your pumpkin craving. They’re best hot out of the pan, but if you’d rather get the frying out of the way earlier, I suspect they’d warm up nicely with a few minutes in a 300 degrees oven. (They were gone before I had a chance to test that theory.) These little packets of heaven will have everyone feeling thankful on Thanksgiving!

Fried Pumpkin Wontons

Ingredients

For the Wontons:

  • 1 cup pumpkin puree
  • 2 1/2 tablespoons brown sugar
  • 1/2 teaspoon cinnamon
  • 1/8 teaspoon ginger
  • 1/8 teaspoon nutmeg
  • Pinch of salt
  • 40 wonton wrappers*
  • Vegetable Oil (for frying)

For the Spiced Sugar:

  • 1/4 cup sugar
  • 1/2 teaspoon cinnamon
  • Pinch of nutmeg
*My grocery store carries the wonton wrappers in the frozen foods section. Some grocery stores may store them near the refrigerated produce.

Directions

Combine the pumpkin, sugar, salt, cinnamon, nutmeg, and ginger until well blended. Place about a teaspoon of filling in the center of each wonton wrapper. Fold the wrapper around the filling, using a wet finger to seal the edges. (Check out my wonton folding tips in this Apple Cinnamon Rangoon recipe.)Place each folded wonton on a piece of wax paper as you work.

Once all wontons have been prepared, heat about 1/4″-1/2″ of vegetable (or other neutral tasting oil) in a skillet over medium/medium high heat. Test the heat by placing one wonton in the pan. It should immediately sizzle and cook very quickly (less than 30 seconds per side). Flip when the bottom is golden brown. Cook for a few seconds on the other side. If they are cooking too slowly, raise the heat. If they’re cooking faster than you can manage to flip them, turn down the heat. Use a spatula to remove the wontons from the oil and place them on a paper towel to drain. Immediately sprinkle with cinnamon sugar mixture. Serve warm.

Coconut Custard Pie

Halloween has come and gone. Just like that. The costumes have been washed and packed away (though I think I’d put my baby in his monkey costume everyday if it were socially acceptable to do so). The candy has been picked over for the good stuff. (You know who I’m talking about, Almond Joy.) And the daily morning frost makes it feel more like winter than autumn. We’re on the fast track to Thanksgiving.
And with Thanksgiving comes one of my favorite meals of the year. Comfort food just doesn’t get much more comforting than Thanksgiving dinner. Savory stuffings, tart cranberry sauce, vegetables doused in cream, doughy buttered rolls, and pie. Sweet, delicious pie.
This recipe comes by request of a reader in search of a recipe for a graham cracker coconut crust to use for a fresh pumpkin pie. I decided to use my crust to make a seriously satisfying coconut custard pie, but this crust would also work beautifully with a fresh pumpkin coconut pie filling or any other filling you can dream up.
This recipe is written for use with a deep pie dish. If you have a more shallow pie dish, you will probably have some extra crust and custard. Spoon the extra custard into cups and top with some of the extra crust mixture for a tasty little treat!
Coconut Custard Pie
For the Crust:
  • 1 1/2 cups graham cracker crumbs
  • 3/4 cup shredded coconut
  • 1 tablespoon brown sugar
  • 1 stick (8 tablespoons) melted butter (I use salted butter.)

For the Custard:

  • 3 cups milk*
  • 1/2 cup sugar
  • 1 tablespoon vanilla extract
  • 1/4 teaspoon salt
  • 1/3 cup cornstarch
  • 5 egg yolks
  • 2 cups shredded coconut
*If you’re looking to reduce the calorie and fat content, skim milk will work just fine!

Directions

To make the crust: Combine graham cracker crumbs, coconut, brown sugar, and melted butter. Press the mixture onto the bottom and sides of a deep pie dish. Bake for 13-15 minutes at 350 degrees.

To make the custard: Bring the milk, sugar, vanilla, salt and cornstarch to a simmer over medium heat, whisking frequently so that the sugar and cornstarch dissolve. Once the mixture begins to bubble and thicken, reduce the heat. In a separate bowl, lightly beat the egg yolks. Gradually whisk about 1/2 of the hot milk mixture into the egg yolks, starting with a slow drizzle. (Gradually incorporating the hot milk into the egg yolks tempers the eggs, allowing them to slowly rise in temperature without scrambling.) Gradually whisk the egg mixture into the remaining hot milk mixture in the pot. Bring to a gentle boil over medium heat, whisking constantly for about 3 minutes, until thickened and smooth. Stir in the shredded coconut.

Pour the custard into the prepared crust. Cool for a few hours, until set.

Garnish with whipped cream and toasted coconut or crushed graham crackers before serving.

How to Roast Pumpkin Seeds

Got pumpkins?

Perhaps a few small ones destined for fresh pumpkin pie? Or maybe a great big one, awaiting its jack-o-lantern fate?

Whatever the case, save those seeds! Pumpkin seeds, or pepitas, make a delicious and incredibly nutritious snack. Follow this simple step-by-step guide on how to roast your fresh pumpkin seeds.

Step 1: Use a spoon to scoop seeds from the pumpkin.

Step 2: Rinse the seeds under cool running water, while removing any stringy, orange pulp.

Step 3: Dry the seeds on a paper towel.

Step 4: Spread the seeds onto a baking sheet. Drizzle the seeds with a little olive oil and sprinkle with salt and pepper. Move the seeds around to evenly distribute the oil and seasonings.

Step 5: Bake for about 20 minutes at 375 degrees.

Enjoy!

You can have fun with the seasonings for your seeds. I prefer basic salt and pepper pepitas, but you may enjoy cinnamon sugar, parmesan cheese, garlic salt, or even chile flavored seeds!

Roasted Pumpkin Caramel Bisque

Posted on

I have a gray hair. One gray strand, on my otherwise brown head of hair.

I must be getting old.

It grows in. I pull it out. It grows in again. I pull it out again.

I’m not trying to abolish the nasty offender. I just want to take a closer look. It intrigues me. It’s a shimmery white.

Perhaps I’ll feel differently when that lonely strand of hair starts gathering friends, but for now I’m content to let my hair turn whatever shade of gray, silver, or white it chooses to be.

I’m quite comfortable with my age. I’m as comfortable to be turning 35 as I would be to turn 25. In fact, I might even like 35 better.

I’m comfortable with that gray hair on my head.

I’m comfortable with me (though I’d be even more comfortable with twenty pounds less of me).

Comfort is good.  It’s like a warm, cashmere sweater; one that’s three sizes too big so you can snuggle up within its soft embrace. Comfort is molten dark chocolate. It’s a warm, crackling fire. Comfort is this creamy roasted pumpkin caramel bisque. It’s slightly sweet, warm, and smooth. It smells like autumn and feels like a hug. Seriously…a great, big, warm hug.

Roasted Pumpkin Caramel Bisque

Ingredients

  • 2 pie pumpkins (3-4 pounds each) or about 7-8 cups canned pumpkin puree
  • 2 tablespoons butter
  • 1 medium onion, finely diced
  • 4 cups vegetable stock
  • 2 cups half and half
  • 1/2 teaspoon cinnamon
  • Dash of nutmeg
  • Salt (about 3 teaspoons)
  • 1/2 cup prepared caramel sauce/dip
  • A few dashes of cayenne pepper, to taste

Directions

To roast the pumpkins – Preheat the oven to 375 degrees. Cut the pumpkins in half and scoop out all of the seeds and stringy pulp. Place the pumpkins cut side down on a baking sheet. Fill the baking sheet with about 1/4″ water. Bake for about 90 minutes, until tender. Allow to cool, then scoop out the tender insides. You should have about 8 cups of roasted pumpkin. Click HERE to see a photo guide on how to roast pumpkins.

To prepare the soup, heat butter over medium heat in a large saucepan. Add the onions and cook for about 10 minutes, until tender and golden. Add the roasted pumpkin (or pumpkin puree) and vegetable stock to the pan.

Use an immersion blender to blend the mixture until smooth or transfer the mixture in small batches to a blender or food processor to blend. Return the blended mixture to the saucepan and heat to a simmer. Stir in the half and half, cinnamon, nutmeg, and salt. Add the salt gradually, to taste. Gradually stir most of the caramel into the soup, reserving a spoonful or two for garnish. (Taste as you go. The soup should be savory and slightly sweet.) Season with a few dashes of cayenne pepper, as desired.

Garnish with a drizzle of caramel and pumpkin seeds or top with crunchy croutons.

Makes a huge batch of soup…plenty for freezing!

Secrets of An Avon Beauty Boss

Achieving Beautiful Dreams with Avon

The Gourmand Mom

Good food, seasoned with a dash of life

%d bloggers like this: