RSS Feed

Tag Archives: pizza

Grilled Chicken Tikka Masala Pizza

Posted on

Anyone following all of this crazy zombie apocalypse ‘news’ popping up?? There’s some seriously wacky stuff going on out there.  I’ve seen enough zombie movies to know that this is always how it begins…a few random incidents which are brushed off as isolated events with some logical cause. The public is urged not to panic and then all h.e.double hockey sticks breaks loose. (Being told not to panic is a sure sign that it’s time to panic.) And honestly, though I’m inclined to believe that all of this has more to do with dangerous mind-altering drugs than a zombie armageddon, I’m not sure that brings me any peace of mind.

Did ya know that the CDC’s website has a section on zombie preparedness?? I kid you not. I’m pretty sure it’s a tongue-in-cheek, fun way to educate about general disaster readiness. Or is it???

Personally, I learned everything I need to know from the educational zombie comedy, Zombieland.

Zombie Survival Rule #1: Cardio

Good thing I’ve been running again. And it feels so good. I’d been struggling to get back to a regular running routine ever since having my baby 15 months ago and it’s been an uphill battle, both literally and figuratively. My progress had been dreadfully slow. But, the baby weaned from nursing almost two months ago and my running progress has accelerated ever since. Guess I didn’t realize the toll it was taking on my body. It feels good to get out there for my runs and I’ll be ready when the zombies…errr, I mean bath salt crazies…start chasing me down. (I’m joking…mostly.)

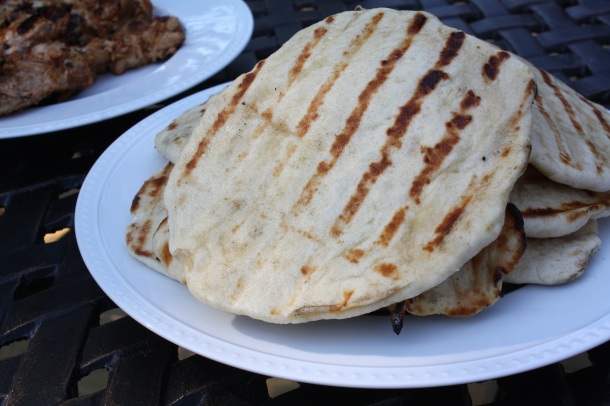
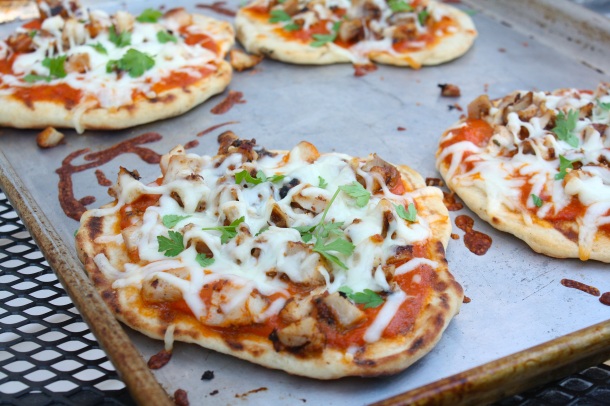
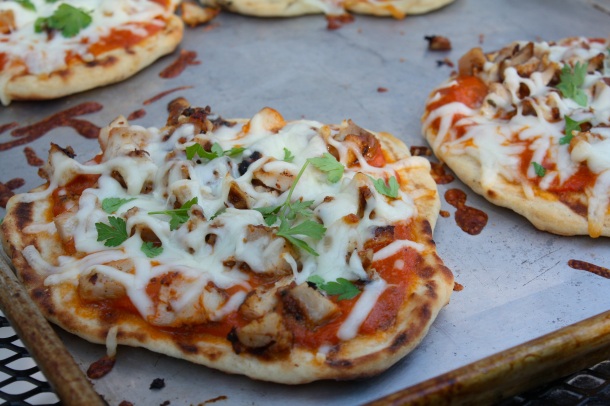
The other benefit of running is that it affords me a little more wiggle room in my dietary choices, so I can afford to enjoy a few indulgences. Ok, my running/indulgence balance is admittedly still a bit off, but it’s getting closer. This grilled chicken tikka masala is one of those indulgences that I think about when I’m running. This mouth-watering pizza combines one of my all-time favorite dishes, chicken tikka masala, with homemade garlicky grilled naan flatbread and a bit of melty mozzarella cheese. Seriously yummy and worth every second of heart-pounding cardio.

I’d like to tell you that this dish is a cinch to pull together, but that would be a lie. There is nothing inherently difficult about it, but between preparing the marinade, making the sauce, preparing the dough, grilling the chicken, grilling the naan, and then assembling and grilling the pizzas, this is a time consuming meal. But it is a labor of love. Definitely worth the time! Just save it for a sunny weekend day and get the whole family involved in the process!

To make things more manageable, you may want to plan to cook the meal in parts. The chicken can be marinated the night before. The sauce, the chicken, and the naan can all be made ahead of time and will hold well in the fridge for a day or two. You could even enjoy the meal as traditional chicken tikka masala with rice and naan one night and make the pizzas for leftovers the next day! However you decide to break it up, I think you’re going to enjoy this delicious meal!

Grilled Chicken Tikka Masala Pizza

Ingredients

For the Naan*

  • 1 packet dry active yeast
  • 1 cup warm water (about 110-115 degrees)
  • 1/8 cup sugar
  • 3/4 teaspoon salt
  • 1/4 cup milk
  • 1 egg, lightly beaten
  • 1 tablespoon garlic, minced
  • 4 cups flour (approximately)
  • 4 tablespoons butter, melted

For the Chicken

  • 1 1/2 pounds boneless, skinless chicken thighs, trimmed of excess fat
  • 1 1/2 cups plain yogurt
  • 3 tablespoons garam masala
  • 2 teaspoons garlic, minced
  • 1/2 teaspoon salt
  • 1 teaspoon paprika
  • 1/4 teaspoon cayenne
  • 1/2 inch segment of fresh ginger, grated

For the Sauce

  • 3 tablespoon butter
  • 1 small onion, diced
  • 1 teaspoon garlic, minced
  • 1 1-2″ segment fresh ginger, grated
  • 2 small serrano peppers, seeds and ribs removed, diced
  • 1 1/2 tablespoons garam masala
  • 1 (29 ounce) can crushed tomatoes
  • 1/4 cup tomato paste
  • 1 cup heavy cream
  • 1/4-1/2 teaspoon cayenne (plus more, if desired)
  • 1 teaspoon salt (plus more, if desired)
For the Pizzas
  • 2 cups mozzarella cheese, shredded
  • Fresh parsley leaves, chopped

Directions

To prepare the chicken marinade: Combine all marinade ingredients in a container with a tight-fitting lid. Place the chicken thighs in the marinade and toss to evenly coat. Refrigerate and allow the chicken to marinade for at least six hours or overnight.

To grill the chicken: Wipe the grill with a bit of vegetable oil to help prevent sticking. Preheat grill to medium heat. Shake the excess marinade off of the chicken and place it on the preheated grill. Cook the chicken for about 7-10 minutes on each side. (Cooking time will depend on the thickness of the chicken. The chicken is fully cooked when it has reached an internal temperature of 165 degrees.) Allow the chicken to cool, then cut into small pieces. Refrigerate until using.

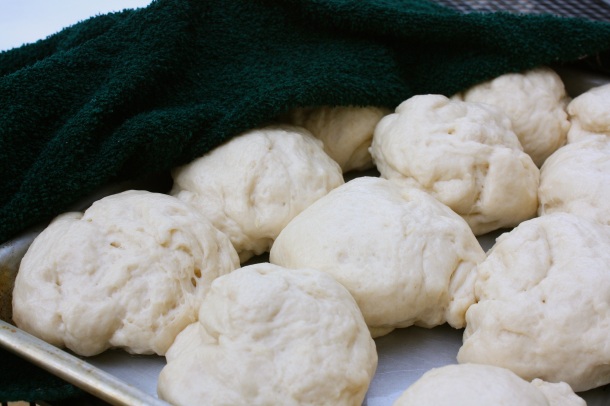
To make the naan: Stir together the yeast and warm water. Allow to rest for about 10 minutes. Stir in the sugar, salt, milk, garlic and egg. Add the flour 1 cup at a time, stirring and kneading for several minutes until a soft dough forms. (Add the flour slowly towards the end, since the quantity of flour will vary. The dough should be slightly sticky, but manageable. If the dough is too dry, add little bits of water or milk. If the dough is too wet, add small quantities of additional flour.) Place the dough in a lightly oiled bowl. Cover with a slightly damp towel and allow it to rest at room temperature for 1-2 hours, until it has doubled in size. Then, divide the risen dough into 12 equal balls of dough. Place the balls on a lightly oiled baking sheet. Cover with the towel and allow to rest at room temperature for about 30 minutes. Preheat your grill to medium heat. Prepare a work station near your grill with a rolling pin, cutting board, and flour. Lightly scatter the flour over the cutting board. One at a time, roll each ball of dough into a flat round, then gently stretch the dough into a soft teardrop shape. Place the dough directly onto the grill and cook for about a minute on each side. It will begin to puff slightly when it is done. Remove from the grill and brush with melted butter.

To make the sauce: Melt butter in a saucepan over medium heat. Add the onions, garlic, ginger, and serrano peppers. Cook for about 5 minutes, stirring frequently, until the onion is translucent. Add the garam masala, stir, and cook for another minute. Add the crushed tomatoes, tomato paste, salt, and cayenne pepper. Stir to combine. Continue cooking until heated through, stirring frequently. Reduce the heat and add the cream. Taste and adjust seasoning with additional salt and cayenne pepper, as desired.

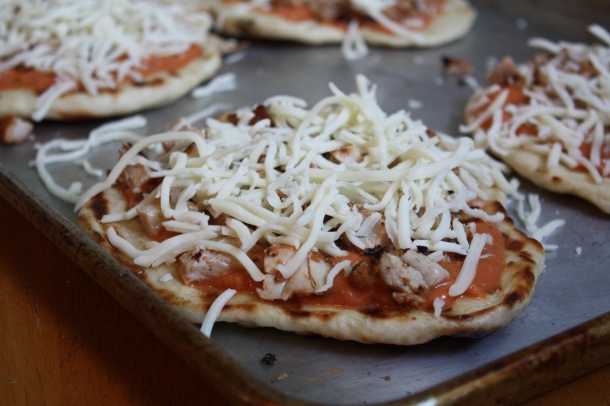
To assemble the pizzas: Spread a layer of sauce onto each piece of naan. Scatter some of the chicken over each naan. Sprinkle each pizza with a bit of the mozzarella cheese. Garnish with fresh parsley. Heat the pizzas on the grill or in a 350 degree oven until the cheese is melty and all components are heated through (about 8-10 minutes).

*Recipe for naan adapted from the recipe found HERE.

Makes 10-12 small individual pizzas
Steak and White Cheddar Flatbread Pizza

Posted on

I had another parenting panic moment recently, similar to my reaction upon discovering that my oldest had his first loose tooth. Only this time, I didn’t immediately rush off to the doctor, which is a good thing, since he surely would have laughed at me.

You see, on multiple occasions during the past few weeks, we have noticed that the top of the baby’s right foot appears darkened; sort of a like a pale bruise. Each time, the darkening has gone away by the next day and since he seemed otherwise alright, we assumed we were just seeing things with our over-cautious parent eyes. Until it happened again, which increased our worry. Then, just the other day, it happened again. And I thought…That’s it! I’m bringing this kid into to the doctor, for something is surely wrong. I was in full Mommy panic mode by that point, assuming that my sweet baby must have some sort of horrible circulation disorder or something unimaginably worse.

But, before calling the doctor, I had the clever idea to try washing his foot. Sure enough, that pale bruised appearance quickly wiped away revealing a perfect little foot to match his left. Relief washed over me. And with the clarity of relief, I quickly figured out what had been causing the top of that one foot to repeatedly turn brown. You see, our sweet little baby has the most unique crawl I’ve ever seen. He started doing it a couple months ago. It is so fast and effective that we fear he’ll never choose to walk, though he already has all of the skills and coordination to do so. We fondly call it his ‘Planet of the Apes’ crawl, for it strongly resembles the half walk/half crawl of an evolved ape. He plants both hands and one foot (his left foot) flat onto the ground. The other leg (his right) maintains a bent crawling position. He leads with the left foot, in a pseudo walk, as he drags the bent right leg along. It’s an extremely fast and effective mode of locomotion. He does not have a circulation disorder. He does not have a bruised foot. The top of his right foot is merely the embarrassing evidence of my dirty floors. I’ve never been so relieved over dirty floors.

In between moments of needless parenting panic, I spend my mental energy obsessing over favored flavor combinations. They get caught in my head and I find myself itching to marry those flavor combinations again and again, in every form I can think of. Prosciutto, figs, and gorgonzola or chicken with hot sauce and bleu cheese or goat cheese with sun-dried tomatoes and olives.

Lately, I’m stuck on the combination of steak with aged white cheddar and horseradish. Recently, I made the most amazing, warm and cheesy steak and white cheddar dip. The dip was crave-worthy delicious. We used warm slices of French baguette to shovel the tasty dip into our hungry mouths. But it was an ugly dip; not at all photogenic. Definitely too ugly to form a post around.

And then, I found myself with some leftover flank steak. It didn’t take me long to decide what I would do. I’d adapt that luscious dip, into a flavorful spread, which I’d lather over flatbreads, then top with the leftover steak and some sweet caramelized onions; a final sprinkle of mozzarella and white cheddar cheese, with a scatter of green onions for a little vibrant color, and we’d have steak and white cheddar flatbread pizzas. Crave-worthy AND photogenic!

Steak and White Cheddar Flatbread Pizza

Ingredients

  • 4 ounces cream cheese, softened to room temperature
  • 1 cup aged white cheddar cheese, shredded
  • 1/2 cup sour cream
  • 2 tablespoons prepared horseradish
  • Dash of hot sauce
  • Salt and pepper
  • 1 cup leftover steak, cut into small pieces
  • 1 red onion, thinly sliced
  • 2 tablespoons olive oil
  • 4 flatbreads, naan, or pita rounds
  • 1/2 cup mozzarella cheese, shredded
  • 1/2 cup white cheddar cheese, shredded
  • 3 green onions, sliced

Directions

To prepare the cheddar-horseradish spread: Combine cream cheese, white cheddar, sour cream, horseradish, and hot sauce until well blended. Taste and season with salt and pepper, as desired. Refrigerate until using.

To prepare the caramelized onions: Heat olive oil in a pan over medium heat. Add the onions and cook, stirring frequently, until the onions are tender, sweet, and lightly golden (about 10-15 minutes should do the trick).

To assemble the pizzas: Spread a thin layer of the white cheddar spread over each flatbread. Top with a portion of the caramelized onions and steak. Sprinkle with a bit of mozzarella and white cheddar cheese. Garnish with some of the sliced green onions. Bake in a 400 degrees oven for about 15 minutes, until the crusts are slightly crisp and the toppings are hot and melty. (Placing the pizzas directly on the oven rack will help the crust to get crispier faster.)

Makes 4 flatbread pizzas

Sweet Little Monkey Baby

The Kids Cook Monday – Mexican Chicken Pizza

There are moments when I feel like I’m doing it wrong; this whole parenting thing. Like when my kids are climbing the shelves at Target while making unusually loud and appalling animal noises. Or laughing at me while I’m blue in the face trying to get them to pick up their toys. Or filling their water glasses with bits of salad and pasta while simultaneously stuffing entire slices of Italian bread into their mouths, as we dine with old friends.

And then there are moments when everything seems just fine. Perhaps even better than fine. Like when my boys embrace each other in a loving hug after being separated during the school day. Or when they share favorite toys without prompting. Or when they reach out to take each other’s hands to safely cross the street.

It’s in those little moments that I realize I am not ruining my kids…at least not completely.

I like the way my dad puts it best:

I believe in a heaven and I want to go there when I die. I want my family to be there with me. Have I taught them how to get there? 

When all is said and done, if I can answer yes to that question, then all of the other stuff; the messes, the whining, the salad-filled water glass; is pretty small in the grand scheme of things.

Parenting is hard. There’s hardly ever a day when I feel like I did it all right. But my grandma says I’m doing a good job…and that’s got to count for something, right??

There will always be days when the kids are dancing to the beat of their own drummer, leading me to question who’s really in charge around here. (I’m fairly certain there’s an elaborate governing system being negotiated between the three boys and the dog. I’m powerless.) But if you can’t beat them, get them to join you...in the kitchen, that is!

Spoken from experience, it’s a heck of a lot easier to engage the kids in cooking with you, than fight with them to behave while you try to do it yourself. Almost every recipe has plenty of steps to engage even the littlest chef, and this simple Mexican-style pizza is no exception! Young chefs will enjoy measuring the ingredients, spreading the beans, mixing the chicken and taco sauce, and sprinkling the ingredients. The whole family will enjoy the delicious, cheesy result!

Mexican Chicken Pizza

Ingredients

  • 1 prepared pizza crust
  • 3/4 cup refried beans
  • 1 1/2 cups cooked chicken, chopped
  • 1/3 cup taco sauce
  •  1 can diced tomatoes with chiles, well-drained
  • 1 1/2 cups Mexican blend cheese, shredded
  • 1 jalapeño pepper, seeds and ribs removed, thinly sliced (optional)

Directions

Preheat oven to 375 degrees. Place the pizza crust on a large baking sheet. Spread the refried beans over the pizza crust. Stir together the chicken and taco sauce. Scatter the sauced chicken over the beans. Scatter the diced tomatoes over the pizza. Sprinkle the cheese in an even layer on top. If desired, scatter a few slices of jalapeño peppers on top. (We left half of the pizza without jalapeños for the little guys!)

Bake for 15-18 minutes, until hot and melty.

Check out www.thekidscookmonday.org for more delicious, child-friendly cooking ideas!

Shrimp Scampi Flatbread Pizza

Posted on

As predicted, every pizza joint in my area is suddenly a fish fry too! After Easter, the Friday fish fry specials will gradually fade away, but for anyone who abstains from meat on Fridays during this time of the year, your local pizza shop is probably your one-stop-shop for Friday takeout!

If you’re feeling like something other than pizza, fried haddock or frozen fish sticks, I’ve got a few ideas for you. For starters, I’ve got a new recipe for a shrimp scampi flatbread pizza. We’ll start with a basic shrimp scampi, which will drizzle over individual flatbread crusts, and bake with a bit of asiago and mozzarella cheese. Garlic-flavored naan (Indian flatbread) makes an especially tasty crust for this pizza. Many supermarkets now carry prepared naan, either fresh in the bread or international section or frozen. If you can’t get your hands on flatbread or naan, a thin prepared pizza crust would do the trick.

For the purpose of this pizza, small salad shrimp (the kind you can typically find cooked and frozen) work perfectly. If you’d like to use this scampi recipe for serving over rice or pasta, substitute the salad shrimp for larger, fresh shrimp and allow them to cook in the buttery garlic sauce.

Shrimp Scampi Flatbread Pizza

Ingredients

  • 4 flatbreads, Indian naan, or a thin-crust pizza shell
  • 6 Tablespoons butter
  • 1 shallot, finely diced
  • 1 head of garlic, cloves peeled and thinly sliced
  • 1/4 cup white wine
  • 1 Tablespoon lemon juice
  • 2 cups cooked salad-sized shrimp, defrosted
  • Crushed red pepper
  • Salt
  • 2-3 Tablespoons fresh parsley, chopped
  • 1 cup asiago cheese, shredded
  • 2 cups mozzarella cheese, shredded

Directions

Preheat oven to 400 degrees. Melt butter in a pan over medium heat. Add the shallots and garlic. Cook for about 5 minutes, until the garlic just begins to turn a golden brown. Lower the heat, if necessary, to prevent burning. Add the white wine and lemon juice. Simmer for about 5 minutes. Add the shrimp and gently simmer until heated through. Season with crushed red pepper and salt, as desired. Stir in the fresh parsley. Allow the scampi mixture to cool slightly.

To assemble the pizzas, place the flatbreads or naan onto baking sheets. Sprinkle approximately 1/4 cup asiago cheese over each flatbread or naan. Spoon some of the shrimp mixture, with a small amount of the buttery sauce, over the cheese. To prevent your pizza from becoming soggy, do not use too much of the sauce. A light drizzle around the pizza will be perfect. Sprinkle about 1/2 cup mozzarella cheese over the top of each pizza. Bake for about 12 minutes.

Makes 4 Individual Flatbread Pizzas

Looking for a few other meat-free dinner options? Check out these previously posted Gourmand Mom recipes:

Codfish Cakes


Pan-Fried Tilapia with Grapefruit and Shaved Leeks


Broiled Salmon Bruschetta


Coconut Crusted Tilapia with Tropical Fruit Salsa


Roasted Beets and Goat Cheese in a Citrus-Honey Vinaigrette


Cinnamon Apple and Brie Quesadillas


Broiled Halibut with Olives, Sun-dried Tomatoes, and Capers


Tropical Fish Tacos with Spicy Mango Salsa and Coconut Rice


Salmon Burgers with Horseradish Sauce


Heirloom Tomatoes and Fresh Mozzarella


Chilled Avocado Soup and Crab Cakes with Chipotle Remoulade


Buttermilk Battered Coconut Shrimp with Pineapple Chipotle Dipping Sauce


Hawaiian Garlic Shrimp


Shrimp and Asparagus in a Lemony Basic Alfredo Sauce


The Kids Cook Monday – White Garlic Shrimp Pizza

Don’t get me wrong…I love a traditional slice of saucy, cheesy pizza as much as the next person (preferably dipped in a bit of bleu cheese dressing). But there’s something about a slice of white garlic pizza which makes my taste buds do a little happy dance. And last week, my happy-dancing taste buds decided that a homemade white garlic pizza, with a generous topping of tiny shrimp, was exactly what we needed.
Truth be told, I made this pizza twice last week. I had initially planned to post the recipe on Friday, but my first take on the pizza was less than ideal. It was garlicky and delicious, but the proportions of sauce and cheese to the dough were off kilter. On top of being too heavily sauced, the ricotta layer cooked up into a bit of a mess. I figured that all it needed was a little reduction on the toppings and a touch of egg white to bind the ricotta. I was about to post the recipe with my theorized improvements, but made a last minute decision to run another test. There were no complaints in our household about having this pizza twice in the same week! The second run-through was a definite winner!
As part of our Kids Cook Monday series, I invited my little helpers into the kitchen. Pizza making is ripe with opportunities for young children to get involved. Stretching dough, spreading sauces, arranging toppings, and scattering cheese are ideal tasks for little hands. Kids benefit in a number of ways while cooking. They develop math skills while measuring, fine motor skills while spreading and arranging pizza toppings, health and safety skills while washing up before cooking, and language skills while following directions. But, in my opinion, there’s no bigger reward than the proud smiles on their little faces as our family sits down to enjoy the meal they had a hand in creating.
White Garlic Shrimp Pizza
Ingredients
  • 1 large pizza shell or pizza dough, prepared or homemade*
  • 2 cups salad shrimp, cooked
  • 1 cup Mozzarella cheese, shredded
  • 2 Tablespoons fresh parsley, chopped

For the Ricotta Layer

  • 3/4 cup Ricotta cheese
  • 1 egg white
  • 1/4 teaspoon garlic, minced
  • 1 Tablespoon fresh parsley, chopped
  • 1/8 teaspoon salt

For the Garlic Sauce

  • 2 Tablespoons butter
  • 1/2 Tablespoon garlic, minced
  • 1 1/2 Tablespoons flour
  • 3/4 cup milk
  • 1/4 cup Asiago or Parmesan cheese, shredded
  • 1/4 tsp salt
  • Ground black pepper

*Click here to see my post on making homemade pizza dough.

Directions

Preheat oven to 450 degrees. If using pizza dough, stretch the dough into a large round and arrange on a pizza stone or large baking sheet, lightly greased with olive oil.

Prepare the ricotta by combining the ricotta, egg white, garlic, parsley, and salt.

Prepare the garlic sauce. In a saucepan, melt the butter over medium heat. Add the minced garlic to the butter. Cook for about two minutes. Add the flour to the mixture and stir. Cook for about 3 minutes, stirring frequently. Gradually whisk in the milk until smooth. Bring to a simmer and continue cooking for 4-5 minutes, until the milk begins to thicken. Turn down the heat. Add the cheese, salt, and pepper. Stir to combine.

To assemble the pizza, spread a thin, even layer of the ricotta mixture over the pizza dough. Then, spread a thin, even layer of the garlic sauce over the ricotta. Scatter the salad shrimp over the sauce. Sprinkle with the mozzarella cheese and parsley. Bake for 15-20 minutes.

Pizza Dough with Kids

Posted on

Food inspiration can come from any place. My sister’s breakfast pizza was inspired by a visit to a gas station, my vanilla carrot bisque came by request of my imaginative toddler, and the internet has recently been flooded with stories and recipes for spaghetti tacos, inspired by an episode of the popular children’s show, iCarly. I’ve got to admit that spaghetti tacos are a genius idea. I’ll probably be serving mine up topped with baby meatballs and cheese. Personally, my inspiration often comes from pictures of food, restaurant menus, or food on tv. It comes through daydreams of favorite flavors and insatiable cravings. In the absence of other ideas, a walk through the grocery store never fails to flood me with inspiration.

Most recently, I was inspired by an episode of Barney. Yes, Barney. My boys and I were snuggled up on the couch one recent morning; our typical early morning routine, prior to starting the day. They were enjoying an episode of Barney, while I was poking around the internet. I looked up to see the giant purple dinosaur skipping around a kitchen, followed by a small army of children, throwing pizza dough in the air and singing a merry song. Boy were they having a grand ol’ time! I casually asked the boys if they’d like to make pizza dough someday. In an instant, my three year threw the blanket off his lap and jumped off the couch, excitedly saying, Lets do it right now!

I was hardly ready to make pizza dough at that very instant, but we did make it the very next day. Myself being a pizza dough novice, I ran a search online for a basic pizza dough recipe. I settled upon a recipe from Giada De Laurentiis at the Food Network. My husband is skeptical of skinny chefs. I love that about my husband. I just want to know her secret. Regardless, Giada knows her way around an Italian kitchen, so I was fully confident in her recipe.

I gathered our ingredients, cleaned our work surface, then called my tiny sous chefs into the kitchen. After getting them cleaned up and reminding them of the importance of clean hands in the kitchen, we set to work.

We started by sprinkling one packet of Dry Active Yeast (7 grams) over 1 1/2 cups Warm Water (approximately 100-110 degrees). An instant-read thermometer is helpful in checking the temperature. Water that is too hot will kill the yeast, while too cold will prevent it from activating. Stir until the yeast is dissolved.

In a separate bowl, whisk together 5 cups Flour with 1 1/2 tsp Salt.

Pour the yeast mixture over the flour and stir to combine. If the mixture is too dry, add more water, a tablespoon at a time, until the dough comes together. If the dough gets too wet, add more flour, a tablespoon at a time. We needed to add a few spoonfuls of additional water to achieve the right consistency.

Remove the dough from the bowl and place it on a well-floured surface. Lightly coat your hands in flour and knead the dough for about 10-12 minutes. Small children make excellent kneaders.

Place the dough in an oiled bowl. Turn the dough in the bowl so that all sides of the dough are lightly coated in oil. Cover loosely with a piece of plastic wrap and allow it to rest at room temperature for about two hours. It should double in size.

Push down the dough and divide it into 3 equal sized balls. Place each ball in its own oiled bowl. Cover and let rest for another hour.

Thoroughly wrap each ball of dough in plastic wrap and refrigerate. You can use it immediately or keep it refrigerated for up to a day.

To use the dough, lightly oil your work surface. Press and pull the dough into an 8-12 inch round. If desired, roll the edges to create an outer crust. Place the pizza round onto a baking sheet which has been sprinkled with a bit of corn meal. The corn meal will prevent the dough from sticking.

Top with your desired sauce, cheese, and toppings. Children love spreading sauce and sprinkling toppings. Set up an assortment of toppings and let them go to town! Bake for about 10 minutes on your oven’s highest heat (about 500 degrees).

As you know, I’m  a huge fan of cooking with kids. It develops a wide range of skills and helps to develop an appreciation of food. The process of cooking together is bursting with teachable moments about language, science, and math. It’s engaging, memorable, and helps kids develop a sense of pride in their accomplishments as they enjoy the product of their work.

To ensure a positive cooking experience with kids, be prepared. Gather the necessary ingredients and materials ahead of time, so you can keep the process moving smoothly. Muster up all of your patience and be prepared for a bit of mess, which admittedly, is often easier said than done. It’s normal for young children to need repeated directions and multiple prompts to stay on task. They may find that brushing all the flour off of the table onto the floor is more interesting than kneading the dough. Take a deep breath and try to redirect their attention. Modeling is your best teaching tool. Prior to each step, explain and show children what to do. If necessary, guide their hands as they complete each step.  Finally, talk, talk, talk as you cook. Talk about the procedure. Talk about the ingredients. Discuss how the yeast makes the dough grow. Make predictions about what will happen next. Ask questions and engage their curiosity.

This pizza dough recipe is a winner! It comes together easily, is a cinch to work with, and tastes perfectly doughy and delicious. It would be delicious with any combination of toppings.  My husband and I enjoyed one of the dough rounds with a few ingredients we had on hand; Bertolli’s Four Cheese Rosa Sauce, sliced pieces of leftover Wine and Cheese Sausage, and a generous sprinkle of a Monterey Jack cheese blend.

The kids chose traditional pizza sauce with mild cheddar, bologna, and pineapple tidbits. Such a kids’ pizza!

Everyone was satisfied with their selections. This dough will most definitely be making future appearances in our home. Also, keep your eye out for a basic pizza sauce recipe, coming up soon!

Oven-roasted Pulled Pork and Summer Peach Pizza

Posted on

Recently, I was having a conversation with someone who was tossing around the idea of opening a pizza shop in a city whose pizza market is predominated by chain restaurants. I suggested that as a way of setting himself apart, he should focus on using very fresh ingredients; local, seasonal, and organic when possible. In addition to offering a really good traditional pizza with traditional toppings, he could offer a special of the month, something a bit different, which features the most seasonal produce. As an example, I threw out peaches. Well, that got an odd look. So, I continued, Maybe with a BBQ type of sauce and pork or something. The odd look remained.

Over the next couple days, I mentioned this peach and pork pizza idea to a handful of other people, all of whom had the same confused reaction. Maybe I should have let it go, but for some reason, I couldn’t get this pizza off my mind. I mean, people put ham and pineapple on pizza. So why not pork and peaches?

I let the idea simmer in my brain for a while. The pork should be slow-cooked and tender, like pulled pork. The peaches would need to be roasted to make them extra sweet and tender. The sauce should full of tomato flavor, but with a definite sweet bbq accent. The cheese should be melty and mild. The more I thought it through, the more convinced I became that it would work.

So, I picked up a big pork shoulder and got cooking. Pulled pork is something which works best when cooked low and slow. There are several ways to do it, all of which can be successful. My preferred method is to oven-roast the pork, since I can use that method year round and I find that it produces a less mushy result than with a slow-cooker. You can decrease the cooking time by increasing the heat, but low and slow is your best bet for a tender roast, which will pull apart with ease. My recipe is sort of in middle as far as heat and time goes, but if you have more time on your hands, lower the heat and give it a bit more time.

For the sauce, I made a Honey Garlic BBQ sauce. I cooked the sauce along with the pork to pick up some of the pork flavor and allow the flavors to blend and concentrate. This also allows the onion and roasted garlic to slow cook for an even sweeter flavor. For a leaner end-result, you can cook the sauce separate from the roast.

Pulled Pork and Summer Peach Pizza

Ingredients

For the Roasted Garlic-Honey BBQ Sauce:

  • 1 15 oz. can Tomato Sauce
  • 1/4 cup Tomato Paste
  • 1/3 cup Apple Cider Vinegar
  • 2 Tbsp Mustard
  • 1/4 cup Worchestire
  • 1/4 cup Honey
  • 1 tsp Cayenne
  • 1/2 tsp Salt
  • 1 head Roasted Garlic, cloves removed from the skin*
  • 1 Small Onion, chopped

For the Roast:

  • 1 5-7 pound Pork Shoulder
  • Paprika
  • Brown Sugar
  • Salt
  • Cayenne Pepper

For the Peaches:

  • 2 Peaches, thinly sliced
  • 1/2 Tbsp Brown Sugar

For the Pizza:

  • 2 12″ Prepared Pizza Crusts
  • 2-3 cups Mozzarella Cheese
  • 1/3 cup Chives, finely chopped

*Click here for my guide to roasting garlic.

Directions

To prepare the roast, trim the excess fat from the exterior. Rub the roast all over with paprika, brown sugar, salt, and cayenne. Refrigerate for at least an hour.

Preheat oven to 325 degrees. In a heavy dutch oven pan with a tight fitting lid or in a baking dish that is just big enough to hold the roast, combine all sauce ingredients. Place the roast on top of the sauce and cover. If using a baking dish, tightly seal the pan with foil. Place it in the oven and cook for about 5 hours. No need to check, stir, or baste. Just pop it in a let it do its thing. You’ll know it’s done when the meat starts to pull away from the bone and the internal temperature, as measured with an instant-read thermometer, has reached at  least 170 degrees. You can also test the meat by scraping a fork into a piece of the roast. It should easily shred from the roast.

For the peaches, place the thin slices in a small baking dish and toss with the brown sugar. You can omit the sugar, if desired, but the small amount of sugar gives the peaches a very light, sweet glaze. Place the baking dish in the oven during the last 30 minutes of the roast’s cooking time.

When the roast is cooked, remove from the oven. Carefully lift the roast from the pan and place it on a rack or in a colander to cool for about 15 minutes.

While the roast is cooling, pour the sauce through a strainer to remove the chunks of onion, garlic, and any pork pieces. Allow the sauce to settle. Then, pour off any excess fat, which will rise to the top or use a spoon to remove the fat. Taste the sauce and adjust the flavor with more salt, cayenne, or honey, as desired.

When the pork is cool enough to handle, but still warm, use a fork to begin pulling the meat. If you scrape the fork against the meat, it should start pulling apart easily. Discard any fatty chunks. I like to go back over the meat with my fingers after pulling it, to make sure there are no slimy, fatty bits remaining.

Pour the sauce over the meat and toss to combine.

For the pizza, preheat oven to 425 degrees. Scatter the sauced pork in an even layer over the crust. Place several slices of peach on top of the pork. Sprinkle with a good layer of mozzarella cheese. Garnish with the chopped chives. Bake for about 12 minutes until everything is hot, the cheese is melty and the edges of the crust are golden.

Makes 2 12-inch Pizzas (plus leftover pulled pork for sandwiches!)

This pizza was really good. Even my skeptical husband was pleased!

Pizza Dragon and Chairs of Stock

Posted on

Childhood can be a confusing time. So many new experiences to take in, so much to learn about the world, the potential for confusion lurking around every corner. As a child, I remember the day our father told my sisters and I about the shares of stock which had been purchased for us. Our youthful minds heard chairs of stock. We continued the discussion with our father, he talking of the shares, we talking about chairs. Imagine our confusion when he tried to explain that our chairs were going to help us to pay for college. How in the world, we asked. Well, we could sell our shares, he explained. People will want to buy our chairs? Yes, he explained, people buy and sell shares all of the time. Hmm… We continued trying to process this whole chair thing. So, where do they keep all of our chairs? My father paused for a moment. We continued, Is there like a room somewhere filled up with our chairs? And, that’s when he realized we weren’t talking about the same thing.

Or take, for example, our first experience at Chuck E. Cheese. My family sat down and ordered some pizza and sodas. On the wall was a giant movie screen, the size of the wall. On it, the movie Pete’s Dragon was playing. Our parents told us the name of the movie. Between bites of our pizza, we heard Pizza Dragon. Eat pizza, watch Pizza Dragon. Made sense at the time. Took us a few years before we realized the movie was not actually Pizza Dragon.

Speaking of pizza, we’re having my signature pizza tonight. My brother in law is visiting and his top food request for the weekend was this very pizza. I’ve taken a Steak Bordelaise dinner; steak in a rich wine sauce with caramelized onions, sauteed mushrooms, and gorgonzola cheese; and I’ve turned it into a pizza. It’s the steak dinner you can eat with your hands. I told you I really enjoy handheld meals. You can use either, neither, or both mushrooms and onions on the pizza, depending on your preference. The best part is that all components of the pizza can be prepared ahead of time! This is a very hardy pizza, so it works well with a side of fresh salad.

P.S. There’s skirt steak on this pizza. Have I mentioned how much I love skirt steak??


Steak Bordelaise Pizza

Ingredients

For the Sauce

  • 1 cup Dry Red Wine
  • 1 Shallot, finely diced
  • 1 sprig Thyme
  • 2 cups Beef Stock
  • 1 Tbsp Cornstarch
  • 1 Tbsp Water
  • Salt and Pepper

For the Toppings

  • 1 Onion, chopped (optional)
  • 2 cups Mushrooms, sliced (optional)
  • 2 Tbsp Butter
  • 1 Skirt Steak (about 1/2 pound)
  • 1/2 cup Gorgonzola Cheese, crumbled
  • 1 cup Mozzarella Cheese
  • Salt and Pepper
  • 1 Thick Pizza Crust, homemade or store bought (12 inch diameter)

Directions

For the sauce, combine red wine, shallot, and thyme in a saucepan. Bring to a simmer over medium heat and simmer until the sauce reduces by 3/4. There should be about 1/4 cup remaining. Add the beef stock. Bring to a simmer and cook until the sauce reduces by half. There should be about a cup remaining. Strain the sauce to remove the shallots and thyme. Return the sauce to the saucepan. In a small dish, combine the cornstarch with the water. Add a spoonful or two of the hot sauce. Stir to combine, then add the cornstarch mixture to the sauce. Simmer for another minute or two until the sauce thickens. Season with a little salt and pepper.

For the onions, heat 1 Tbsp butter in a pan over medium heat. Add the onions to the pan and cook for a few minutes, stirring frequently, until they begin to lightly brown. Turn down the heat and cook for 10-15 minutes until the onions are soft and sweet.

For the mushrooms, heat 1 Tbsp butter in a pan over medium heat. Add the sliced mushrooms. Cook, stirring frequently for about 10 minutes until the are soft and lightly browned.

For the steak, preheat an oven to 450 degrees. Place the steak on a baking sheet and season with salt and pepper. Bake for about 10 minutes. When cool enough to handle, cut the steak into small bite-sized pieces.

To assemble the pizza, preheat oven to 375 degrees. Spread about 3/4 cup of the sauce over the pizza crust. Evenly distribute the steak over the sauce. Add the onions and/or mushrooms. Sprinkle with gorgonzola and mozzarella cheeses. Bake for about 15 minutes. Let the pizza cool for a few minutes before slicing.

The Gourmand Mom

Good food, seasoned with a dash of life