RSS Feed

Tag Archives: Recipes

Indian Chickpeas and Mango Lassis

Posted on

We spent last weekend at a rental house in the Catskill mountains with some friends from college and a few of their close friends. 10 adults. 8 little boys ages 6 month to 6 years. An endless supply of good food. Late nights and early mornings. Amazing fun.

IMG_7713

The weather was cold and rainy, but the house was well equipped to keep everyone occupied. We played air hockey and foosball and pool and Settlers of Catan. The kids got lessons in backgammon, dominos, and the card game, war. On the warmest day, we played bubbles and hopscotch. The kids enjoyed the large outdoor play set and playing tee-ball in the yard, which was much more a practice in turn-taking than anything else. There were nature walks, a close call with a tick and a perfectly freaky encounter with a snake. The jacuzzi went largely unused and the karaoke machine went completely neglected. (The beer fridge worked double time.)

IMG_8186

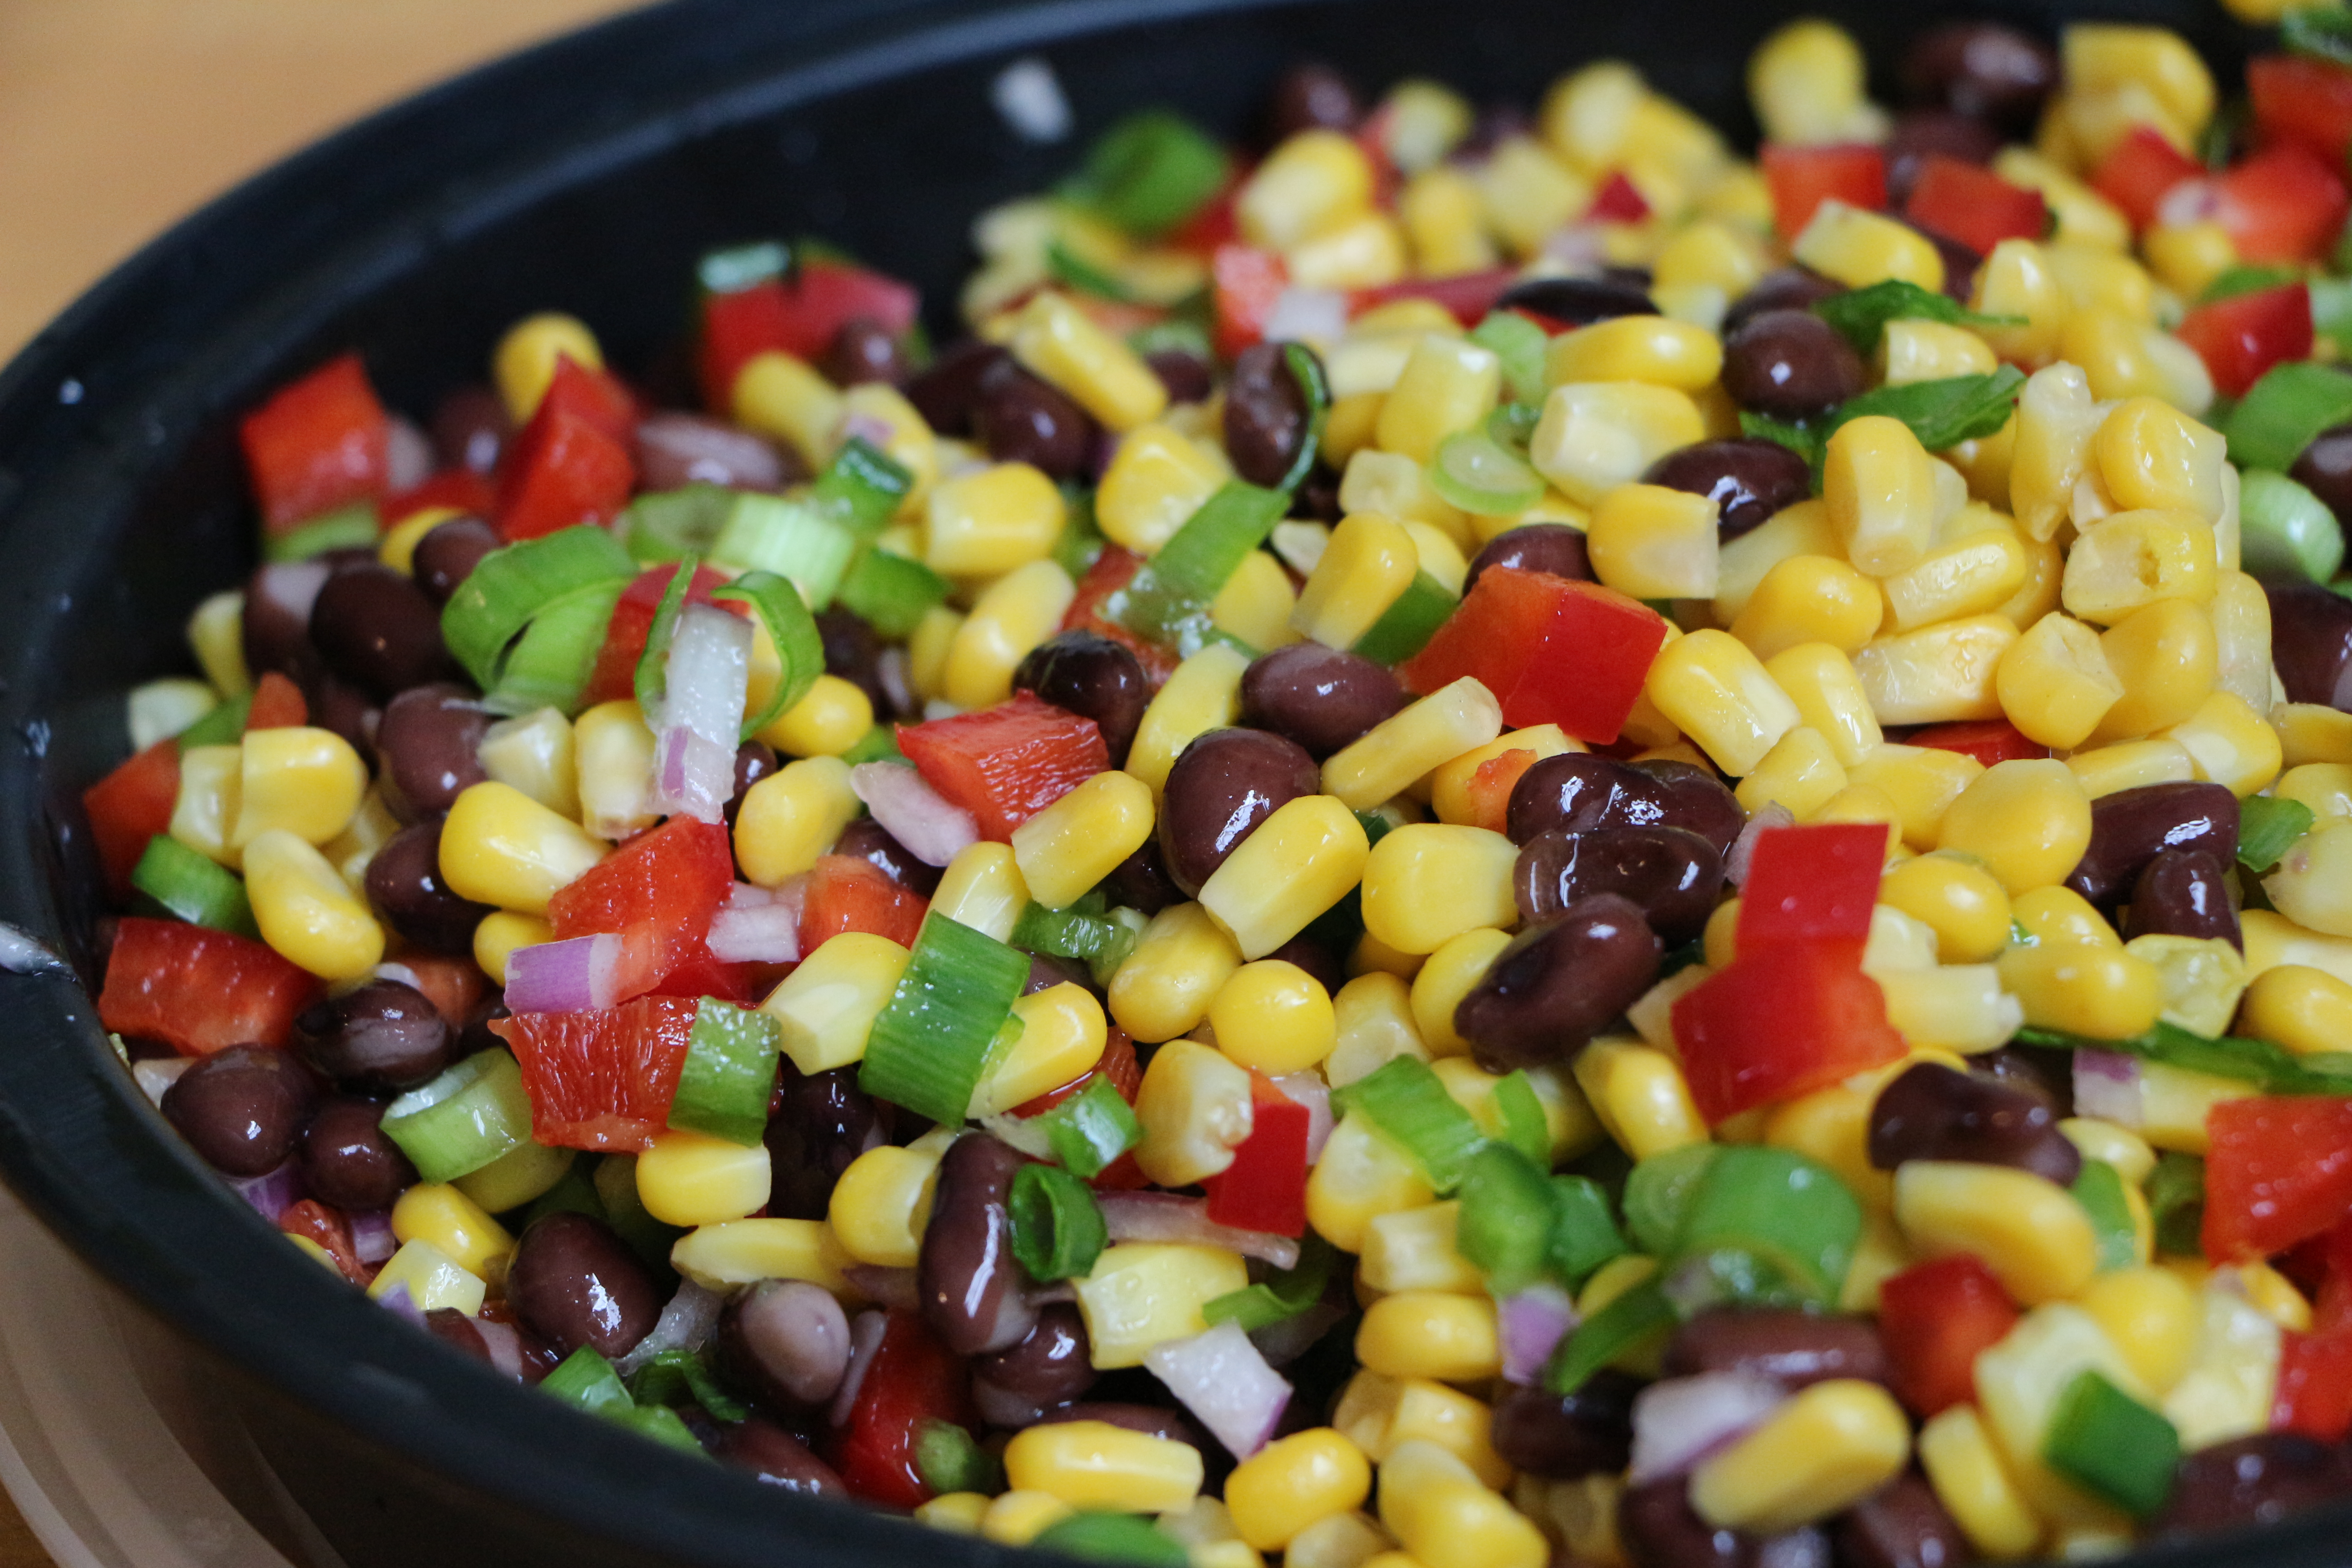
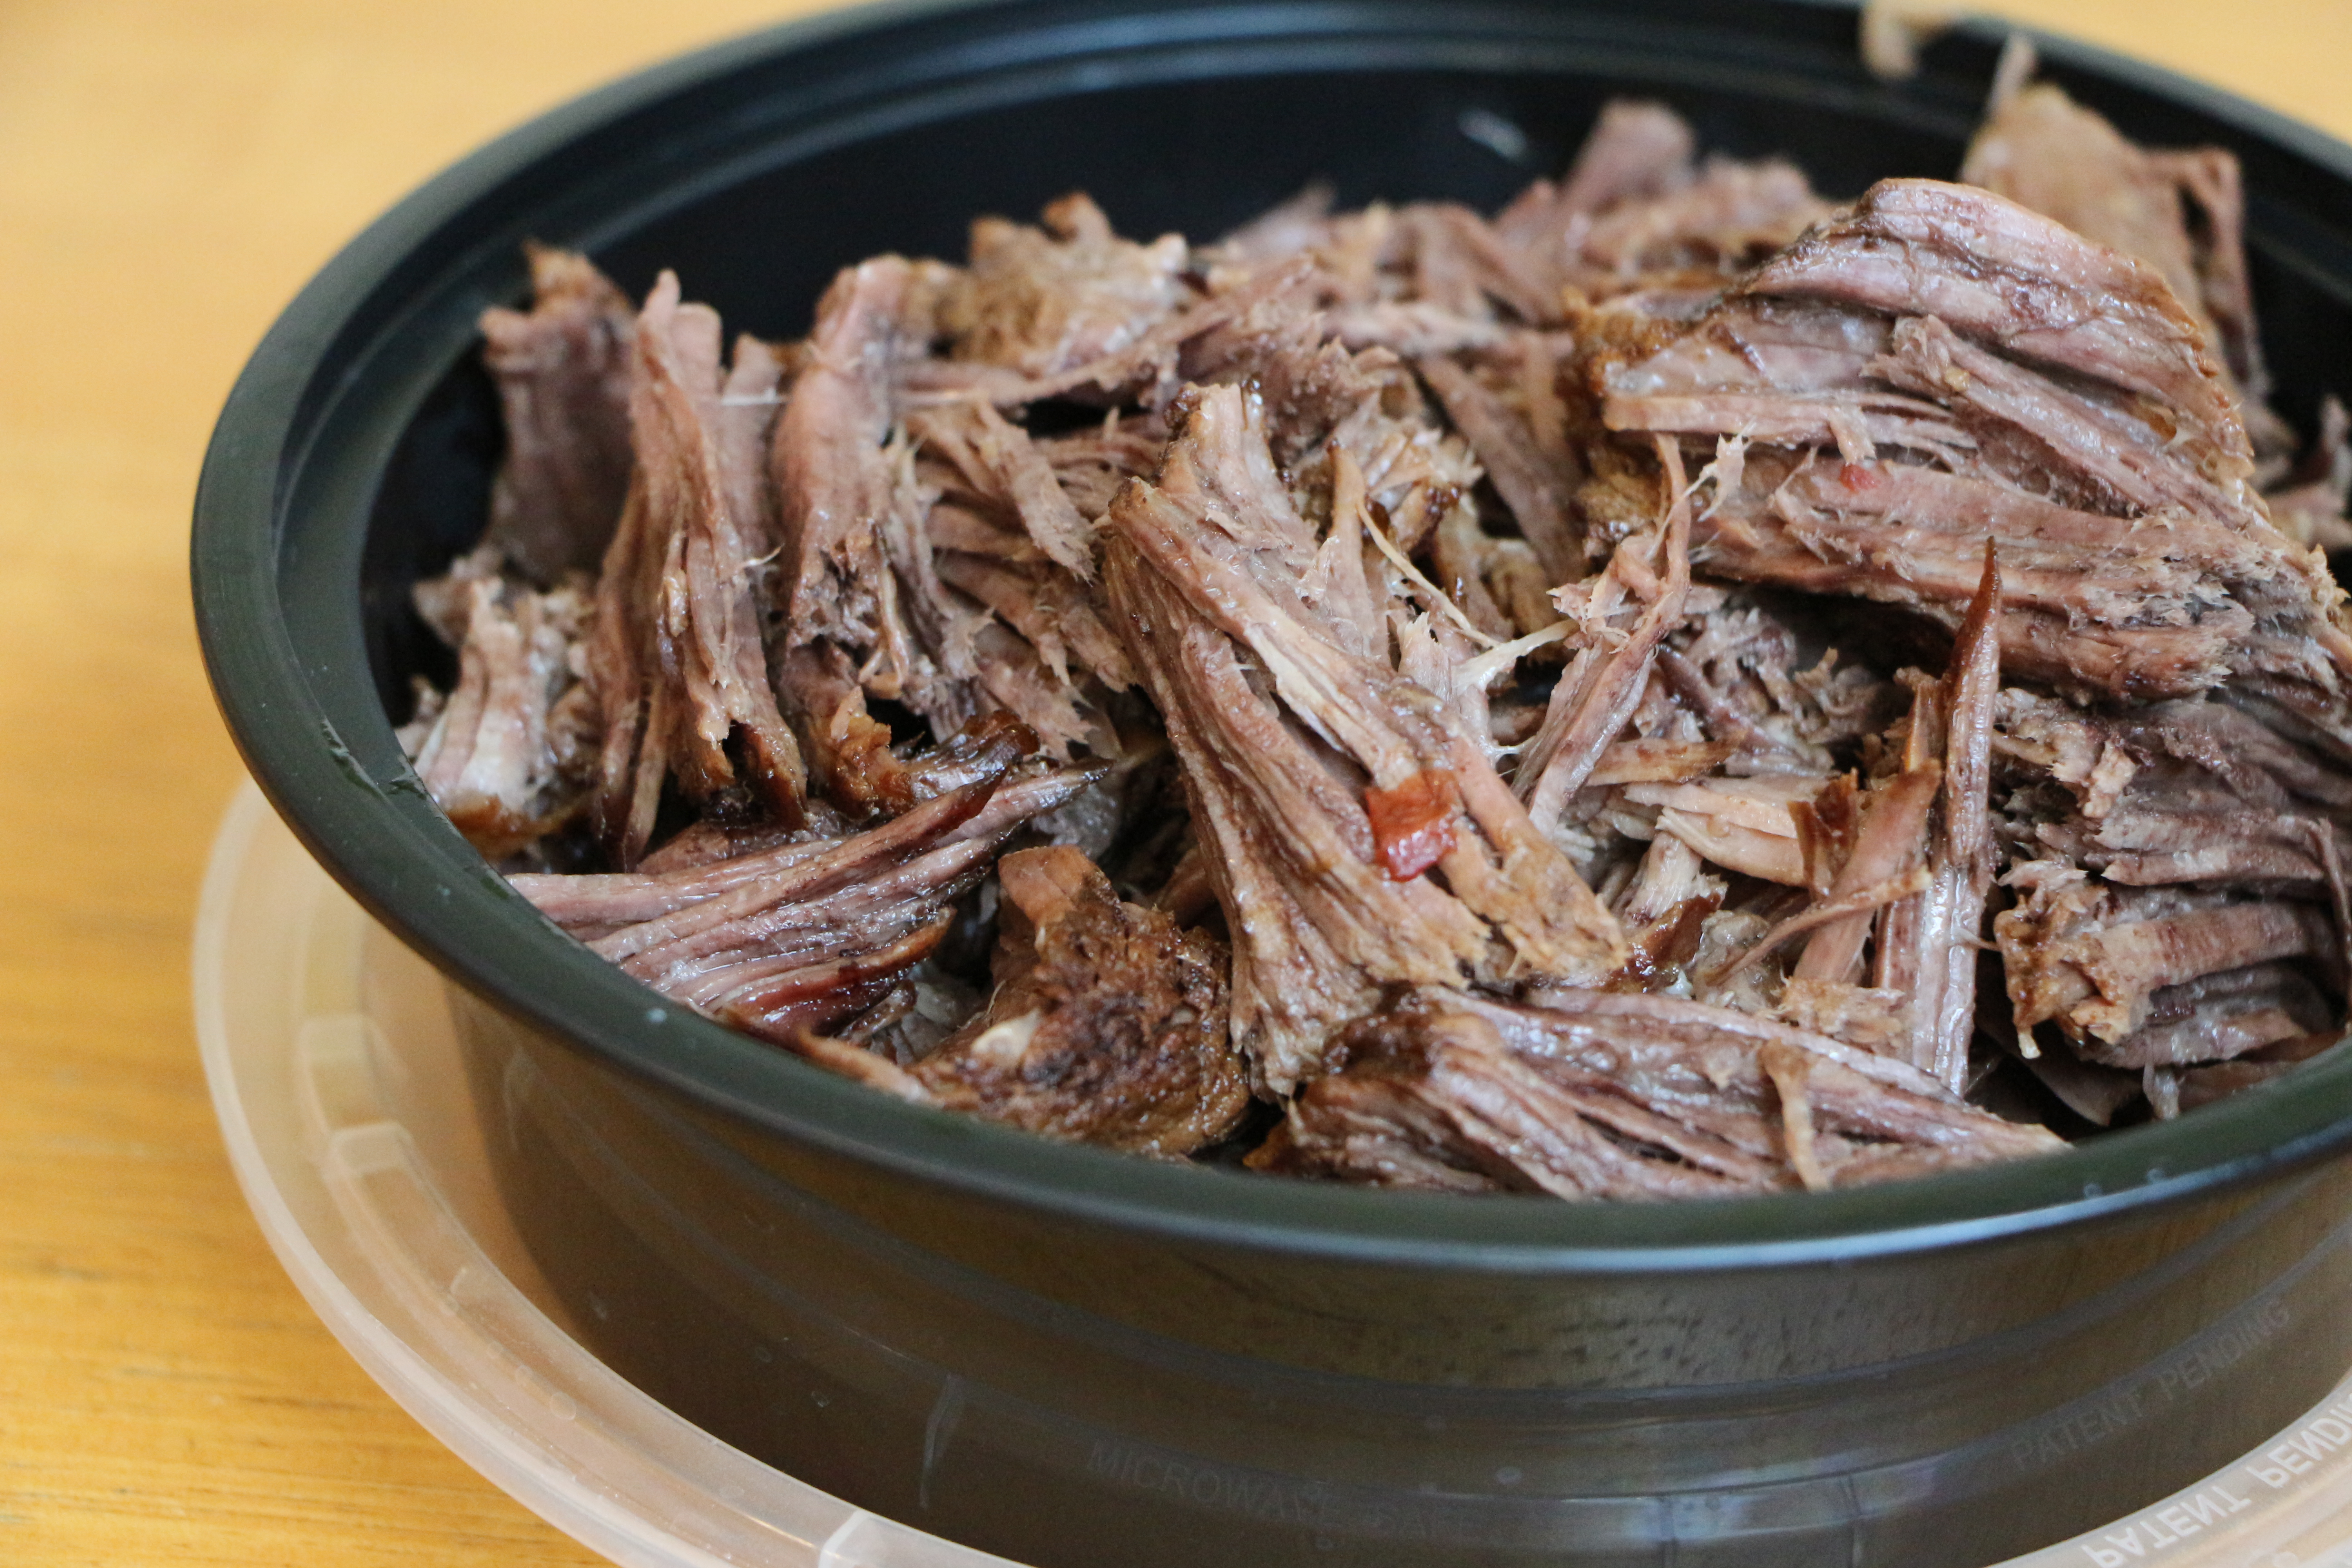
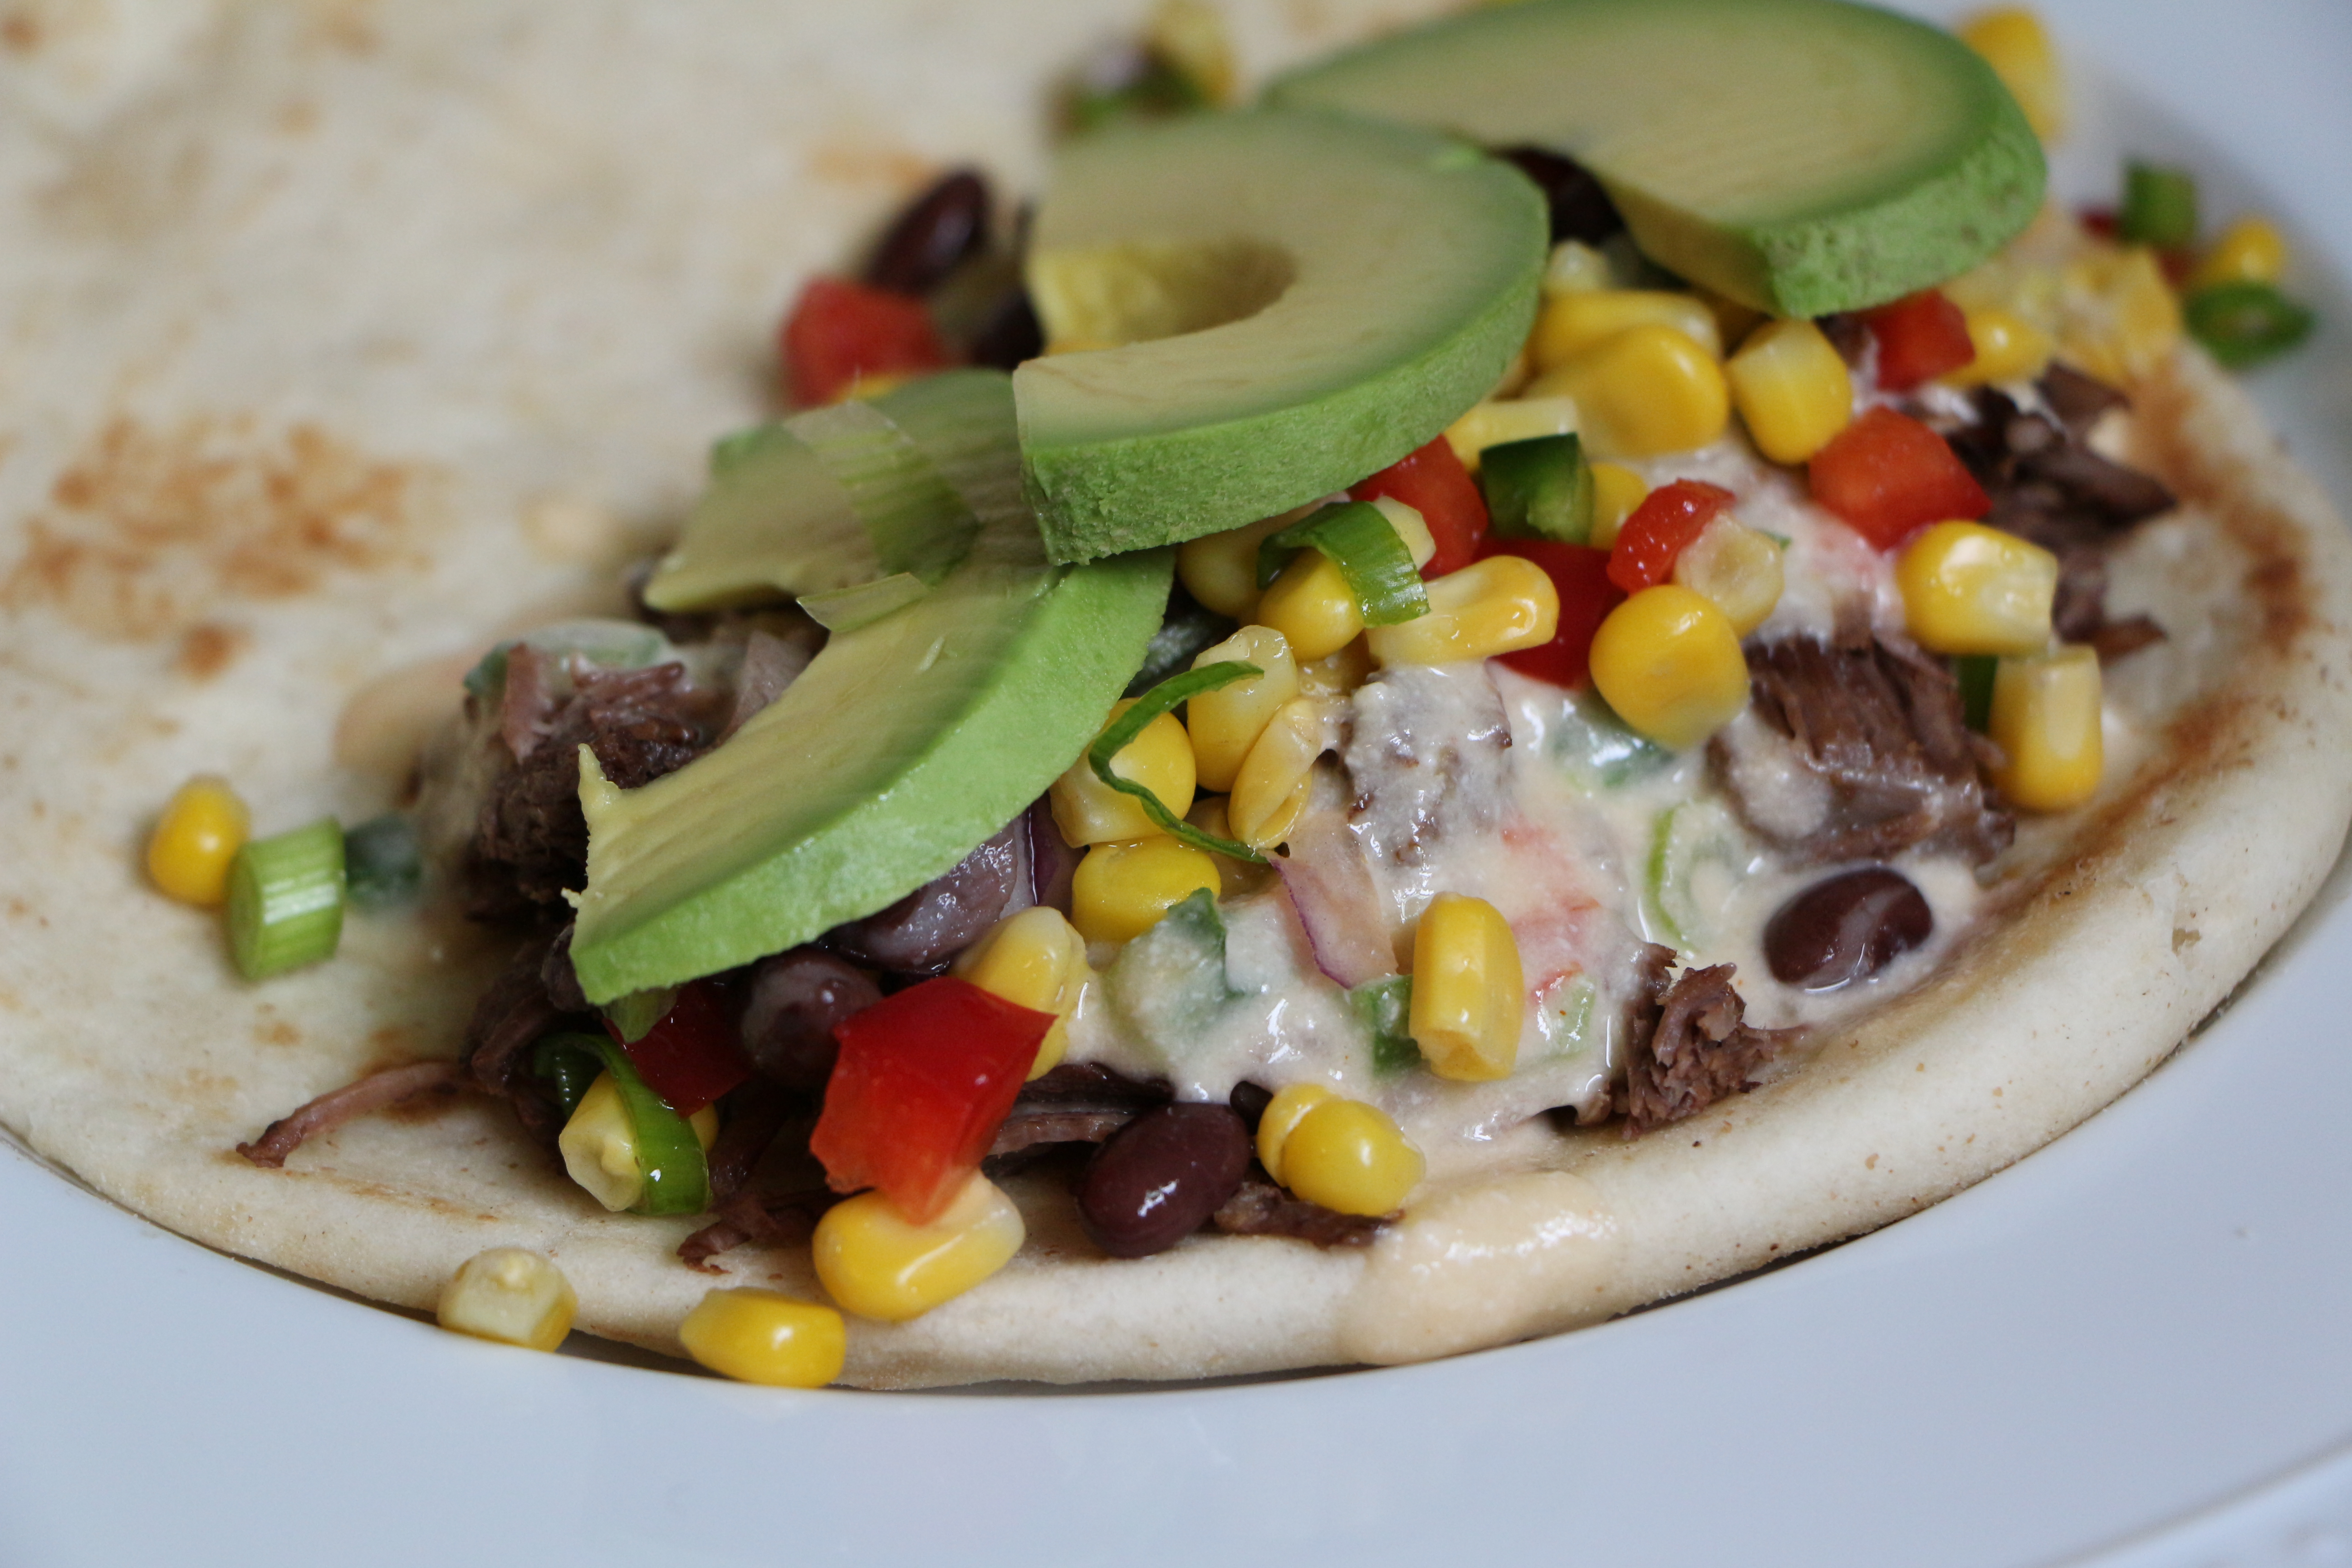
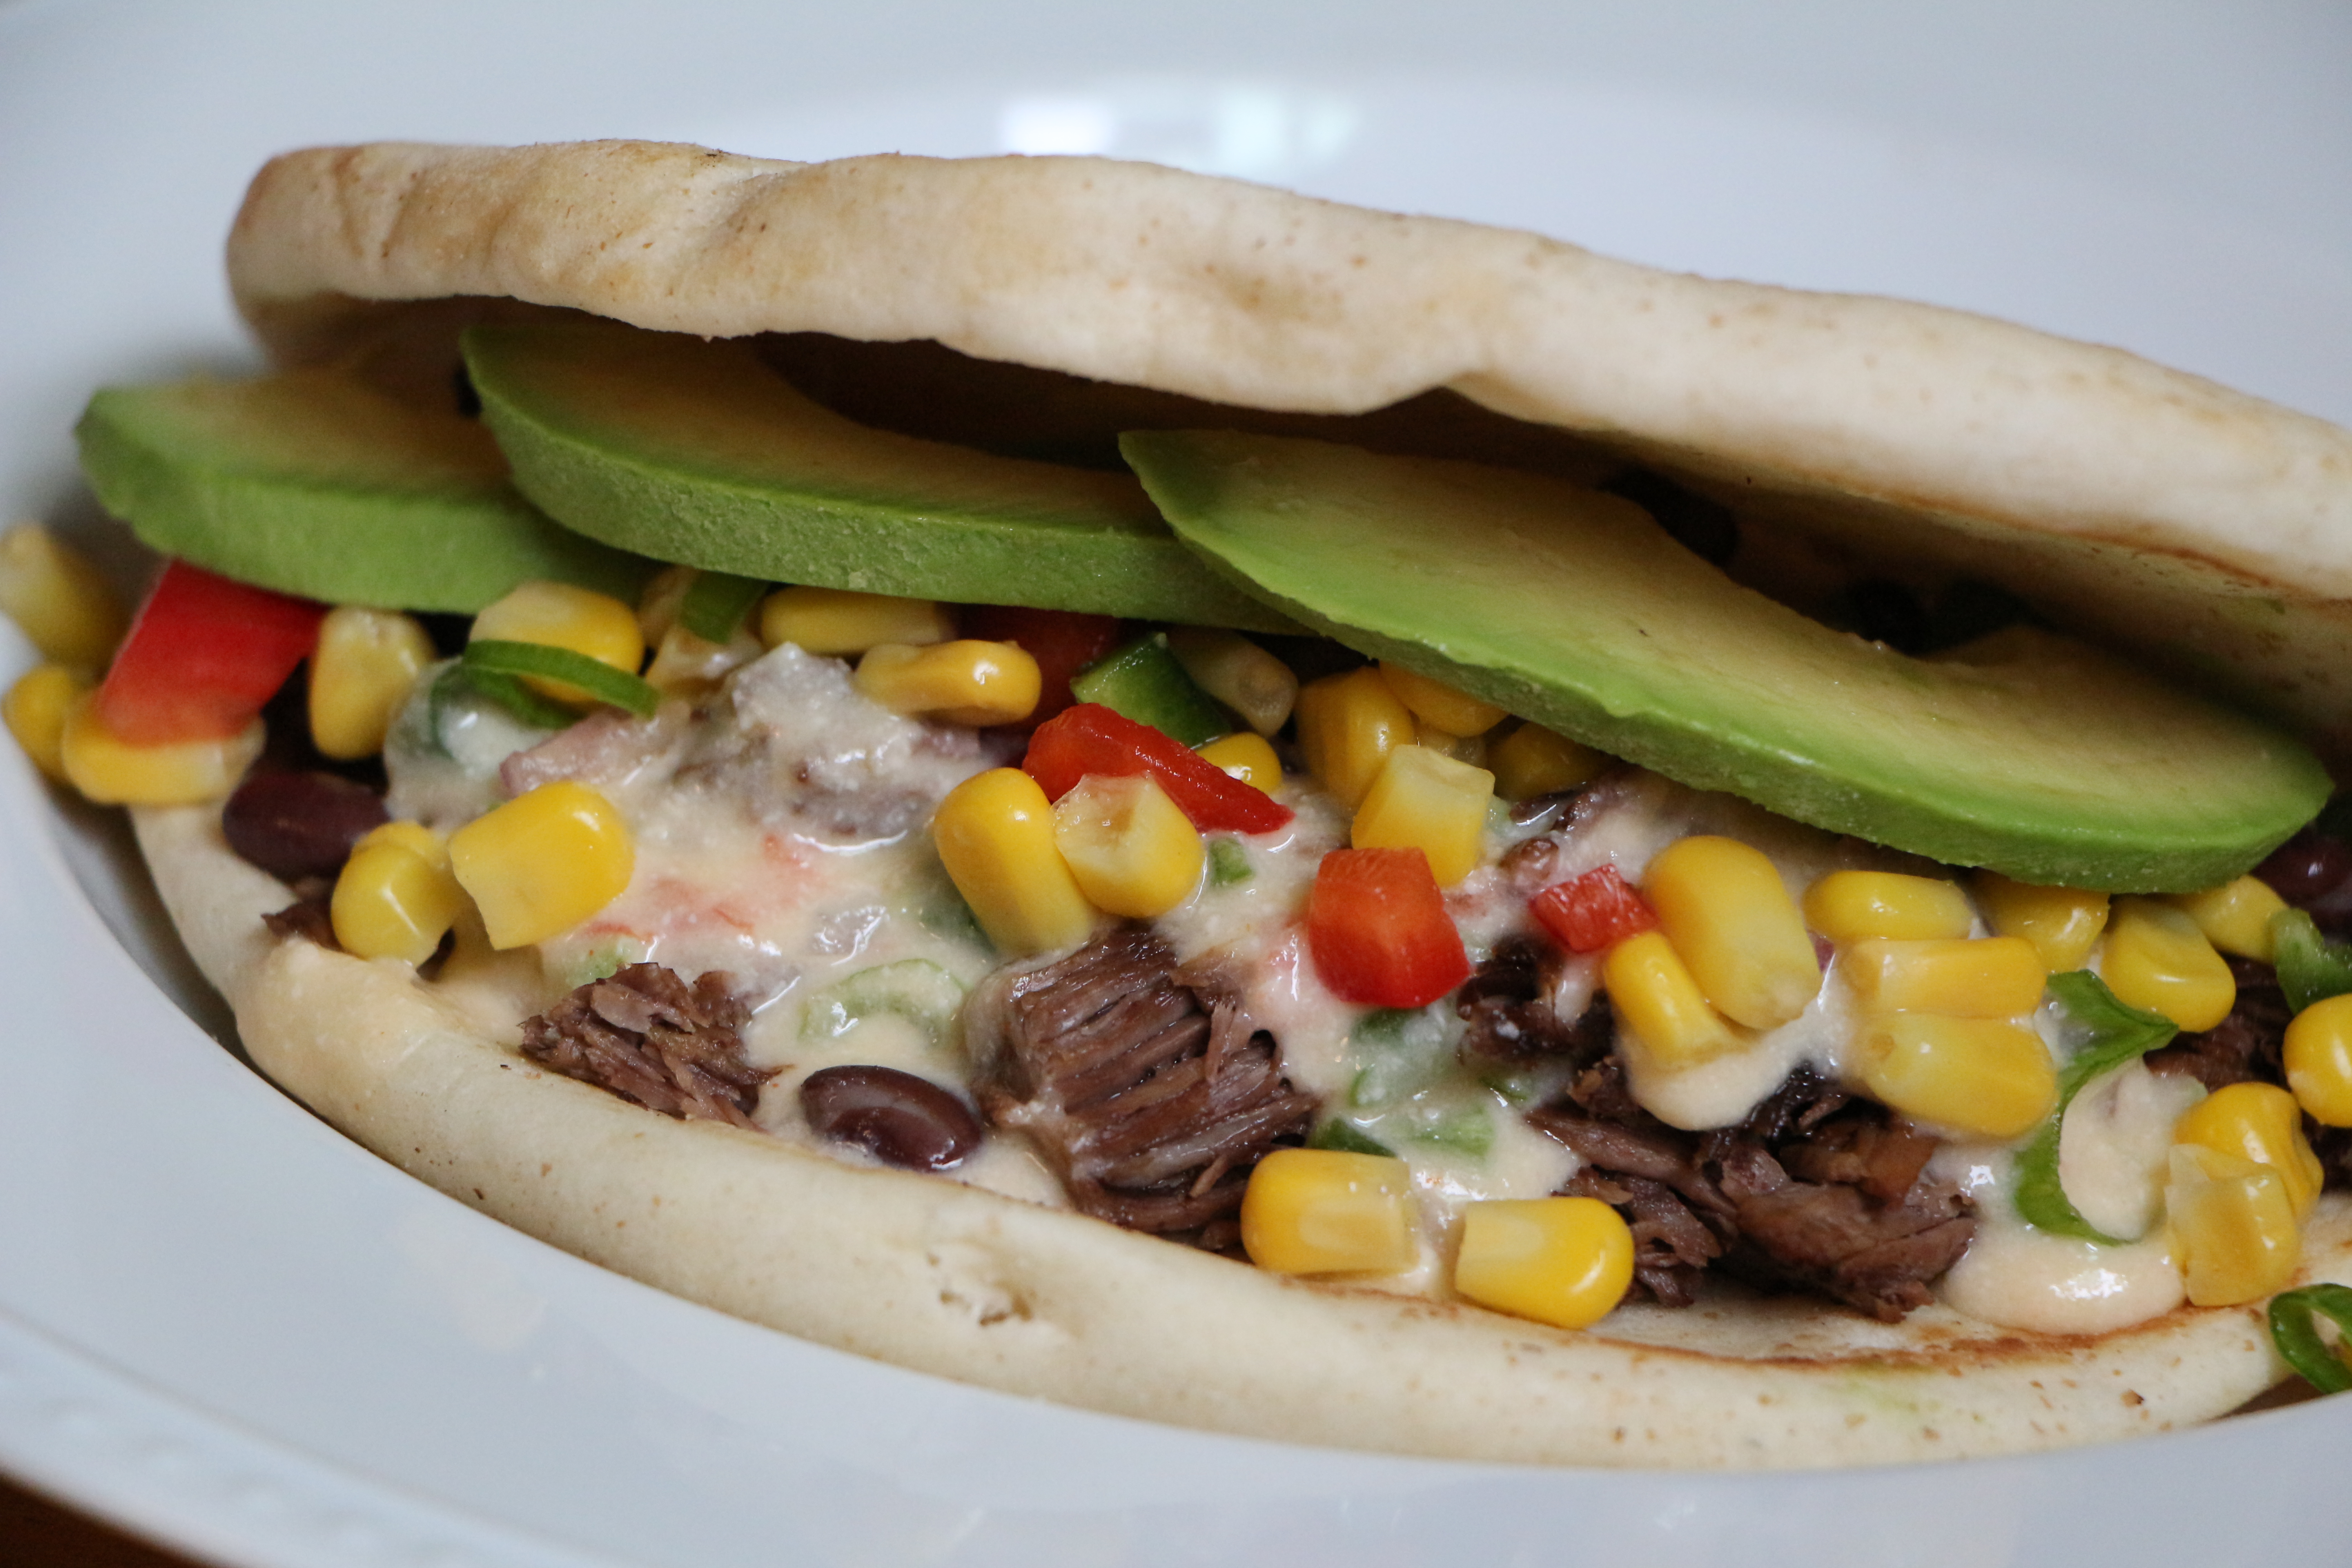
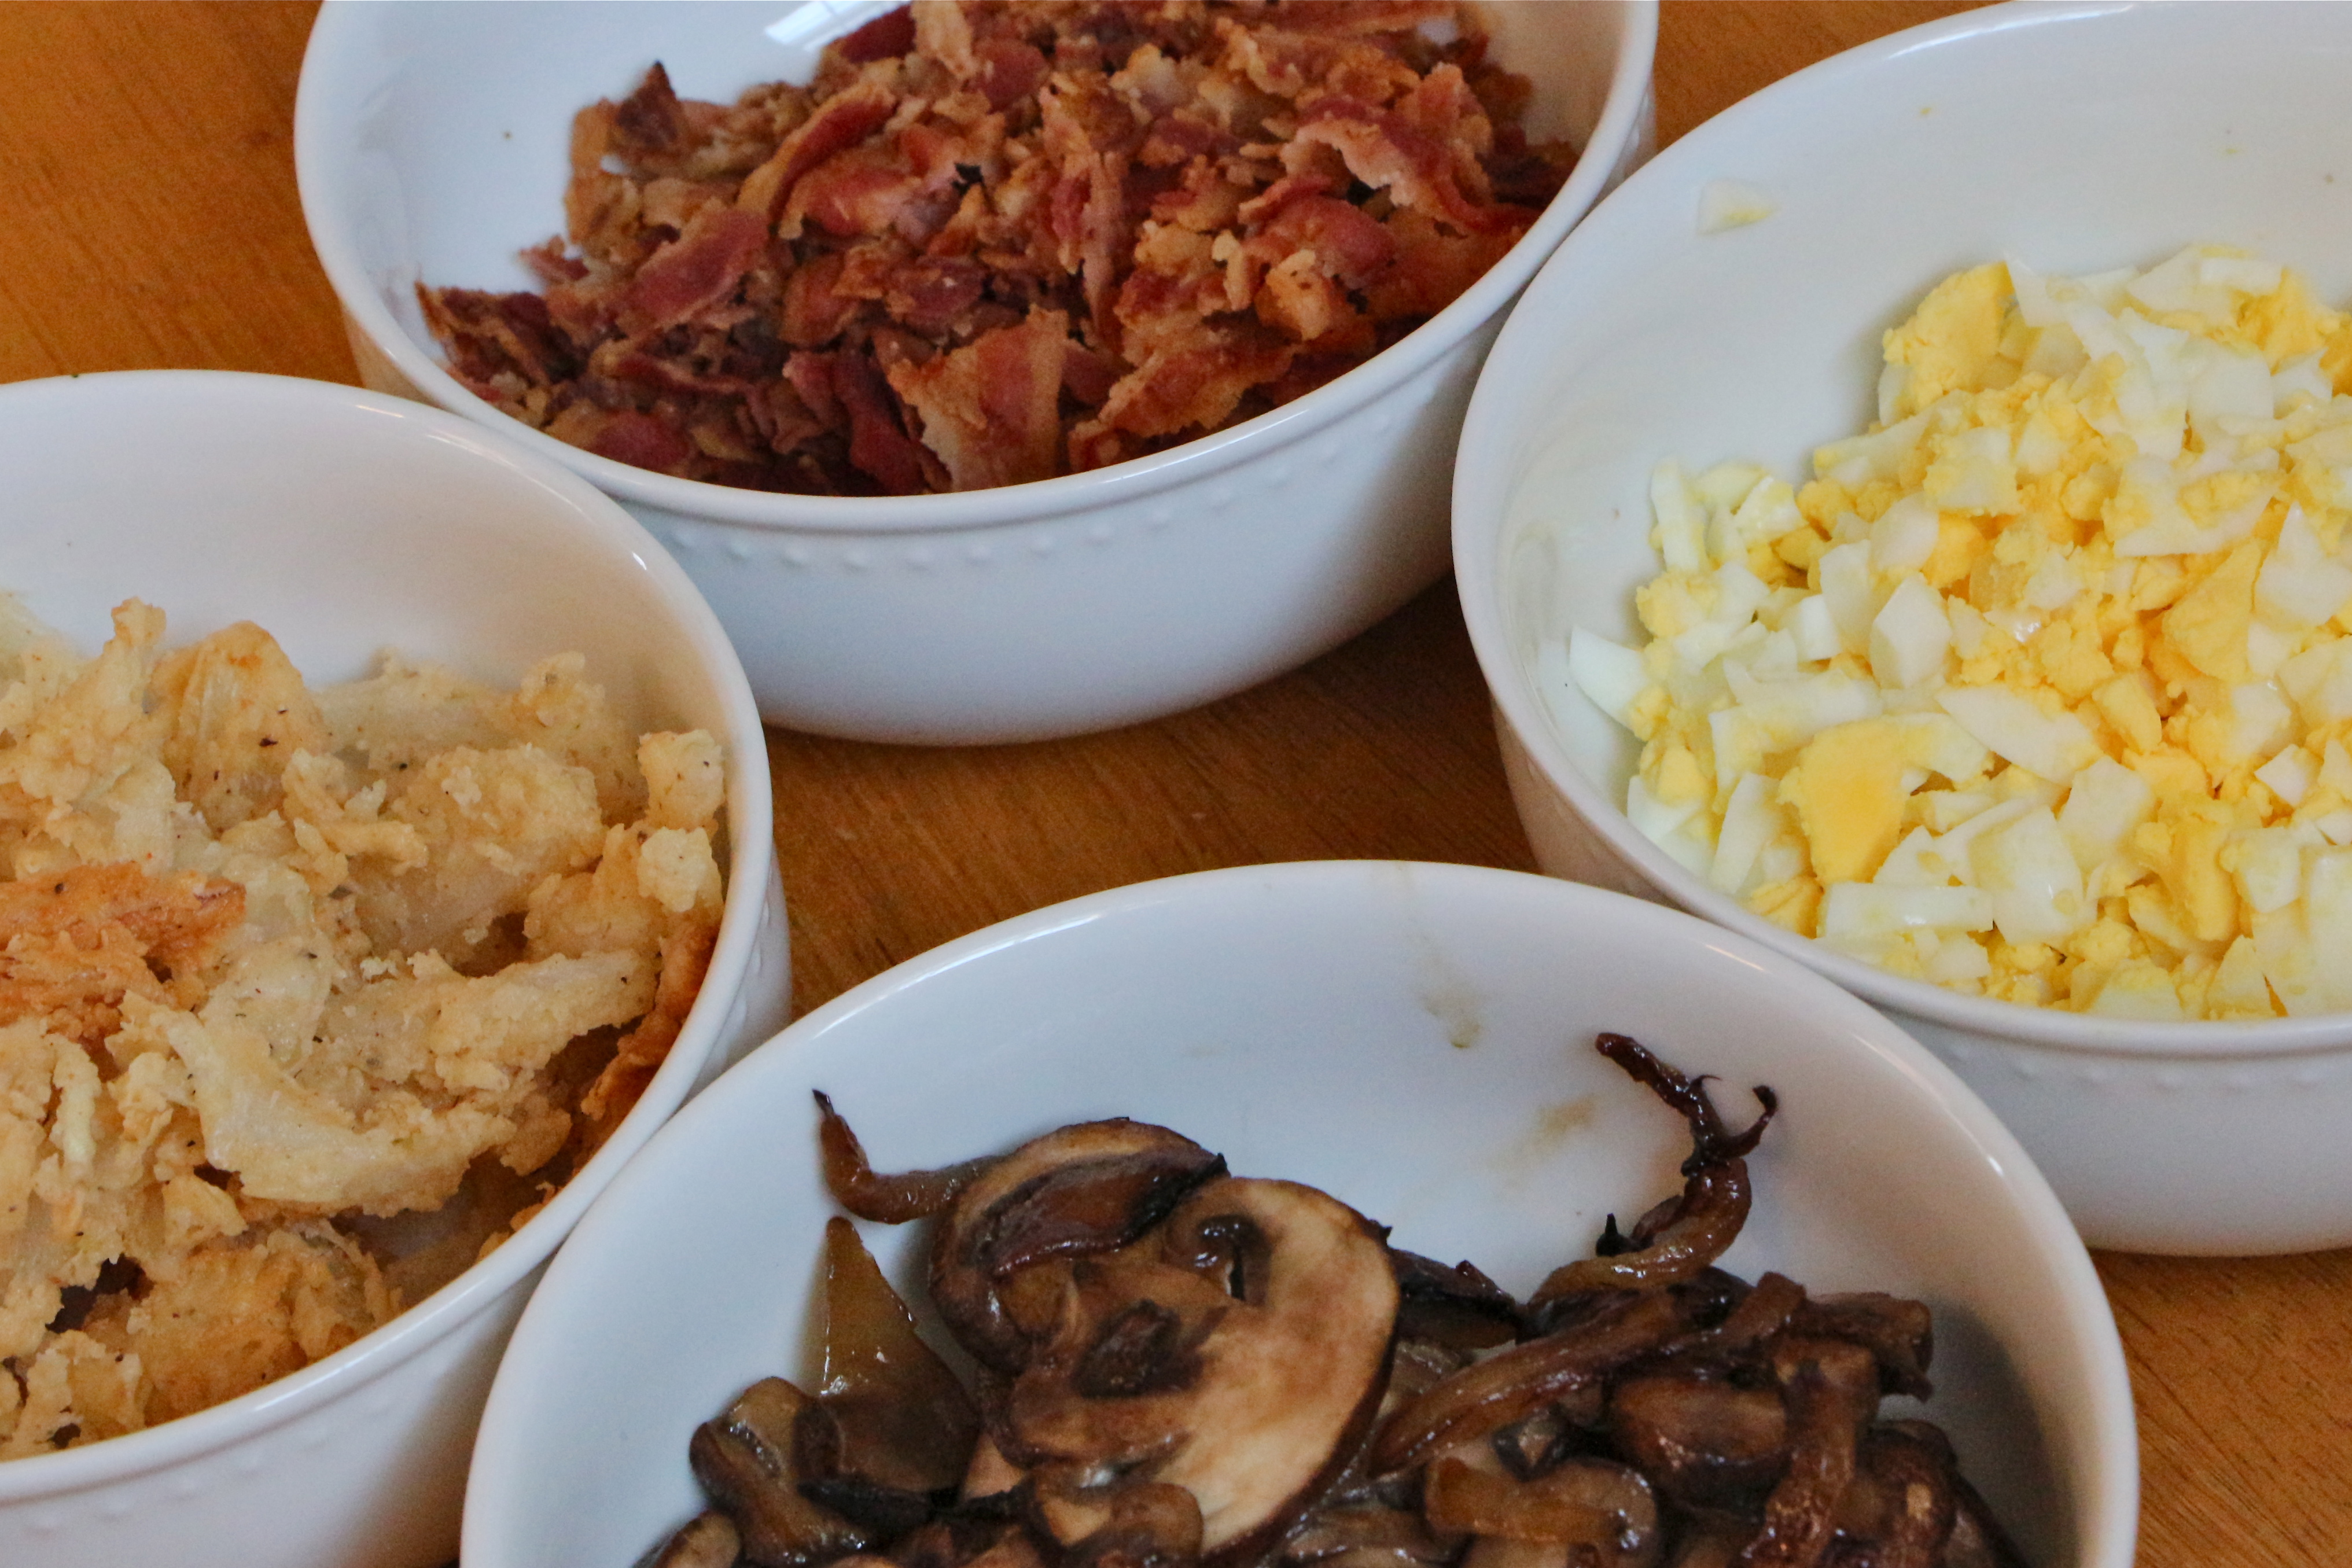
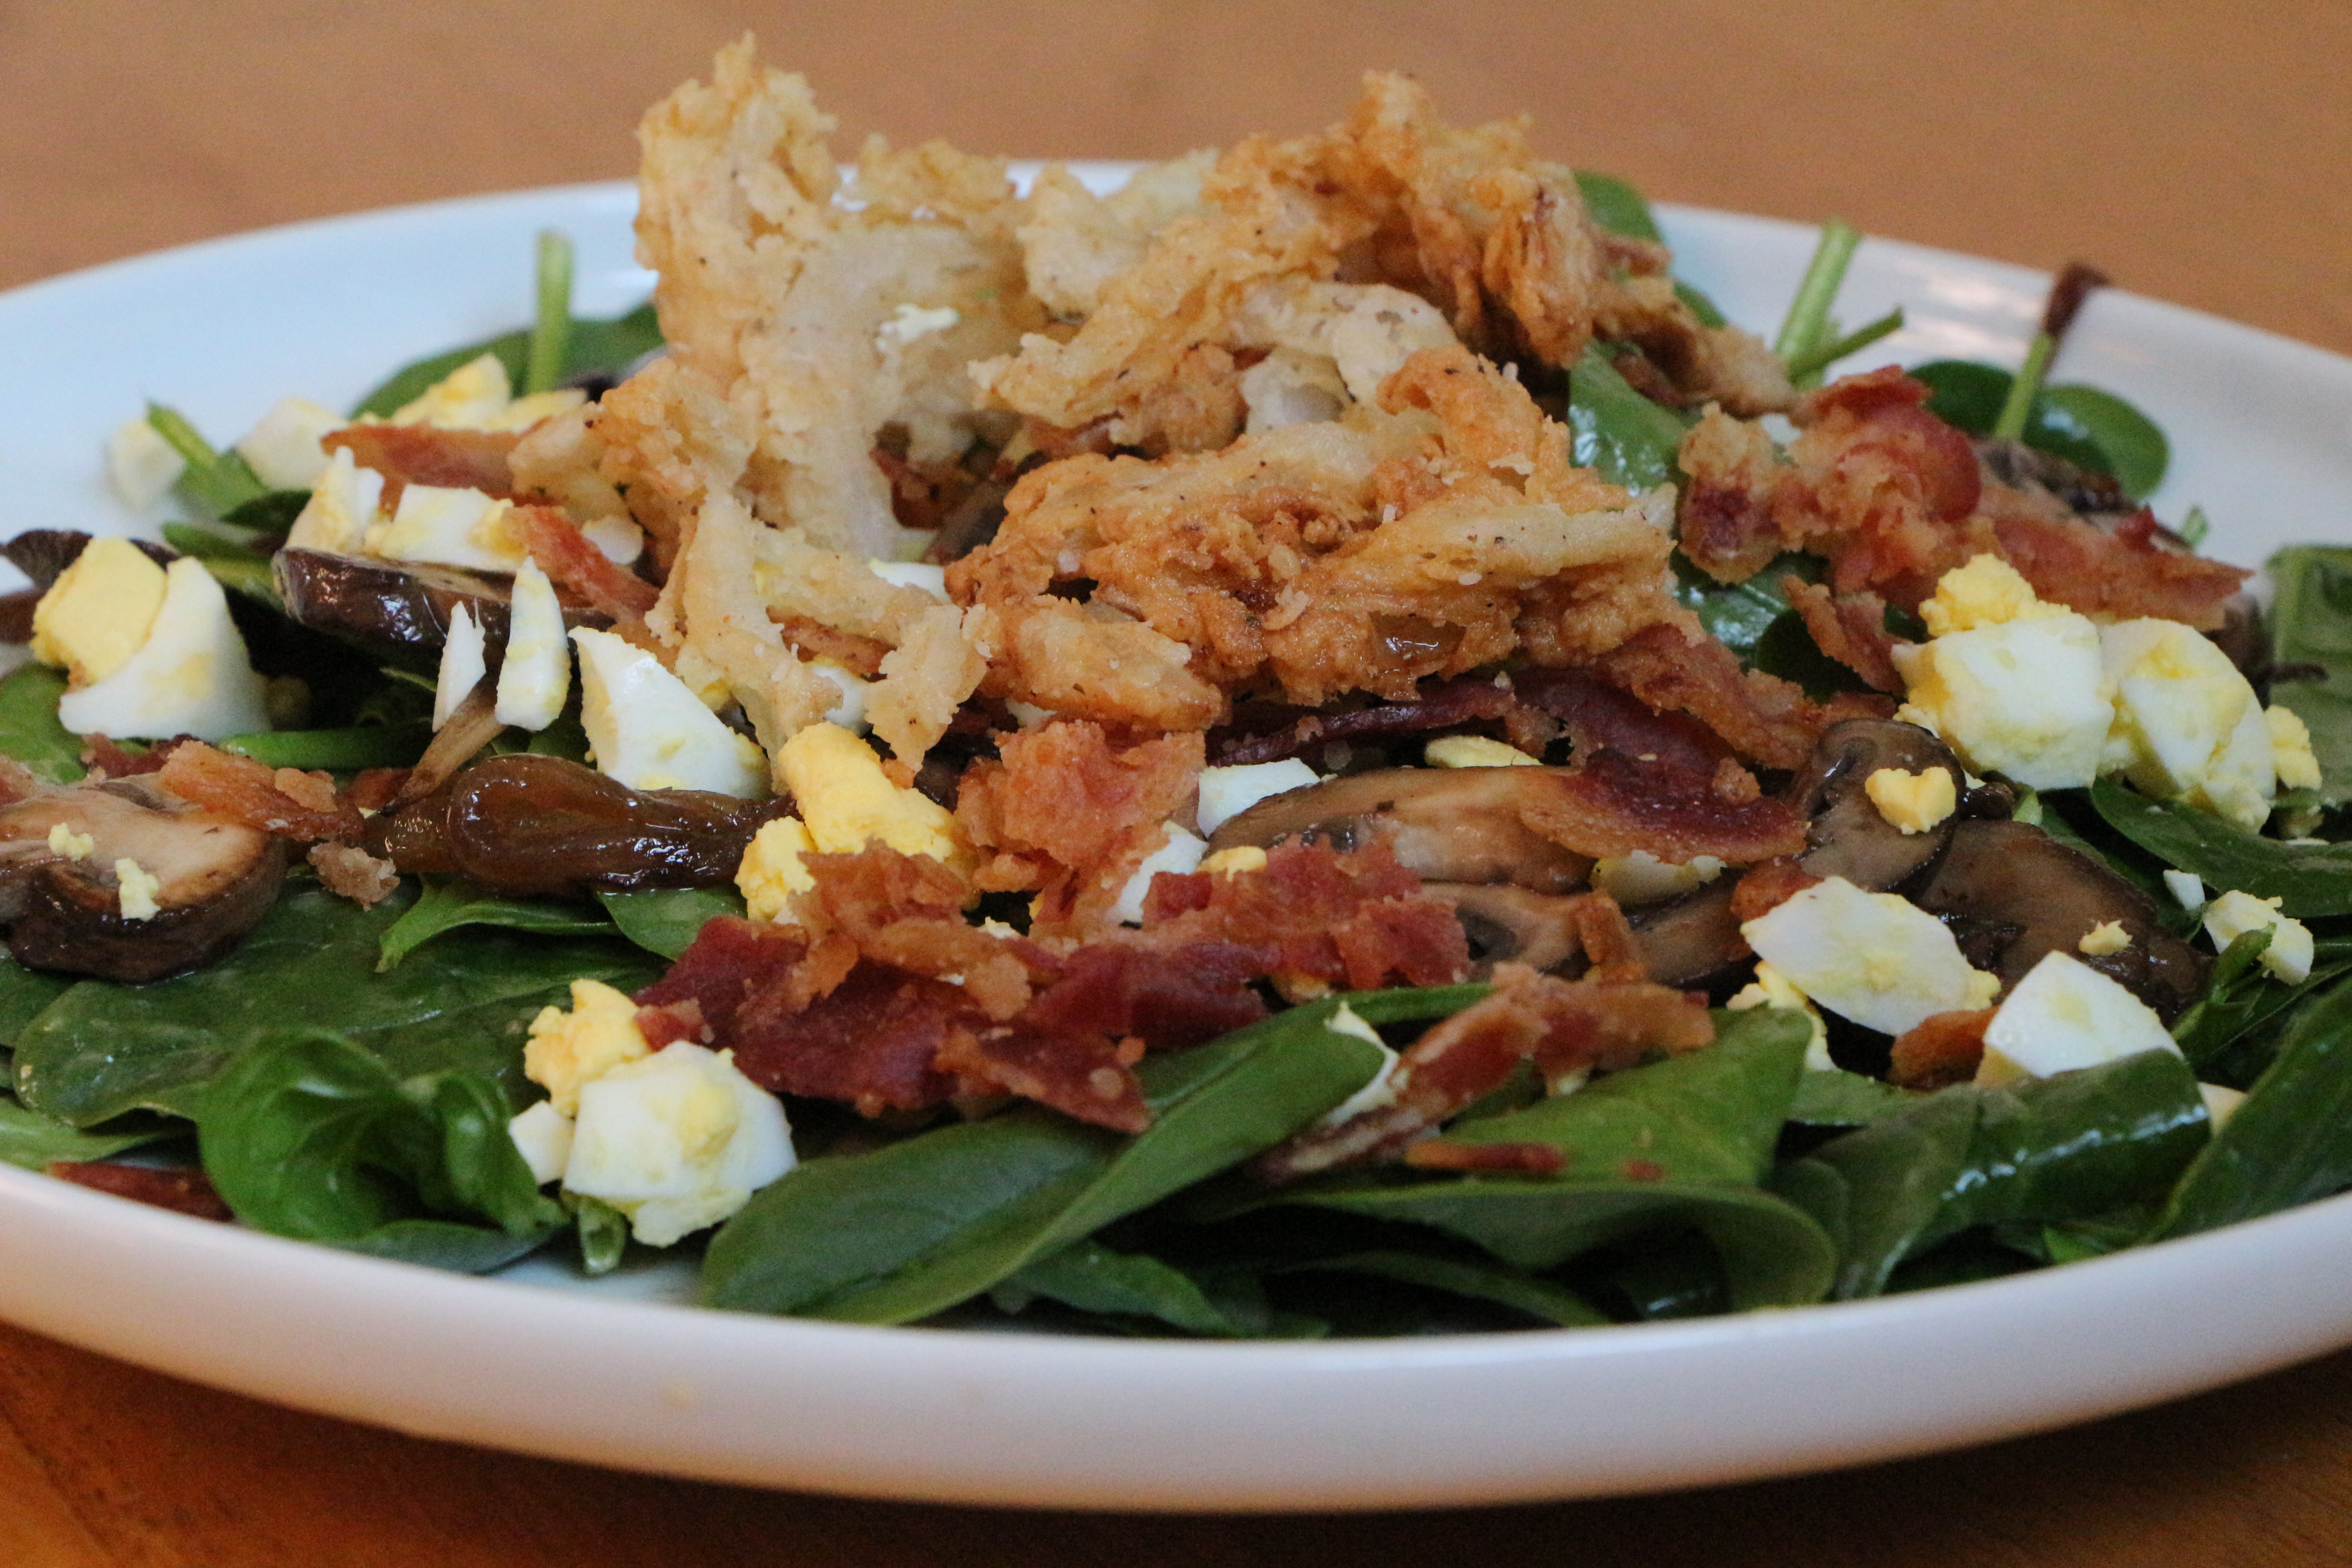
Each of the five families prepared a meal during our weekend stay. We ate tender slow-cooked BBQ pork with grilled sweet corn, beer can chicken, homemade waffles with ripe strawberries and fresh whipped cream (the sweet result of a multi-person hand-whipping effort), an assortment of four types of bacon, cinnamon roll french toast bake, cheddar garlic biscuits, scrambled eggs with applewood smoked bacon, caramelized onions, and gruyere, and a taco spread that would make any mouth water. (The lime marinated skirt steak won my heart.)

IMG_7417

And though the food was amazing, the home more than comfortable, and the entertainment plentiful, the best part of the weekend, by far, was the people. Over the course of three days, eighteen of us lived together, laughing and connecting, enjoying old friendships and beginning new ones.

In my last post, I asked you to share what you believe is the #1 factor which creates a memorable party, as your entry into a giveaway for a $50 gift card to Shindigz. And though I completely agree that the food, theme, decor and a relaxed host all lend a big hand, after the experience of this past weekend, I wholeheartedly believe it is the people that make the party.

IMG_8108

Likewise, it was the people who made our recent Temple Run birthday party such a grand success – the friends and family who traveled from out of town to celebrate with us, the ones who came early to help set up, my brother who chased 20 or so small children through the Temple Run obstacle course in a hot gorilla suit, the guests who repeatedly helped me to repair the course with packaging tape every time one of our small runners plowed through the perimeter, and our fun and social guests. The food and the decorations and the theme all set the stage, but the people made the party.

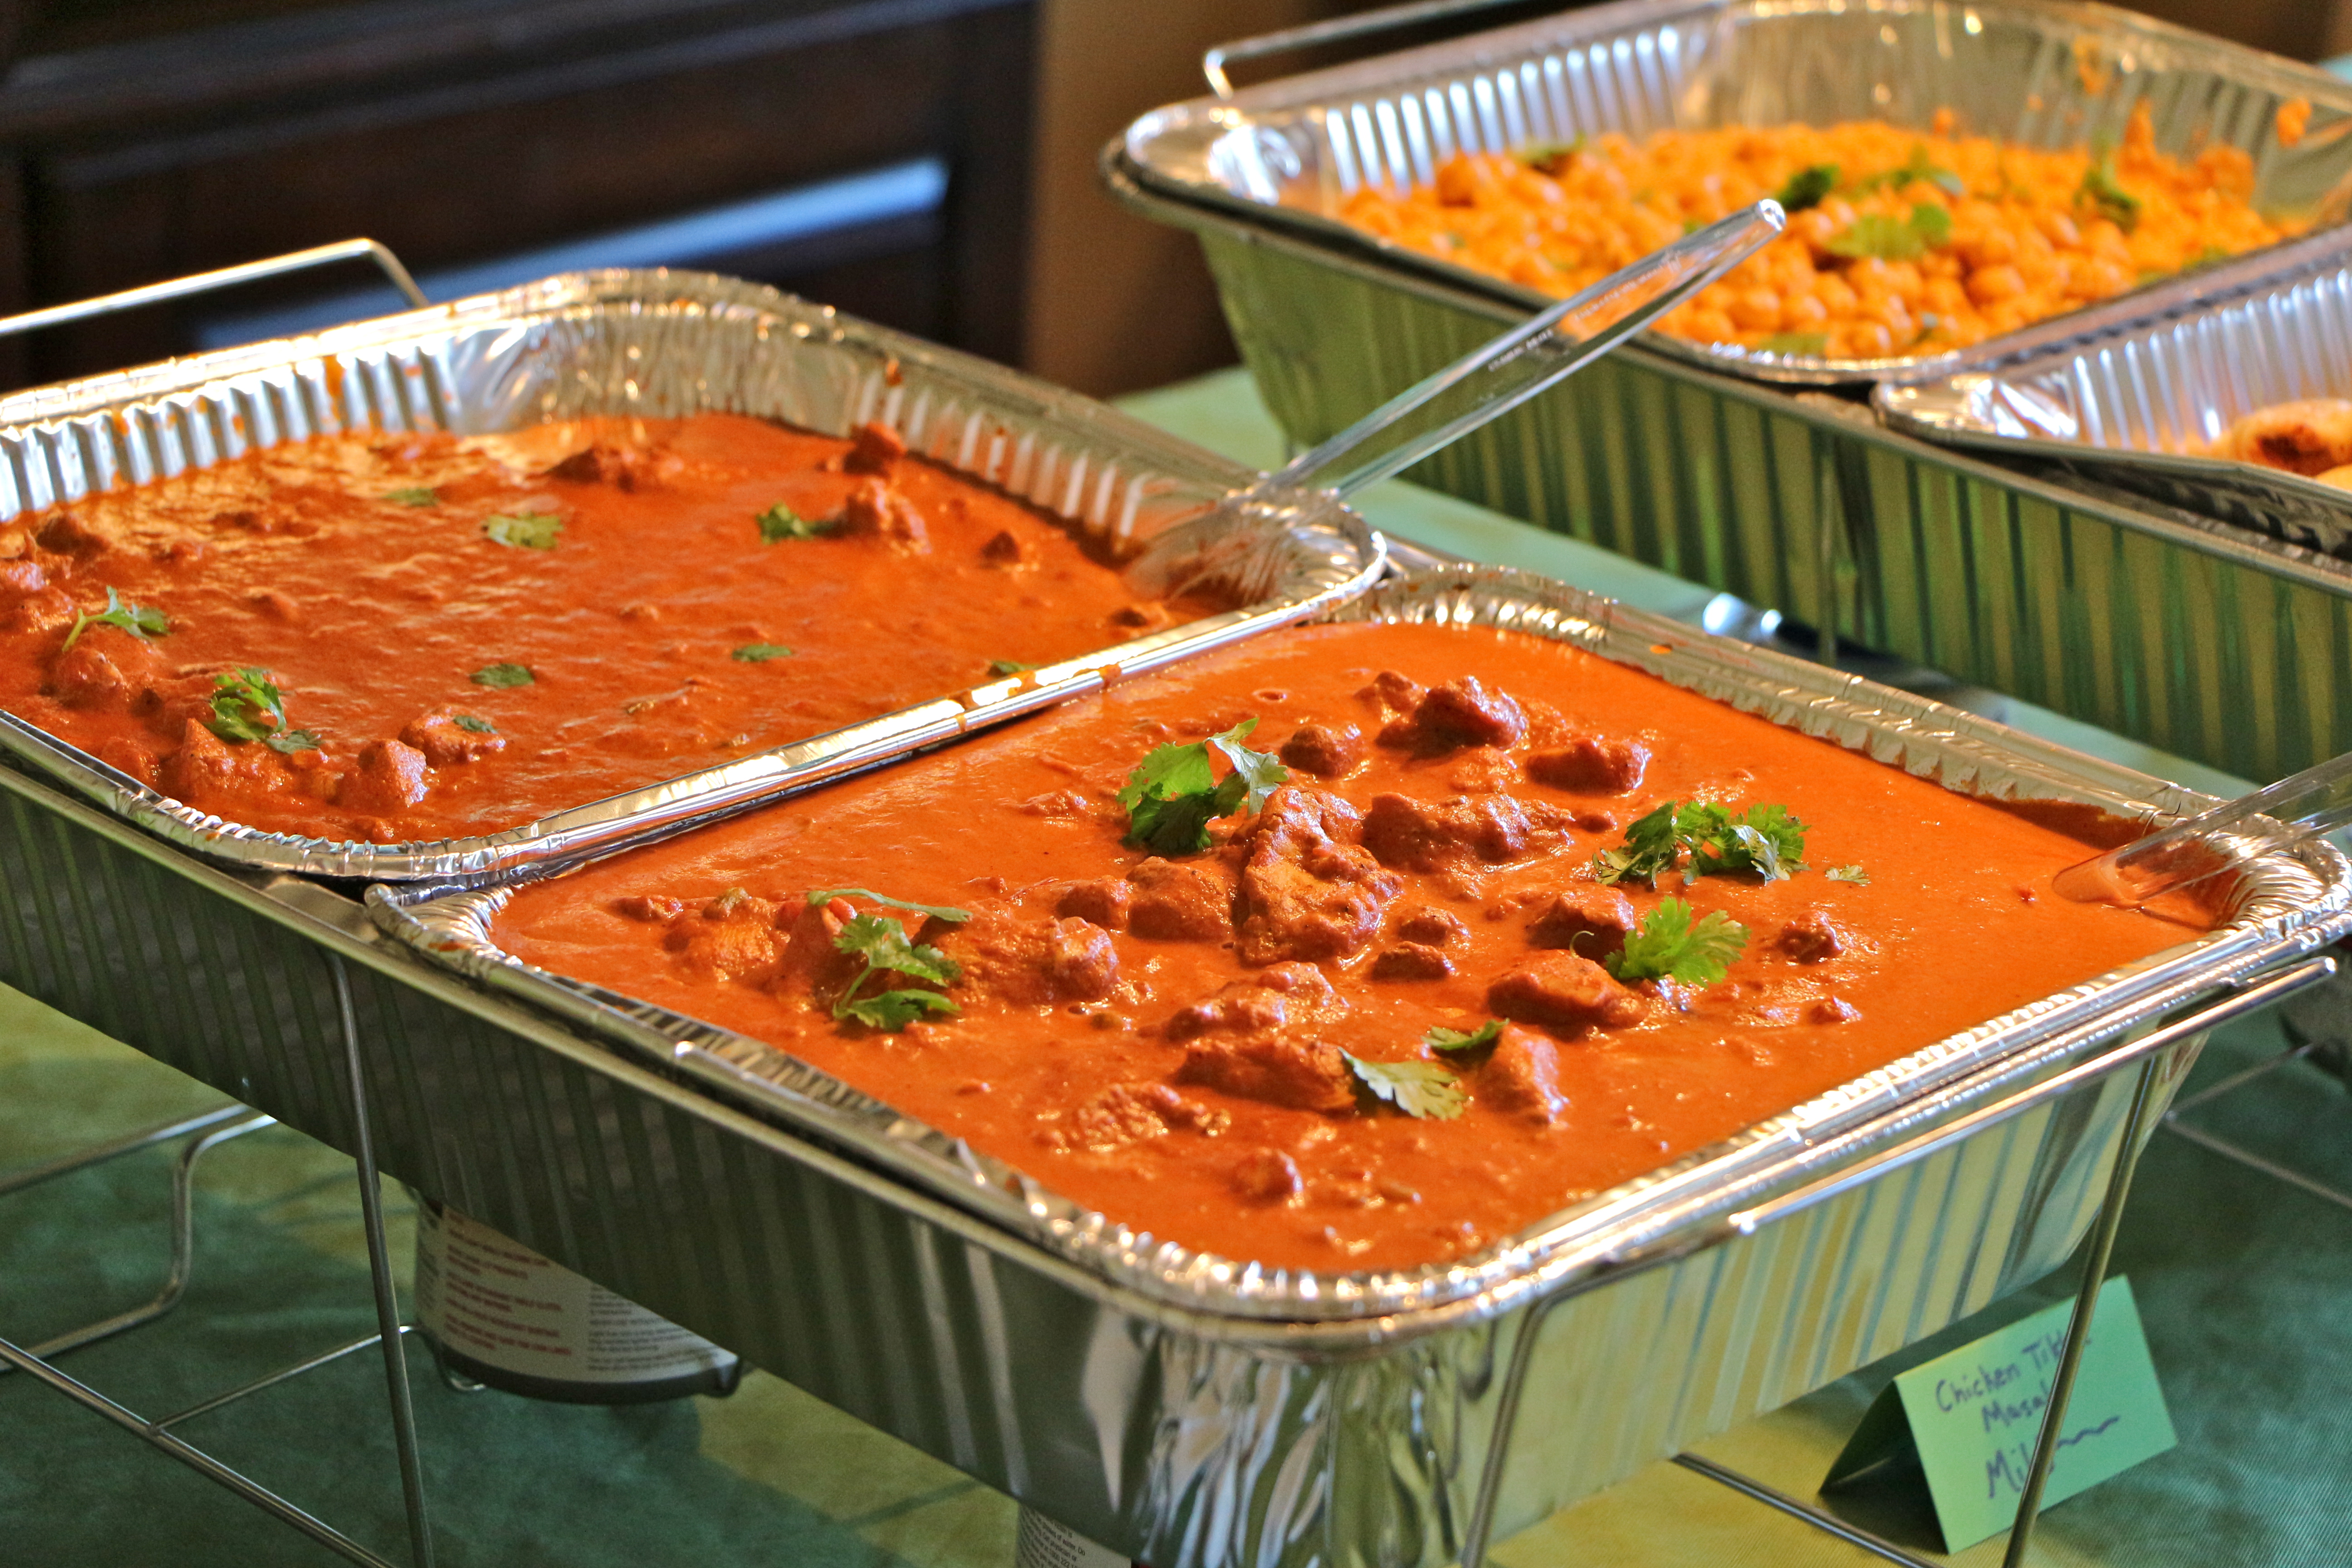
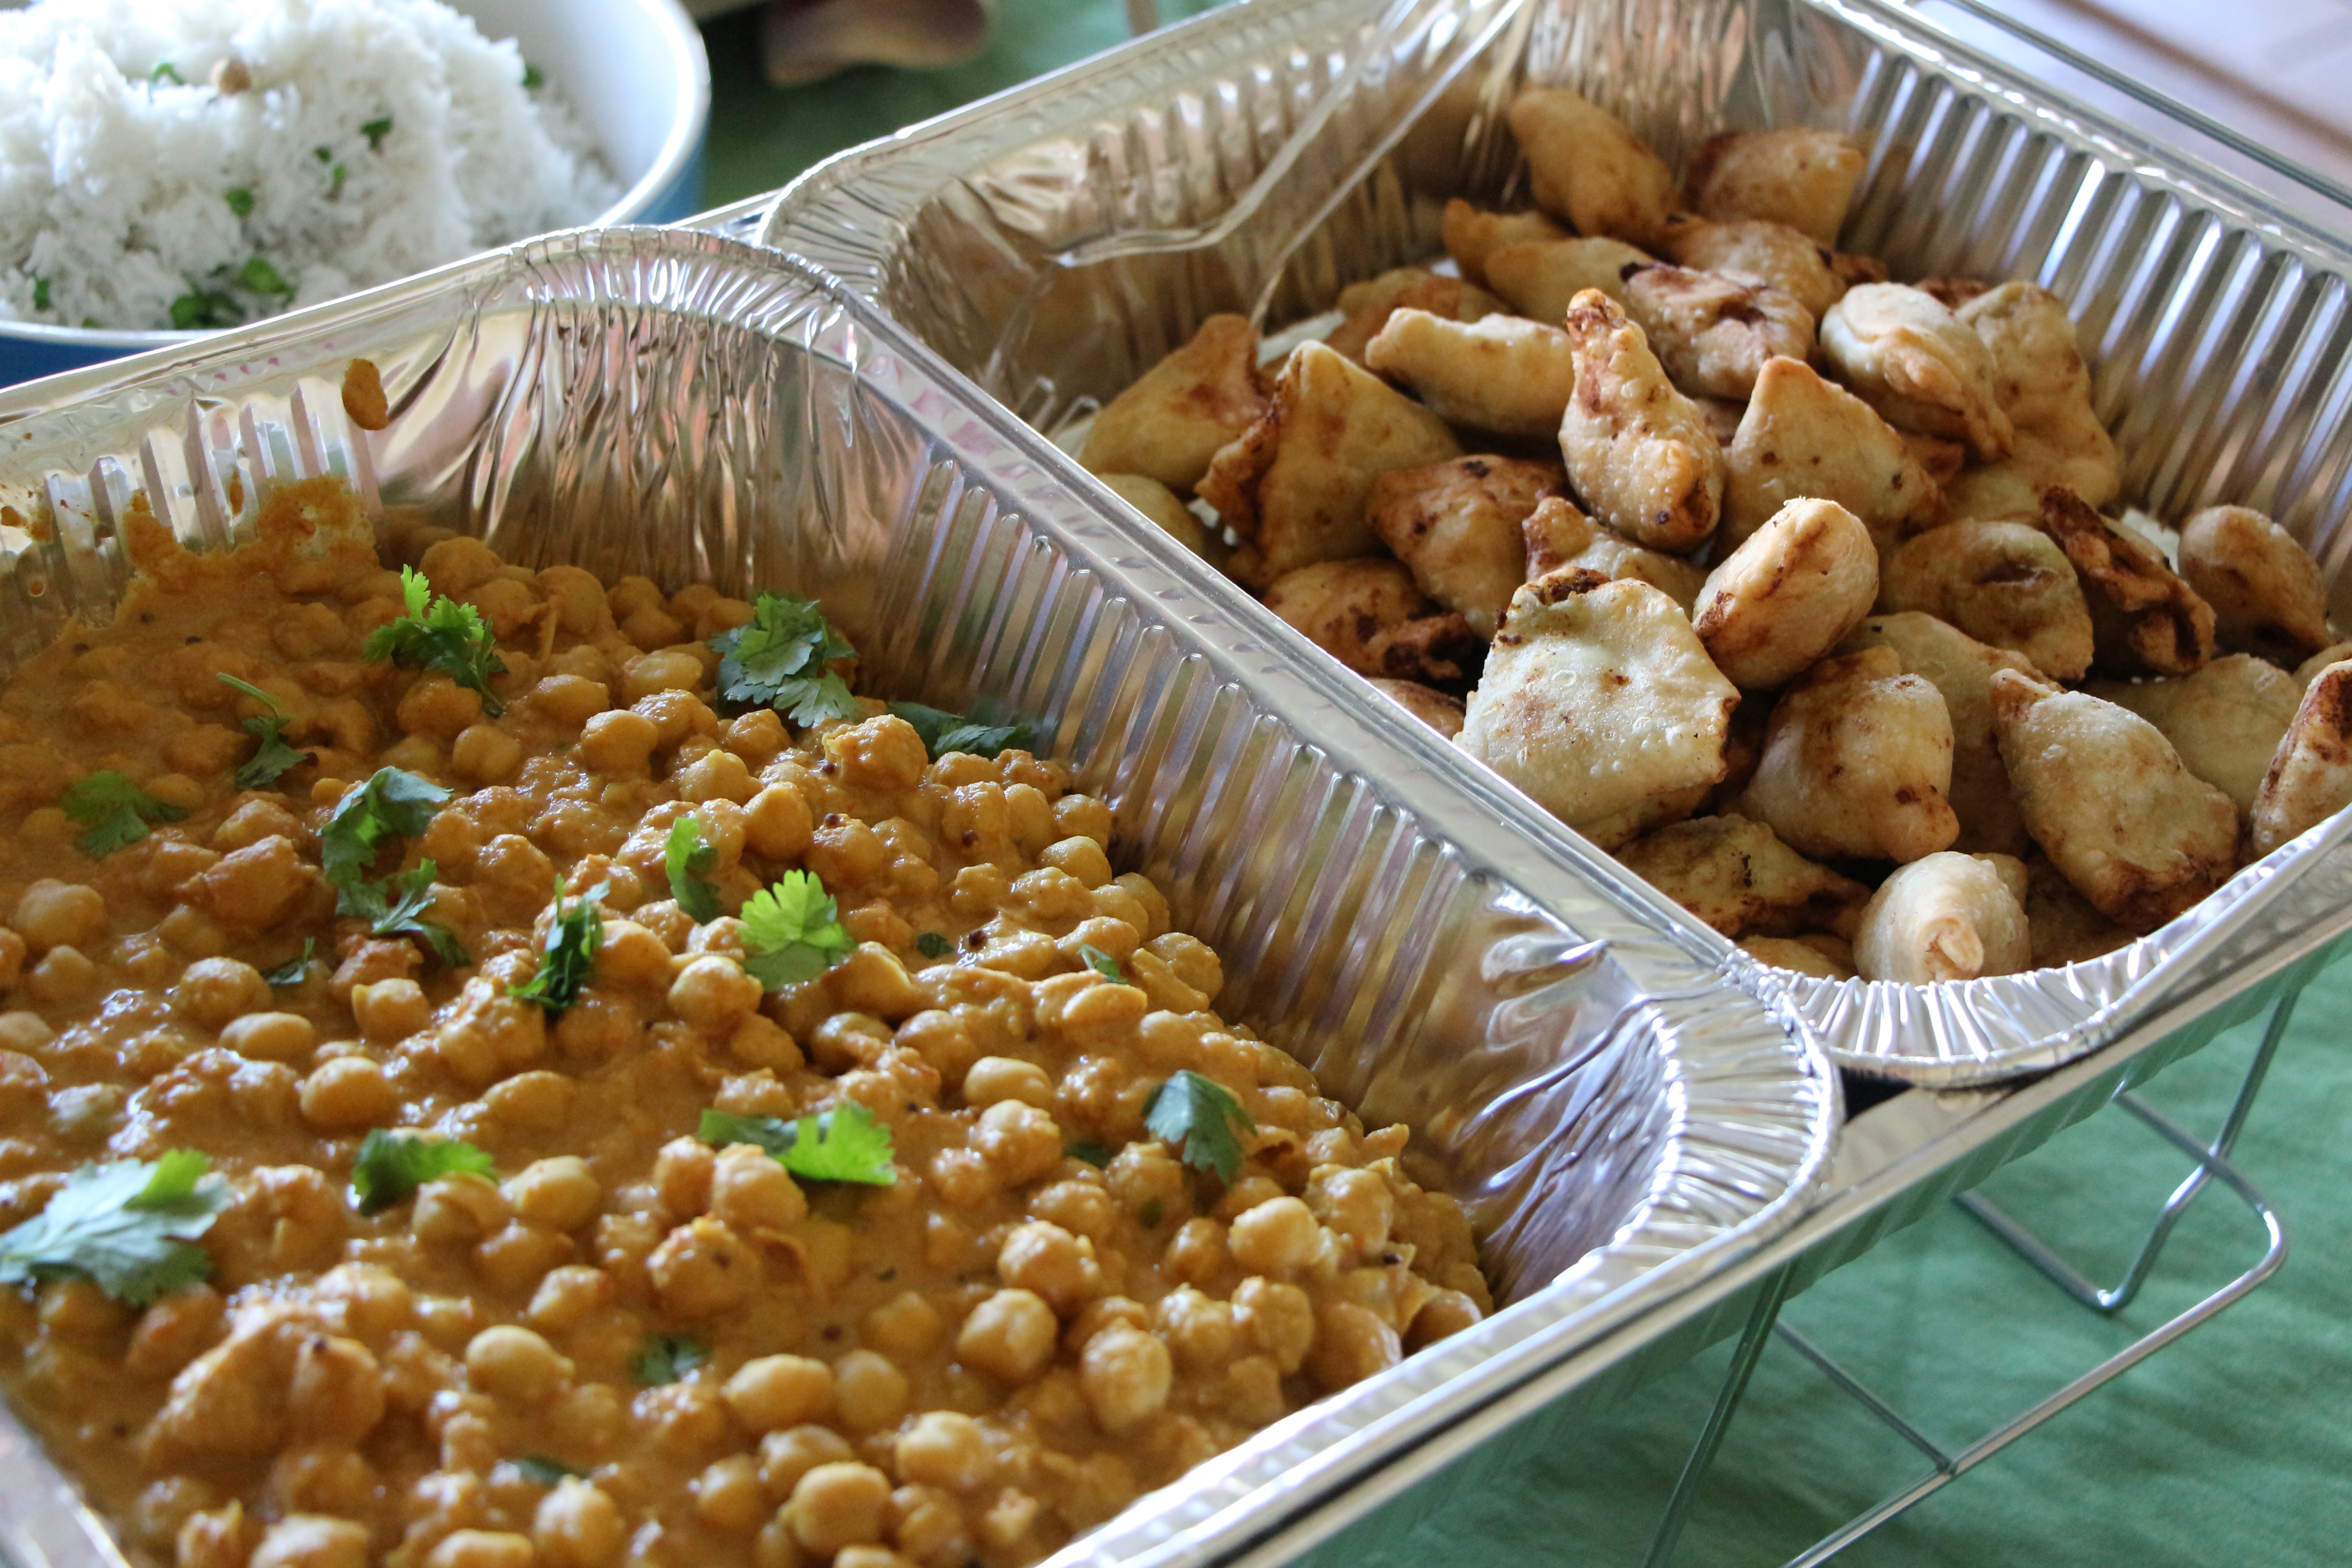
Thankfully, I had help from Shindigz when it came to acquiring the right decor and party supplies to make our party theme come to life and I had help from a friend when it came to our Indian-themed menu. I’m no stranger to googling recipes when I’m looking to cook something new, (like a full buffet of Indian food) but this time I also had the benefit of an old teaching buddy of mine, who kindly shared the recipe for one of her mom’s signature dishes with me – a dish she fondly recalls from her childhood, as being served with pooris on special occasions and when entertaining visiting family from India.

IMG_7737

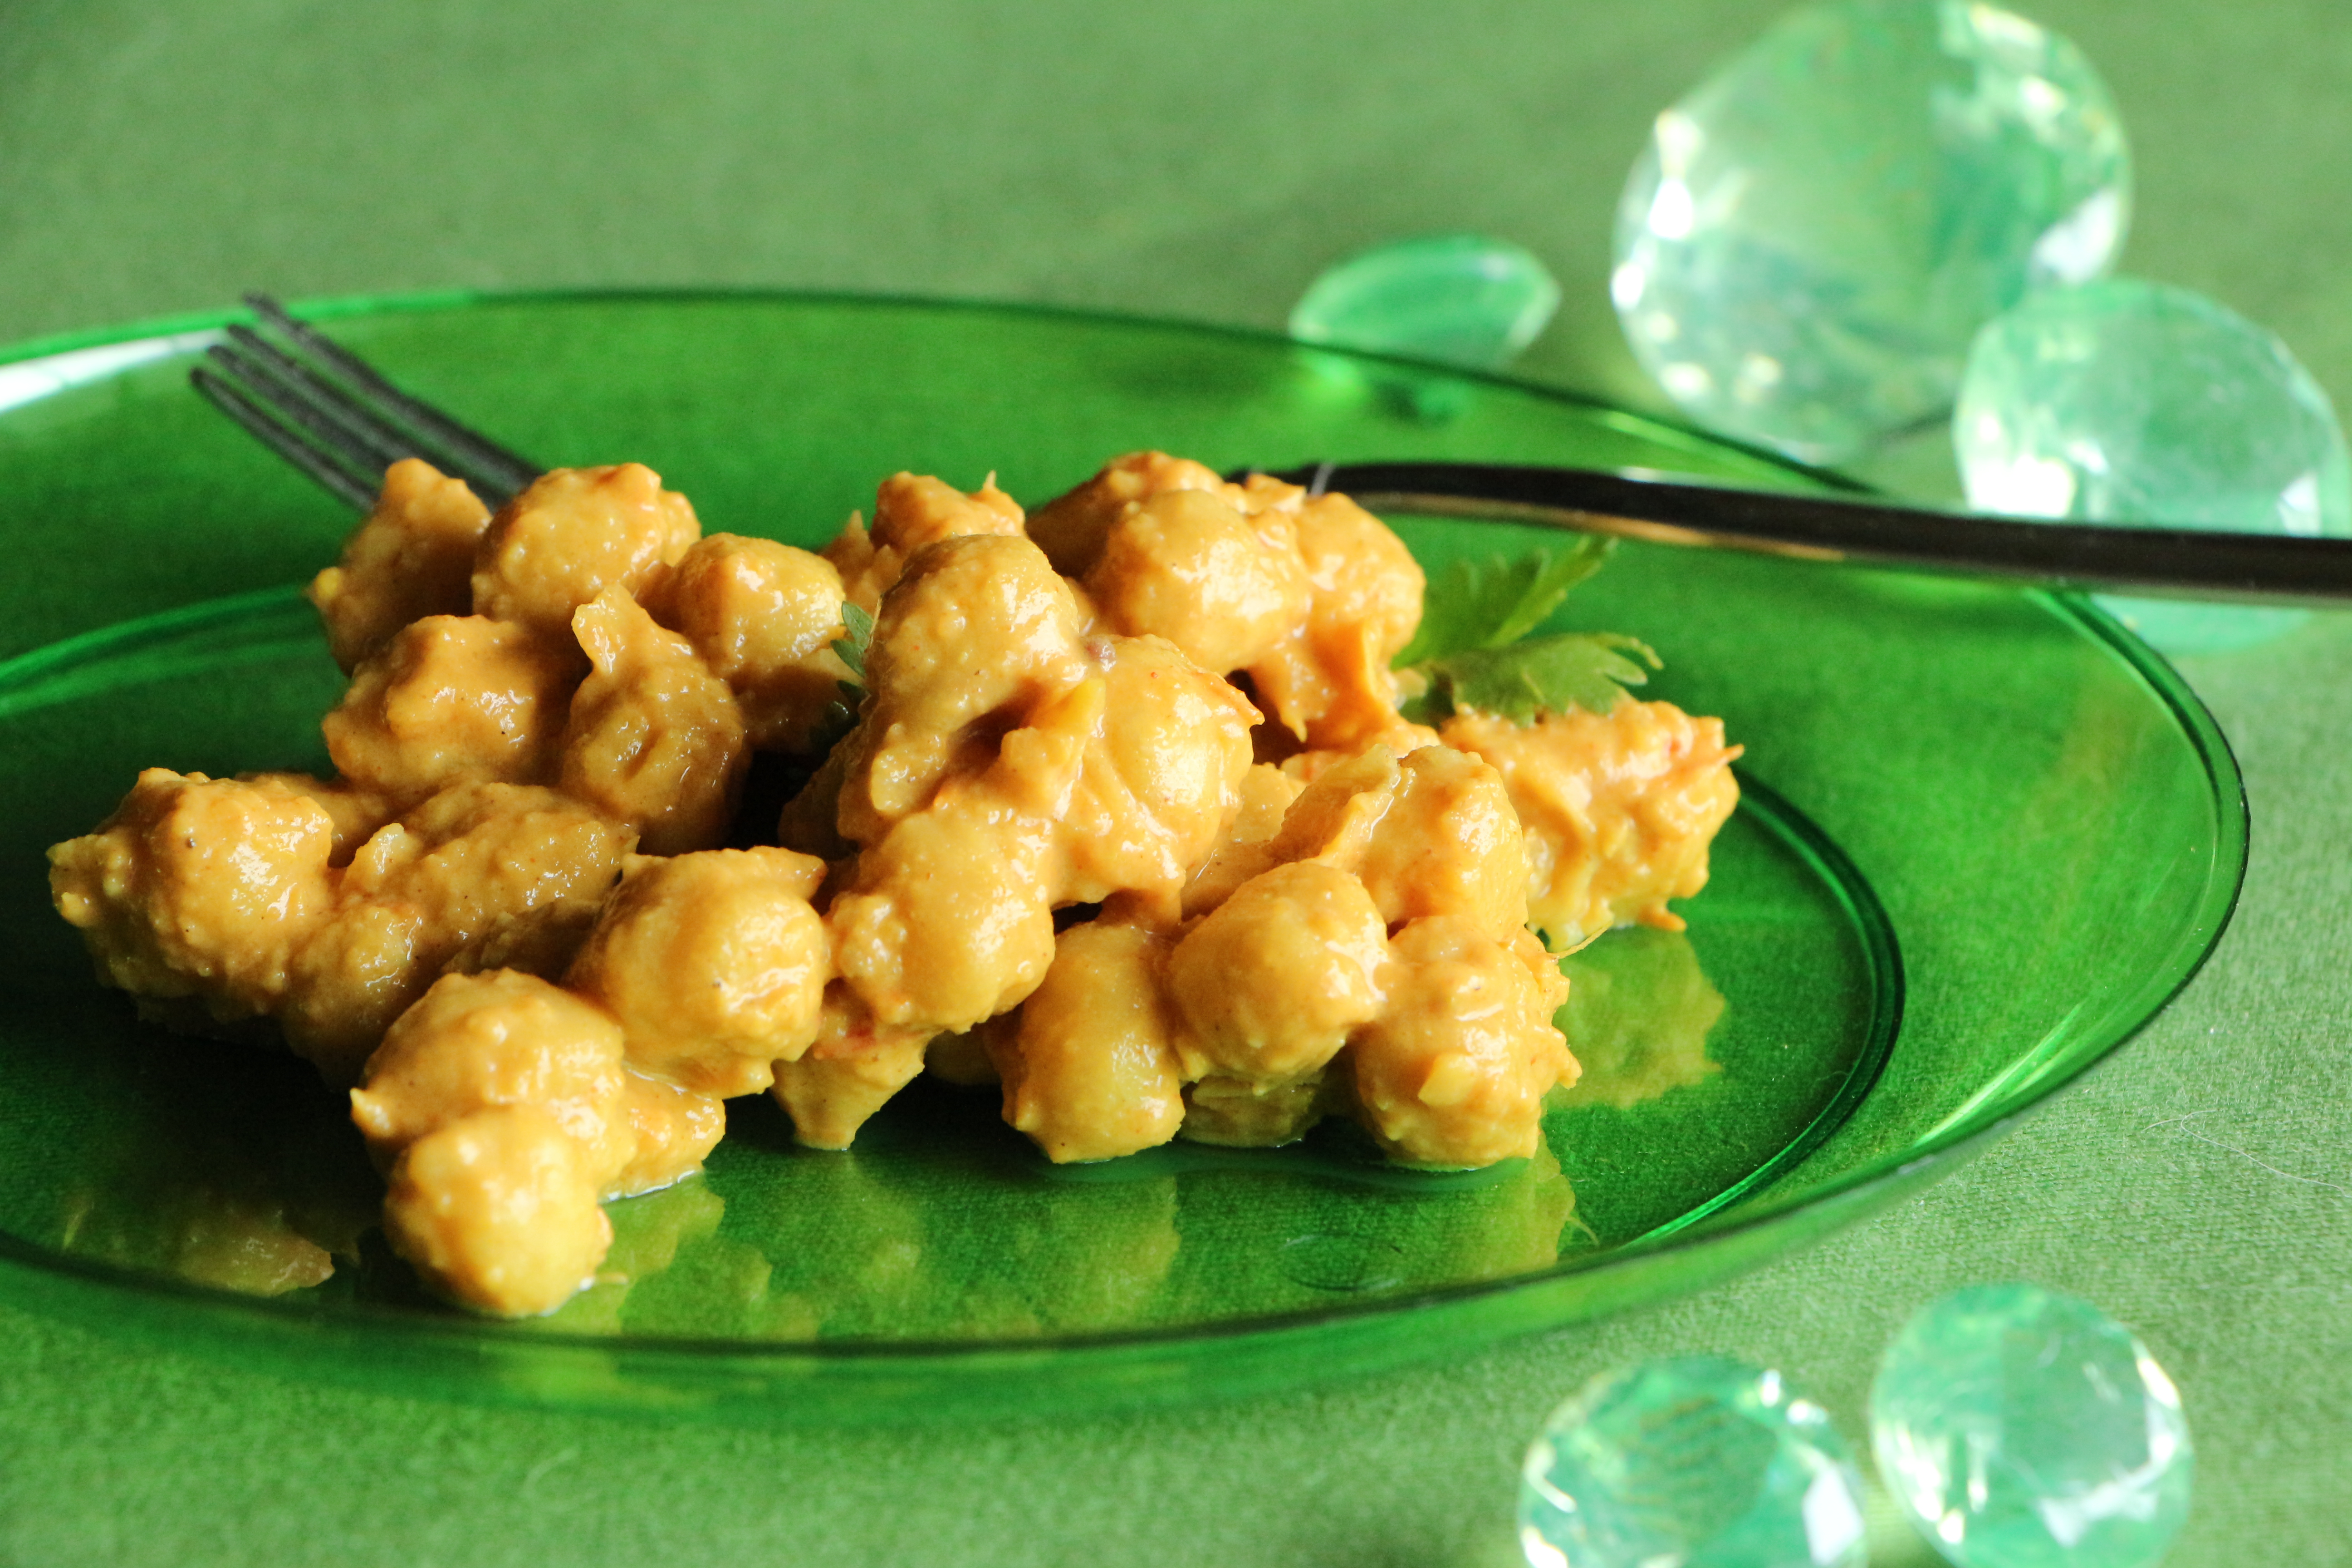
Vibrant green plates from Shindigz!

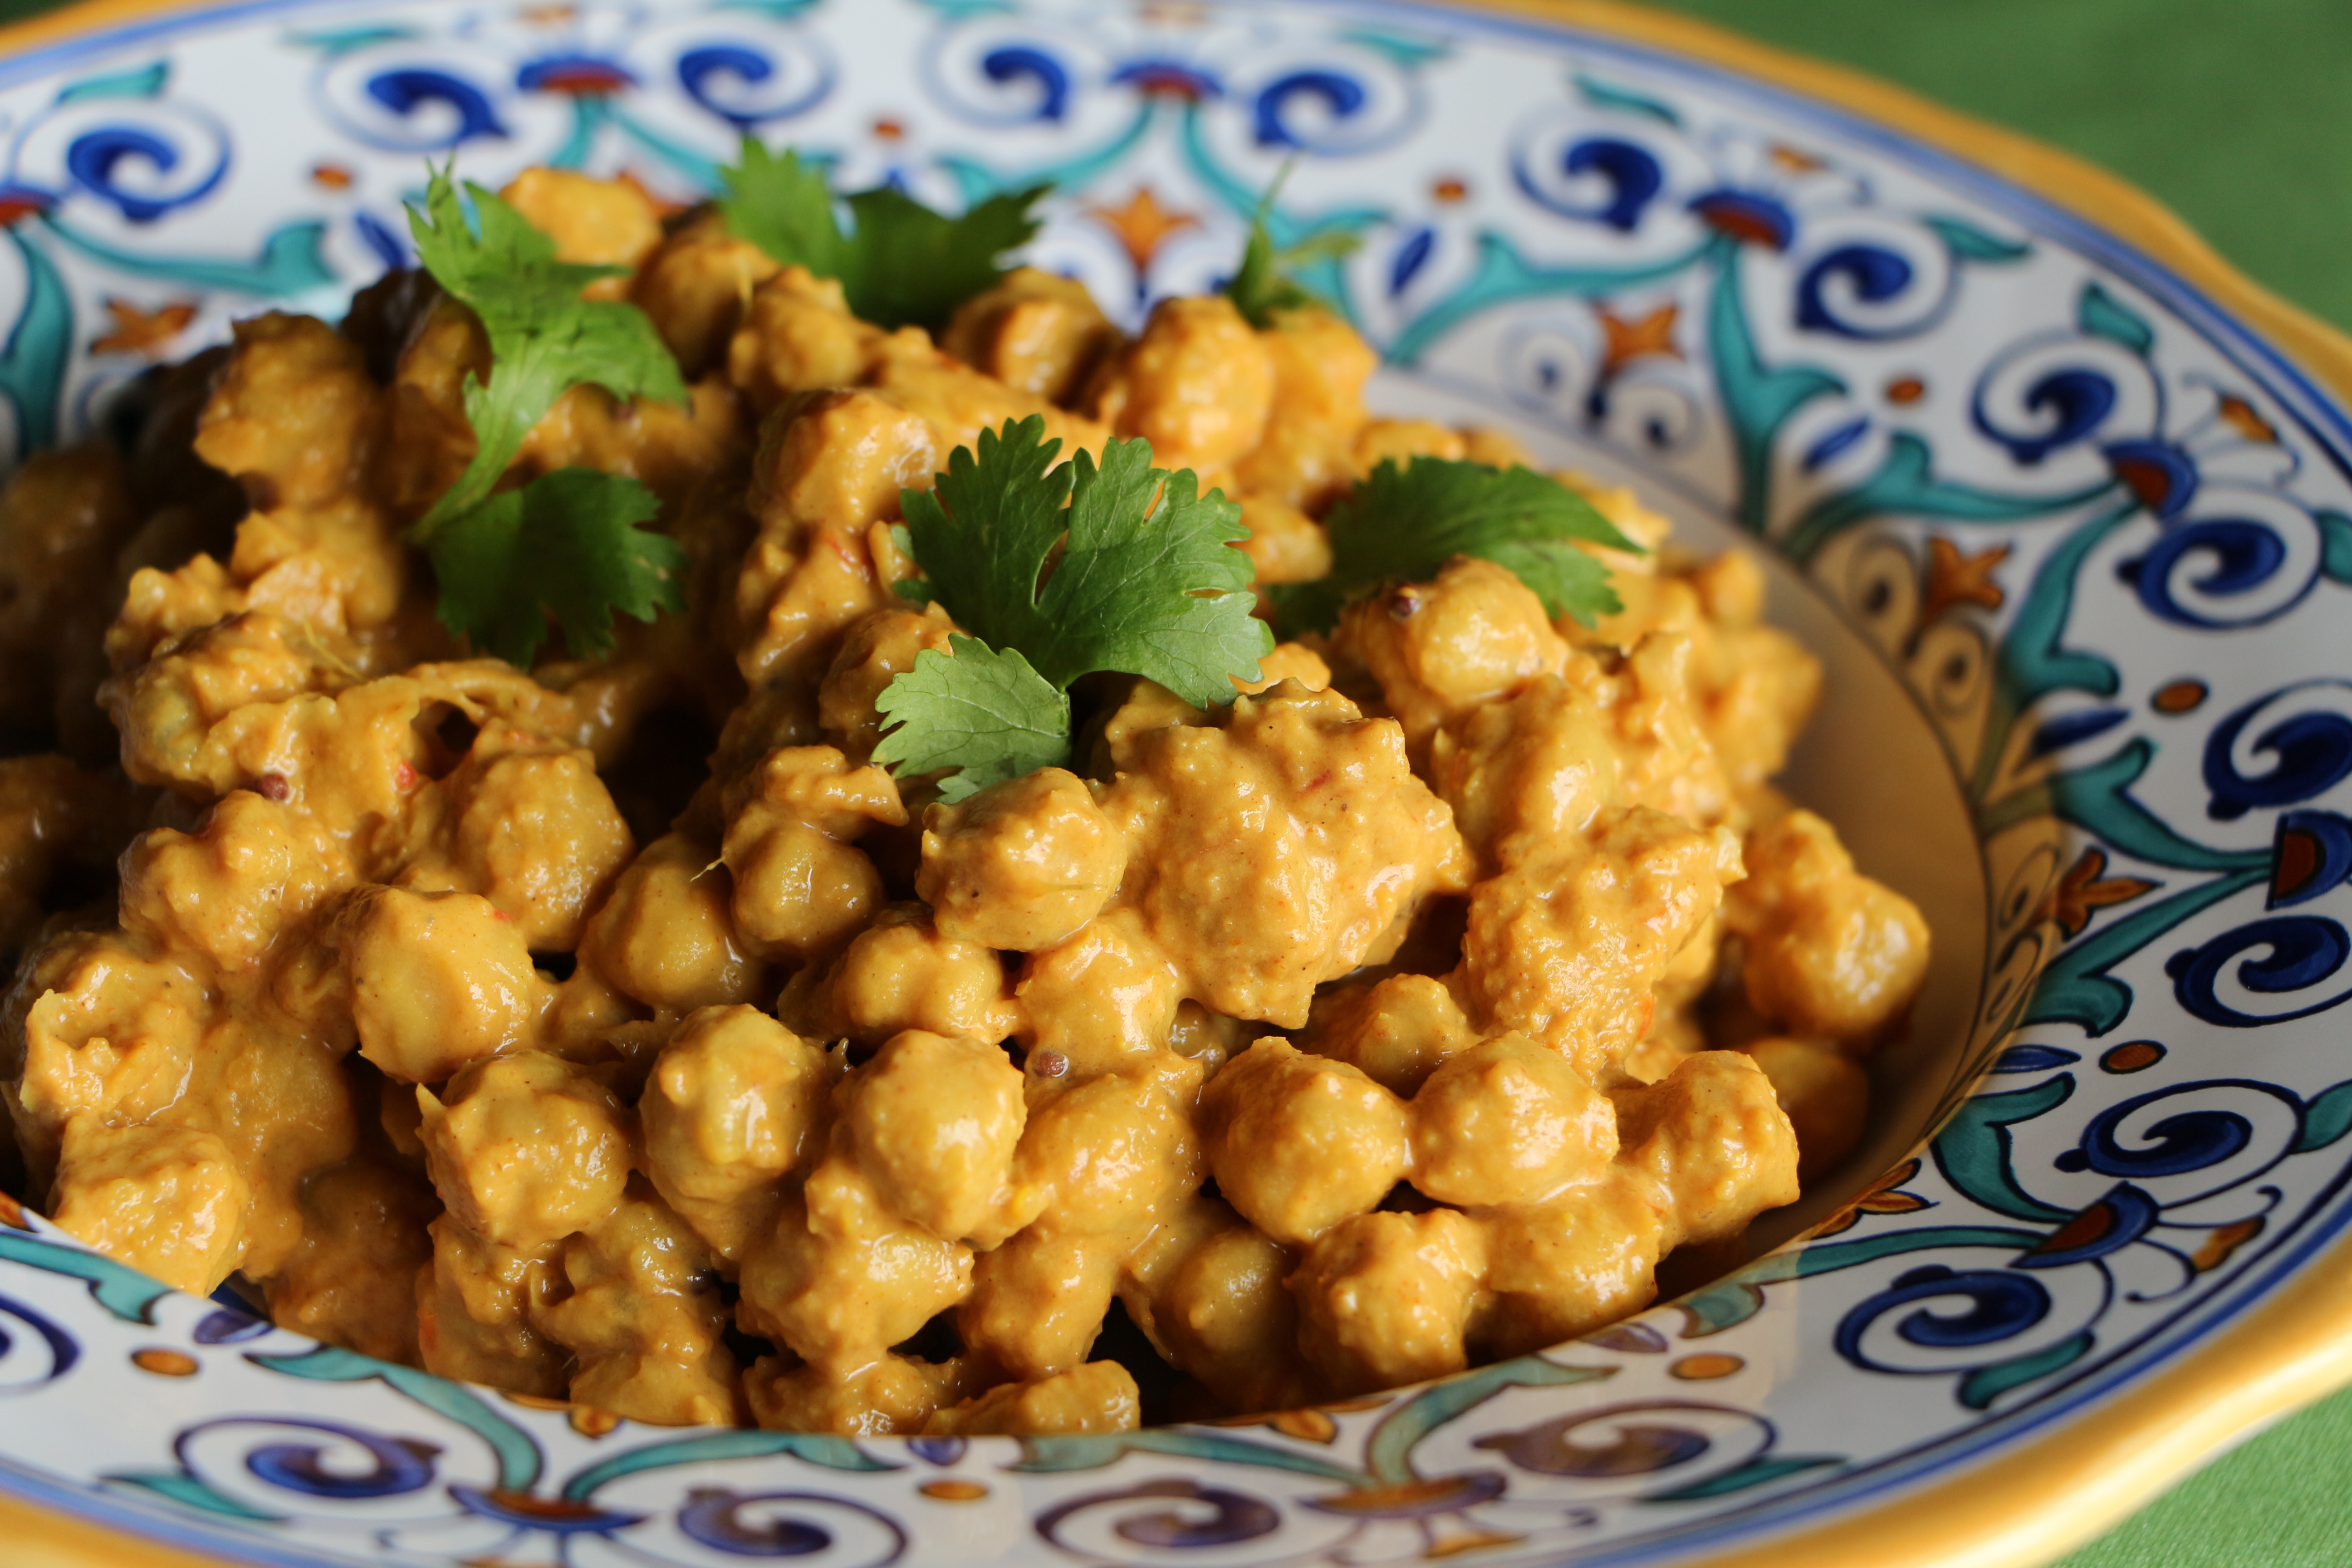
Like many familiar family recipes, which are passed on through generations, this recipe is often cooked more by taste than by exact measure. And since I’ve never had the pleasure of tasting the original recipe, I had to use a bit of guesswork and personal guidance from my own taste buds when determining the measurements for most of the spices in this dish. My version of this tasty recipe may not be exactly like my friend’s familiar family favorite, but these savory chickpeas certainly made a delicious addition to our party menu!

It’s not too late to enter the giveaway for a $50 gift card to Shindigz! For more details, click back to my last post, Temple Run’ Indian-Spiced Meatballs with Raita, and leave a comment there about what you believe is the #1 factor that makes a memorable party. The winner will be selected at random on Friday, May 31, 2013 at 12:00pm EST. One entry per person, 18 years and older, US mailing addresses only, please.

Indian Chickpeas

Adapted from a recipe by Rekha Antani

Ingredients

  • 3 cans chick peas
  • 1 medium onion, coarse chopped
  • 3 vine-riperned tomatoes, coarse chopped
  • 3 cloves of garlic
  • 1/2 inch segment of ginger, peeled
  • 3/4 teaspoon mustard seeds
  • 1/2 teaspoon turmeric
  • 3/4  teaspoon chile powder
  • 1/4 teaspoon cinnamon
  • Pinch of cloves
  • 3 whole cardamoms
  • 1/2 tablespoon sugar
  • 1/2 tablespoon cumin
  • 1/2 tablespoon coriander powder
  • 1 cup sour cream
  • 3 tablespoons powdered cashews (optional)*

Directions

Drain chick peas, reserving the liquid for later. Process the onion, tomatoes, ginger and garlic in a blender or food processor, until smooth. Combine the mustard seeds, turmeric, chile powder and cardamoms in a saucepan over medium heat. Immediately add the onion and tomato mixture to the pan. Add the cinnamon, cloves, sugar, and cumin/coriander powder. Stir well and let it simmer for 2-3 minutes. Add the chick peas to the mixture, stirring from the bottom. Over medium heat, bring the mixture to a simmer. Continue simmering, partially covered, for 25-30 minutes, adding some of the reserved liquid, a little at a time, as the liquid reduces. Once it appears that the chick peas have changed color by absorbing the spices, lower the heat. Take about 1/4 cup of the hot liquid in the pan and mix it with the sour cream. Then, add the sour cream mixture to the pan. Simmer for 3-4 minutes more at a medium/low heat, until it begins to bubble and thicken. Add the powdered cashews, if desired. Garnish with fresh chopped coriander.

*I omitted the powdered cashews in my preparation due to children with nut allergies at our party.

**The original recipe also calls for an unspecified quantity of a spice called hing or asafoetida, which was not available in my well-stocked grocery store. It would likely be available in an Indian grocery store.

IMG_7399

Mango Lassi (Mango and Yogurt Smoothie)
Ingredients
  • 2 cups mango nectar
  • 2 cups mango chunks, frozen
  • 3 cups plain yogurt
  • 1 teaspoon lemon juice
  • Honey (optional, to taste)
Directions
Combine all ingredients in a blender. Blend until smooth. Adjust sweetness with additional honey, to taste. Sprinkle with a dash of cardamom powder or garnish with a sprig of fresh mint, if desired.
IMG_8304
Disclaimer – Shindigz provided me with  $100 gift card to sample their products and services in order to share  my experience with you. All opinions expressed in this post are completely my own. 
Advertisement

‘Temple Run’ Indian-Spiced Meatballs with Raita (and a GIVEAWAY!!)

Posted on

Anyone play the game, Temple Run? You know, the video game for phones and tablets where this great big, manic, hybrid gorilla-vulture creature chases your character as you dodge fire, rushing waterfalls, and treacherous cliffs at the same time as trying to collect shiny medallions and green gems? That’s the one. We’re big fans of that game around here, bordering on obsession, to the point that I had to give it up for Lent to prevent myself from spending every second of my already minimal free time dodging fire and escaping gorilla beasts.

IMG_7368

Tiki Lantern Garland from Shindigz, for that exotic ‘Temple Run’ vibe.

Well, when my oldest son requested a Temple Run themed birthday party for his 6th birthday, I promptly replied, “No, they don’t make Temple Run party supplies. I’m not even sure how we’d do that. Think of another theme. How about pirates or rock ‘n’ roll or superheroes?” But, my son is not easily dissuaded once he’s stuck on an idea, so he persisted with his request. And I persisted with offering alternate ideas. Construction trucks, a luau, dinosaurs???

IMG_7387

Beginning of the ‘Temple Run’ obstacle course, complete with jungle entrance, terrifying flames and a rushing waterfall.

But after a bit of brainstorming with some friends, a vision for a Temple Run themed party started to evolve. We’d construct a Temple Run obstacle course in the backyard. There’d be fire and waterfalls and a cave. There’d be green gems and monkeys and tropical birds. There’d be a terrifying gorilla chasing our young party guests through the course, as they attempted to gather gold medallions and green gems to redeem for goody bag treats. Perhaps we’d need to ask parents to sign a waiver as they arrived with the party guests, sort of like those waivers of death they merrily hand you as you arrive at a bounce house party. (Kidding, sort of.) My husband was skeptical about this insane plan, but I’m just about as hard to dissuade as our six year old, once I’m set on an idea.

IMG_7379

Unfortunate temple runner who took a turn down the dead end, lured by the shiny gold medallions.

As if by fate, in the early stages of my party planning, I received an email from a party supply company, Shindigz, offering to send me a gift certificate to sample their products and services, in order to share my experience with all of you. It was kismet. It only took a few minutes of browsing their site to spark a million ideas. During a quick search for jungle party supplies, my plan for a Temple Run obstacle course became clear. I found green festooning in three different colors  to use to as tropical vines framing the perimeter of our course. Rolls of sheer gossamer fabric printed in a water pattern would create the perfect waterfall obstacle. A shimmery foil banner printed with flames would become our fire obstacle. Plastic gold medallions became the coins we needed to entice our temple runners – coins which they could later redeem for goody bag treats. Tropical birds and monkeys lent an exotic feel to my run of the mill backyard. We added tiki lantern garland and a hanging fiery pot to complete the atmosphere. The hardest part was narrowing down my wish list from Shindigz’ extensive collection of party supplies. I was so happy with everything I received and how fast it got to me, that I actually placed a second order for more festooning and a variety of streamers, which arrived just as quickly.

IMG_7469

The gorilla beast, right on Lucas’ tail, as he choose the faster route around the cave, instead of crawling through it.

Once the vision for our ‘Temple Run’ course was in place, all that was left to do was plan an appropriately themed menu. Admittedly, I was stuck for quite a while. I even tried researching the supposed setting for the Temple Run game, but came up empty handed. Then, I started thinking about Indiana Jones and the Temple of Doom. I certainly wasn’t about to go down the monkey brains and snake-stuffed snakes route for our menu, but then it occurred to me that Temple of Doom took place in India, which just happens to serve up some of my family’s favorite food. In fact, chicken tikka masala with naan is high on the list of the birthday boy’s favorite foods.

An Indian-themed buffet it would be. From that point, it was just a matter of selecting dishes that would appeal to both children and adults, as well as people who might not be so adventurous when it comes to trying new foods. The other top priority was ease of reheating during the party.

IMG_7471

Capture anyway, just before escaping through the waterfall exit!

This was the Indian-themed ‘Temple Run’ menu we settled on:

Chicken Tikka Masala
Naan*
Basmati Rice with Cinnamon, Cardamon, and Peas
Indian-Spiced Meatballs with Raita
Beef and Potato Samosas with Mango Chutney
Indian Chickpeas
Mango Lassis (Mango Yogurt Smoothies)
 
IMG_7326

We also served a large platter of fresh fruit as well as a plate full of peanut butter and jelly sandwiches, for anyone craving something a bit less adventurous. The PB&Js went largely untouched, as our Temple Run menu was enjoyed by most of our guests, big and small. I’ve linked to the recipes for the chicken tikka masala and naan in the menu above. (Rather than grill the naan, as in the linked recipe, I cooked them on a baking sheet, several inches under the broiler for about two minutes on the first side, a minute on the second. Worked like a charm!) I’ll be sharing the recipes for the Indian Chickpeas and Mango Lassis in the near future.

Today, I’m sharing the recipe for the Indian-spiced meatballs and raita. Raita is a refreshing yogurt dip, not too different from a Greek tzatziki sauce. It’s frequently served as a cooling counterbalance to spicy Indian dishes, and while these meatballs are not overly spicy, the raita makes a perfect dip. (Kids love to dip stuff. Trust me.) I added these meatballs to the menu mostly to appeal to our younger guests, but they were a notable hit with the bigger guests too!

IMG_7400

Chicken tikka masala, spicy and mild, to please all taste buds!

A GIVEAWAY!!! My friends at Shindigz are offering a $50 gift card to one lucky reader, to give you a chance to enjoy their wide variety of part supplies. With graduation and summer barbecue season just around the corner, I’m sure that gift card would come in handy! To enter the drawing for the gift card, simply leave a comment below sharing what you think is the #1 factor which makes a memorable party! The winner will be selected using Random.org on Friday, May 31, 2013 at 12:00pm EST. One entry per person. 18 years or older. US mailing addresses only, please. Good luck!!

IMG_7409

Indian-Spiced Meatballs

Ingredients

  • 1 small or 1/2 medium onion, very finely diced
  • 1/2 teaspoon garlic, minced
  • 1/2 tablespoon fresh ginger, grated
  • 1/2 teaspoon curry powder
  • 1 teaspoon garam masala
  • 1/2 teaspoon salt
  • 1/8 teaspoon cayenne pepper
  • 2 eggs, lightly beaten
  • 1/2 cup bread crumbs
  • 1 pound ground beef

Directions

Preheat oven to 375 degrees. Wipe a baking sheet with a little oil or spray with nonstick cooking spray.

Combine the chopped onion, garlic, ginger, curry powder, garam masala, salt, cayenne pepper, eggs and bread crumbs (everything except the meat) in a large bowl, until evenly blended. Add the meat. Use your hands to combine the mixture, just enough to evenly disperse the ingredients.

Form the mixture into balls, about 1 1/2″ in diameter. Place them on the prepared baking sheet. Bake for about 20 minutes, until cooked through.

Makes about 24 small meatballs

IMG_7408

Cucumber Mint Raita

Ingredients

  • 1 large seedless cucumber
  • 1 1/2 cups plain yogurt
  • 1/8 cup fresh mint leaves, finely diced
  • Salt and pepper

Directions

Use a box grater to finely grate the cucumber. Squeeze the cucumber gratings to remove as much liquid as possible. (If you have a piece of cheesecloth available, it’s useful to place the cucumber gratings inside the cheesecloth, then squeeze to remove the excess liquid.) Combine the cucumber, yogurt, and chopped fresh mint. Season with a pinch of salt and pepper.

IMG_7480

Green Gem Ringpop Cupcakes

Disclaimer – Shindigz provided me with  $100 gift card to sample their products and services in order to share  my experience with you. All opinions expressed in this post are completely my own. 

Chipotle Shredded Beef Flatbread Sandwiches

Posted on

My husband’s band was out of town for a gig on Saturday night, leaving me to get up early with the kids on Mother’s Day, as they eagerly attempted to prepare me my traditional, once-a-year breakfast-in-bed. My breakfast tray featured a half-eaten chocolate donut, sitting on top of a frozen pancake, which was elegantly placed on the foil wrapper from the plastic tub of the Frosted Flakes they prepared for me. (My boys prepare a classy breakfast tray.) They decided to toast only half of the bagel and gave up on spreading the too-thick cream cheese. The baby stayed occupied during the breakfast preparation by dipping an Elmo spoon into my cup of orange juice, taking small sips, then repeating. I enthusiastically ate all of my perfectly imperfect breakfast, of course.

IMG_6951

Following breakfast, the three boys proceeded to spin cyclones of chaos around the house in a flurry of special day excitement equivalent to that of Christmas morning. I spent a good part of the morning chasing after them, picking up garbage and toys from the floor, in a fruitless attempt at maintaining some semblance of order. At some point, caught between equal parts desire to live in a tidy house and lack of desire to pick up any more toys or fight with the kids to do it, compounded by my longing for a restful Mother’s Day, I fell apart. I sat on the stairs and had myself a good cry, equal parts disappointed that my day wasn’t going as I envisioned it would and angry at myself for being unable to just settle into the chaotic messiness of the morning.

Being a mom isn’t easy and it’s not always fun, not even on Mother’s Day, but what else can you do besides keep on keeping on. So, I stood up, waited for my eyes to be not so red, dressed the kids and brought them to Home Depot to purchase gardening supplies. When we got home, we planted a small fruit and vegetable garden in the backyard. We needed something to do to keep busy and the boys like dirt, plain and simple. I took a picture of our new little garden.

IMG_7785

The nature of the moments we capture on film lend themselves towards the good times: achievements, celebrations, vacations, something beautiful, or something funny; a graduation from school, a birthday party, an escape to Barbados, a stunning rainbow, a hand-made quilt, smiling faces, evidence of loving and of being loved, a garden. We share these images and it paints a portrait of an idyllic life, filled with joyful events and beautiful moments.

And life is beautiful, but it is far from the perpetually blissful existence that any one person’s photo album might suggest. We just don’t capture the ugly, frustrating, tearful moments on film, because those are the moments we are simply getting through. We’re not picking up the camera when the kids are fighting, because we’re busy playing referee. We’re not picking up the camera when the baby is smearing yogurt on the wall, because we’re busy grabbing paper towels. We’re not picking up the camera when the entire load of folded laundry has just been dumped on the floor, because we’re busy refolding it. We’re not picking up the camera when the house is covered in toys and the kids are all in time-out for refusing to pick them up, because we’re sitting on the stairs crying in frustration over something that shouldn’t be nearly as frustrating as it somehow feels in that moment.

IMG_6941

The experience of being a mom is a lot like planting that little fruit and vegetable garden. Successfully done, the plants will grow and thrive and produce photo-worthy, sweet fruits and nourishing veggies. I’ll proudly share those photos with family and friends, evidence of my gardening prowess. What the photos will not show however, are my tears of frustration that led to the trip to Home Depot, my dirt stained knees, the sun burn on the back of my neck, the muscle aches from cutting through the roots of an old tree as I prepared the garden bed, or the dirt collected under my fingernails. Yet all of those things were part of the experience.

My point is this… We share the fruit. We don’t often share the pains it took to get there. Being a mom can be messy and ugly. Like planting a garden, it’s hard work, but every so often, we get to harvest our fruit. Those are the moments we capture on film to remember why we do what we do, day in and day out. In between those moments, we’ve got tears on our face and dirt under our nails. As moms, we have a tendency to look at photos of other mom’s gardens and wonder why our own garden doesn’t seem as bountiful, forgetting that in between harvesting their fruit, that mom has got tears on her face and dirt under her nails too. We’re all living this perfectly imperfect life together.

I hope every mom out there had a beautiful Mother’s Day with a few perfect moments of bliss. Keep on keeping on. Your garden is growing and thriving as a result of everything you do in all of the moments between the photo-worthy ones.

IMG_6955

I’ve been hanging on to this recipe for a while and now seems like the right time to share this tasty treat. This is a multi-component recipe which takes a bit of time to assemble, but everything can be prepared ahead of time. The best part about the components of this dish is that you can mix and match the pieces in a million ways. Enjoy the corn and bean relish as part of this sandwich or with a bowl of tortilla chips or used as a bed for shrimp burgers. Enjoy the queso drizzled over a hamburger, tossed with macaroni or straight-up with chips. The tender, spicy beef is fantastic on this sandwich, but would stand alone beautifully too, served with a side of mashed potatoes.

IMG_6962

Chipotle Shredded Beef Flatbread Sandwiches

Ingredients

  • 4-6 flatbreads
  • 1 ripe avocado, sliced (Click here for a photo guide on slicing avocado)

For the Chipotle Braised Beef

  • 2 tablespoons olive oil
  • Approximately 3-lb beef chuck roast
  • 1 can chipotles in adobo (only use a few for a less spicy result)
  • 1/2 red onion, coarse chopped
  • 3 cloves garlic, smashed
  • 2-3 cups beef broth
  • Salt

For the Corn and Bean Relish

  • 1 1/2 cups sweet corn kernels  (defrosted frozen corn kernels will do the trick)
  • 1 15-ounce can black beans, drained and rinsed
  • 1/2 red onion, finely diced (Click here for a photo guide on dicing onions)
  • 1 red bell pepper, ribs and seeds removed, finely diced
  • 1 teaspoon garlic, minced
  • 2-3 green onions, chopped
  • 1/4 cup fresh cilantro, chopped
  • Juice from 1/2 lime
  • Salt and pepper, to taste

For the Homemade Queso

  • 2 tablespoons butter
  • 1 poblano pepper, ribs and seeds removed, finely diced
  • 1 jalapeno peppers, ribs and seeds removed, finely diced
  • 1/2 red onion, finely diced
  • 1 teaspoon garlic
  • 1 1/2 tablespoons flour
  • 1 cup milk
  • 1 cup Mexican cheese blend, shredded
  • 1 tomato, finely diced
  • Salt and cayenne pepper, to taste

Directions

For the Chipotle Braised Beef – Preheat oven to 325 degrees. Trim the chuck roast of any excess exterior fat. Season generously with salt. In a large dutch oven or oven safe pan, heat olive oil over medium/medium-high heat. Place the meat in the pan and brown on all sides, about 2-3 minutes per side. Add the beef broth, red onion, garlic, and as many chipotles as desired (I used all of them). The beef broth should come almost to the top of the meat, but not cover it. Bring the liquid to a simmer, then cover the pan and place it in the oven. Cook for 3.5 hours. Remove from the oven and allow to cool slightly. Using your fingers or a fork, pull the tender beef into small pieces, discarding any fatty bits.

For the Corn and Bean Relish – Combine  the corn, black beans, red pepper, green onions, red onion, garlic, and cilantro in a medium sized container. Squeeze half a lime over the mixture and toss to combine. Season with salt and pepper, as desired.

For the Queso – In a saucepan, melt the butter over medium heat. Add the peppers, onion, and garlic. Cook for about 5 minutes, until tender. Sprinkle the flour over the mixture and stir to coat. Cook for another minute or two. Gradually add the milk and whisk to combine. Bring the mixture to a gentle simmer and cook for a few minutes until the milk thickens. Turn the heat down to low and add the cheese. Stir until the cheese has melted into the sauce. Stir in the chopped tomato. Season with salt and cayenne pepper, to taste.

To Assemble the Sandwiches – Warm the flatbreads for a few minutes in a 350 degrees oven. In the center of each flatbread, place a generous mound of the braised beef. Drizzle the beef with warm queso. Top with the corn salsa and slices of fresh avocado.

Makes 4-6 Sandwiches

Spectacular Spinach Salad

Posted on

Process for Vacuuming a Room Without Kids:

Step 1: Remove vacuum cleaner from closet.
Step 2: Plug in the vacuum.
Step 3: Turn on the vacuum.
Step 4: Use the vacuum to suck debris and animal hair from the floor.
Step 5: Unplug and return the vacuum to the closet.
 
Approximate Time Required: 5 minutes

IMG_7030

Process for Vacuuming a Room With Kids:

Step 1: Remove vacuum cleaner from closet.
Step 2: Rehang all of the jackets which the baby pulled from the closet while you were removing the vacuum.
Step 3: Negotiate an argument over the remote between the two other kids.
Step 4: Plug in the vacuum.
Step 5: Instruct oldest kid to return the salamander to the outdoors and to stop squishing him.
Step 6: Replug the vacuum which the baby unplugged, while you were trying to save the salamander’s life.
Step 7: Return all vacuum accessories to their proper places.
Step 8: Turn on the vacuum.
Step 9: Begin vacuuming the room, while the baby rides on top of the vacuum, switching it off at intervals of 5 seconds.
Step 10: Turn the vacuum back on. Repeat as often as necessary in order to vacuum first half of room.
Step 11: Pause to console the child who is literally crying over spilt milk.
Step 12: Clean up the milk.
Step 13: Unravel the vacuum cord from the baby’s neck.
Step 14: Resume vacuuming the second half of the room.
Step 15: Revacuum the first half of the room after the baby spills goldfish on the floor, then crushes them riverdance-style.
Step 16: Instruct the children to put clothes on before playing outside.
Step 17: Accept that the vacuuming task is futile. Try again tomorrow.
 

Approximate Time Required: Unknown – This task has never been successfully completed.

IMG_7032

The actual experience, when sandwiched between twenty other equally impossible ‘simple’ tasks, is only remotely comical in writing. Experiencing it is a heart-pounding, curl-into-a-ball-and-cry-with-frustration, exercise in futility. (Yes, attempting to vacuum a room has brought me to tears more times than I’d care to admit.) If only I could learn to accept this loss of control over accomplishing simple tasks. Each day feels like a mad rush of tasks, errands, and chores, yet there is scarce evidence of the work accomplished by the end. Even the process of writing this simple blog post has been overly complicated by a million micro interruptions of the salamander, spilt milk, and crushed goldfish variety.

But recently I have managed to find the most perfect peace in a somewhat unusual place…the gym. Many people dread going to the gym. For me, the gym’s bright, sterile environment invokes the same calm as a dimly lit spa with soothing water features. I feel my heart rate decelerate when I walk through those doors, because my gym offers childcare. So, every day, I have been shuffling the little ones off to the gym, where I claim one hour to use as I please. One precious hour, where I am the master of my time, to select a task and complete it with minimal interruptions. One hour where I can choose to move slowly between the strength training machines or to let my heart race with the endorphins of a good run as compared to the cortisol of home stress. That hour may not make vacuuming a room any less stressful, but at least I had that one blissful hour.

And truly, as completing any task is basically impossible anyway, that one hour removed from my daily duties, has made little to no difference with respect to the condition of my house. Now, if that daily hour manages to make a difference with respect to the condition of my waistline, that will be the icing on the cake.

IMG_7033

Thankfully, the kids actually love going to the Kids Korner at the gym. There are novel toys and video games (which are a bit more violent than anything I allow in our home, thus exciting in an illicit way) and other kids to socialize with. So, in addition to my daily weekday gym escape, we’ve been taking a family trip to the gym each weekend. A post-gym stop at Panera for lunch, where we pick up salads and smoothies and other sorts of yummy feel-good food, has become part of our weekend routine.

I’ve been crushing on Panera’s Spinach Power Salad ever since they introduced it to the menu. I could eat it everyday, but that be bad for my wallet. So, I’ve come up with my own version of a salad inspired by Panera’s tasty offering. My salad features the same fresh baby spinach, topped with sauteed mushrooms and onions, crispy bacon, protein-rich eggs, and crispy garlic-pepper onion straws, tossed in a simple vinaigrette made with sweet caramelized onions and a touch of honey. It’s a near perfect combination of flavors and textures, the sort of thing which makes a healthful salad feel like a treat.

Today’s Focus on Technique – Mustard as an Emulsifier

I add a touch of mustard to almost every vinaigrette I make. In addition to adding a satisfying hint of flavor, mustard has the ability to act as an emulsifier, binding the oil and vinegar, so that the dressing is less likely to separate. This secret superpower of mustard occurs as a result of the  ground mustard seed’s particles’ ability to coat tiny droplets of oil, allowing them to mix harmoniously with the vinegar or lemon juice in a dressing. It doesn’t take a lot, but has the best overall result with ground mustard powder or a good quality prepared mustard.

Spinach Salad with Bacon, Eggs, Mushrooms and Caramelized Onion Vinaigrette

Inspired by Panera’s Spinach Power Salad

Ingredients

  • 8 slices bacon, cooked to crisp, crumbled
  • 3 eggs, hardboiled and chopped
  • 9-12 cups baby spinach leaves

For the sauteed mushrooms and onions

  • 1-2 tablespoons olive oil
  • 1 large sweet onion, thinly sliced
  • 2 cups baby bella (cremini) mushrooms, sliced
  • Salt and pepper

For the dressing

  • 1/2 cup caramelized onions (from the sauteed onions)
  • 1/4 cup white balsamic vinegar
  • 1/4 cup olive oil
  • 1 teaspoon dijon mustard
  • 1 tablespoon honey
  • Salt and pepper

For the crispy onions

  • 1 large sweet onion, very thinly sliced
  • 1 cup buttermilk
  • 1 cup flour
  • 1-1 1/2 teaspoons salt
  • 1 teaspoon garlic powder
  • 3/4 teaspoon black pepper
  • Vegetable oil, for frying

Directions

For the sauteed mushrooms and onions: Heat the olive oil in a pan over medium heat. Add the onion. Cook for 10-15 minutes, stirring frequently, until tender and golden. Remove the onions from the pan. Set 1/2 cup aside for the dressing. Save the remaining onions for topping the salad. Add a touch more oil to the pan, if necessary. Add the mushrooms and cook for about 7-10 minutes, until tender and golden. Season with a sprinkle of salt and pepper.

For the caramelized onion vinaigrette: In a blender or food processor, combine the caramelized onions, vinegar, oil, mustard, and honey. Blend until well combined. Season with salt and pepper.

For the crispy garlic-pepper onion straws: Soak the sliced onions in the buttermilk for 30 minutes or so. In a separate bowl, combine the flour, salt, garlic powder, and pepper. In a large fry pan, heat about 1 inch of vegetable oil at medium/medium-high heat for a few minutes, until it’s good and hot. In small batches, remove some of the onions from the buttermilk, shake to remove excess, then toss in the flour mixture until well coated. Scatter the onions in the oil. If the oil is hot enough, they should sizzle instantly and cook to golden and crispy in about two minutes. Remove the onions with a slotted spoon and drain over a paper towel. Repeat with remaining onions.

To assemble the salad: Toss a generous serving of spinach leaves (3-4 cups) with a bit of the dressing. Top the salad with the sauteed onions and mushrooms, chopped boiled egg, bacon, and the crispy garlic-pepper onions.

Makes 3-4 large salads

IMG_7044

Pasta with Ham and Mushrooms in a Creamy Spinach Ricotta Sauce

Posted on

If you celebrate Easter, it’s likely that come Sunday, you may find yourself with an excess of boiled eggs, some ham, and maybe even some candy. With that in mind, I’ve gathered up a few tasty ideas on how to make delicious use of those leftovers, including a brand new, super-simple recipe for pasta with ham and mushrooms in a creamy, cheesy spinach ricotta sauce.

What to do with Leftover Boiled Eggs…

Creole Deviled Eggs

029

Deviled Egg Salad

img_5869

Pasta with Bacon, Eggs, and Spinach

img_5924

What to do with Leftover Candy…

Cadbury Creme Crepes

img_3593

What to do with Leftover Ham…

Ham and Corn Chowder

img_5965

Grilled Peach and Prosciutto Salad with Creamy BBQ Dressing (use sliced ham in place of prosciutto)

img_9310

Grilled Brie, Prosciutto and Apricot Sandwiches (use ham in place of prosciutto)

img_4685

Chicken Cordon Bleu Panini

img_3708

Pasta with Ham and Mushrooms in a Creamy Spinach Ricotta Sauce

Ingredients

  • 1-2 tablespoons olive oil, plus more if necessary
  • 1/2 medium onion, finely diced
  • 1 teaspoon garlic, minced
  • 2 cups baby bella mushrooms, sliced
  • 2 cups ricotta cheese
  • 1 1/2 cups milk
  • 1 cup parmesan cheese, grated
  • 1 6-ounce bag baby spinach leaves, chopped
  • 2 cups leftover ham, diced
  • Salt and pepper, to taste
  • 1 pound pasta, cooked al dente
  • Additional parmesan cheese and crushed red pepper, for garnish

Directions

Heat the olive oil in a large pan over medium heat. Add the mushrooms. Cook for 7-10 minutes until tender and lightly caramelized. Remove the mushrooms from the pan and set aside. Add a touch more olive oil to the pan, if necessary, then add the onion. Cook for 5-7 minutes until tender and golden. Add the garlic and cook for another 1-2 minutes. Add the ricotta cheese, milk, and parmesan cheese. Cook for a few minutes, stirring frequently, until hot and well blended. Add the mushrooms, ham and spinach. Gently simmer for a few minutes until the spinach is wilted. Taste and season with salt and pepper, as desired. Pour the sauce over cooked pasta and toss to combine. Garnish with crushed red pepper and additional parmesan cheese, if desired.

IMG_6410

Cheesecake-Swirled Carrot Cake

Posted on

Every so often, I get an idea for a recipe which I’m certain is so genius that no home cook or master chef has thought of it yet. 99.9999% of the time, it turns out that someone else has already covered that ground. It’s really challenging to come up with something truly novel and unique in the culinary field…at least for me it is.

IMG_6415

Such is the case with this cheesecake-swirled carrot cake. The idea came to me as I was brainstorming for some interesting twist on carrot cake to share as Easter approaches. The way I figured it, if carrot cake and sweet vanilla cream cheese frosting are delicious together (and they are), and cheesecake is also made with cream cheese, sugar, and vanilla (which it is), then carrot cake and cheesecake would be delicious together. If A and B, then C sort of logic…or something like that anyway.

IMG_6446

I initially contemplated stacking layers of carrot cake with cheesecake, but the idea seemed too similar to a basic carrot cake with cream cheese frosting. That was the point where I decided I’d bake the two cakes together in one pan, intermingled to create one grand cheesecake-swirled carrot cake. It was in my research phase of concocting this delicious confection that I discovered The Cheesecake Factory already beat me to the punch. Having been to The Cheesecake Factory a grand total of one, maybe two times in my life, probably about ten years ago, this was news to me. Perhaps you’ve already had theirs??

IMG_6564

So, turns out my grand idea isn’t nearly as revolutionary as I’d initially thought, but it is spectacularly delicious, nonetheless. Rich, moist carrot cake gets twisted with a creamy classic cheesecake to create a treat which is sure to be the hit of the Easter dessert buffet. Ol’ Peter Rabbit might even forego his basket of candy in favor of a slice of this carroty beauty.

IMG_6503

Cheesecake-Swirled Carrot Cake

Ingredients

For the Carrot Cake

  • 1 3/4 cups flour
  • 3/4 teaspoon baking powder
  • 3/4 teaspoon baking soda
  • 3/4 teaspoon cinnamon
  • 1/4 teaspoon ginger
  • Pinch of nutmeg
  • 1/2 teaspoon salt
  • 2 sticks unsalted butter, softened to room temperature (plus more for greasing pan)
  • 2/3 cup dark brown sugar
  • 1/3 cup white sugar
  • 1 1/2 teaspoon vanilla
  • 2 eggs
  • 1/3 cup water
  • 2 cups finely grated carrots (approximately 4 medium-sized carrots)
  • 3/4 cup golden raisins (optional, but recommended)

For the Cheesecake

  • 3 8-ounce bars of cream cheese, softened to room temperature
  • 1 cup sugar
  • 3 eggs
  • 1 teaspoon vanilla

Directions

Preheat oven to 350 degrees. Grease a 10″ springform pan with butter.

For the Carrot Cake: In a large bowl, combine the flour, baking powder, baking soda, cinnamon, ginger, nutmeg and salt. In a separate bowl, beat together the butter and sugars until light and fluffy. Add the vanilla and the eggs, one at a time, beating between each addition. Add the water, then beat for another minute. Add the carrots, then beat for another minute. On low speed, gradually beat in the dry mixture until well blended. Stir in the raisins.

For the Cheesecake: Using an electric mixer, beat together the cream cheese and sugar until well blended. Add the vanilla and the eggs one at a time, beating until well blended.

To Assemble the Cake: Spread about 1/2 of the carrot cake batter over the bottom of the prepared springform pan. Drop large spoonfuls of about 1/2 of the cheesecake mixture on top of the carrot cake. Drop large spoonfuls of the remaining carrot cake mixture on top of and around the cheesecake. Pour the remaining cheesecake mixture over the top. Use a spatula to smooth the cheesecake on the top. Bake for about 55-65 minutes, until set.

Cool at room temperature for about an hour, then refrigerate for a few hours until completely chilled.

** Carrot cake portion of the recipe is adapted from Martha Stewart’s Carrot Cake recipe, found HERE.

Irish Mocha Chip Ice Cream

Posted on

Well, hello there! Long time, no see.

IMG_5145

I hadn’t intended to abandon the blog for any length of time, but life sort of sucked me into its unpredictable time warp. Between the kids and appointments and work and all of the other business of being a family of five, the weeks just flew by. Oh, and I joined a local gym, which has a ‘Kids Korner’, that the kids actually love going to. Ninety bucks bought me up to two hours of time for myself, every day, forever. Best childcare deal out there, folks. I’ve rarely missed a day since I joined. The getting in shape aspect almost feels like the bonus of going, not the very purpose itself.

IMG_6057

But, it’s come to my attention that one of my favorite holidays is rapidly approaching. So, I’ve pulled myself out of life’s time warp in order to bring you an appropriately Irish themed recipe. This is one for the grown-ups, as it’s chock full of caffeine and festively spiked with a bit of Irish Cream. Interestingly, it was my five year who inspired the whole ice cream idea, while I was pondering aloud about some Baileys twist on panna cotta or chocolate mousse. “It should be an ice cream,” he insisted. And with the approaching spring season peppering our days with warmer weather, he was right-on with that suggestion. I may need to reward him with a decaf, alcohol-free version of this recipe soon.

IMG_6102

The look your child may make when you prepare an ice cream, just for grown-ups.

If you’re looking for some more traditional Irish ideas, like Corned Beef and Cabbage, Irish Soda Bread, Shepherd’s Pie or even a low-carb twist on Cottage Pie, check out last year’s St. Patty’s Day recipe round-up HERE.

Have fun and most importantly, be safe, in all of your St. Patty’s Day festivities!

Today’s Focus on Technique – The Difference Between Ice Cream and Frozen Custard

The main difference between ice cream and frozen custard (also known as French-style ice cream or French custard ice cream) is the addition of egg yolks. Technically, to be considered a frozen custard, it must contain at least 1.4% egg yolks by weight. The USDA has lengthy documents which define all of the characteristics of ice cream, frozen custard, gelato, sherbet and something called mellorine, but basically, the difference between ice cream and frozen custard comes down to the egg yolks. The egg yolks in a frozen custard add a rich, silky creaminess to the end result. When adding the egg yolks to the ice cream mixture, it is important to temper the eggs by very gradually adding the hot cream mixture to the yolks. This allows the temperature of the eggs to rise to meet the temperature of the hot cream mixture without scrambling the eggs. The egg mixture is then returned to the pan and gently heated until the eggs are cooked to a safe temperature. For more info on tempering eggs into hot liquids, click here. I haven’t calculated the percent weight of egg yolks in the following recipe, but I’d venture to say it falls technically in the family of frozen custards.

IMG_6146

Irish Mocha Chip Ice Cream

Adapted from Emeril’s Coffee Ice Cream 

Ingredients

  • 1 1/2 cups heavy cream
  • 1 1/2 cups whole milk
  • 2/3 cup sugar
  • 1 1/2 tablespoons instant coffee granules
  • 1 1/2 tablespoons unsweetened cocoa powder
  • 3-4 tablespoons Baileys Irish Cream*
  • 4 egg yolks
  • 2/3 cup mini chocolate chips

*TIP – When cooking with liquors or liqueurs that you don’t frequently use, see if your liquor store carries the mini bottles (like they have on airplanes), to avoid having leftovers go to waste. 

Directions

Combine the cream, milk, sugar, coffee, and cocoa powder in a medium saucepan. Bring to a gentle boil over medium heat, stirring until sugar, coffee and cocoa are dissolved. Remove from the heat.

In a medium bowl, lightly beat the egg yolks with a fork. In a slow steady stream, gradually whisk about 1 cup of the hot mixture into the egg yolks. Then, gradually add the egg mixture to the remaining mixture in the pan. Cook the mixture over medium-low/low heat, stirring frequently, for 5-8 minutes, until it just begins to bubble. (You can use an instant read thermometer to check that the mixture is at least 170ºF.) Remove from the heat. Cool slightly at room temperature, then transfer to a bowl and cover with plastic wrap, pressing down against the surface to prevent a skin from forming. Refrigerate until completely chilled, about 2-3 hours. Stir in the Baileys Irish Cream and chocolate chips just before freezing in the ice cream maker.

Transfer the cooled mixture to your ice cream maker. Freeze according to your ice cream maker’s instructions. The ice cream will still be semi-soft (and lusciously creamy) coming out of the ice cream maker. It will harden a bit further after a few hours in the freezer.

*This recipe would make a perfectly delicious mocha chip ice cream without the Bailey’s. You could also use decaf instant coffee grounds if you’d prefer to skip the caffeine.

IMG_5140

Tropical Chia Green Smoothies

It’s been pointed out to me, that my own enthusiasm for holiday celebrations, may explain the intense energy my 5-year-old, Liam, puts into planning how we’ll honor each special day. We are two peas in a pod when it comes to festive occasions. Heck, we’re already co-planning the Temple Run themed birthday party we’ll throw in May, complete with a costumed gorilla to chase the party guests through the obstacle course we will assemble in the backyard. My husband is skeptical about the logistics involved in carrying out this event, but Liam and I have got it covered.

IMG_5885

As Valentine’s Day approached, Liam easily slipped into holiday planning mode. For weeks, I heard about the special Valentine’s Day he was planning for me. It was to be a spa day, as imagined by a 5-year-old, pieced together with ideas he’d gleaned from watching episodes of Phineas and Ferb or Spongebob. I was given a list of the supplies to acquire for this special day: bubblegum scented bubble bath, ‘some kind of soap’ for my face (a face mask), cucumber slices, candy, and bubbly water. Then I eagerly waited for Valentine’s Day and the one hundred arm massages I’d been promised as part of this luxurious spa package.

IMG_5859

But then I received the phone call from the school nurse. My sweet, little valentine was running a fever and needed to be picked up from school. After a bit of rest at home, I decided to turn his little spa idea around on him. It just seemed like he needed the extra attention more than I did. The boys enjoyed the funny face masks and cool cucumber eyes and they laughed their bubble-bearded faces to near tears in the over-filled bathtub. I poured cool glasses of cucumber water for the boys to sip while they enjoyed the soothing effects of the face masks, but none of the boys would drink what they perceived to be ‘pickle water’.

IMG_5901

After soothing face masks, ‘pickle water’, and bubble baths, we enjoyed some delicious tropical green smoothies. Inspiration for these smoothies came to me while watching a food documentary I ran across on Netflix, Hungry for Change. For the most part, the film spoke to what most of us already know; whole foods are good for you, processed foods are not. Eat lots of fresh, unprocessed fruits and vegetables and you’ll feel better, look younger, and have glowing skin. (They talked a lot about skin.) At one point, the filmed focused so heavily on juicing that I started to suspect I’d been tricked into watching an 89-minute long informercial for a juicing machine. But all-in-all, it was a decent film which drove home some important points about healthy eating.

IMG_5921

Above all, to me, the most interesting segment had to do with foods that have the ability to reset and detoxify our bodies, so that they function more efficiently and effectively. Leafy green vegetables and gelatinous plant foods, such as chia seeds, were given the biggest focus. After doing a bit of research into chia seeds and discovering their many potential health benefits, I made the decision to incorporate them into my diet, starting with these delicious and nutrient dense smoothies. These vibrant smoothies start with fresh tropical fruit and a big handful of baby spinach. Protein-rich greek yogurt, omega-3 and fiber-rich chia seeds, and natural, sweet honey complete the mix to form a nutritional powerhouse smoothie you can feel great about enjoying.

IMG_5939

Today’s Focus on Technique – Making Smoothies with Frozen Fruit

Keeping a stash of fresh fruit pieces in your freezer makes smoothie-making a breeze. Most fruit contains enough water content to give your smoothies that icy texture, without actually adding any ice. (Banana smoothies usually require some ice.) Clean, peel, and chop your favorite fruits, then freeze them in large ziploc bags or airtight containers. For extra convenience, consider buying the bags of pre-cut, no-sugar-added frozen fruit, which can be found in the freezer section of your grocery store.

Tropical Chia Green Smoothie

Ingredients*

  • 1 6-ounce container plain Greek yogurt
  • 1 cup pineapple, cut into cubes and frozen
  • 1 cup mango, cut into cubes and frozen
  • 1 cup kiwi, cut and frozen
  • 1 1/2 cups baby spinach leaves
  • 1/4 cup orange juice (or milk)
  • 3 tablespoons chia seeds
  • 1-2 tablespoons honey

*All ingredient measurements are approximate.

Directions

Add all ingredients to a blender. Blend until well combined. Taste and adjust sweetness with additional honey, if desired.

Makes 2 generous smoothies

IMG_5906

Treat Your Valentine

Treat your valentine to a day’s worth of mouth-watering meals. Here are three ideas for each meal, from super simple to more elaborate. Click on the pictures or the links to see the recipes!

You can also check out the Recipes section at the top of the page for more ideas to delight your sweetie.

Breakfast

Super Simple: Strawberry and Nutella Stuffed French Toast

img_4248

A Bit More Complex: Cinnamon Raisin Donut Bread Pudding

img_7310

Manageably Elaborate: Eggs Benedict

0721

Lunch

Super Simple: Sausage, Bean, and Rapini Soup

10-26-10-042

A Bit More Complex: Smoked Salmon and Cucumber Salad

img_3389

Manageably Elaborate: Quiche Lorraine

074

Dinner

Super Simple: Penne a la Vodka

110

A Bit More Complex: Pork Chops with Fontina and Marsala

0371

Manageably Elaborate: Slow-Braised Beef Short Ribs with Figs over Creamy Brie Potatoes

img_8548

Dessert

Super Simple: World’s Simplest Fudgey Brownies with Raspberry Coulis

img_4317

A Bit More Complex: Chocolate Raspberry Torte

img_2783

Manageably Elaborate: Fresh Berry Mousse with Vanilla Panna Cotta

mousse-and-panna-cotta-in-cup

Cherry Cordial Brownie Bites

My Lucas is charismatic, enigmatic, and profusely loving. There’s just something insanely captivating about him. He’s a heart-melter for sure, with his big blue eyes, sweet dimples, and long, dark lashes. And he’s mine. More than anyone or anything in the whole world (except perhaps Ninjago legos), he loves me. Not sure how I got so lucky!

IMG_1649

Just look at that face!

The kid says, “I love you sooooo much,” so many times each day that I’d begun to suspect it was just a filler statement; simply something to say when there was nothing else to be said. He even says it in his sleep, when I sneak in at night to kiss his little head before I tuck myself into bed. “Mommy, I love you so much.”

But I’ve come to realize that his words are so much more than sounds to fill the silence. He recently turned to my husband and began to say, “Daddy, I love…” I’d expected the statement to end with his predictable “…you soooo much.” But it didn’t. It was quite beautifully, “Daddy, I love Mommy soooo much.” He’s my precious little lovebug.

IMG_5788

On a recent trip to the grocery store, as we walked hand in hand through the parking lot, he squeezed my hand and expressed his sweet statement of love. I returned the sentiment, then we continued into the store. An older woman, who’d been coming from her car, caught the exchange as we passed. I saw her pause and hold her heart for a moment. We ran into that woman as we made our way through the store and she stopped to comment on my sweet boys. I thanked her and she parted with a friendly, “God bless.” As we began to walk away, she shouted back, “What am I saying? Clearly, He already has.”

He certainly has. I have been so generously blessed in love; a family who cherishes and supports me, a husband I can laugh with, children whose love is more contagious than the flu, and the most beautiful friends, who persistently raise me up. This Valentine’s Day, I will celebrate every bit of that priceless, precious love.

IMG_5790

Sweet treats are the perfect way to celebrate the sweetest people in your life, like these absolutely decadent, truffle-like cherry cordial brownie bites. They start with my World’s Simplest Fudgey Brownies, which are then blended with a bit of cream cheese, until rich and smooth. The luscious brownie mixture is then rolled into small balls with a Grand Marnier (or orange juice, for the kiddies) soaked cherry in the center, before being dipped in smooth, melted chocolate. A drizzle of melted pink candy and sprinkles provide the perfect final touches.

Today’s Focus on Technique – Using a Double Boiler

The process of cooking with a double boiler (also called a bain marie) is an ideal technique to use when preparing delicate sauces, such as hollandaise, or when melting chocolates. In a double boiler set-up, the food is placed in a bowl which is suspended above simmering water. The water provides a gentle, consistent, indirect heat which prevents finicky foods from breaking (separating) or burning. It works in a similar manner as using water bath to prepare custards and other delicate egg-based dishes. No special equipment or dedicated ‘double boiler’ is required to utilize a double boiler technique. Simply fill a saucepan with an inch or two of water. Place a stainless steel or glass mixing bowl on top of the pot, so that the bottom of the bowl dips into the pot, but does not touch the water. Place the food you’re preparing in the bowl, bring the water to a simmer, and you’re set to go!

For more useful tips, techniques, and culinary photo guides click HERE.

IMG_5804

Cherry Cordial Brownie Bites

Ingredients

For the brownies:

  • 1 stick of butter
  • 1 cup chocolate chips
  • 1 cup sugar
  • 1 cup flour
  • 2 eggs
  • 1/4 teaspoon salt

For the brownie bites:

  • 1/4 cup Grand Marnier or orange juice (approximately)*
  • 3 dozen dried cherries
  • 4 ounces cream cheese, softened to room temperature
  • 2 cups chocolate chips (semi-sweet or milk chocolate)
  • Pink or red candy melts and sprinkles, for decorating (optional)

*Be aware that no alcohol will be cooked off in the preparation of these candies, so it would be wise to use the orange juice for children, pregnant women, or anyone who is avoiding alcohol intake.

Directions

To prepare the brownies:

Preheat oven to 350 degrees. Spray an 8×8 baking dish with cooking spray. In a saucepan over medium-low heat, melt the chocolate chips and butter until smooth, stirring constantly. Turn off the heat. Stir in the sugar and salt until dissolved. Stir in the flour. Add the eggs and stir until well blended. Pour the mixture into the prepared pan and bake for about 35 minutes.

To prepare the brownie bites:

Soak the dried cherries in approximately 1/4 cup of Grand Marnier or orange juice for at least an hour.

Once the brownies are cool, crumble into small pieces, then place in a food processor. Add the cream cheese and pulse until well-blended and smooth. (A food processor would work best for this task, but it can also be done by hand. If combining by hand, cut off the crispy brownie edges before blending, for a smoother result. If using the food processor, it’s not necessary to cut off the brownies edges.) Roll the mixture into small balls (less than 1″ diameter), inserting a soaked cherry in the center as you roll. Refrigerate until well chilled.

Melt the chocolate chips in a double boiler, stirring frequently, until smooth. Use a fork to lower each brownie ball into the melted chocolate. Shake off the excess chocolate, then place on a baking sheet, which has been lined with parchment paper or wax paper. Refrigerate until the chocolate has set. If desired, drizzle the brownie bites with melted pink or red candy melts and decorate with sprinkles.**

**Click HERE to see an easy pastry bag technique, which can be used for drizzling the brownie bites.

Makes 2.5 – 3 dozen candies

IMG_5841

The Gourmand Mom

Good food, seasoned with a dash of life

%d bloggers like this: